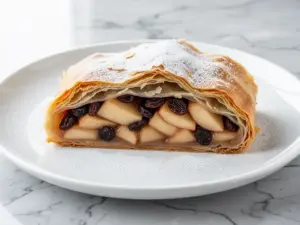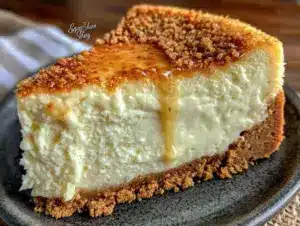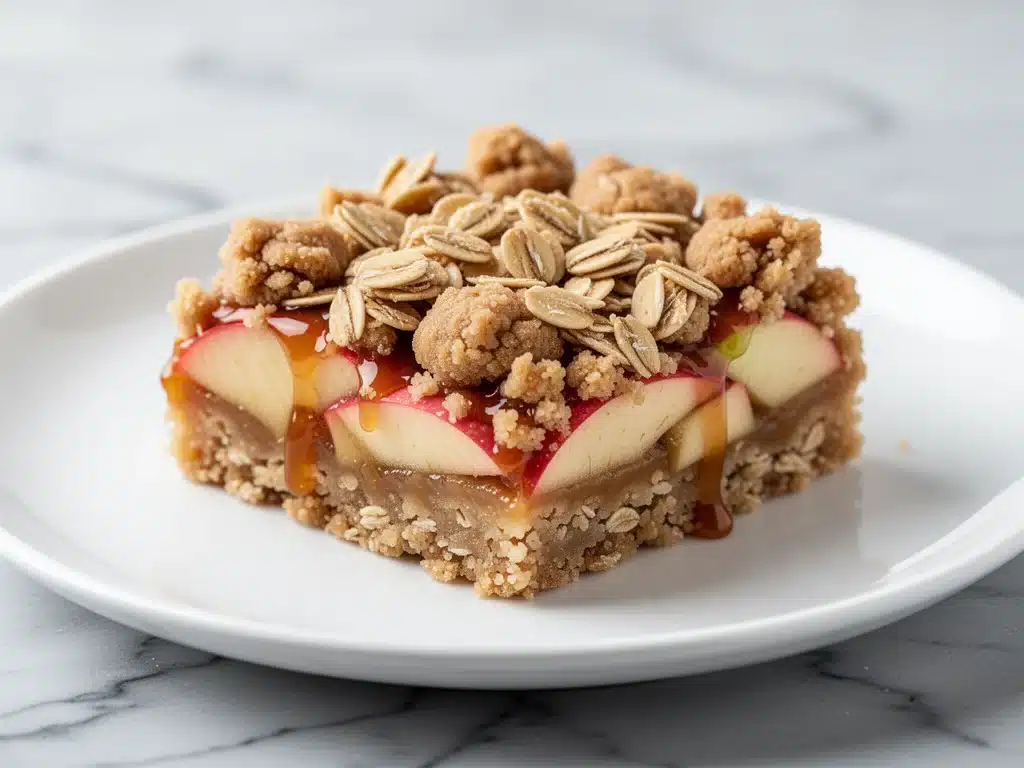
There is a specific kind of magic that happens in October. The air gets crisp, my sweater drawer gets raided, and suddenly every recipe I see online involves apples and cinnamon. Last week, I was standing in my kitchen at 7:30 PM on a Tuesday, feeling that familiar post-work slump. My kids had just finished homework, my husband was asking the dreaded “what’s for dinner?” question for the third time, and I was staring into the fridge like it might spit out a solution. It didn’t. But it did have a bag of Granny Smith apples, some butter, brown sugar, and a box of graham crackers.
I didn’t want to make a full pie. Pies are a commitment. They require a crust that might not turn out, a filling that might bubble over, and at least forty minutes of babysitting. I wanted something that felt like a treat but didn’t demand my life for the evening. So I improvised. I crushed the crackers, mixed them with butter, dumped the chopped apples and sugar on top, and threw it in the oven. Fifteen minutes later, I pulled out these Fall Caramel Apple Crumble Bars. They were hot, sticky, and smelled like a bakery window in Brooklyn.
My daughter took one bite and immediately asked if we could have dessert before dinner. (We didn’t, but the sentiment was there.) I’ve made these Fall Caramel Apple Crumble Bars at least six times since that Tuesday. They’ve become my secret weapon for busy weeknights when I want to feel like a domestic goddess without actually doing the work. They’re sweet, they’re crunchy, and they come together faster than ordering takeout. If you’re looking for a dessert that captures the entire essence of autumn but fits into a frantic schedule, this is it.
Why You’ll Love This Recipe
I’m not going to lie to you—there are a thousand apple dessert recipes out there. But this specific version? It’s different. It’s not just a crumble in a dish; it’s a bar. That means portable, shareable, and infinitely easier to manage than a slice of pie. Here’s why these bars have taken over our weeknight routine:
Stupid Simple One-Bowl Prep — Seriously, you can mix the base and the topping in the same bowl if you’re being lazy (which I often am). There’s no rolling dough, no complex layering, and no fancy techniques. If you can melt butter in the microwave, you can make this.
Lightning Fast — This is the real selling point. From start to finish, including baking, it takes about 35 minutes, but the active prep is barely 10. That means you can start this right after the kids get home from soccer practice and have it ready before they even log into their tablets. It’s perfect for those “I forgot to plan dessert” moments.
Pantry-Friendly Ingredients — You probably already have everything you need. Graham crackers, butter, brown sugar, flour, cinnamon, and apples. I keep a bag of apples in the fridge during fall specifically for this. It’s cheaper than buying pre-sliced apples and tastes way better.
Perfectly Portable — Because they are bars, they don’t need to be served warm from the oven (though they taste amazing that way). You can cut them into squares, put them in a container, and take them to a potluck, pack them in lunchboxes, or just keep them on the counter for afternoon snacks. They hold up well at room temperature for a day or two.
Budget-Smart — Apples are cheap in the fall. You can get a bushel for $10-15 and make dozens of these bars. That’s fractions of a cent per bite compared to buying a slice of apple pie at a cafe. It’s indulgence on a budget.
This recipe has completely changed our Friday nights. Instead of stressing about a complicated dessert, we just pull these out of the fridge. They’re reliable, delicious, and make everyone happy without making you miserable in the kitchen.
Ingredients You’ll Need
Here’s the best part: this recipe uses simple, honest ingredients. You don’t need any weird specialty items. I’m particular about three things here, but for the most part, you can grab what’s on sale. Here is what you need to make the best Fall Caramel Apple Crumble Bars.
For the Crust and Topping
Graham Cracker Crumbs (2 cups / 200g) — This is your base. You can buy pre-made crumbs, but I honestly think they’re expensive and sometimes stale. Crushing a sleeve of graham crackers by hand takes about 60 seconds and tastes fresher. If you’re in a rush, the store-bought stuff works fine.
Unsalted Butter (½ cup / 113g) — You need real butter here. Margarine just doesn’t give you that rich, crumbly texture. I use salted butter sometimes, but if you do, reduce the added salt in the recipe. Melted butter is key for binding the crumbs.
Granulated Sugar (¼ cup / 50g) — Just a little bit to sweeten the crust. You don’t want it too sweet, just enough to help it brown.
All-Purpose Flour (1 cup / 125g) — This gives the topping some structure so it’s not just a pile of wet crumbs. It helps create that nice crumble texture.
Brown Sugar (½ cup / 100g, packed) — This is where the “caramel” flavor comes from. Dark brown sugar has more molasses and gives a deeper, richer taste. If you only have light brown, it’ll still work, just a bit lighter in flavor.
Cinnamon (1 teaspoon) — Essential for that fall vibe. Don’t skip it. If you like a spicy kick, add a pinch of nutmeg or allspice.
Salt (¼ teaspoon) — Just a pinch to balance the sweetness. It makes the cinnamon pop.
For the Apple Filling
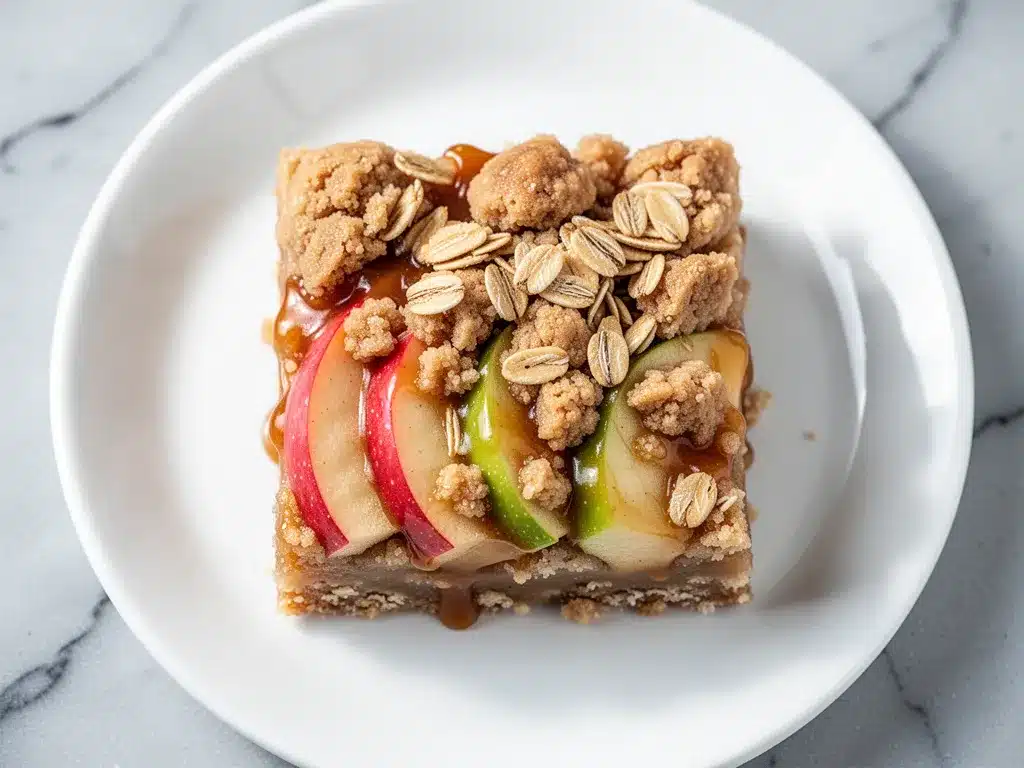
Granny Smith Apples (3 medium / about 600g) — I’m very specific about this. Granny Smiths are tart and firm. They hold their shape when baked. If you use Red Delicious, they’ll turn into mush. Honeycrisp is okay if you like them softer, but Granny Smith is the gold standard for crumbles.
Lemon Juice (1 tablespoon) — Tossing the apples in lemon juice prevents them from browning while you prep and adds a little brightness that cuts through the sugar.
Extra Cinnamon (½ teaspoon) — Sprinkled directly on the apples for extra flavor.
Optional: Cornstarch (1 teaspoon) — If your apples are extra juicy, a teaspoon of cornstarch helps thicken the juices so you don’t end up with a soggy bar. I usually skip it if the apples aren’t watery, but it’s a good safety net.
Equipment Needed
You don’t need fancy equipment for this. Here’s what I actually use in my home kitchen. If you don’t have these exact items, there are easy swaps.
9×9 Inch Baking Pan — This is the standard size for bars. It gives you the perfect thickness. If you don’t have one, an 8×8 pan works but the bars will be thicker and take slightly longer to bake. A 9×13 pan is too big; the bars will be too thin and dry out.
Microwave-Safe Bowl or Measuring Cup — For melting the butter. I use a glass measuring cup because I can see the butter level and it’s easy to pour. A microwave-safe bowl works too.
Ziplock Bag or Food Processor — To crush the graham crackers. I prefer the bag method because it’s quiet and doesn’t require cleaning a food processor. Put the crackers in the bag, seal it tight, and smash them with a rolling pin or a heavy can. It’s therapeutic.
Mixing Bowl — A medium-sized bowl is perfect for mixing the crust and topping.
Peeler or Knife — To peel and chop the apples. I use a paring knife because it gives me more control over the chunk size.
Wire Rack — To cool the bars. You can let them cool in the pan on the counter, but a rack helps them cool evenly so the bottom doesn’t get soggy from steam.
How to Make It: Step-by-Step
Alright, let’s make this! I’m walking you through exactly how I do it, including the little tricks I’ve picked up over the years. This is going to be easy, and I promise you’ll be impressed by how little effort it takes.
Step 1: Prep Your Oven and Pan (2 minutes)
Preheat your oven to 350°F (175°C). Grease your 9×9 inch baking pan with butter or non-stick spray. I usually spray it and then dust it with a little flour to make sure nothing sticks. Line it with parchment paper if you want easy removal later, but greasing is usually enough for this recipe.
Step 2: Crush the Graham Crackers (2 minutes)
Take one sleeve of graham crackers (about 16 full squares) and put them in a large Ziplock bag. Seal it tight, getting all the air out. Use a rolling pin, a meat mallet, or even a heavy bottle to crush them into fine crumbs. You want them fine enough to bind together, but you can have a few small pieces for texture. Pour the crumbs into your mixing bowl.
Step 3: Make the Crust Mixture (2 minutes)
To the graham cracker crumbs, add the melted butter, granulated sugar, flour, brown sugar, cinnamon, and salt. Mix it all together with a fork or your hands until it looks like wet sand. This mixture will form both the bottom crust and the crumble topping.
Step 4: Press in the Base (2 minutes)
Take about two-thirds of the crumb mixture (save the rest for the top) and press it firmly into the bottom of your prepared pan. Use the bottom of a measuring cup or your fingers to make it as even and compact as possible. A tight base prevents the bars from falling apart when you cut them. Put this in the oven for 10 minutes to set the crust. While it bakes, you can prep the apples.
Step 5: Prep the Apples (5 minutes)
Peel, core, and chop your Granny Smith apples. I like to cut them into small cubes, about half an inch. If they’re too big, they won’t cook through. If they’re too small, they turn to applesauce. Toss the chopped apples in a bowl with the lemon juice and extra cinnamon. If you’re using cornstarch, add it now and toss again.
Step 6: Assemble and Bake (15-20 minutes)
Take the pan out of the oven. Spread the chopped apples evenly over the hot crust. Then, take the remaining one-third of the crumb mixture and sprinkle it generously over the apples. Don’t be shy with the topping; that’s the best part! Return the pan to the oven and bake for 15-20 minutes. You’ll know it’s done when the topping is golden brown and the apples are tender (you can test with a knife). The kitchen should smell incredible by now.
Step 7: Cool and Cut (15 minutes)
Let the bars cool in the pan for at least 15 minutes. They will be very hot and soft right out of the oven, so if you cut them immediately, they’ll be a mess. Let them set up. Once cooled, cut them into squares. You’ll get about 9 large bars or 16 smaller squares.
Total Time: About 35 minutes (10 minutes active, 25 minutes mostly hands-off)
Expert Tips & Tricks
Here’s everything I’ve learned from making this dozens of times. These tips will save you from my mistakes.
Don’t Skimp on the Butter
The butter is what binds everything. If you try to reduce it, your bars will crumble into dust. Use the full ½ cup. It’s worth the calories for the texture.
Press the Crust Tight
When pressing the base into the pan, really pack it down. I use the bottom of a glass to press it firmly. If the base is loose, your bars will fall apart when you pick them up. A tight crust is a happy crust.
Use Tart Apples
I cannot stress this enough. Use Granny Smiths. If you use sweet apples like Fuji or Gala, the bars will be cloyingly sweet and the apples will get mushy. The tartness balances the sugar perfectly.
Cool Completely for Clean Cuts
I know it’s hard to wait, but cutting warm bars is a recipe for disaster. They’re soft and sticky. Let them cool completely for the cleanest cuts. If you’re in a rush, at least wait 15 minutes.
Storage is Key
These bars keep well in an airtight container at room temperature for up to 3 days. In the fridge, they last up to a week. They actually taste better the next day as the flavors meld together. I usually make them on Sunday for the week ahead.
Variations & Substitutions
Once you’ve nailed the basic version, here’s how you can mix it up. I’ve tried all of these, and they all work.
Chewy M&M Cookie Bars Twist
If you like chewy M&M cookie bars, you can add a handful of chocolate chips or chopped nuts to the crumb topping. It adds a nice crunch and sweetness. I love adding pecans for a classic apple pie vibe.
Gluten-Free Option
Use gluten-free graham crackers and gluten-free flour. Most major brands make GF graham crackers that work just as well. The texture might be slightly more delicate, so be gentle when cutting.
Maple Pecan Sticky Buns Flavor
For a more decadent version, add a drizzle of maple syrup to the apples before baking. It mimics the flavor profile of maple pecan sticky buns but in bar form. Top with a cream cheese glaze after cooling.
Apple Pie Bars Shortcut
If you want to simplify even further, you can use a box of apple pie filling instead of fresh apples. Just spread it over the crust and add the topping. It’s less fresh-tasting but incredibly fast and consistent. See my apple pie bars recipe for that version.
Vegan Version
Use vegan butter and vegan graham crackers. The result is surprisingly close to the original, though the texture might be slightly less crisp. It’s a great option for friends with dietary restrictions.
Serving & Storage
These bars are versatile and easy to serve. Here’s how I handle them.
How to Serve
I usually serve these warm, straight from the oven or reheated in the microwave for 30 seconds. They taste amazing with a scoop of vanilla ice cream or a dollop of whipped cream. But they’re also perfect cold as a snack. I pack them in lunchboxes for my kids—they’re sturdy enough to travel well.
Side Dishes
Since this is a dessert, it pairs well with a hot beverage. Coffee, tea, or hot cider are perfect companions. If you’re serving these at a dinner party, they pair nicely with savory dishes like Mediterranean chickpea salad or creamy southern pasta salad if you’re doing a buffet-style meal.
Storage Instructions
Refrigerator: Store in an airtight container for up to 4 days. The crust might soften slightly, but the flavor remains great.
Freezing: Yes, you can freeze these! Wrap individual bars in plastic wrap and then put them in a freezer bag. They’ll last for up to 2 months. Thaw at room temperature or microwave briefly.
Reheating: Microwave for 20-30 seconds to warm up the apples and soften the crust. Don’t overheat or the butter will separate.
Nutrition Information
I’m not a nutritionist, but here’s the breakdown if you’re tracking. Keep in mind that these are sweet bars, so they’re higher in sugar and carbs.
Per Serving (based on 9 bars):
- Calories: 220
- Protein: 2g
- Carbs: 32g
- Fiber: 2g
- Sugar: 18g
- Fat: 10g
- Saturated Fat: 6g
What’s Good:
Granny Smith apples provide some fiber and vitamin C. The graham crackers offer some whole grains (depending on the brand).
What to Know:
Higher in sugar and saturated fat due to butter and brown sugar. It’s a treat, not a health food. Enjoy in moderation!
Final Thoughts
So that’s my go-to Fall Caramel Apple Crumble Bars! I’ve probably talked your ear off at this point, but when you make a recipe this often, you have a lot to say about it. These bars have saved my weeknight dessert game more times than I can count. They’re my answer to “what’s for dessert” when I’m tired, don’t want to bake a cake, and still want something that tastes homemade and comforting.
My kids are happy, my husband’s happy, and I’m happy because I’m not stressed about cooking. Make it yours! Try different apples, add nuts, or drizzle with caramel sauce. The best recipes are the ones you adapt to your family’s tastes.
If you make this, drop a comment and let me know what you think! I love hearing how recipes turn out in your kitchen. And if something doesn’t work, tell me that too—I’m here to help troubleshoot. Happy cooking! And I hope your kitchen smells half as good as mine does right now.
Frequently Asked Questions
Can I use a different type of apple?
You can, but I strongly recommend sticking to tart, firm apples like Granny Smith, Honeycrisp, or Braeburn. Soft apples like Red Delicious or McIntosh will break down too much and turn your bars into a mushy mess. If you use Honeycrisp, the bars will be sweeter and the apples will hold their shape better.
Can I make this ahead of time?
Absolutely. In fact, these bars taste even better the next day. You can bake them up to 2 days ahead and store them at room temperature. If you’re prepping for a party, you can bake them the night before and just bring them out when you need them. They hold up well without refrigeration.
Why did my bars turn out soggy?
This usually happens if the apples were too juicy or if the crust wasn’t pre-baked. Pre-baking the crust for 10 minutes creates a barrier that helps keep the bottom crisp. Also, make sure you’re using tart apples that don’t release as much liquid as sweeter varieties. If your apples are very watery, toss them with cornstarch as suggested.
Can I freeze these bars?
Yes! These freeze beautifully. Wrap individual bars tightly in plastic wrap and then place them in a freezer-safe bag or container. They’ll last for up to 2 months. Thaw them at room temperature for about 30 minutes or microwave for 20 seconds. The texture might be slightly softer after thawing, but the flavor is still great.
Do I have to use graham crackers?
Not necessarily. You can use vanilla wafers, shortbread cookies, or even crushed ginger snaps for a spicier kick. Graham crackers are the classic choice because they’re slightly sweet and have a nice crumbly texture, but feel free to experiment. Just make sure the cookie you choose can hold together when mixed with butter.
Can I double this recipe?
Yes, you can double the recipe and bake it in a 9×13 inch pan. The baking time will increase slightly, so check it at 25-30 minutes. Make sure your apples are spread in an even layer so they cook uniformly. The ratios remain the same, so it’s a simple scaling process.
Pin This Recipe!
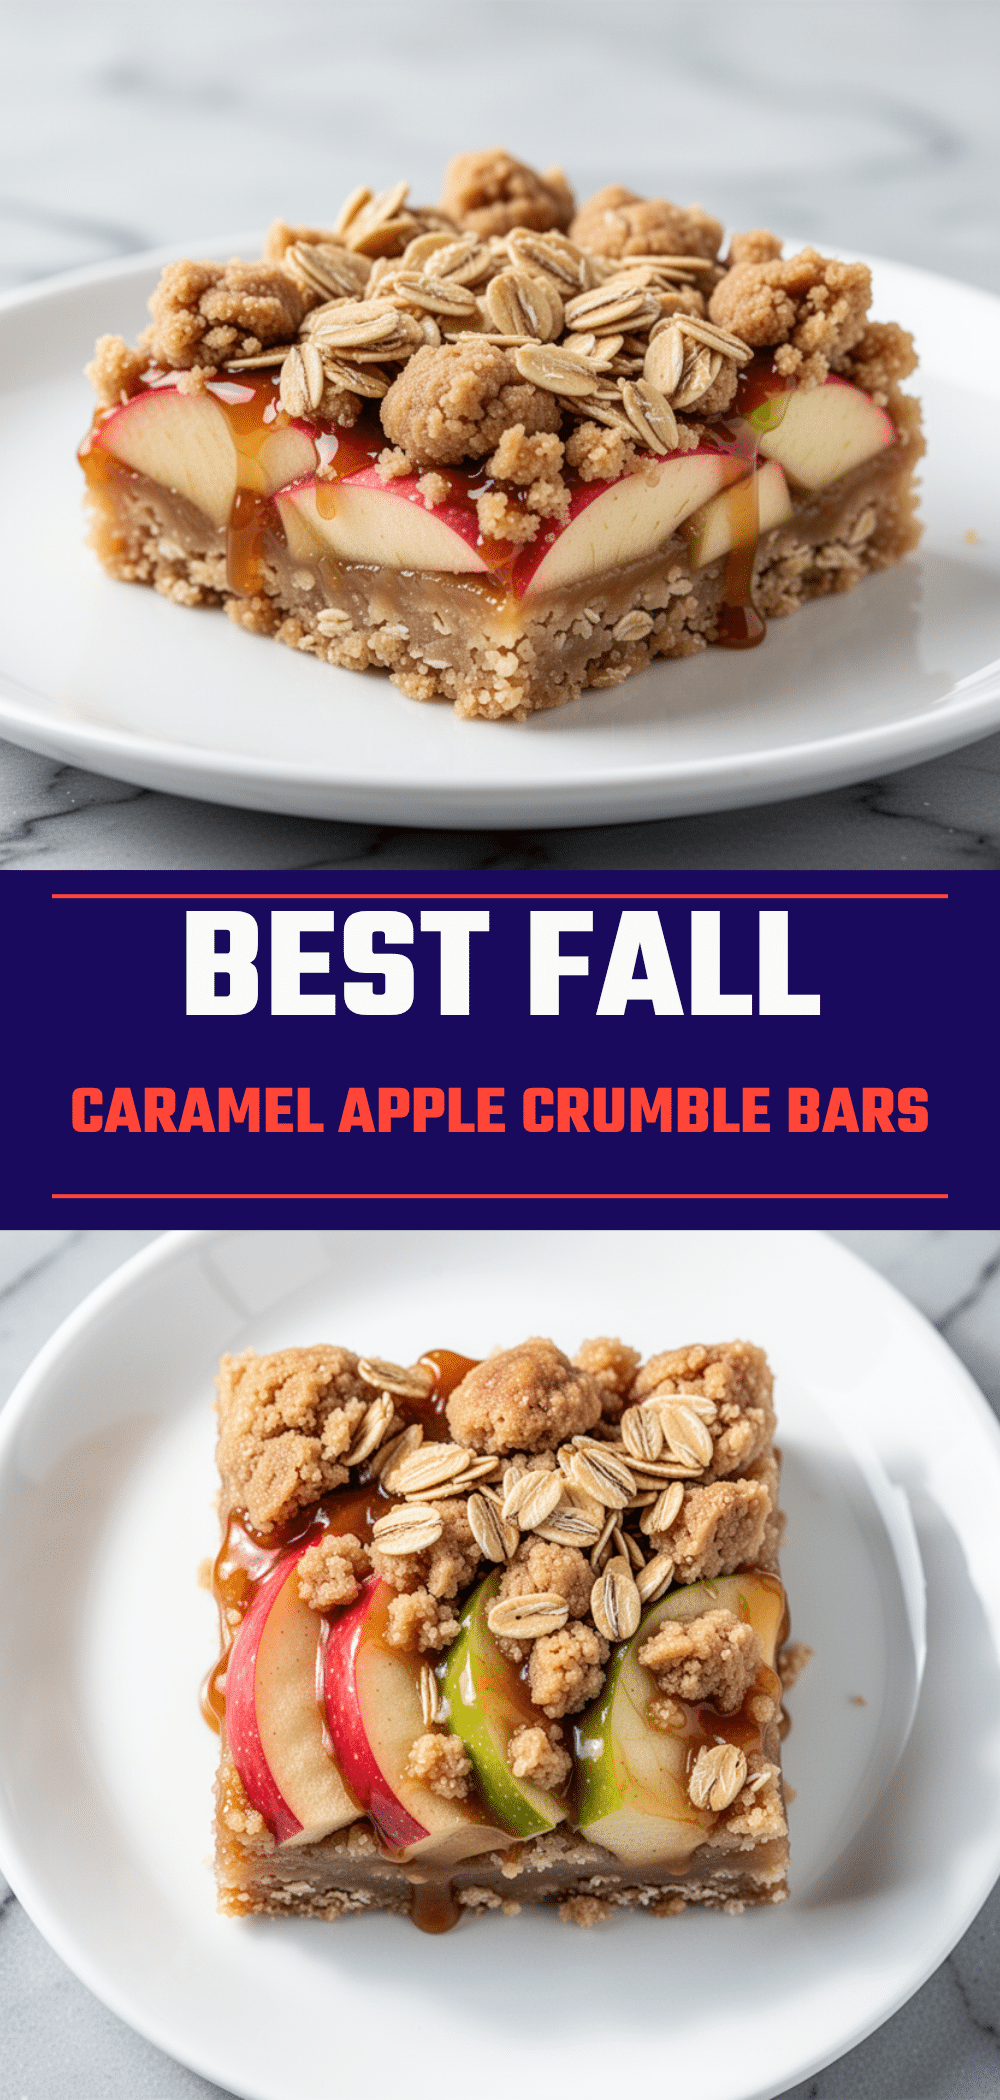
Fall Caramel Apple Crumble Bars
- Total Time: 35 minutes
- Yield: 9 servings 1x
Description
A quick and easy 15-minute dessert featuring a buttery graham cracker crust, tart Granny Smith apples, and a sweet cinnamon crumble topping. Perfect for busy weeknights and pantry-friendly ingredients.
Ingredients
- 2 cups (200g) graham cracker crumbs
- 1/2 cup (113g) unsalted butter, melted
- 1/4 cup (50g) granulated sugar
- 1 cup (125g) all-purpose flour
- 1/2 cup (100g) packed brown sugar
- 1 teaspoon cinnamon, divided
- 1/4 teaspoon salt
- 3 medium Granny Smith apples, peeled, cored, and chopped
- 1 tablespoon lemon juice
- 1 teaspoon cornstarch (optional, for juicy apples)
Instructions
- Preheat oven to 350°F (175°C). Grease a 9×9 inch baking pan with butter or non-stick spray.
- Crush graham crackers into fine crumbs using a rolling pin in a Ziplock bag or a food processor. Place crumbs in a mixing bowl.
- Add melted butter, granulated sugar, flour, brown sugar, 1/2 teaspoon cinnamon, and salt to the crumbs. Mix until it resembles wet sand.
- Press two-thirds of the crumb mixture firmly into the bottom of the prepared pan to form the crust. Bake for 10 minutes to set.
- While the crust bakes, toss chopped apples with lemon juice, remaining 1/2 teaspoon cinnamon, and cornstarch (if using).
- Remove pan from oven. Spread apples evenly over the hot crust. Sprinkle the remaining one-third of the crumb mixture over the apples.
- Bake for 15-20 minutes until the topping is golden brown and apples are tender.
- Cool in the pan for at least 15 minutes before cutting into squares.
Notes
Use tart apples like Granny Smith to prevent mushiness. Press the crust firmly to ensure bars hold together. Cool completely for clean cuts. Store in an airtight container at room temperature for up to 3 days or in the fridge for up to a week. Can be frozen for up to 2 months.
- Prep Time: 10 minutes
- Cook Time: 25 minutes
- Category: Dessert
- Cuisine: American
Nutrition
- Serving Size: 1 bar
- Calories: 220
- Sugar: 18
- Fat: 10
- Saturated Fat: 6
- Carbohydrates: 32
- Fiber: 2
- Protein: 2
Keywords: fall dessert, apple bars, graham cracker crust, easy dessert, weeknight baking, caramel apple, one-bowl recipe