There is a specific kind of panic that hits around 6:00 PM on a Friday. You’ve had a long week. Your brain is fried. You want to do something special for Saturday morning brunch because your parents are coming over, but the idea of waking up at 5:00 AM to proof dough feels like a personal attack. So, what do you do? You reach for the frozen tube.
For years, that’s exactly what I did. I bought the refrigerated sticky buns. I followed the box instructions. And honestly? They were fine. But they were also just… fine. Doughy in the middle, too sweet on top, and lacking that deep, caramelized richness that makes sticky buns feel like a real celebration.
Last fall, I decided I was done with the mediocrity. I wanted sticky buns that were gooey, spiced, nutty, and absolutely irresistible. I wanted the kind of breakfast that makes your guests stop mid-chew and ask, “Wait, you made these?”
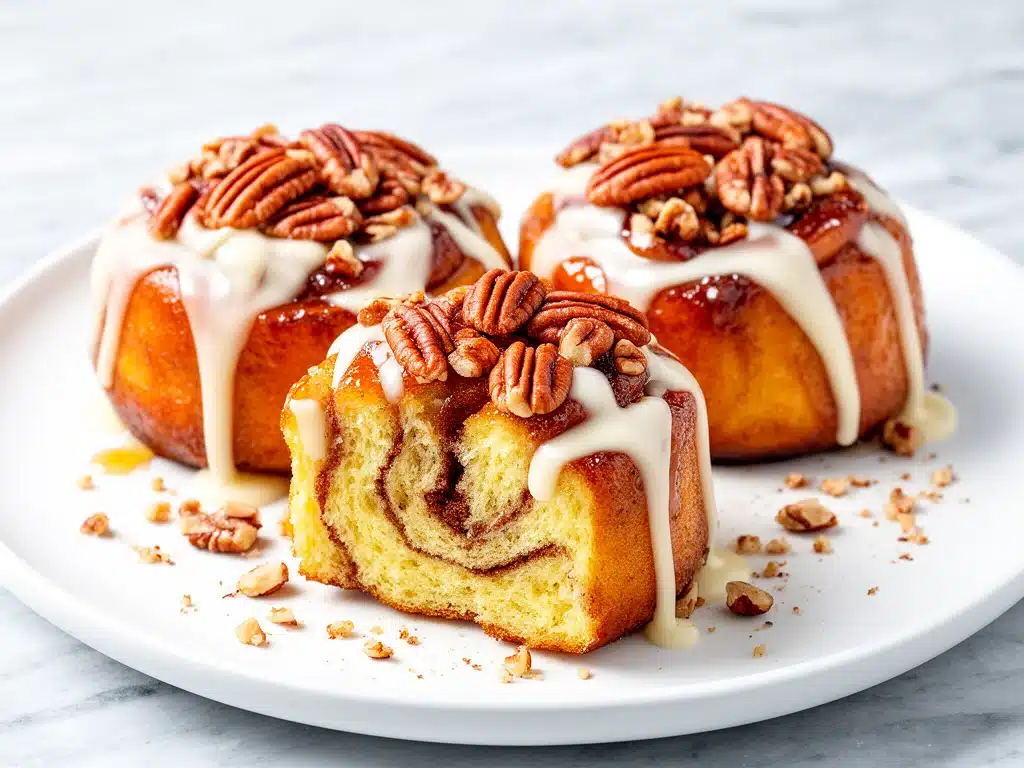
I spent three weekends failing. My first batch was too dense. My second batch burned because I didn’t pay attention to the oven temperature. My third batch was just sad. But on the fourth try, I cracked the code. I found a method that balances ease with actual flavor. The result? Maple Pecan Sticky Buns with Cream Cheese Glaze that are tender enough to pull apart with your fingers and rich enough to justify the sugar rush.
Here’s the thing about these buns—they’re not just a treat. They’ve become part of my routine. I make them every few weeks when I need a hug in food form. They freeze beautifully, they reheat like a dream, and that cream cheese glaze? It’s the secret weapon that cuts through the sweetness perfectly. If you’ve been looking for a weekend project that actually pays off, this is it. And if you’re short on time, I’ve got some tips to make make-ahead breakfast muffin cups for the mornings when the buns just aren’t happening.
Why You’ll Love This Recipe
Look, I’m not going to lie to you. Making bread from scratch takes time. But this maple pecan sticky bun recipe is designed for real life. It’s not some complicated sourdough starter situation. It’s straightforward, forgiving, and incredibly rewarding. Here’s why these buns have earned a permanent spot in my weekend rotation:
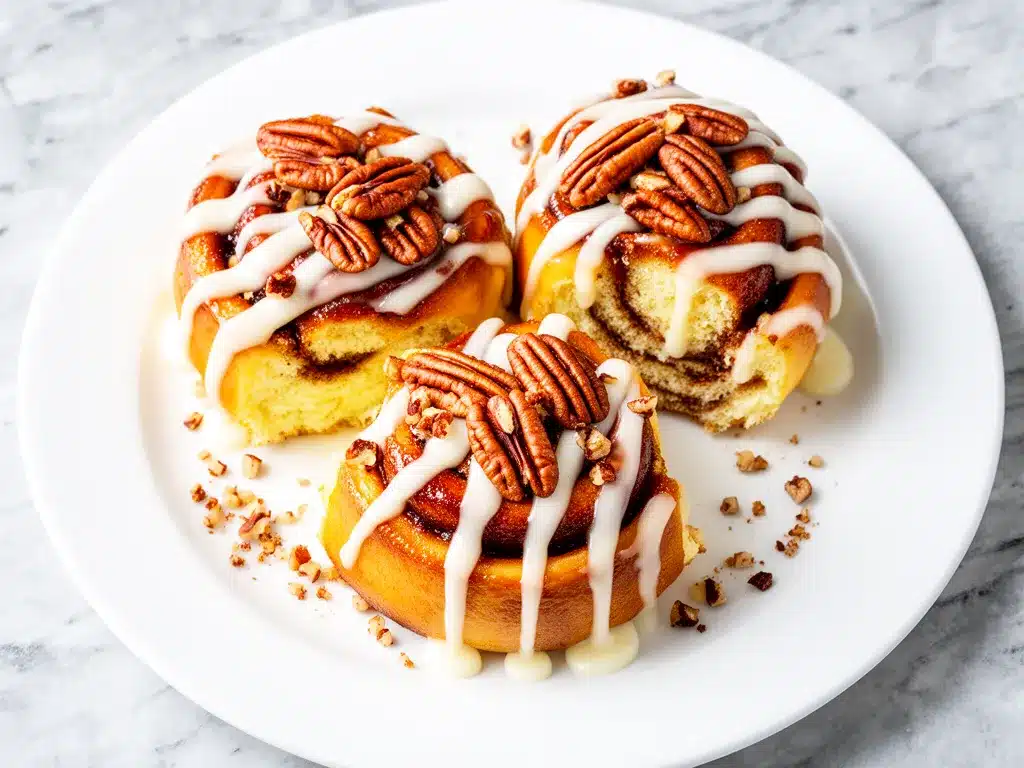
- They’re Gooey in the Best Way — I’m talking about those pools of caramelized maple syrup and brown sugar at the bottom of the pan. When you flip them out, the glaze drips down the sides like golden lava. It’s messy, but that’s part of the fun.
- Cream Cheese Glaze is a Game-Changer — Plain powdered sugar glaze is fine, but it’s one-note. Adding cream cheese adds tang and richness that balances the heavy sweetness of the maple syrup. It’s like the difference between a vanilla cupcake and a red velvet one.
- Pecans Add Necessary Texture — Without nuts, sticky buns can be a bit one-dimensional. The toasted pecans add a crunch that contrasts with the soft, pillowy dough. Plus, they make the buns feel more substantial and less like a sugary snack.
- Freezer-Friendly — This is huge for me. I often make the dough on Friday night, let it rise, and then freeze the unbaked buns. On Saturday morning, I let them thaw and rise while I make coffee. Then they go in the oven. Fresh hot buns without the early wake-up call.
- Impressive but Not Impossible — You don’t need to be a professional baker to pull this off. If you can mix ingredients and wait for dough to rise, you can make these. The hardest part is resisting eating all the raw dough.
I’ve made these for potlucks, holiday breakfasts, and lazy Sundays. They always get devoured. Even people who claim they “don’t like sweet breakfasts” end up asking for the recipe. That’s the power of good dough and better glaze.
Ingredients You’ll Need
Before we get to the mixing, let’s talk about what goes into these buns. I’m particular about a few things here, mostly because I’ve learned the hard way that shortcuts can ruin the texture. You don’t need fancy equipment, but you do need quality basics.
For the Dough
All-purpose flour (3 ½ cups / 440g) — This is your foundation. Don’t use bread flour unless you want chewier, denser buns. All-purpose gives that tender, cake-like crumb I love. Sift it if it’s lumpy, but don’t over-flour your measuring cup.
Instant yeast (2 ¼ tsp / 1 packet) — I prefer instant yeast because you don’t need to activate it in water first. Just mix it in with the dry ingredients. Active dry yeast works too, but you’ll need to proof it in warm milk first. Instant is faster and less finicky.
Granulated sugar (½ cup / 100g) — This feeds the yeast and adds sweetness to the dough itself. Don’t skip it, or the buns will taste bland.
Salt (1 tsp) — Essential for flavor. It balances the sweetness and strengthens the gluten structure.
Warm milk (1 cup / 240ml) — Whole milk is best for richness. Make sure it’s warm to the touch (about 110°F/43°C), not hot. If it’s too hot, it’ll kill the yeast. If it’s too cold, the dough won’t rise properly.
Melted butter (¼ cup / 57g) — Unsalted butter adds flavor and tenderness. Let it cool slightly before mixing so it doesn’t scramble the eggs.
Egg (1 large) — This binds the dough and adds structure. Room temperature eggs mix in more evenly.
Vanilla extract (1 tsp) — Just a hint of vanilla adds warmth and depth. It’s subtle but noticeable.
For the Filling & Caramel
Unsalted butter (½ cup / 113g) — Softened, not melted. This goes into the filling. It creates that rich, buttery layer.
Brown sugar (1 cup / 200g) — Dark brown sugar has more molasses, which gives a deeper, toffee-like flavor. Light brown works, but dark is better for sticky buns.
Maple syrup (½ cup / 120ml) — Use real maple syrup (Grade B or Grade A Dark). Avoid “pancake syrup” made with corn syrup. The maple flavor needs to shine through.
Pecans (1 cup / 113g, chopped) — Toasting them first brings out their natural oils and crunch. Don’t skip this step!
Cinnamon (2 tsp) — The classic spice for sticky buns. Adjust to taste if you love cinnamon.
For the Cream Cheese Glaze
Cream cheese (4 oz / 113g) — Full-fat, softened. This is crucial. Low-fat cream cheese won’t give you the same creamy texture.
Confectioners’ sugar (1 cup / 120g) — Sifted to remove lumps. You want a smooth, drizzleable glaze.
Milk or cream (1-2 tbsp) — Adjust for consistency. Add slowly until you reach your desired thickness.
Vanilla extract (½ tsp) — Complements the cream cheese.
Pro Tip on Ingredients
I always check the expiration date on my yeast. Old yeast is the #1 reason bread fails. If you’re unsure, proof it in a little warm water with a pinch of sugar. If it foams up in 10 minutes, you’re good to go.
Equipment Needed
You don’t need a fancy stand mixer, but having the right tools makes life easier. Here’s what I actually use in my kitchen:
9×13-inch baking dish — This is the standard size for sticky buns. It allows them to spread out just enough without being too crowded. Glass or ceramic works best for even heating.
Large mixing bowl — For combining the dough. I use a glass bowl because I can see the dough rise through the sides.
Whisk and spatula — For mixing the glaze and spreading the filling. A silicone spatula is great for scraping bowls clean.
Measuring cups and spoons — Accuracy matters in baking. I use metal measuring cups for dry ingredients and liquid measuring cups for wet ones.
Parchment paper — Optional but helpful. Line the bottom of your baking dish before greasing it. This ensures easy removal and less cleanup.
Pastry brush — For brushing melted butter on the dough before rolling. It gives an even coating.
Cooling rack — Essential for cooling the buns. Placing them directly on a plate can make the bottoms soggy.
Optional but Nice
Stand mixer with dough hook — If you have one, use it! It saves time and effort. But honestly, I often mix by hand just to save on cleanup. Both methods work.
Instant-read thermometer — To check the milk temperature. No thermometer? Dip your finger in. It should feel warm, like a baby’s bath, not hot.
How to Make It: Step-by-Step
Alright, let’s get baking. This process is straightforward, but timing is key. I’m walking you through exactly how I do it, including the little tricks I’ve picked up over the years.
Step 1: Make the Dough (10 minutes active)
In a large bowl, whisk together the flour, instant yeast, sugar, and salt. Make a well in the center. In a separate bowl or measuring cup, combine the warm milk, melted butter, egg, and vanilla. Pour the wet ingredients into the well. Mix until a shaggy dough forms. If you’re using a stand mixer, use the dough hook on low speed for 5-7 minutes. If mixing by hand, knead on a floured surface for 8-10 minutes. The dough should be smooth, elastic, and slightly tacky but not sticky. Add a little more flour if it’s too sticky, or a splash of milk if it’s too dry.
Step 2: First Rise (1-2 hours)
Place the dough in a lightly oiled bowl, turning once to coat. Cover with plastic wrap or a damp towel. Let it rise in a warm, draft-free spot until doubled in size. This usually takes 1-2 hours. If your kitchen is cold, put it in the oven with the light on (but don’t turn the oven on). The dough is ready when you poke it, and the indentation stays.
Step 3: Prepare the Caramel Layer (5 minutes)
While the dough rises, melt the ½ cup of butter for the caramel in your 9×13 baking dish. You can do this in the microwave or on the stovetop. Once melted, stir in the brown sugar and maple syrup until smooth. Sprinkle the chopped pecans evenly over the caramel. Set aside.
Step 4: Roll and Fill (10 minutes)
Punch down the risen dough to release air. Turn it out onto a lightly floured surface. Roll it into a large rectangle, about 12×18 inches. Spread the softened ½ cup butter evenly over the dough, leaving a small border at the edges. In a small bowl, mix the remaining brown sugar (if using extra) and cinnamon. Sprinkle this mixture evenly over the butter. Starting from the long edge, roll the dough up tightly into a log. Pinch the seam to seal.
Step 5: Cut and Rise Again (30-45 minutes)
Using a sharp knife or dental floss (yes, floss!), cut the log into 12 equal slices. Place them cut-side up into the prepared baking dish with the caramel and pecans. They should be close together. Cover loosely and let them rise again until puffy. This takes about 30-45 minutes. Don’t rush this step, or the buns will be dense.
Step 6: Bake (25-30 minutes)
Preheat your oven to 350°F (175°C). Bake the buns for 25-30 minutes, or until golden brown and cooked through. If the tops start browning too quickly, tent them with foil. The internal temperature should reach 190°F (88°C). Remove from the oven and let cool in the pan for 5-10 minutes.
Step 7: Flip and Glaze (5 minutes)
Place a large serving platter over the baking dish. Carefully flip the dish over so the buns land on the platter. The caramel will drip down the sides. Let them sit for 2 minutes so the caramel sets slightly. Whisk together the cream cheese, powdered sugar, milk, and vanilla until smooth. Drizzle generously over the warm buns. Serve immediately.
Expert Tips & Tricks
Here’s everything I’ve learned from making these dozens of times. These tips will save you from my mistakes.
Toast Your Pecans
I can’t stress this enough. Raw pecans are bland. Toast them in a dry skillet over medium heat for 3-5 minutes until fragrant. Let them cool before chopping. This step adds so much flavor.
Don’t Overwork the Dough
Knead until smooth, but don’t knead for 20 minutes. Over-kneading develops too much gluten, making the buns tough. You want tender, not chewy.
Use Dental Floss for Cutting
If you use a knife, you’ll squish the buns. Take a piece of unwaxed dental floss, slide it under the log, cross the ends over the top, and pull tight. It cuts cleanly without compressing the dough.
Glaze While Warm
The glaze melts slightly into the buns, creating a delicious crust. Don’t wait until they’re cold to glaze them.
Make-Ahead Strategy
After the second rise, cover the dish tightly with plastic wrap and freeze. When ready to bake, let them thaw and rise for 1-2 hours, then bake as directed. This is perfect for holiday mornings.
Variations & Substitutions
Once you’ve nailed the basic version, here’s how you can mix it up. I’ve tried all of these.
Maple Bourbon
Add 1 tablespoon of bourbon to the caramel layer. It adds a sophisticated kick that pairs beautifully with maple.
Chai Spice
Swap cinnamon for chai spice mix. It adds warmth and complexity. Great for winter.
Gluten-Free
Use a 1:1 gluten-free flour blend with xanthan gum. The texture will be slightly different but still delicious. I’ve used King Arthur’s blend with good results.
Vegan
Use coconut oil instead of butter, oat milk instead of dairy milk, and vegan cream cheese for the glaze. The maple syrup is already vegan, so just check your other ingredients.
No Pecans
Walnuts or almonds work just as well. Or skip the nuts entirely if you prefer. The caramel is still amazing on its own.
If you’re looking for a quicker, healthier alternative on busy mornings, try these no-bake peanut butter banana energy bites. They’re not sticky buns, but they’re satisfying and easy to grab.
Serving & Storage
I usually serve these straight from the platter at the dinner table. They look rustic and stay warm. But here are other ways I’ve enjoyed them:
Side Dishes
– Crisp bacon or sausage links
– Fresh fruit salad (berries and oranges cut the sweetness)
– Strong black coffee or hot cocoa
Storage Instructions
Refrigerator: Store leftovers in an airtight container for up to 3 days. The caramel will harden in the fridge, so you’ll need to reheat them.
Reheating: Microwave individual buns for 20-30 seconds. Or warm the whole batch in a 300°F oven for 10 minutes. This restores the gooey texture.
Freezing: You can freeze baked buns for up to 2 months. Wrap tightly in plastic and foil. Thaw overnight in the fridge and reheat.
Nutrition Information
I’m not a nutritionist, but here’s the breakdown if you’re tracking. These are indulgent buns, so portion control is key.
Per Bun (based on 12 buns):
- Calories: 380
- Protein: 6g
- Carbs: 52g
- Fiber: 2g
- Sugar: 28g
- Fat: 16g
- Saturated Fat: 9g
- Cholesterol: 35mg
- Sodium: 220mg
What’s Good: Decent protein from the egg and dairy. Calcium from the cream cheese glaze.
What to Know: High in sugar and saturated fat. Use this as a special occasion treat, not an everyday breakfast.
Final Thoughts
So that’s my maple pecan sticky bun recipe! I’ve probably talked your ear off at this point, but when you make a recipe this often, you have a lot to say about it.
These buns have saved my breakfast game more times than I can count. They’re my answer to “what’s for brunch” when I want to impress but also want to relax. My family loves them, my friends request them, and I love making them.
Make it yours! Try different nuts, add a dash of cardamom, or drizzle extra maple syrup on top. The best recipes are the ones you adapt to your tastes.
If you make this, drop a comment and let me know what you think! I love hearing how recipes turn out in your kitchen. And if something doesn’t work, tell me that too—I’m here to help troubleshoot.
Happy baking! And I hope your kitchen smells half as good as mine does right now.
Frequently Asked Questions
Can I use active dry yeast instead of instant yeast?
Yes! Just proof it first. Dissolve 2 ¼ tsp active dry yeast in the warm milk with a pinch of sugar. Let it sit for 5-10 minutes until foamy. Then proceed with the recipe. It adds an extra step, but it works.
Why did my buns turn out dense?
Usually, this means the dough didn’t rise enough. Make sure your kitchen is warm and draft-free. Also, don’t skip the second rise. If the dough is over-kneaded, it can also become tough. Knead just until smooth.
Can I make these ahead and freeze them?
Absolutely. After the second rise, cover tightly and freeze. When ready to bake, let them thaw and rise for 1-2 hours, then bake as directed. This is perfect for holiday mornings.
Can I use light brown sugar instead of dark?
Yes, but dark brown sugar has more molasses, which gives a deeper flavor. If you only have light brown, it will still taste good, just less rich.
How do I reheat leftovers without them getting dry?
Microwave with a damp paper towel over the bun for 20-30 seconds. The steam keeps them moist. Or warm in a 300°F oven for 10 minutes.
Can I double the recipe?
Yes, but you’ll need two 9×13 pans. Adjust baking time slightly, checking for doneness at 25 minutes.
Why is my glaze too thick?
Add milk one teaspoon at a time until it reaches your desired consistency. It’s easier to thin it out than to fix a runny glaze.
Pin This Recipe!
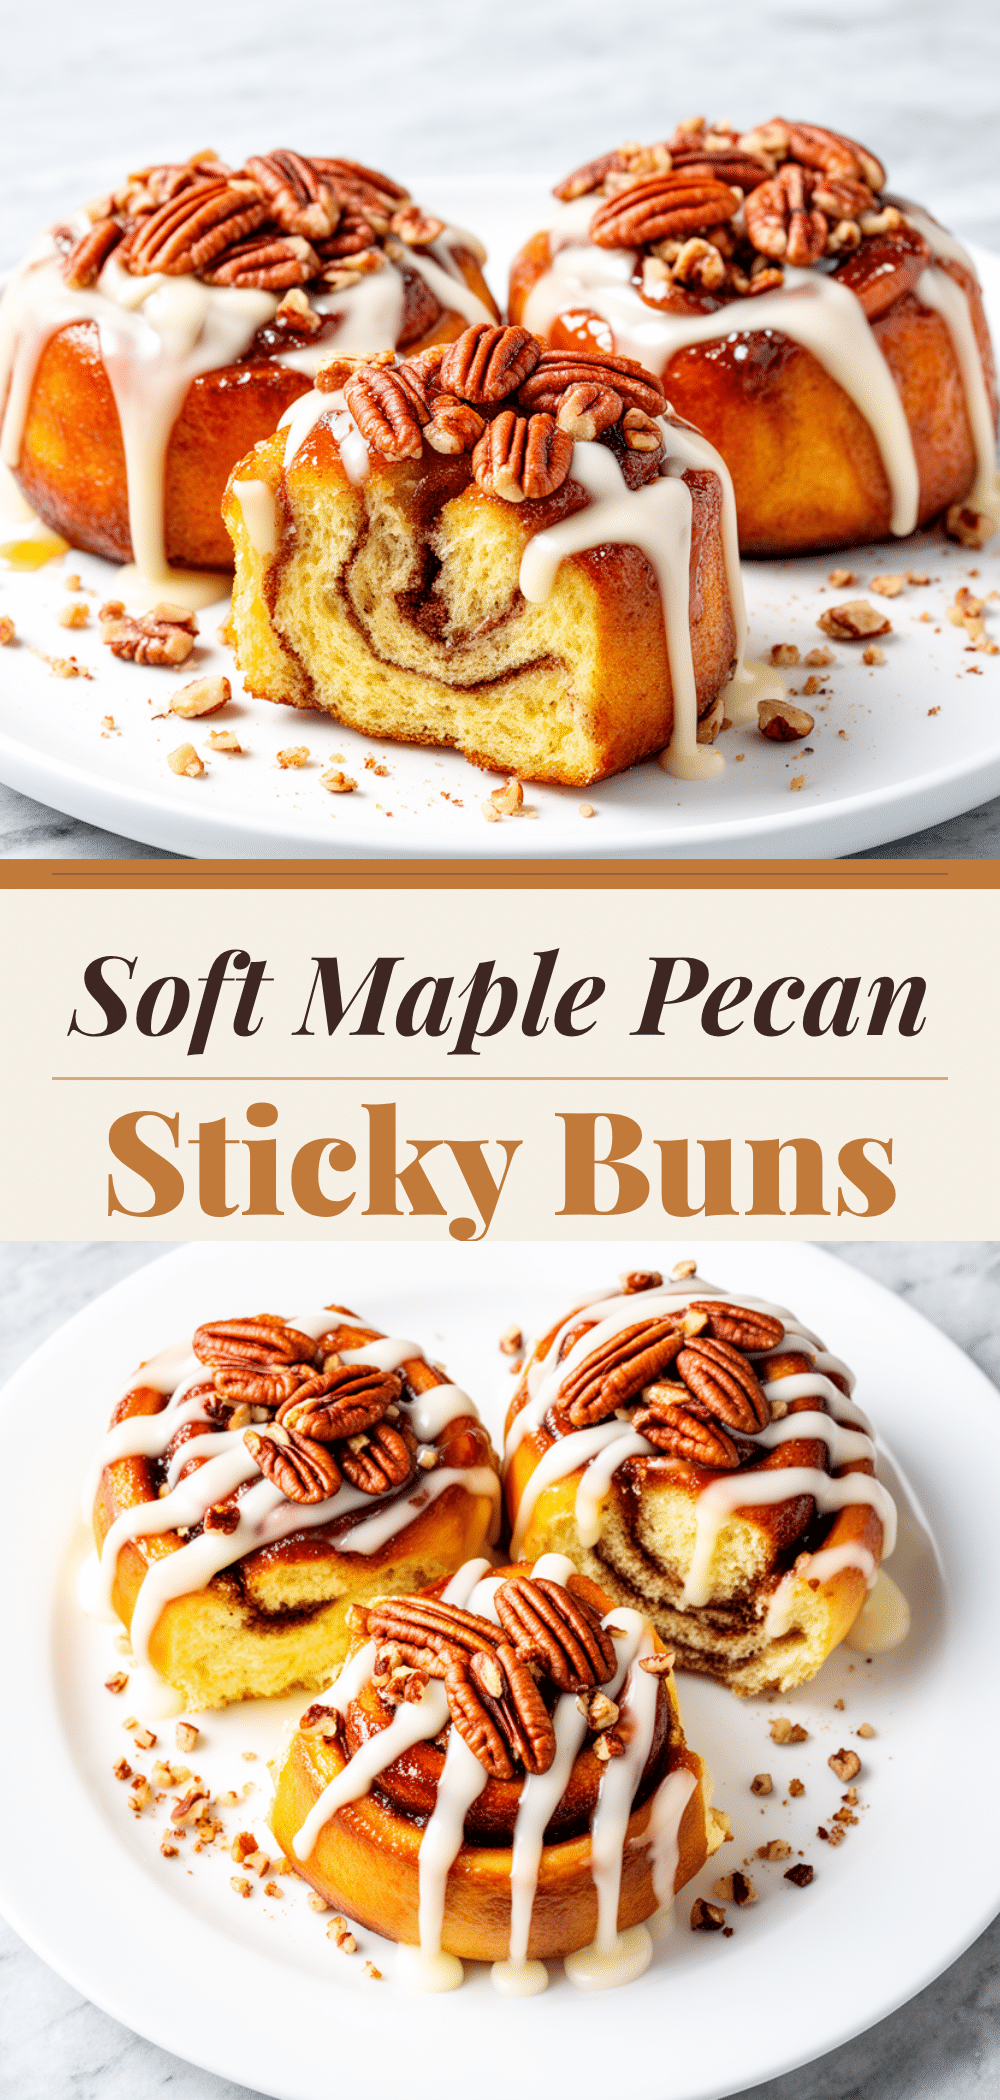
Maple Pecan Sticky Buns with Cream Cheese Glaze
- Total Time: 75 minutes
- Yield: 12 servings 1x
Description
Tender, gooey sticky buns filled with cinnamon and pecans, topped with a rich caramelized maple syrup glaze and finished with a tangy cream cheese drizzle. Perfect for impressing guests at brunch.
Ingredients
- 3 ½ cups all-purpose flour
- 2 ¼ tsp instant yeast (1 packet)
- ½ cup granulated sugar
- 1 tsp salt
- 1 cup warm whole milk
- ¼ cup melted unsalted butter
- 1 large egg
- 1 tsp vanilla extract
- ½ cup unsalted butter (softened, for filling)
- 1 cup dark brown sugar
- ½ cup real maple syrup
- 1 cup chopped pecans (toasted)
- 2 tsp cinnamon
- 4 oz full-fat cream cheese (softened)
- 1 cup confectioners’ sugar (sifted)
- 1–2 tbsp milk or cream
- ½ tsp vanilla extract
Instructions
- In a large bowl, whisk together flour, instant yeast, granulated sugar, and salt. Make a well in the center.
- In a separate bowl, combine warm milk, melted butter, egg, and 1 tsp vanilla. Pour wet ingredients into the dry mixture.
- Mix until a shaggy dough forms. Knead by hand for 8-10 minutes or use a stand mixer with dough hook on low for 5-7 minutes until smooth and elastic.
- Place dough in a lightly oiled bowl, cover, and let rise in a warm spot for 1-2 hours until doubled in size.
- While dough rises, melt ½ cup butter in a 9×13-inch baking dish. Stir in brown sugar and maple syrup until smooth. Sprinkle toasted pecans over the caramel.
- Punch down risen dough and roll into a 12×18 inch rectangle on a floured surface.
- Spread softened ½ cup butter over the dough, leaving a border. Mix remaining brown sugar (if using extra) and cinnamon, then sprinkle over butter.
- Roll dough tightly into a log from the long edge and pinch seam to seal.
- Cut log into 12 equal slices using dental floss or a sharp knife. Place cut-side up into the prepared baking dish.
- Cover loosely and let rise again for 30-45 minutes until puffy.
- Preheat oven to 350°F (175°C). Bake buns for 25-30 minutes until golden brown and internal temperature reaches 190°F.
- Cool in pan for 5-10 minutes. Place a serving platter over the dish and carefully flip to release buns.
- Whisk cream cheese, confectioners’ sugar, milk/cream, and ½ tsp vanilla until smooth.
- Drizzle glaze over warm buns and serve immediately.
Notes
Toast pecans in a dry skillet for 3-5 minutes before chopping to enhance flavor. Use dental floss to cut the dough log for clean slices without squishing. For make-ahead, freeze unbaked buns after the second rise; thaw and rise for 1-2 hours before baking. Glaze while buns are warm for best texture.
- Prep Time: 45 minutes
- Cook Time: 30 minutes
- Category: Breakfast
- Cuisine: American
Nutrition
- Serving Size: 1 bun
- Calories: 380
- Sugar: 28
- Sodium: 220
- Fat: 16
- Saturated Fat: 9
- Carbohydrates: 52
- Fiber: 2
- Protein: 6
Keywords: sticky buns, maple pecan buns, cream cheese glaze, brunch recipes, homemade bread, weekend baking, make-ahead breakfast