Last Tuesday, I was staring at a pile of unshelled walnuts on my counter, wondering if I was losing my mind. I’d bought them for a salad I wasn’t making and a pie I wasn’t baking. The clock was ticking toward dinner time, and instead of feeling productive, I felt like a nut hoarder with a problem. That’s when I remembered the bag of brown sugar in the pantry and the stick of butter sitting out to soften.
I didn’t plan to bake. I just wanted something warm and sweet to eat while I figured out my life. But then I decided to brown the butter. You know that nutty, toasty smell that fills the house when you cook butter until it’s golden? That smell is basically autumn in a saucepan. I poured that hot, fragrant butter over the sugars, mixed in the maple syrup, and folded in those walnuts. I didn’t even have vanilla extract on hand, and it didn’t matter.
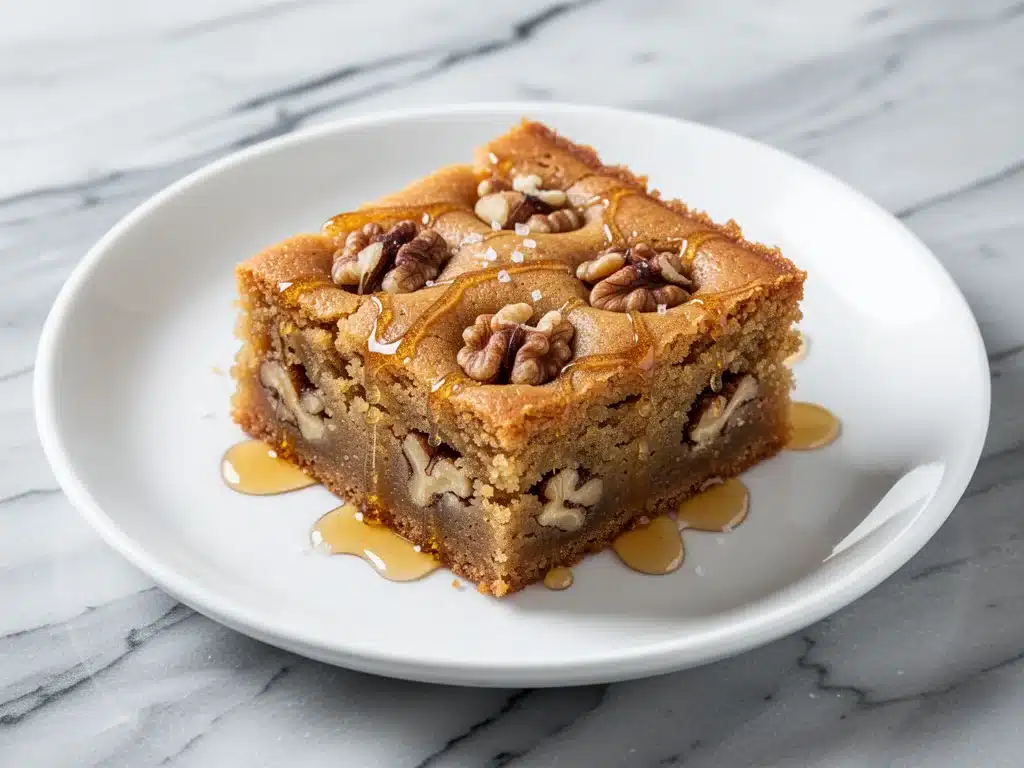
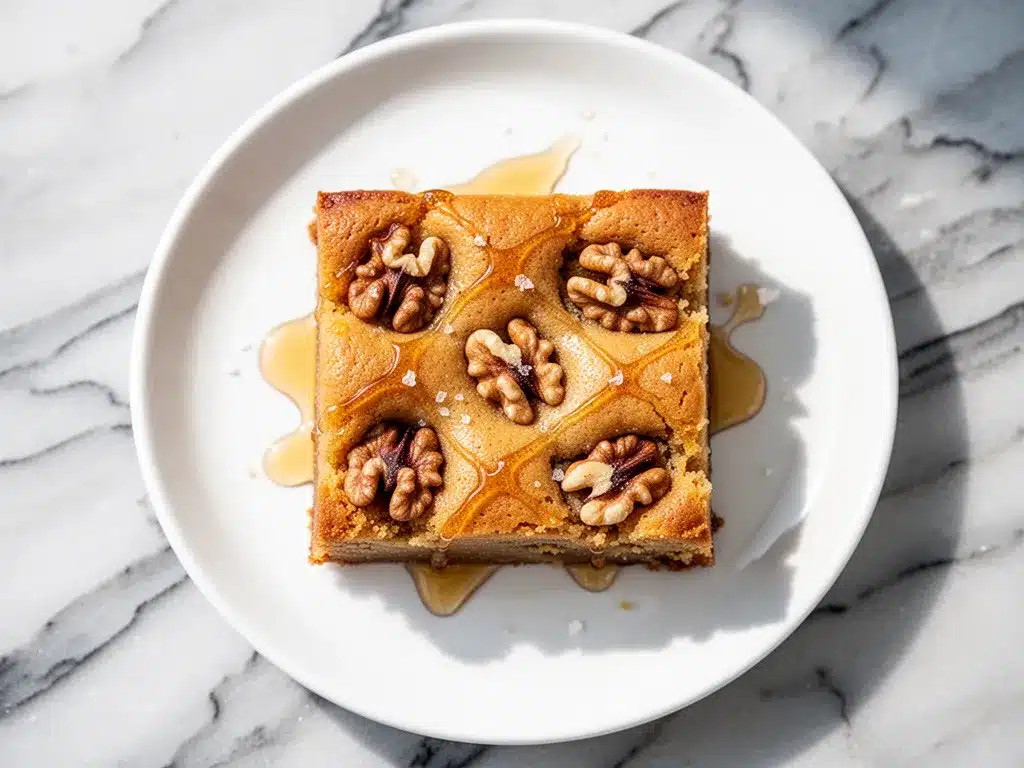
When they came out of the oven, crispy on the edges and chewy in the middle, I realized I had accidentally created the perfect fall dessert. These fall maple brown butter blondies with crunchy toasted walnuts are better than anything you’d buy at a bakery. They’re richer, more complex, and honestly? They smell better than maple pecan sticky buns, which is saying a lot.
I’ve made these blondies at least eight times in the last month. Sometimes I use walnuts, sometimes I swap in pecans. Sometimes I add a drizzle of caramel. But the core recipe stays the same because it’s just that good. It’s the kind of dessert that makes your family stop arguing about what movie to watch and gather around the kitchen island. It’s cozy, it’s indulgent, and it’s stupidly easy to make.
Why You’ll Love This Recipe
There are about ten reasons I keep making these, but here are the big ones that keep them in regular rotation:
That Brown Butter Magic — Most blondie recipes just call for melted butter. But browning it first? It adds this deep, toasted flavor that tastes like it took hours to make. It’s the difference between a snack and a gourmet treat.
Real Maple Flavor — I don’t use fake maple syrup (the kind with corn syrup) in these. You need the real stuff. The maple syrup isn’t just a sweetener; it’s a main character. It pairs perfectly with the toasted walnuts and creates that classic fall flavor profile.
Crunchy Texture — I know some people hate nuts in their desserts, but hear me out. The toasted walnuts provide this essential crunch that contrasts with the soft, chewy blondie. It’s not just sad, soft squares. It’s texture heaven.
One Bowl (Mostly) — You do need to brown the butter in a saucepan, but the batter itself comes together in one large mixing bowl. No fancy stand mixer needed. If you can whisk, you can make these.
Better Than Takeout — Seriously. Ordering dessert out costs $8-$12 and arrives lukewarm. These cost about $2 to make, taste fresh, and keep for days. Plus, you get the bonus of smelling like a bakery all day.
This is my go-to when I need to impress guests, treat myself after a hard week, or just need a little sweetness in my life. No complicated techniques, just reliable, delicious food that makes everyone happy.
Ingredients You’ll Need
Here’s the best part: you probably have most of this already. I’m particular about three ingredients here, and I’ll tell you exactly why.
For the Base
Unsalted Butter (1 cup / 2 sticks / 226g) — This is non-negotiable. You need enough butter to brown properly. I use high-quality European butter if I can find it, but standard unsalted works fine. Salted butter will make the blondies too salty since we’re adding salt separately.
Dark Brown Sugar (1 ½ cups / 300g) — Light brown sugar works, but dark brown has more molasses. More molasses means deeper flavor, which pairs better with the maple. Don’t skimp on the molasses flavor here.
Maple Syrup (¼ cup / 60ml) — Use 100% pure maple syrup. The kind in the pancake syrup bottle is sugar water and will ruin the flavor. Look for Grade A or Grade B. Grade B is darker and stronger, which I prefer for baking.
Large Eggs (2 large, room temperature) — Room temperature eggs incorporate better into the batter. If you’re in a rush, crack them into a bowl of warm water for 5 minutes.
For the Structure
All-Purpose Flour (1 ½ cups / 190g) — Spoon and level your flour. Don’t scoop it directly from the bag or you’ll pack it down and get dry blondies. I always use King Arthur Flour, but any brand works.
Baking Powder (1 teaspoon) — Just a little bit to help them rise slightly. You want them chewy, not cakey.
Salt (½ teaspoon) — Even though the butter is unsalted, you need salt to balance the sweetness. It makes the maple flavor pop.
For the Crunch
Walnuts (1 cup / 115g, chopped) — Toasting these first is the secret weapon. Raw walnuts are fine, but toasted walnuts are *chef’s kiss*. I chop them roughly—some big chunks, some small pieces.
Vanilla Extract (1 teaspoon) — I usually skip this because the brown butter and maple are so strong, but if you like that classic vanilla undertone, add it. I keep a bottle of pure vanilla in my pantry at all times.
Flaky Sea Salt (for topping) — Optional but highly recommended. Sprinkling Maldon salt on top right after they come out of the oven creates this salty-sweet contrast that is addictive.
Equipment Needed
You don’t need fancy equipment for this. Here’s what I actually use:
Small Saucepan — I use a 2-quart stainless steel pan. It needs to be light-colored so you can actually see the butter turning brown. If you use a dark non-stick pan, you might burn it before you realize it.
9×9 Inch Baking Pan — This is the perfect size for these blondies. They’ll be about an inch thick, which is ideal for that chewy center. You can use a 9×13 pan, but they’ll be thin and crispy all over, which is a different texture.
Parchment Paper — Line your pan. Do not skip this. These are sticky. The maple syrup and butter will bond with the pan if you don’t line it. I like to leave a little overhang on the sides so I can lift the whole block out once it cools.
Mixing Bowl — A large glass or metal bowl works best. I’ve tried doing this in plastic, and the hot butter sometimes warps it. Glass is safer.
Whisk — For mixing the wet ingredients and the dry ingredients. A silicone whisk is nice because it scrapes the sides.
Knife — For chopping the walnuts. I don’t bother with a food processor; a knife gives better control over the chunk size.
How to Make It: Step-by-Step
Alright, let’s make this! I’m walking you through exactly how I do it, including the little tricks I’ve picked up.
Step 1: Prep Your Pan and Oven (5 minutes)
Preheat your oven to 350°F (175°C). Line your 9×9 inch baking pan with parchment paper, leaving an overhang on the long sides. This makes it easy to lift the blondies out later. I usually spray the parchment with a little cooking spray just to be safe.
Step 2: Brown the Butter (5-7 minutes)
This is the most important step. Place your unsalted butter in a saucepan over medium heat. Stir it constantly with a wooden spoon. It will melt, then foam up, then settle down. Keep watching! You want the foam to settle and the butter to turn a golden amber color. You’ll see little brown specks at the bottom of the pan. Smell it—it should smell nutty and toasty. As soon as you see that color and smell that scent, remove it from the heat immediately. If you wait too long, it will burn. Pour the hot butter into your mixing bowl.
Step 3: Mix the Wet Ingredients (2 minutes)
While the butter is still hot, add the brown sugar and maple syrup to the bowl. Whisk vigorously. The heat from the butter will help dissolve the sugar. Whisk for about a minute until the mixture looks smooth and glossy. Let it cool for 5 minutes so it doesn’t cook the eggs when you add them. Crack in the eggs and whisk again until combined. Stir in the vanilla extract.
Step 4: Combine Dry Ingredients (2 minutes)
Add the flour, baking powder, and salt to the wet mixture. Use a spatula or wooden spoon to fold it in. Mix until *just* combined. You’ll still see little streaks of flour. That’s okay! Overmixing is the enemy of chewy blondies. Stop as soon as the dry flour disappears.
Step 5: Fold in Walnuts and Bake (30-35 minutes)
Fold in your chopped toasted walnuts. Pour the batter into your prepared pan and spread it out evenly. Bake for 30-35 minutes. You’ll know they’re done when the edges are golden brown and set, and the center is just slightly jiggly. A toothpick inserted into the center should come out with a few moist crumbs attached, not wet batter. If it’s clean, you’ve overbaked them.
Step 6: Cool and Top (15 minutes)
Let the blondies cool in the pan for at least 15 minutes. This is the hardest part. Resist the urge to cut them immediately. As they cool, sprinkle with flaky sea salt if you’re using it. Once cooled, lift them out of the pan using the parchment paper and slice into squares.
Pro Tip: These taste best the next day. The flavors meld together overnight. If you can wait that long, do it. If you can’t… I won’t judge.
Expert Tips & Tricks
Here’s everything I’ve learned from making this dozens of times. These tips will save you from my mistakes.
Toast Your Walnuts
I can’t stress this enough. Raw walnuts are fine, but toasted walnuts are better. Spread them on a baking sheet and toast at 350°F for 5-7 minutes until fragrant. Let them cool before chopping. The oils release and the flavor intensifies. It’s a small step that makes a huge difference.
Don’t Burn the Butter
Browning butter is a race against time. Once it turns brown, it goes from “perfect” to “bitter” in seconds. If you smell acrid smoke, start over. Trust your nose, not the clock. The butter should smell like hazelnuts or toasted almonds.
Room Temperature Eggs
I know it’s a hassle, but room temperature eggs emulsify better with the butter and sugar. Cold eggs can cause the butter to seize up slightly. Just crack them into a bowl of warm water while you brown the butter.
Use a Light-Colored Pan
If you’re browning butter in a dark pan, you won’t see the color change. Use a stainless steel or light-colored aluminum pan. Your eyes are your best tool here.
Don’t Overbake
Blondies continue to cook in the hot pan after you take them out of the oven. Pull them when the center still looks slightly underdone. They will firm up as they cool. Overbaked blondies are dry and crumbly. We want chewy and fudgy.
Storage is Key
Store these in an airtight container at room temperature for up to 4 days. They actually get chewier after day one. If you live in a hot climate, refrigerate them, but let them come to room temperature before eating.
Variations & Substitutions
Once you’ve nailed the basic version, here’s how you can mix it up. I’ve tried all of these.
Pecan Swap
Walnuts are classic, but toasted pecans are just as good. In fact, I love the sweetness of pecans with maple. Use the same amount. This is great if you’re making these for a holiday gathering.
Chocolate Chip
Add 1 cup of semi-sweet chocolate chips when you fold in the walnuts. This turns them into a hybrid brownie-blondie. The chocolate adds richness, but it masks some of the maple flavor. I prefer them without chocolate to let the maple shine, but my kids go crazy for the chocolate version.
Caramel Drizzle
Once the blondies are baked and slightly cooled, drizzle warm caramel sauce over the top. Then sprinkle with sea salt. This is the “fancy” version I make when I have guests over. It looks stunning and tastes incredible.
Gluten-Free
Swap the all-purpose flour for a 1:1 gluten-free baking flour blend (like Bob’s Red Mill or King Arthur). The texture might be slightly more crumbly, but it still tastes amazing. I’ve used both blends and they work equally well.
Dairy-Free
Replace the butter with a high-quality dairy-free butter stick (like Miyoko’s or Earth Balance). Use coconut oil instead of maple syrup if you want to avoid maple, but maple syrup is naturally dairy-free, so you just need to swap the butter. The flavor will be slightly different, but still good.
Nut-Free
Skip the walnuts entirely. You can add dried cranberries or raisins for a chewy texture. Or just leave them out for a plain maple brown butter blondie. It’s still delicious, just less crunchy.
Serving & Storage
How to Serve:
I usually serve these warm, right out of the oven. They’re best with a cup of coffee or a glass of cold milk. I like to cut them into small squares for parties because people tend to eat more when they’re bite-sized. For a cozy night in, I eat them big and chunky with a mug of tea.
Side Dishes:
These are a dessert, so they stand alone. But if you’re serving them as part of a fall brunch, they pair well with fluffy lemon ricotta pancakes or cinnamon roll French toast bake. The maple flavor ties everything together.
Refrigerator:
Store in an airtight container at room temperature for up to 4 days. If your kitchen is hot, refrigerate them. They’ll last up to a week in the fridge, but let them come to room temperature before eating for the best texture.
Freezing:
Yes, you can freeze these! Wrap the whole block in plastic wrap and then in aluminum foil. They’ll last for up to 3 months. Thaw them overnight in the fridge or at room temperature. You can also freeze individual squares for quick snacks.
Reheating:
Microwave a square for 15-20 seconds to warm it up. The center will become gooey and warm. It’s like getting a fresh blondie every time.
Nutrition Information
I’m not a nutritionist, but here’s the breakdown if you’re tracking. Please remember these are rich, indulgent treats, so portion control is key.
Per Serving (based on 16 squares):
| Nutrient | Amount |
|---|---|
| Calories | 280 |
| Protein | 4g |
| Carbs | 32g |
| Fiber | 1g |
| Sugar | 24g |
| Fat | 16g |
| Saturated Fat | 7g |
| Sodium | 180mg |
What’s Good:
They provide some energy from the carbs and healthy fats from the walnuts. The walnuts add a bit of protein and fiber compared to plain blondies.
What to Know:
They are high in sugar and calories because of the butter, brown sugar, and maple syrup. This is comfort food. Enjoy it as a treat, not a health food.
Final Thoughts
So that’s my go-to fall maple brown butter blondies! I’ve probably talked your ear off at this point, but when you make a recipe this often, you have a lot to say about it.
This has saved my dessert routine more times than I can count. It’s my answer to “what’s for dessert?” when I want something special but don’t want to spend hours in the kitchen. The smell of brown butter filling the house is worth the effort alone. My family is obsessed, and I’m obsessed with how easy they are to make.
Make it yours! Try different nuts, add chocolate chips, or drizzle caramel. The best recipes are the ones you adapt to your family’s tastes. If you make these, drop a comment and let me know what you think! I love hearing how recipes turn out in your kitchen. And if something doesn’t work, tell me that too—I’m here to help troubleshoot.
Happy baking! And I hope your kitchen smells half as good as mine does right now.
Frequently Asked Questions
Can I use light brown sugar instead of dark brown sugar?
You can, but dark brown sugar has more molasses, which gives a deeper, richer flavor. If you only have light brown sugar, it will still work, but the blondies will be slightly less complex in flavor. I prefer dark brown sugar for fall recipes.
Why did my blondies turn out dry?
Most likely, you overbaked them. Blondies continue to cook in the pan after you take them out of the oven. Pull them when the center still looks slightly underdone. Also, make sure you’re spooning and leveling your flour, not scooping it, which packs it down and leads to dry blondies.
Can I double this recipe?
Yes, but you’ll need a 9×13 inch baking pan. The baking time will increase to about 35-40 minutes. Keep an eye on them, as larger pans can bake unevenly. I usually rotate the pan halfway through baking.
Do I have to toast the walnuts?
It’s highly recommended. Toasting walnuts brings out their natural oils and makes them crunchier and more flavorful. Raw walnuts can taste bland in comparison. It only takes 5 minutes in the oven, but it makes a huge difference in the final taste.
Can I make these ahead of time?
Yes! These actually taste better the next day. You can make them up to 2 days ahead and store them in an airtight container at room temperature. They also freeze well for up to 3 months if you need to prep for a party.
What if I don’t have maple syrup?
You can use honey, but the flavor will be different. Honey is stronger and more floral. I’d recommend using ⅓ cup of honey instead of ¼ cup of maple syrup. Or, you can just use extra brown sugar and a teaspoon of vanilla, but you’ll miss that distinct maple flavor.
Pin This Recipe!
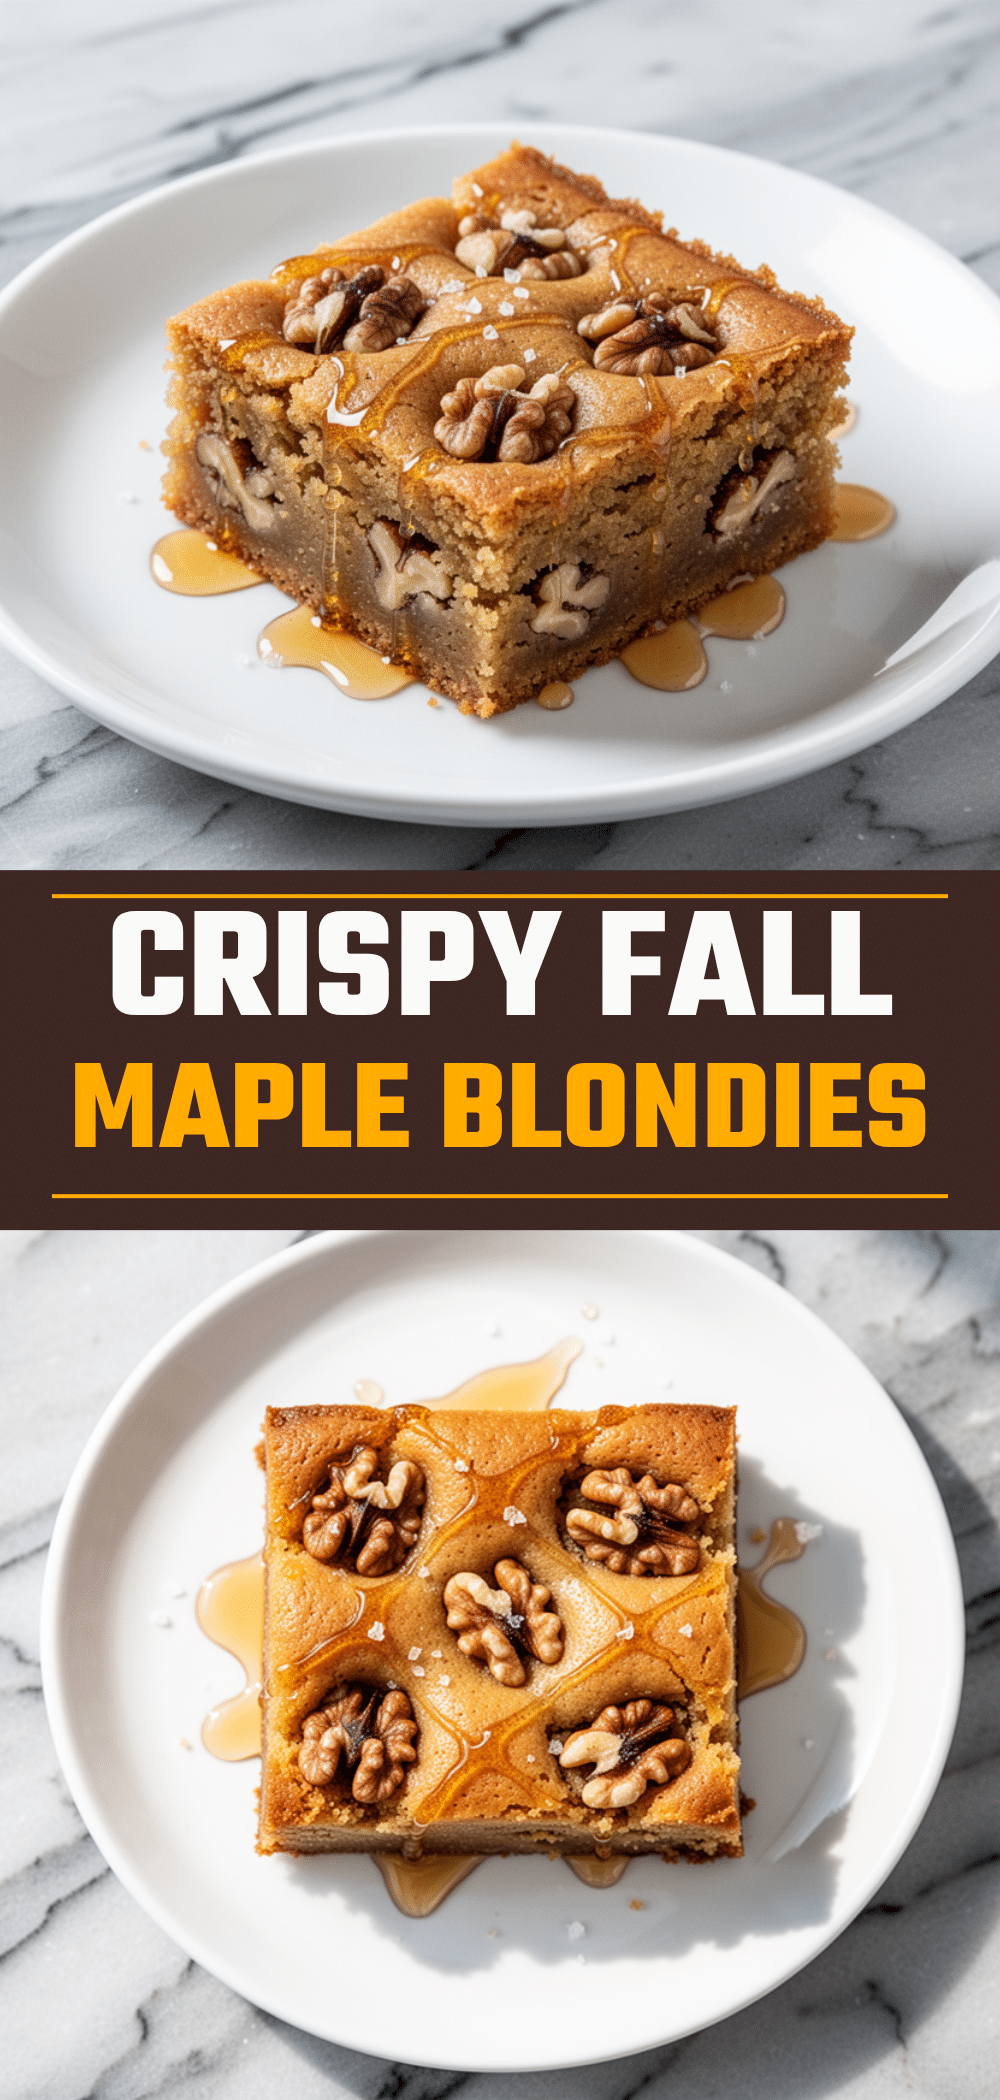
Fall Maple Brown Butter Blondies
- Total Time: 45 minutes
- Yield: 16 servings 1x
Description
Rich, chewy blondies made with nutty brown butter, real maple syrup, and crunchy toasted walnuts. This easy one-bowl dessert is the perfect cozy fall treat.
Ingredients
- 1 cup (2 sticks / 226g) unsalted butter
- 1 ½ cups (300g) dark brown sugar
- ¼ cup (60ml) 100% pure maple syrup
- 2 large eggs, room temperature
- 1 teaspoon vanilla extract
- 1 ½ cups (190g) all-purpose flour
- 1 teaspoon baking powder
- ½ teaspoon salt
- 1 cup (115g) walnuts, chopped and toasted
- Flaky sea salt, for topping (optional)
Instructions
- Preheat oven to 350°F (175°C). Line a 9×9 inch baking pan with parchment paper, leaving an overhang on the long sides, and lightly spray with cooking spray.
- Melt the unsalted butter in a small saucepan over medium heat. Stir constantly until the butter foams, settles, and turns a golden amber color with a nutty aroma. Immediately pour the hot butter into a large mixing bowl.
- While the butter is still hot, add the brown sugar and maple syrup to the bowl. Whisk vigorously for about a minute until the mixture is smooth and glossy. Let it cool for 5 minutes.
- Add the eggs and vanilla extract to the cooled butter mixture. Whisk until combined.
- Add the flour, baking powder, and salt to the wet ingredients. Fold in gently with a spatula until just combined; do not overmix.
- Fold in the chopped toasted walnuts. Pour the batter into the prepared pan and spread evenly.
- Bake for 30-35 minutes, or until the edges are golden brown and set, and the center is slightly jiggly. A toothpick inserted should come out with moist crumbs.
- Let the blondies cool in the pan for at least 15 minutes. Sprinkle with flaky sea salt if desired. Lift out using the parchment paper and slice into squares.
Notes
Toast walnuts at 350°F for 5-7 minutes before chopping for best flavor. Do not overbake as blondies continue to cook in the hot pan. These taste best the next day as flavors meld. Store in an airtight container at room temperature for up to 4 days.
- Prep Time: 10 minutes
- Cook Time: 35 minutes
- Category: Dessert
- Cuisine: American
Nutrition
- Serving Size: 1 square
- Calories: 280
- Sugar: 24
- Sodium: 180
- Fat: 16
- Saturated Fat: 7
- Carbohydrates: 32
- Fiber: 1
- Protein: 4
Keywords: fall dessert, maple blondies, brown butter, walnut blondies, easy baking, cozy recipes