It was 4:45 PM on a Tuesday, and I was staring into the open fridge like it held the secrets of the universe. Spoiler alert: it didn’t. It had half a jar of pickles, some sad-looking spinach, and a package of ground beef that had been sitting in the back since Sunday. My kids were already asking if we could order pizza, and my husband was eyeing the car keys with that specific look that says, “If we leave now, we can beat traffic.”
I didn’t have the energy to shop. I didn’t have the patience to chop a dozen vegetables. And I definitely didn’t have the willpower to explain to my seven-year-old why we couldn’t have pepperoni rings tonight.
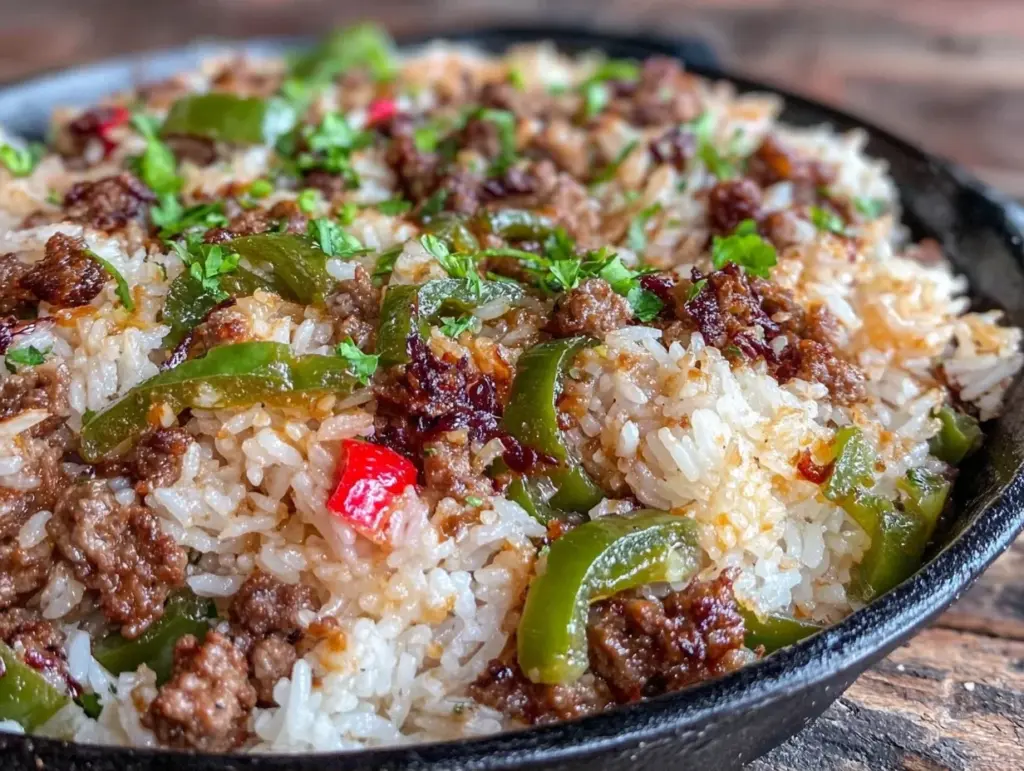
So I threw everything into one skillet. I know. It sounds basic. But I’ve made this one-pot ground beef and rice skillet at least thirty times in the last year, and it has single-handedly saved my sanity during the school year rush. It’s the kind of meal that feels like a hug, costs less than a delivery app fee, and leaves only one pot to wash. Seriously. One pot. That’s it.
If you’re standing in your kitchen right now wondering what to feed your family when the clock hits five, stop scrolling. This is your answer. It’s hearty, it’s creamy, it’s ready in 25 minutes, and it tastes like you spent hours simmering it. (Spoiler: You didn’t.)
Why You’ll Love This Skillet
I’m not saying this is the most gourmet dish you’ll ever make, but it’s the most reliable. Here’s why this one-pot ground beef and rice skillet has earned a permanent spot in our weekly rotation:
Zero Cleanup Drama — I hate doing dishes. Like, physically hate it. This recipe requires one large skillet, one measuring cup, and one spoon. That’s it. You can throw a sheet of foil over the skillet while it rests, and you’re done. I’ve even cooked this while helping my kids with homework because I only need to stir it once or twice.
Uses Up Leftovers — I usually toss in leftover roasted veggies or whatever cheese is about to expire in the fridge. The rice and beef act as a blank canvas. Last week, I used up some leftover corn and black beans, and it was delicious. It’s my go-to for clearing out the fridge before grocery day.
Kid-Approved — My picky eater son, who usually refuses to eat anything brown, asks for “that beef and rice thing” by name. The cheese pull is a major selling point. If you want to hide vegetables, this is the vehicle. I’ve blended carrots into the sauce before, and he never noticed. (Don’t tell him.)
Under $15 — Ground beef, rice, a can of soup, some spices. It’s cheap. Like, “pay the electric bill on time” cheap. I can feed four hungry people for less than what I’d spend on gas to drive to a drive-thru.
This is the dinner that works when you’re tired, broke, or just don’t want to think. It’s comfort food without the fuss.
Ingredients You’ll Need
Here’s the best part: you probably have most of this already. It’s pantry-friendly, which is crucial for a 5pm rescue mission.
Ground Beef (1 pound / 450g) — I use 80/20 because the fat adds flavor. If you’re watching calories, 90/10 works, but drain the grease well. Don’t skip this step, or it’ll be greasy.
Long Grain White Rice (1 cup / 200g) — Do not use instant rice. Do not use brown rice (cooking time is totally different). Standard long-grain white rice like Uncle Ben’s or any store brand works perfectly. It absorbs the liquid and gets nice and fluffy.
Beef Broth (1 ½ cups / 360ml) — Use low-sodium so you can control the saltiness. I keep a box of Better Than Bouillon in the fridge because it lasts forever and tastes way better than powder.
Cream of Mushroom Soup (1 can / 10.5 oz) — I know, it’s a bit retro. But it provides the creamy texture without needing heavy cream. If you want a healthier version, you can swap this for a can of cream of chicken, or even make a quick roux with butter and flour, but the soup is the shortcut that makes this work.
Shredded Cheddar Cheese (1 ½ cups / 170g) — Use a block and shred it yourself. Pre-shredded cheese has cellulose that prevents it from melting smoothly. I’ve made the mistake of using the bag stuff before, and the sauce gets grainy. Just take the extra 2 minutes.
Onion (1 medium, diced / about 150g) — Yellow onion is standard, but sweet onion is great if you have it. Finely diced so it cooks evenly.
Garlic (3 cloves, minced / about 1 tablespoon) — Fresh garlic is non-negotiable here. Jarred garlic tastes metallic in this dish. If you’re really lazy, buy the pre-minced in the jar, but fresh is better.
Seasonings — 1 teaspoon garlic powder, 1 teaspoon onion powder, ½ teaspoon paprika, and salt and pepper to taste. I keep a “skillet spice” blend going, but these basics work every time.
Optional Add-ins — Frozen peas, diced bell peppers, or even some canned black beans. I throw in frozen peas in the last 5 minutes because they’re easy and my kids won’t say no to green bits.
Equipment Needed
You don’t need a fancy kitchen for this. Here’s what I actually use:
Large Skillet or Dutch Oven — I use a 12-inch cast iron skillet. It holds heat well and goes from stove to table. A large non-stick skillet works too, just make sure it’s big enough to hold all the ingredients without spilling. If you have a Dutch oven, that’s perfect too.
Wooden Spoon — For stirring. Silicone works, but I like wood because it doesn’t scratch my pans.
Measuring Cups and Spoons — Standard stuff. I have a set from the dollar store that’s been with me for ten years.
Colander — Not actually needed for this recipe since we cook the rice in the skillet, but handy if you want to rinse the beef (I don’t, but some people do).
Sharp Knife and Cutting Board — For the onion and garlic. If your knife is dull, you’re crying more than you need to. Sharpen it.
How to Make It: Step-by-Step
Alright, let’s make this! I’m walking you through exactly how I do it, including the little tricks I’ve picked up so you don’t end up with mushy rice or burnt beef.
Step 1: Brown the Beef (5 minutes)
Heat your large skillet over medium-high heat. Add the ground beef. Break it up with your wooden spoon as it cooks. You want small crumbles, not big chunks. Cook until it’s no longer pink, about 5-7 minutes. If there’s a lot of grease, drain most of it, but leave about a tablespoon for flavor. This step is crucial for building that savory base.
Step 2: Sauté the Aromatics (2 minutes)
Add the diced onion to the beef. Cook for 2 minutes until it starts to soften. Add the minced garlic and your dry spices (garlic powder, onion powder, paprika, salt, pepper). Stir constantly for 30 seconds until it smells amazing. Don’t let the garlic burn—it turns bitter fast. If it’s getting too dark, lower the heat.
Step 3: Add the Rice and Liquid (2 minutes)
Pour in the uncooked rice. Stir it around for a minute to coat it in the beef fat. This helps the rice absorb flavor. Then, pour in the beef broth and the can of cream of mushroom soup. Stir well to combine. The mixture will look soupy and weird. That’s normal. Bring it to a boil.
Step 4: Simmer the Rice (15 minutes)
Once it’s boiling, reduce the heat to low. Cover the skillet with a tight-fitting lid. Let it simmer for 15 minutes. Do not lift the lid. I know it’s tempting to peek, but every time you lift the lid, you let out steam, and the rice won’t cook evenly. Set a timer and walk away. If you have other things to do, do them now. This is hands-off time.
Step 5: The Cheese Pull (2 minutes)
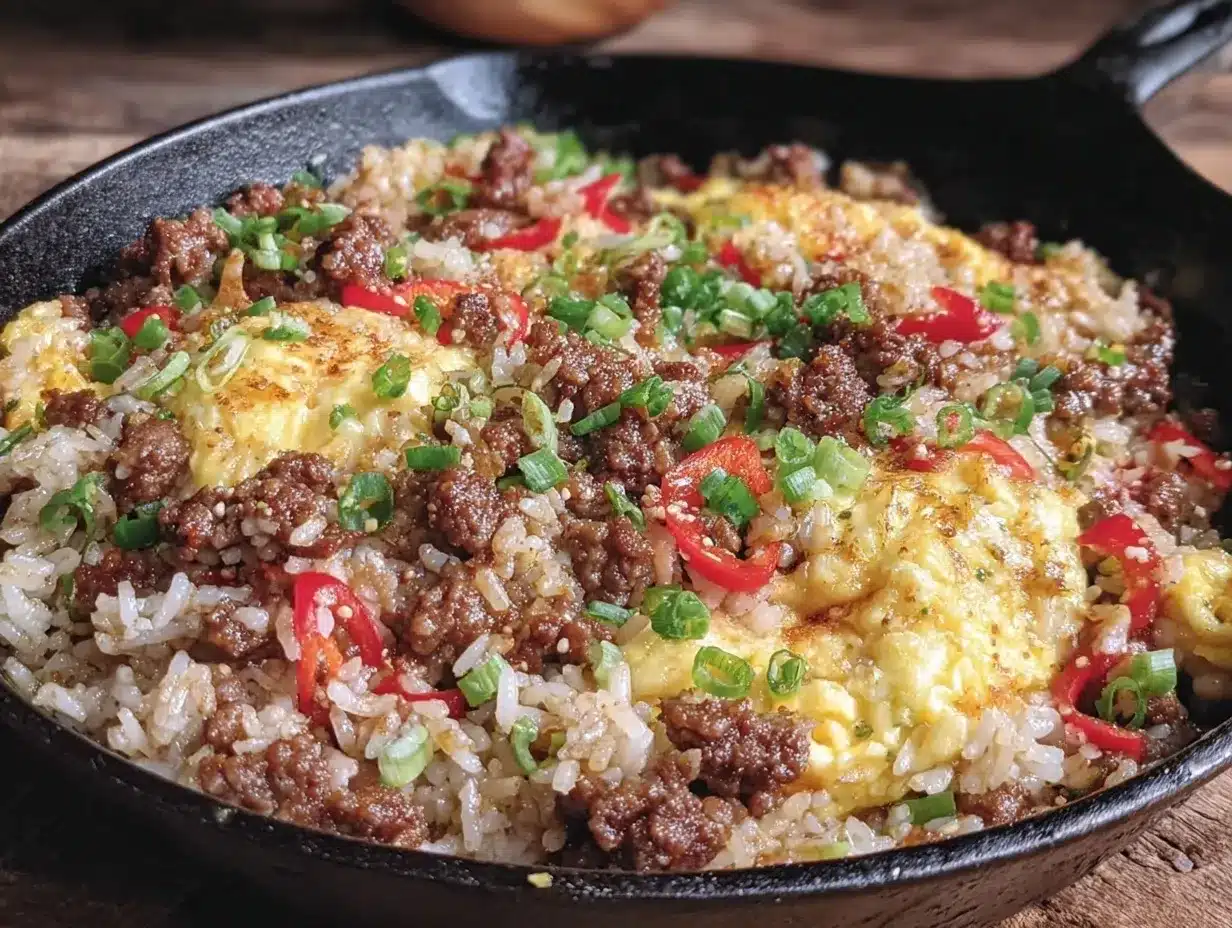
After 15 minutes, check the rice. It should be tender and the liquid should be mostly absorbed. If there’s still water, simmer uncovered for another 2-3 minutes. Remove from heat. Sprinkle the shredded cheese over the top. Cover and let it sit for 2 minutes. The residual heat will melt the cheese perfectly. Stir it in gently until creamy.
Step 6: Serve
Taste and adjust salt if needed. Serve immediately with crusty bread or a simple green salad. I like to top it with chopped green onions if I have them, but it’s not required.
Total Time: About 25 minutes (5 minutes prep, 20 minutes cooking)
Expert Tips & Tricks
Here’s everything I’ve learned from making this dozens of times. These tips will save you from my mistakes.
Don’t Stir the Rice While It Simmers — Once you cover it, leave it alone. Stirring releases starch and makes the rice gummy. You want fluffy grains, not glue.
Check the Rice Type — I’ve made this with “quick cook” rice by accident, and it turned into mush in 10 minutes. Stick to standard long-grain white rice. If you must use short-grain, reduce the liquid slightly, but long-grain is the safest bet.
The Lid Matters — Make sure your lid fits tightly. If your skillet lid is loose, cover the pan with foil first, then put the lid on. This traps the steam, which is what cooks the rice.
Rest Before Serving — Let it sit for 5 minutes after removing from heat. The rice continues to absorb liquid and firm up. It’s easier to serve and less mushy.
Pro Trick: The Butter Finish — Stir in a tablespoon of cold butter at the very end. It makes the sauce glossy and adds a rich finish. It’s a restaurant trick that’s easy to pull off at home.
Variations & Substitutions
Once you’ve nailed the basic version, here’s how you can mix it up. I’ve tried all of these.
Taco Style — Swap the beef broth for chicken broth. Use taco seasoning instead of the basic spices. Top with sour cream, salsa, and cilantro. It’s basically deconstructed tacos.
Cajun Style — Use Cajun seasoning and add some diced bell peppers and celery with the onions. Top with green onions. Spicy and smoky.
Vegetarian Version — Swap the beef for a can of black beans or lentils. Use vegetable broth. The texture is slightly different but still hearty and delicious.
Cheesy Beef and Broccoli — Add steamed broccoli florets in the last 5 minutes of simmering. Use cheddar and a little soy sauce for an Asian-inspired twist.
Gluten-Free — This recipe is naturally gluten-free if you use gluten-free broth and ensure your soup is GF (some cream soups contain wheat flour). Check labels, but it’s usually easy to make GF.
Serving & Storage
How to Serve: I usually serve this straight from the skillet at the dinner table—it looks rustic and stays warm. But here are other ways I’ve enjoyed it:
Side Dishes: Garlic bread is a must. A simple cucumber salad or roasted asparagus works well to cut through the richness. I also like to serve it with cheesy baked spaghetti if I’m making a big spread, but honestly, this is hearty enough on its own.
Toppings Bar: When I have guests, I put out: extra cheese, sour cream, sliced jalapeños, and chopped green onions. Everyone customizes their bowl.
Refrigerator: Store in an airtight container for up to 4 days. The rice will absorb more liquid in the fridge, so it might look dry.
Reheating: Add a splash of water or broth to the skillet when reheating. Microwave works too, but add a tablespoon of water and cover with a damp paper towel to keep it moist. Stir well before eating.
Freezing: You can freeze this for up to 3 months. Thaw in the fridge overnight and reheat gently with added liquid. The texture might be slightly softer, but it’s still good.
Nutrition Information
I’m not a nutritionist, but here’s the breakdown if you’re tracking.
Per Serving (based on 6 servings):
- Calories: 380
- Protein: 22g
- Carbs: 35g
- Fiber: 1g
- Sugar: 2g
- Fat: 18g
- Saturated Fat: 9g
- Cholesterol: 65mg
- Sodium: 650mg
My Take: This is comfort food. It’s not a diet recipe. But it’s way better than takeout, costs less, and I know exactly what’s in it. When I want to make it lighter, I use leaner beef and less cheese. But usually? I just eat a reasonable portion and enjoy it.
Final Thoughts
So that’s my go-to one-pot ground beef and rice skillet! I’ve probably talked your ear off at this point, but when you make a recipe this often, you have a lot to say about it.
This has saved weeknight dinners more times than I can count. It’s my answer to “what’s for dinner” when I’m tired, don’t want takeout, and still want something that tastes really good. My kids are happy, my husband’s happy, and I’m happy because I’m not stressed about cooking.
Make it yours! Try different add-ins, swap in your favorite vegetables, adjust the spices. The best recipes are the ones you adapt to your family’s tastes.
If you make this, drop a comment and let me know what you think! I love hearing how recipes turn out in your kitchen. And if something doesn’t work, tell me that too—I’m here to help troubleshoot.
Happy cooking! And I hope your kitchen smells half as good as mine does right now.
Frequently Asked Questions
Can I use brown rice instead of white rice?
You can, but you’ll need to adjust the liquid and cooking time. Brown rice takes longer to cook and needs more water. I’d recommend using 2 cups of broth and simmering for 40-45 minutes. It’s not as quick, so for a 5pm dinner, white rice is the better choice.
Why is my rice still crunchy?
This usually means the lid wasn’t tight enough, or you lifted it too early. The rice needs trapped steam to finish cooking. Check your lid fit, and don’t peek until the timer goes off. If it’s still crunchy after 20 minutes, add a splash more water and simmer for 5 more minutes.
Can I make this ahead of time?
Yes! You can assemble everything up to the simmering step, cover, and refrigerate for up to 24 hours. When ready to cook, just add a few minutes to the simmering time since the ingredients are cold. It’s a great meal prep option.
Is this recipe similar to other skillet meals?
It’s a bit like a deconstructed cheesy ground beef taco pasta skillet, but with rice instead of pasta. It’s also similar to one-pot garlic butter chicken and rice, just with beef and a creamier sauce. It’s a versatile base for many flavors.
Can I freeze the leftovers?
Absolutely. Let it cool completely, then portion into freezer-safe containers. It keeps for up to 3 months. Thaw in the fridge and reheat with a splash of water or broth to loosen it up.
What if I don’t have cream of mushroom soup?
You can make a quick substitute. Melt 2 tablespoons of butter, whisk in 2 tablespoons of flour, cook for 1 minute, then slowly whisk in 1 cup of milk. Add a teaspoon of dried mushrooms or just use the roux mixture. It’s a bit more work but tastes fresh.
Pin This Recipe!

One-Pot Ground Beef and Rice Skillet
- Total Time: 25 minutes
- Yield: 6 servings 1x
Description
A quick, creamy, and kid-approved weeknight dinner that uses pantry staples and requires only one pot for easy cleanup. Ready in just 25 minutes.
Ingredients
- 1 pound ground beef (80/20 recommended)
- 1 cup long grain white rice
- 1 ½ cups beef broth (low-sodium)
- 1 can (10.5 oz) cream of mushroom soup
- 1 ½ cups shredded cheddar cheese
- 1 medium onion, diced
- 3 cloves garlic, minced
- 1 teaspoon garlic powder
- 1 teaspoon onion powder
- ½ teaspoon paprika
- Salt and pepper to taste
- Optional: Frozen peas, diced bell peppers, or black beans
Instructions
- Heat a large skillet over medium-high heat. Add ground beef and break into small crumbles. Cook until no longer pink (5-7 minutes), draining excess grease but leaving about a tablespoon.
- Add diced onion to the beef and cook for 2 minutes until softened. Add minced garlic, garlic powder, onion powder, paprika, salt, and pepper. Stir constantly for 30 seconds until fragrant.
- Pour in uncooked rice and stir for 1 minute to coat in fat. Add beef broth and cream of mushroom soup, stirring to combine. Bring mixture to a boil.
- Reduce heat to low, cover tightly with a lid, and simmer for 15 minutes without lifting the lid.
- Check rice for tenderness and liquid absorption. If needed, simmer uncovered for 2-3 more minutes. Remove from heat, sprinkle cheese on top, cover, and let sit for 2 minutes to melt.
- Stir cheese in gently until creamy. Taste and adjust seasoning. Serve immediately.
Notes
Do not use instant or brown rice as cooking times differ. Ensure the lid fits tightly to trap steam. Do not stir the rice while simmering to prevent gumminess. For a richer finish, stir in a tablespoon of cold butter at the end. Leftovers can be stored in the fridge for up to 4 days or frozen for 3 months.
- Prep Time: 5 minutes
- Cook Time: 20 minutes
- Category: Main Course
- Cuisine: American
Nutrition
- Serving Size: 1 bowl
- Calories: 380
- Sugar: 2
- Sodium: 650
- Fat: 18
- Saturated Fat: 9
- Carbohydrates: 35
- Fiber: 1
- Protein: 22
Keywords: one-pot dinner, ground beef, rice skillet, weeknight dinner, easy recipes, family meals, comfort food, quick dinner