Last Tuesday, I was standing in the cereal aisle of my local grocery store, staring at a plastic bin of those cute little no-bake energy bites. They looked perfect. Round, uniform, dusted with a bit of coconut or rolled in dark chocolate chips. The label said “all-natural,” which I interpreted as “not actually made of plastic.” I grabbed a bag, tossed it in my cart, and then immediately felt that familiar pang of guilt. Not because they were unhealthy, but because I knew I could make something better at home in five minutes flat, for a fraction of the cost.
See, I’ve always been that person who buys pre-made snacks “because I’m busy.” And then I get home, realize they’re mostly sugar and mystery oils, and end up eating them anyway because they’re right there in the pantry. It’s a vicious cycle. But three weeks ago, I was running late for a morning meeting, had zero energy, and realized my fridge was empty except for three slightly brown bananas and a jar of peanut butter. I didn’t have time to bake. I didn’t have time to think. I just needed fuel.
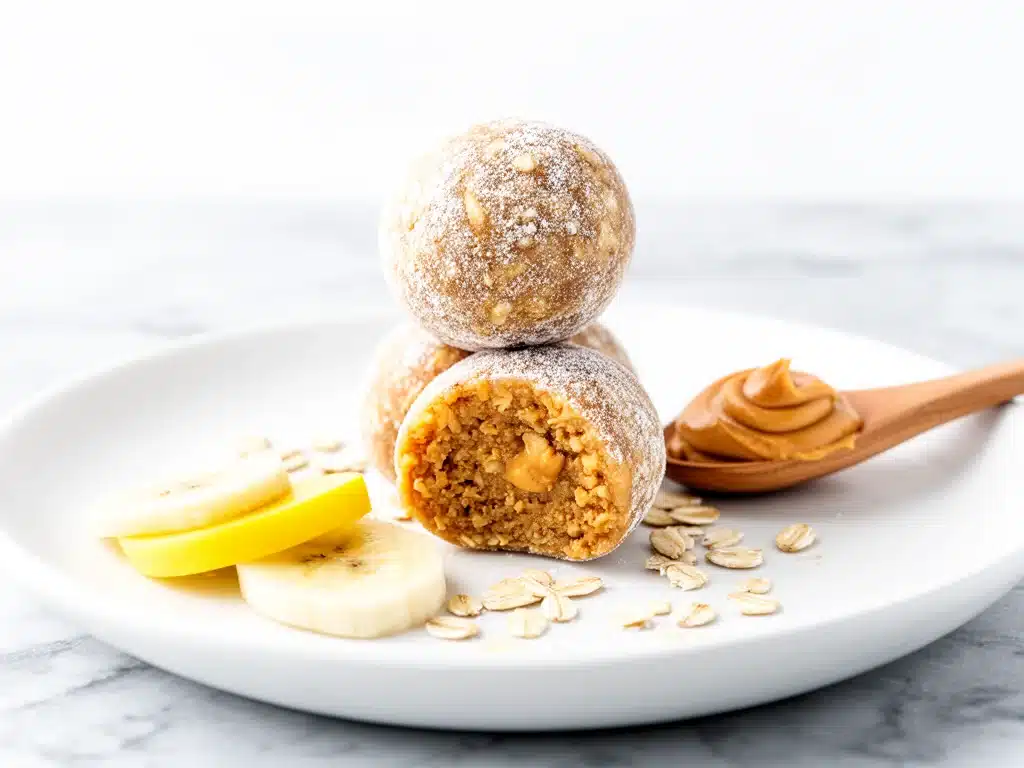
So I threw those bananas and that peanut butter into a bowl with some oats and honey, rolled them into balls, and popped them in the freezer. Twenty minutes later, I had something that tasted like dessert but felt like breakfast. It was creamy, chewy, and didn’t leave me with a sugar crash by 10 AM. I made them again the next day. And the day after that. Now, I make these no-bake peanut butter banana energy bites on repeat, basically every single week. They’ve replaced every pre-packaged snack in my house.
Here’s the thing about these bites: they’re not just convenient; they’re actually delicious. Real food, real ingredients, and zero baking required. If you’re tired of paying $6 for a tiny bag of “healthy” snacks that are mostly sugar, you need to try this. It’s simple, it’s fast, and it’s going to change how you snack forever.
Why You’ll Love This Recipe
I know what you’re thinking. “Another energy bite recipe? Really?” But hear me out. This isn’t just another blog post formula. This specific combination of banana and peanut butter is a flavor profile that just works. It’s sweet without being cloying, salty enough to satisfy cravings, and filling enough to keep you going until lunch. Here’s why these no-bake peanut butter banana energy bites have earned a permanent spot in my kitchen rotation:
- Stupidly Simple — Seriously, if you can mash a banana, you can make these. There’s no mixing bowl required if you’re feeling lazy (I usually mash right in the jar), no oven to preheat, and no cleanup to dread. I’ve made these with one hand while holding my coffee with the other.
- Lightning Fast — Five minutes of active prep time. That’s it. The rest is just chilling in the fridge or freezer. I make these on Sunday nights when I’m feeling productive, or on Wednesday afternoons when I need a quick fix. They come together faster than ordering takeout.
- Pantry-Friendly — You probably have 90% of these ingredients already. Oats, peanut butter, bananas, honey. These are staples. I don’t need to go to the store to make them. It’s the ultimate “I need a snack but I’m broke and lazy” solution.
- Actually Filling — Most energy bites leave you hungry an hour later because they’re just sugar bombs. These have fiber from the oats and healthy fats from the peanut butter and banana. They stick to your ribs. I had one at 9 AM and didn’t touch lunch until 1 PM, and I wasn’t ravenous.
- Kid-Approved — My kids are picky. Like, “I only eat white food” picky. But they love these. They think they’re getting a treat because of the peanut butter and honey, but they’re actually getting potassium and whole grains. It’s a win-win.
- Budget-Smart — This recipe makes about 15-20 bites for under $5. Compare that to $6 for a bag of 4-5 store-bought ones. The savings add up fast, especially if you’re snacking daily.
This is my go-to when I need a snack that just works. No complicated techniques, no weird superfood powders I can’t pronounce, just reliable, delicious food that makes everyone happy. Whether you’re a student, a busy parent, or just someone who likes snacks that don’t taste like cardboard, these are for you.
Ingredients You’ll Need
Here’s the best part: this ingredient list is shorter than most condiment bottles. You don’t need fancy powders or expensive supplements. You just need good, simple stuff. I’m particular about three things here, and I’ll tell you exactly why.
For the Base
Ripe bananas (2 large / about 300g) — This is non-negotiable. They need to be spotted. I’m talking brown-skinned, soft-to-the-touch bananas. Green bananas won’t mash well and will make the bites gritty. Ripe bananas provide the natural sweetness and the binding agent that holds everything together. If you don’t have ripe ones, pop them in the oven at 350°F for 15 minutes to speed it up.
Oats (1 ½ cups / 120g) — I use old-fashioned rolled oats. Quick oats work, but they make the texture a bit mushy. Steel-cut oats are way too hard for this. You want something that holds its shape but softens up when chilled. If you need gluten-free, make sure your oats are certified gluten-free, as oats are often processed alongside wheat.
Peanut butter (½ cup / 128g) — Natural or conventional? I use conventional smooth peanut butter for the classic taste, but natural works too. Just make sure it’s stirred well so the oil isn’t separated. Avoid “peanut butter spread” with added sugar and hydrogenated oils. You want 100% peanuts (and maybe salt). If you’re allergic to peanuts, sunflower seed butter is a great substitute, though the flavor will be different.
For the Flavor

Honey (2 tablespoons / 42g) — This adds extra sweetness and helps bind the mixture. Maple syrup works if you want to keep it vegan, but honey has a better texture for rolling. Don’t skip this, or the bites might fall apart.
Vanilla extract (1 teaspoon / 5ml) — Just a splash. It rounds out the peanut butter flavor and makes it taste more like a dessert. Use real vanilla, not imitation, if you can. It makes a subtle difference.
Salt (¼ teaspoon) — Even though peanut butter and bananas are sweet, a pinch of salt enhances the flavor. Don’t skip it. It’s the secret ingredient that makes it taste “restaurant quality” instead of “home kitchen.”
Optional Add-ins (The Fun Stuff)
Dark chocolate chips (¼ cup / 40g) — Because why not? I add these in for about half the batch. It turns them into little peanut butter cups. If you’re watching sugar, skip these or use sugar-free chips.
Chia seeds (1 tablespoon) — I throw these in for a little extra omega-3s and texture. They don’t change the taste, just boost the nutrition. You can also use flaxseed meal if you prefer.
Cinnamon (½ teaspoon) — If you love peanut butter and banana like I do, cinnamon is your best friend. It adds a warm, cozy flavor that goes perfectly with the oats.
Coconut flakes (for rolling) — If you want to roll the finished bites in coconut, keep some handy. It adds a nice crunch and looks pretty on Pinterest (which is important, let’s be honest).
Equipment Needed
You don’t need fancy equipment for this. Here’s what I actually use. Most of it is stuff you already have in your kitchen drawer.
Mixing bowl — I use a medium-sized glass bowl. It’s easy to see what’s going on and easy to wash. A large bowl works too, but you don’t want it so big that the ingredients scatter.
Fork or potato masher — To mash the bananas. A fork is fine if you’re lazy, but a masher makes it faster and smoother. I prefer the masher because I want smooth bites, not chunky ones.
Measuring cups and spoons — Standard stuff. Dollar store versions work fine. Accuracy matters a little here because the ratio of wet to dry needs to be right, but it’s not baking science.
Baking sheet or plate — To hold the rolled bites while they chill. I use a standard half-sheet pan lined with parchment paper. Parchment makes cleanup instant. If you don’t have parchment, just lightly grease the pan with coconut oil.
Airtight container — For storage. Glass containers are best because they don’t stain. Plastic works, but peanut butter can leave a residue that’s hard to get out. I have a stack of glass Tupperware just for these.
Freezer or fridge — You need a place to chill the bites. The freezer makes them firm faster, which is great if you’re in a rush. The fridge keeps them softer, which some people prefer. I usually do half in each.
Small bowl for rolling — If you’re rolling the bites in coconut or extra oats, have a small shallow dish ready. It makes the process less messy.
How to Make It: Step-by-Step
Alright, let’s make this! I’m walking you through exactly how I do it, including the little tricks I’ve picked up so you don’t end up with a sticky mess on your hands.
Step 1: Prep Your Bananas (2 minutes)
Peel your bananas and put them in your mixing bowl. If they’re super ripe, they’ll mash easily. If they’re a bit firm, use a fork and press down hard, or use a potato masher. You want them completely smooth. No chunks. If you leave chunks, the bites won’t hold together well. Mash until it looks like banana puree.
Step 2: Mix the Wet Ingredients (1 minute)
Add the peanut butter, honey, vanilla extract, and salt to the mashed bananas. Stir it all together. The mixture will be sticky and thick. This is normal. Make sure the peanut butter is fully incorporated. If it’s cold peanut butter, it might be hard to mix. Microwave it for 10 seconds to soften it up if needed.
Step 3: Add the Dry Ingredients (1 minute)
Pour in the oats and any add-ins like chocolate chips or chia seeds. Stir until everything is evenly distributed. The mixture should look like a thick, chunky dough. If it’s too wet and sticky to handle, add a little more oats, one tablespoon at a time. If it’s too dry and crumbling, add a teaspoon of milk or more honey. You want it to be moldable.
Step 4: Roll the Bites (5 minutes)
This is the fun part. Take a small amount of the mixture (about a tablespoon) and roll it between your palms to form a ball. If the mixture is too sticky, wet your hands slightly with water. This prevents it from sticking to your skin. Roll until smooth. Place the ball on your prepared baking sheet. Repeat with the rest of the mixture. You should get about 15-20 bites, depending on how big you make them.
Step 5: Chill (15-30 minutes)
Place the baking sheet in the freezer for 15 minutes, or the fridge for 30 minutes. This step is crucial. It firms up the bites so they don’t fall apart when you touch them. If you skip this, you’ll have a sticky mess in your container. Don’t skip it.
Step 6: Store and Enjoy
Once chilled, transfer the bites to an airtight container. They’re ready to eat! Grab one when you’re running out the door, or save them for a mid-afternoon pick-me-up.
Total Time: About 5 minutes active, plus chilling time.
Troubleshooting Tips:
- Too sticky? Add more oats. Or wet your hands.
- Too dry? Add more banana or honey.
- Not sweet enough? Add a bit more honey or maple syrup.
Expert Tips & Tricks
Here’s everything I’ve learned from making these dozens of times. These tips will save you from my mistakes.
Use Ripe Bananas
This is the #1 tip. Ripe bananas are sweeter and stickier, which helps bind the oats. If your bananas are green, the bites will be bland and crumbly. I keep a bag of bananas in my fruit bowl and only use them when they have brown spots. If you buy green bananas, put them in a paper bag with an apple to speed up ripening.
Don’t Skip the Chill
I know it’s tempting to eat them right away. They look delicious! But they’re soft and messy. Chilling firms them up and makes the flavors meld. It’s worth the 15-minute wait. I usually make them the night before so they’re ready in the morning.
Uniform Size
Try to make the bites the same size. This ensures they chill evenly and look nice in your container. I use a small ice cream scoop to portion the mixture. It makes the process faster and more consistent.
Customize Your Texture
If you like crunch, add some chopped peanuts or almonds. If you like soft, use quick oats instead of rolled oats. I like a mix of both for the best texture.
Pro Trick: The Freezer Hack
If you’re meal prepping, roll all the bites and freeze them on the baking sheet first. Once they’re hard, transfer them to a freezer bag. This prevents them from sticking together in a big clump. You can grab them straight from the freezer for a cold, firm bite.
Variations & Substitutions
Once you’ve nailed the basic version, here’s how you can mix it up. I’ve tried all of these.
Almond Butter Version
Swap peanut butter for almond butter. It’s a bit sweeter and nuttier. Great if you’re avoiding peanuts. The texture is slightly softer, so you might need a touch more oats.
Chocolate Peanut Butter
Add 2 tablespoons of cocoa powder to the wet ingredients. This makes them taste like a chocolate peanut butter cup. Add chocolate chips on top for extra decadence.
Trail Mix Style
Add raisins, dried cranberries, or chopped nuts. This makes them more like trail mix bites. Great for hiking or camping.
Protein-Packed
Add a scoop of vanilla protein powder. This makes them more filling and higher in protein. You might need a little more liquid (milk or honey) because protein powder absorbs moisture.
Dietary Modifications:
- Vegan Use maple syrup instead of honey. All other ingredients are naturally vegan.
- Gluten-Free Use certified gluten-free oats. Everything else is naturally gluten-free.
- Nut-Free Use sunflower seed butter or soy nut butter. Add pumpkin seeds for crunch.
- Sugar-Free Skip the honey and chocolate chips. Use stevia or monk fruit sweetener if needed, but the banana provides plenty of sweetness.
Serving & Storage
How to Serve:
I usually eat these straight out of the container, but they’re great with a glass of milk, on top of yogurt, or crumbled over a smoothie bowl. They’re also perfect for lunchboxes. Just pop two or three in with an apple.
Storage Instructions:
Refrigerator: Store in an airtight container for up to 5 days. They’ll stay soft and chewy.
Freezer: Store in a freezer-safe bag or container for up to 3 months. They freeze beautifully. Thaw in the fridge for 10 minutes before eating.
Reheating: You don’t need to reheat them. Eat them cold. If you want them soft, let them sit at room temperature for 5 minutes.
Pro tip: If they start to get sticky in the container, put a piece of parchment paper between layers. This keeps them from sticking together.
Nutrition Information
I’m not a nutritionist, but here’s the breakdown if you’re tracking. This is per bite (based on 20 bites).
Per Serving:
- Calories: 95
- Protein: 3g
- Carbs: 14g
- Fiber: 2g
- Sugar: 6g
- Fat: 4g
What’s Good:
Good source of fiber from oats and bananas. Healthy fats from peanut butter. Natural sugars from fruit. No refined sugar.
What to Know:
Calories add up if you eat a lot. One or two is a perfect snack. If you’re watching carbs, reduce the oats and add more nuts.
Final Thoughts
So that’s my no-bake peanut butter banana energy bites! I’ve probably talked your ear off at this point, but when you make a recipe this often, you have a lot to say about it. These have saved me from hunger strikes more times than I can count. They’re my answer to “what’s a quick snack” when I’m busy, tired, or just don’t feel like cooking.
My kids love them, my husband loves them, and I love them because they’re healthy, cheap, and delicious. Make them yours! Try different add-ins, swap in your favorite nut butter, or adjust the sweetness. The best recipes are the ones you adapt to your tastes.
If you make this, drop a comment and let me know what you think! I love hearing how recipes turn out in your kitchen. And if something doesn’t work, tell me that too—I’m here to help troubleshoot.
Happy snacking! And I hope your kitchen smells half as good as mine does right now.
Frequently Asked Questions
Q: Can I use frozen bananas?
A: Yes! Frozen bananas work great, but let them thaw slightly before mashing. They’ll be softer and easier to mix. Just make sure they’re not completely liquidy, or you’ll need to add more oats.
Q: Why are my energy bites too sticky?
A: Usually means you didn’t use enough oats or your bananas were too wet. Add more oats, one tablespoon at a time, until the mixture is manageable. You can also chill them longer to firm up.
Q: Can I make these ahead for meal prep?
A: Absolutely! This is the best recipe for meal prep. Make a big batch on Sunday, store them in the fridge for up to 5 days, or freeze them for up to 3 months. They’re perfect for grabbing on the go.
Q: Can I use almond butter instead of peanut butter?
A: Yes, almond butter works perfectly. It’s slightly sweeter and softer, so you might need a tiny bit more oats. Sunflower seed butter is also a great nut-free option.
Q: Do these taste like raw oats?
A: No! The banana and peanut butter mask the oat flavor completely. Once chilled, they taste like a soft, chewy cookie. If you’re worried about raw oats, you can toast them in the oven for 10 minutes first, but it’s not necessary.
Q: How do I keep them from sticking together in the container?
A: Use parchment paper between layers. Or, freeze them first until hard, then transfer to a bag. This prevents them from fusing into one big ball.
Q: Can I add protein powder?
A: Yes, but it absorbs moisture. Start with 1-2 tablespoons and see if you need to add more liquid (honey or milk) to get the right consistency.
Pin This Recipe!


No-Bake Peanut Butter Banana Energy Bites
- Total Time: 20 minutes
- Yield: 15-20 servings 1x
Description
A quick, healthy, and delicious no-bake snack made with just a few pantry staples. These energy bites are sweet, chewy, and perfect for a morning boost or afternoon treat.
Ingredients
- 2 large ripe bananas (about 300g)
- 1 ½ cups old-fashioned rolled oats
- ½ cup smooth peanut butter
- 2 tablespoons honey
- 1 teaspoon vanilla extract
- ¼ teaspoon salt
- Optional: ¼ cup dark chocolate chips
- Optional: 1 tablespoon chia seeds
- Optional: ½ teaspoon cinnamon
- Optional: Coconut flakes for rolling
Instructions
- Peel the bananas and mash them in a mixing bowl until completely smooth with no chunks.
- Add the peanut butter, honey, vanilla extract, and salt to the mashed bananas. Stir until fully incorporated. If the peanut butter is cold, microwave it for 10 seconds to soften.
- Pour in the oats and any optional add-ins (chocolate chips, chia seeds, cinnamon). Stir until the mixture resembles a thick, chunky dough.
- If the mixture is too sticky, add more oats one tablespoon at a time. If too dry, add a teaspoon of milk or more honey.
- Take about a tablespoon of the mixture and roll it between your palms to form a ball. If sticky, wet your hands slightly with water.
- Place the rolled bites on a baking sheet lined with parchment paper.
- Chill in the freezer for 15 minutes or in the fridge for 30 minutes until firm.
- Transfer to an airtight container and store in the fridge or freezer.
Notes
Use very ripe, spotted bananas for natural sweetness and binding. Do not skip the chilling step, as it firms up the bites. For meal prep, freeze the bites on the baking sheet first before transferring to a bag to prevent sticking.
- Prep Time: 5 minutes
- Cook Time: 0 minutes
- Category: Snack
- Cuisine: American
Nutrition
- Serving Size: 1 energy bite
- Calories: 95
- Sugar: 6
- Sodium: 50
- Fat: 4
- Saturated Fat: 1
- Carbohydrates: 14
- Fiber: 2
- Protein: 3
Keywords: no-bake, energy bites, healthy snack, peanut butter, banana, oats, gluten-free, vegan option, meal prep
