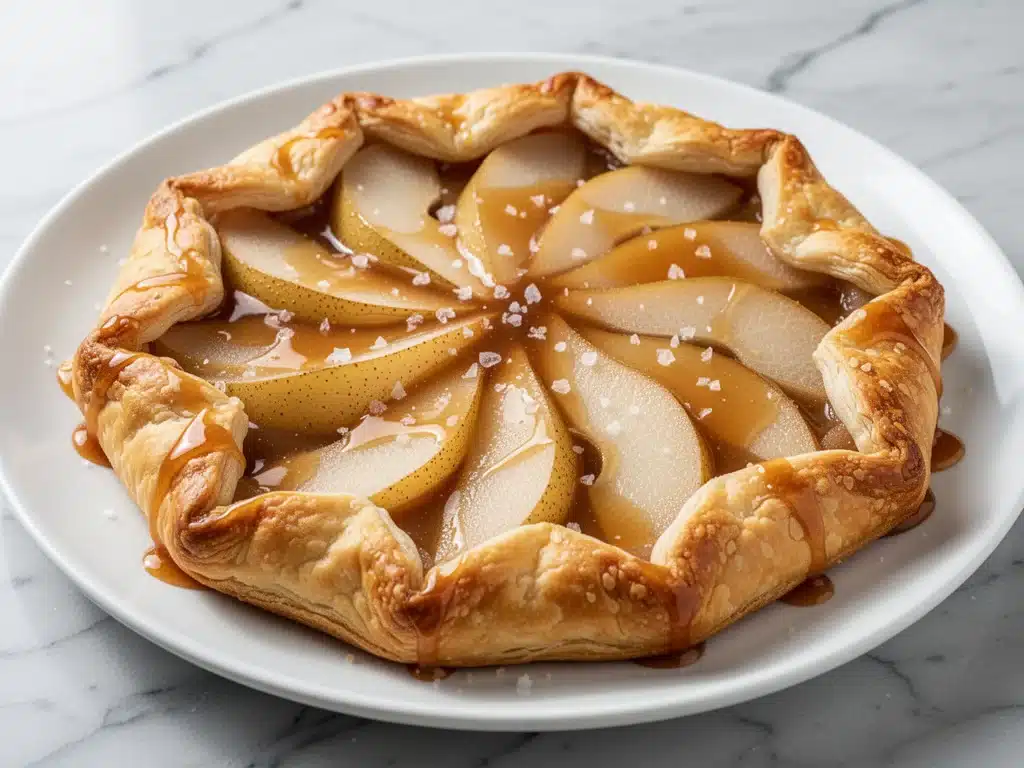
It was one of those crisp October afternoons where the air smells like woodsmoke and dried leaves, and I was standing in my kitchen staring at a bag of pears that had gone from firm to “use immediately or they’ll turn to mush.” I didn’t have time for a formal pie. I didn’t want to fuss with a double crust that would inevitably get soggy. I just wanted something warm, buttery, and seriously impressive without requiring a degree in pastry arts. That’s when I decided to make a galette. I know, I know—it’s basically a free-form pie, but calling it a “rustic tart” makes it sound way more elegant when you serve it to guests, right?
I slathered the crust with salted caramel (because life is too short for plain sugar), arranged the pears in a messy, beautiful circle, and folded the edges over like I was wrapping a present. Thirty minutes later, the whole house smelled like autumn. My husband took one bite, looked at me, and said, “Okay, we are ordering pears every week now.” That’s how this Fall Salted Caramel Pear Galette with Flaky All-Butter Crust was born. It’s not just a dessert; it’s my answer to “I want something fancy but I’m tired.”
I’ve made this recipe at least a dozen times since that Tuesday. I’ve tweaked the caramel ratio, tested different pear varieties (Bosc is king, by the way), and perfected the fold. The result is a crust that shatters when you cut it, filling that’s sweet and tangy, and a flavor profile that feels like a hug in dessert form. If you’ve been intimidated by galettes or worried about your crust turning out tough, this is the one that will change your mind. It’s forgiving, it’s fast, and it tastes like you spent all day in the kitchen (even though you didn’t).
Why You’ll Love This Recipe
There are a lot of dessert recipes out there, but few deliver this kind of payoff for the effort. This Fall Salted Caramel Pear Galette with Flaky All-Butter Crust has become my go-to for everything from last-minute dinner parties to quiet weekend mornings. Here’s why it keeps winning over my family and friends:
- Zero Pie Pan Anxiety — Seriously, if you can make a circle on a baking sheet, you can make this. There’s no cracking edges, no leaking filling, and no fancy tins to buy. It’s rustic by design, so “messy” is actually the goal. I’ve made this on a whim with ingredients I had on hand, and it always looks like I bought it from a high-end bakery.
- The Salted Caramel Secret — This isn’t just sweet pears on dough. The salted caramel cuts through the richness of the butter and the sweetness of the fruit. It adds that savory-sweet depth that makes people ask, “What is in this? It’s so complex.” It’s the game-changer that turns a simple fruit tart into something memorable.
- Flaky, All-Butter Crust (For Real) — I’ve tried pie-in-a-can shortcuts, and while they’re fast, the flavor just isn’t there. This crust uses real butter and a little vinegar (trust me on the vinegar—it tenderizes the gluten). It bakes up golden, shatteringly flaky, and sturdy enough to hold the juicy pears without getting soggy. I’ve even made this while half-asleep on a Sunday morning, and it still came out perfect.
- Impressive but Low-Stress — You can prep the crust a day ahead and keep it in the fridge. Then, when guests arrive, you just assemble and bake. It looks like a showstopper, but it’s actually one of the easiest desserts I make. I serve this alongside my maple pecan sticky buns during holidays, and it’s always the hit of the table.
- Perfect for Seasonal Produce — Pears are cheap and abundant in the fall, but this recipe works with apples, peaches, or even figs. It’s a versatile template that lets you use whatever’s fresh at the farmer’s market. I love that it feels seasonal without being restrictive.
This is the dessert you make when you want to feel like a pro chef but actually want to enjoy your evening. No stress, no stress, just delicious, flaky, caramel-drenched goodness.
Ingredients You’ll Need
Here’s the best part: you probably have most of this already. The list is short, but the quality of each ingredient matters more than usual because there aren’t many of them to hide behind. I’m particular about three things here: the butter, the pears, and the caramel.
For the Flaky All-Butter Crust
All-purpose flour (2 ½ cups / 315g) — This is your base. Don’t swap in cake flour; you need the structure. I use Gold Medal because it’s consistent. If you’re gluten-free, a 1-to-1 GF flour blend works, but the texture will be slightly more crumbly.
Unsalted butter (1 cup / 226g, very cold) — This is non-negotiable. I use high-fat European-style butter like Kerrygold or Plugra when I can find it—it has a higher fat content which means more flavor and better flakiness. Cube it into ½-inch pieces and keep it in the freezer for 10 minutes before using. Cold butter = flaky layers.
Granulated sugar (1 teaspoon) — Just a pinch to help browning. It’s barely noticeable but makes the crust look restaurant-quality.
Salt (1 teaspoon) — Essential for flavor. If you use salted butter, reduce this to ½ teaspoon, but I really recommend unsalted so you control the saltiness.
Ice water (6-8 tablespoons / 90-120ml) — This binds the dough. Add it one tablespoon at a time. You want the dough to just come together in clumps, not a smooth ball. Overworking it makes the crust tough.
Apple cider vinegar (1 teaspoon) — This is the secret weapon. The acid inhibits gluten formation, making the crust tender. You won’t taste it, I promise.
For the Filling
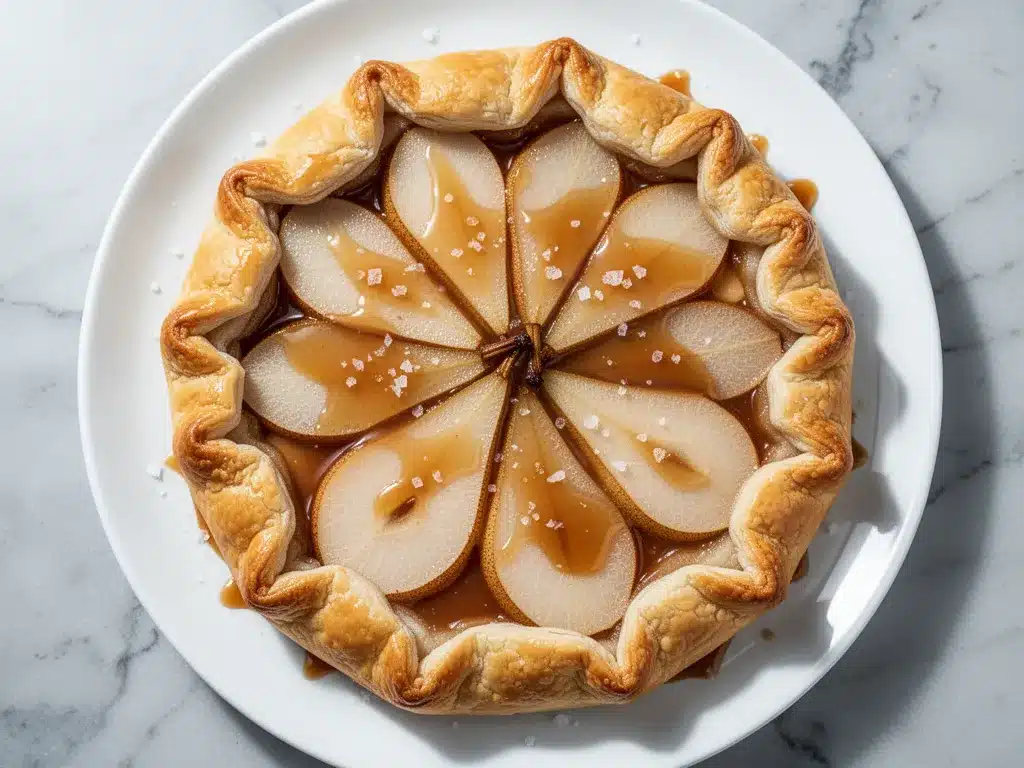
Pears (4-5 medium, about 1.5 lbs / 680g) — I recommend Bosc or Anjou pears. They hold their shape well when baked and have a nice firm texture. If you use Bartlett pears, they might get a bit mushy, which is fine if you like a softer filling, but Bosc is safer for structure.
Salted caramel sauce (½ cup / 120ml) — Homemade is best, but store-bought works in a pinch. I make a big batch of apple pie bars sauce sometimes and freeze it in portions. Look for a sauce that’s thick and chewy, not runny.
Apricot jam or marmalade (2 tablespoons) — This is brushed on top after baking for that glossy, professional shine. It also adds a subtle fruity note that complements the caramel.
Granulated sugar (1 tablespoon) — Sprinkled over the pears to enhance their natural sweetness.
Cinnamon (½ teaspoon) — Warmth that ties the fall flavors together.
Sliced almonds or pistachios (2 tablespoons, optional) — For crunch. I love the contrast of the soft pear and crunchy nut.
Equipment Needed
You don’t need fancy equipment for this. Here’s what I actually use:
Large mixing bowl — I use a wide bowl so I can toss the flour and butter easily. A glass or ceramic bowl works well.
Fork or pastry cutter — I use a fork because it’s faster and I don’t want to overwork the butter. A pastry cutter is fine too, but be gentle.
Baking sheet — A standard 13×18 inch sheet. I line it with parchment paper for easy cleanup and to prevent sticking. No need to grease it.
Parchment paper — Essential for rolling out the dough and for the bottom of the galette. It makes cleanup a breeze.
Rolling pin — Any standard rolling pin works. I like a wooden one because it doesn’t slip.
Pastry brush — For brushing the egg wash and the apricot glaze. A silicone brush is easy to clean.
Chef’s knife — For slicing the pears. A sharp knife makes clean cuts without crushing the fruit.
Small saucepan — Only if you’re making your own caramel. If using store-bought, you can skip this.
How to Make It: Step-by-Step
Alright, let’s make this! I’m walking you through exactly how I do it, including the little tricks I’ve picked up over the years. This Fall Salted Caramel Pear Galette with Flaky All-Butter Crust is easier than it looks, but there are a few key steps to get that perfect texture.
Step 1: Make the Dough (10 minutes)
In your large bowl, whisk together the flour, sugar, and salt. Add the cold, cubed butter. Using a fork or pastry cutter, cut the butter into the flour until the mixture looks like coarse meal with some pea-sized chunks of butter remaining. Those chunks are crucial—they create steam pockets in the oven, which makes the crust flaky. Don’t over-mix; you want visible butter pieces.
Drizzle in the ice water and apple cider vinegar, one tablespoon at a time. Gently toss with a fork until the dough just starts to come together. It should look shaggy and hold together when you pinch it. If it’s too dry, add another tablespoon of water. If it’s too sticky, add a sprinkle of flour. Be gentle here—overworking makes the crust tough.
Divide the dough into two uneven discs (one larger for the base, one smaller for the top if you’re doing a double crust, but for a galette, you’ll mostly use the larger one). Wrap tightly in plastic wrap and refrigerate for at least 1 hour, or up to 2 days. Chilling is non-negotiable; it relaxes the gluten and re-chills the butter.
Step 2: Prep the Pears (10 minutes)
While the dough chills, prep your pears. Peel them if you prefer a smoother texture (I usually peel them for a galette because the skin can be tough), then halve them, remove the core, and slice them into ¼-inch wedges. Toss the slices with the granulated sugar and cinnamon. Let them sit for 10 minutes to release some juices. This helps prevent a soggy crust.
Preheat your oven to 400°F (200°C). Place a baking sheet in the oven to heat up. A hot pan helps cook the bottom crust quickly.
Step 3: Roll Out the Dough (5 minutes)
Take one disc of dough out of the fridge. On a lightly floured surface, roll it into a 12-inch circle. Don’t worry about perfect circles—galettes are rustic! Transfer the dough to the parchment-lined baking sheet. If it tears, just patch it; it’ll hold together during baking.
Spread the salted caramel sauce over the center of the dough, leaving a 2-inch border around the edges. Don’t spread it all the way to the edge, or it’ll bubble over and burn.
Step 4: Arrange the Pears (10 minutes)
Drain the excess liquid from the pears (this is important to avoid sogginess). Arrange the pear slices in overlapping concentric circles over the caramel. Start from the outside and work inward, or fan them out in a spiral. You want them to look beautiful, but don’t stress about perfection. They’ll look rustic and charming.
Once the pears are arranged, fold the 2-inch border of dough over the edges of the fruit, pleating it as you go. You don’t need to seal it completely; let some of the caramel peek out. This folding creates those beautiful, flaky layers.
Step 5: Bake (35-40 minutes)
Brush the folded dough edges with a little egg wash (1 egg beaten with 1 tablespoon water) for a golden finish. Sprinkle the sliced almonds or pistachios over the pears if using. Bake on the preheated baking sheet for 35-40 minutes, or until the crust is deep golden brown and the pears are tender but not mushy. If the edges brown too quickly, cover them with a strip of foil.
Step 6: Glaze and Cool (15 minutes)
While the galette bakes, warm the apricot jam with 1 teaspoon of water in a small saucepan until it’s liquid. Strain it if there are chunks. When the galette comes out of the oven, immediately brush the warm glaze over the pears. This gives it that glossy, bakery-quality shine.
Let the galette cool on the baking sheet for at least 15 minutes before slicing. This allows the caramel to set slightly so it doesn’t run out when you cut it. Serve warm with a dollop of whipped cream or vanilla ice cream.
Expert Tips & Tricks
Here’s everything I’ve learned from making this dozens of times. These tips will save you from my mistakes.
Keep Everything Cold — This is the #1 rule for flaky crust. If your butter starts to soften while you’re working, put the bowl back in the fridge for 10 minutes. Cold butter creates steam, and steam creates flakiness. I keep my butter in the freezer until the last minute.
Don’t Skip the Egg Wash — It looks like an extra step, but it’s what gives the crust that deep, golden, professional color. Without it, the crust can look pale and dull. Brush it generously on the folded edges.
Drain the Pears — I learned this the hard way with a soggy bottom. The sugar draws out moisture from the pears. Drain that liquid before arranging them on the galette. You can even boil it down into a syrup to drizzle on top later.
Use a Hot Baking Sheet — Preheating the baking sheet in the oven helps cook the bottom crust quickly, preventing that dreaded soggy bottom. It’s a simple trick that makes a huge difference.
Don’t Overfill — It’s tempting to pile on the fruit, but if you overload the center, the galette will slump and the caramel will leak out. Stick to a single layer of pears for the best structure.
Cool Before Slicing — I know it’s hard to wait, but slicing a hot galette results in a mess. The caramel needs to set. Let it cool for at least 15 minutes. Patience pays off.
Variations & Substitutions
Once you’ve nailed the basic version, here’s how you can mix it up. I’ve tried all of these.
Apple Galette — Swap pears for thinly sliced apples (Honeycrisp or Granny Smith). Add a pinch of nutmeg to the sugar. This is a classic fall combo that’s always a hit.
Peach and Basil — Use ripe peaches instead of pears. Toss them with fresh chopped basil before arranging. The basil adds a surprising, aromatic freshness that cuts the sweetness.
Fig and Walnut — Halve fresh figs and arrange them over the caramel. Sprinkle with toasted walnuts. This is a more sophisticated, earthy version.
Vegan Version — Use a vegan butter stick (like Miyoko’s) and skip the egg wash, brushing instead with almond milk and sprinkling with coarse sugar for crunch. The caramel should be dairy-free (many store-bought brands are).
Gluten-Free — Use a 1-to-1 gluten-free flour blend. Add an extra teaspoon of xanthan gum if your blend doesn’t include it. The texture will be slightly more crumbly but still delicious.
Spiced Caramel — Stir a pinch of cardamom or ginger into the caramel sauce for a warm, spiced flavor that pairs beautifully with pears.
Serving & Storage
How to Serve: I usually serve this straight from the baking sheet, sliced into wedges. It looks rustic and stays warm. But here are other ways I’ve enjoyed it:
- With Ice Cream — Vanilla bean ice cream is the classic pairing. The cold cream contrasts with the warm, gooey caramel.
- With Whipped Cream — Lightly sweetened whipped cream with a hint of vanilla.
- With Yogurt — For a slightly lighter option, top with Greek yogurt and a drizzle of honey.
Storage Instructions:
Refrigerator: Store leftovers in an airtight container for up to 3 days. The crust may soften slightly, but it’s still good. Reheat in a 350°F oven for 10 minutes to crisp up the crust.
Freezing: You can freeze the unbaked galette. Wrap it tightly in plastic and foil, then freeze. Bake directly from frozen, adding 5-10 minutes to the baking time. You can also freeze the baked galette, but the texture won’t be as flaky when reheated. I usually freeze the dough discs for later use.
Reheating: Avoid the microwave if you want to preserve the crust’s texture. An oven or toaster oven is best. Microwave only if you’re in a huge rush, but expect a softer crust.
Nutrition Information
I’m not a nutritionist, but here’s the breakdown if you’re tracking. This is a rich dessert, so portions matter.
Per Serving (based on 8 servings):
- Calories: 320
- Protein: 4g
- Carbs: 45g
- Fiber: 3g
- Sugar: 28g
- Fat: 15g
- Saturated Fat: 8g
- Cholesterol: 35mg
- Sodium: 220mg
What’s Good: Pears provide fiber and vitamin C. The almonds add healthy fats and crunch. It’s a balanced dessert if you control the portion size.
What to Know: Higher in sugar and fat due to the caramel and butter. It’s a treat, not a health food. Enjoy it mindfully.
Final Thoughts
So that’s my Fall Salted Caramel Pear Galette with Flaky All-Butter Crust! I’ve probably talked your ear off at this point, but when you make a recipe this often, you have a lot to say about it. This has saved my dessert game more times than I can count. It’s my answer to “I want to impress people but I don’t want to stress.” My guests are always delighted, and I’m delighted because I didn’t spend hours in the kitchen.
Make it yours! Try different fruits, play with the spices, or just enjoy the simplicity of a flaky crust and sweet fruit. The best recipes are the ones you adapt to your tastes. If you make this, drop a comment and let me know what you think! I love hearing how recipes turn out in your kitchen. And if something doesn’t work, tell me that too—I’m here to help troubleshoot.
Happy baking! And I hope your kitchen smells half as good as mine does right now.
Frequently Asked Questions
Can I use frozen pears?
You can, but they’ll release a lot more water. Thaw them completely and drain them thoroughly before using. I prefer fresh pears for the best texture, but frozen works in a pinch. Just be extra careful about the soggy bottom issue.
Why did my crust get tough?
Overworking the dough is usually the culprit. Handle it as little as possible. Also, if the butter got too warm before baking, it wouldn’t create steam pockets. Keep everything cold and gentle.
Can I make the crust ahead?
Yes! Wrap the dough discs tightly in plastic wrap and refrigerate for up to 2 days, or freeze for up to 3 months. Let it thaw in the fridge overnight if frozen. This actually makes the dough easier to roll out.
What if I don’t have salted caramel?
You can use regular caramel sauce, but add a pinch of flaky sea salt on top before baking. Or use dulce de leche—it’s sweeter but has a similar richness. Just balance the sweetness with a bit of salt.
How do I prevent the caramel from leaking out?
Don’t spread it all the way to the edge. Leave a 2-inch border. Also, make sure the pears are drained. Too much liquid can cause bubbling and leaking. If some caramel does leak, it’ll caramelize on the pan and still taste good—just scrape it off after baking.
Can I use a different fruit?
Absolutely. Apples, peaches, plums, and figs all work beautifully. Just adjust the slicing thickness and baking time slightly. Apples might need a few extra minutes. The technique remains the same.
Is there a gluten-free option?
Yes, use a 1-to-1 gluten-free flour blend. The texture will be slightly more crumbly, so handle it gently. You might need to chill the dough longer to make it easier to work with.
Pin This Recipe!
Fall Salted Caramel Pear Galette: 6 Easy Steps for a Perfect Flaky All-Butter Crust
- Total Time: 75 minutes
- Yield: 8 servings 1x
Description
A rustic, free-form tart featuring a shatteringly flaky all-butter crust filled with sweet pears and rich salted caramel, finished with a glossy apricot glaze.
Ingredients
- 2 ½ cups (315g) all-purpose flour
- 1 cup (226g) unsalted butter, very cold and cubed
- 1 teaspoon granulated sugar
- 1 teaspoon salt
- 6–8 tablespoons ice water
- 1 teaspoon apple cider vinegar
- 4–5 medium pears (about 1.5 lbs), peeled and sliced
- ½ cup (120ml) salted caramel sauce
- 2 tablespoons apricot jam or marmalade
- 1 tablespoon granulated sugar
- ½ teaspoon cinnamon
- 2 tablespoons sliced almonds or pistachios (optional)
- 1 egg beaten with 1 tablespoon water (for egg wash)
Instructions
- Whisk together flour, sugar, and salt in a large bowl. Cut in cold butter using a fork or pastry cutter until the mixture resembles coarse meal with pea-sized butter chunks.
- Drizzle in ice water and apple cider vinegar one tablespoon at a time, tossing gently until the dough comes together in shaggy clumps. Do not overwork.
- Divide dough into two discs (one larger for the base), wrap in plastic, and refrigerate for at least 1 hour.
- While dough chills, peel, core, and slice pears into ¼-inch wedges. Toss with 1 tablespoon sugar and cinnamon; let sit for 10 minutes to release juices, then drain excess liquid.
- Preheat oven to 400°F (200°C) and place a baking sheet inside to heat.
- Roll the larger dough disc into a 12-inch circle on a floured surface and transfer to a parchment-lined baking sheet.
- Spread salted caramel sauce over the center of the dough, leaving a 2-inch border.
- Arrange drained pear slices in overlapping concentric circles over the caramel.
- Fold the 2-inch dough border over the edges of the fruit, pleating as you go.
- Brush the folded edges with egg wash and sprinkle with almonds or pistachios if using.
- Bake on the preheated sheet for 35-40 minutes until the crust is deep golden brown and pears are tender.
- While baking, warm apricot jam with 1 teaspoon water until liquid. Immediately brush the glaze over the hot galette upon removal from the oven.
- Cool on the baking sheet for at least 15 minutes before slicing to allow caramel to set.
Notes
Keep all ingredients, especially butter, very cold to ensure a flaky crust. Drain the pears thoroughly to prevent a soggy bottom. Preheating the baking sheet helps cook the bottom crust quickly. The crust can be made ahead and refrigerated for up to 2 days or frozen for 3 months.
- Prep Time: 35 minutes
- Cook Time: 40 minutes
- Category: Dessert
- Cuisine: American
Nutrition
- Serving Size: 1 slice (1/8 of gale
- Calories: 320
- Sugar: 28
- Sodium: 220
- Fat: 15
- Saturated Fat: 8
- Carbohydrates: 45
- Fiber: 3
- Protein: 4
Keywords: pear galette, salted caramel dessert, flaky butter crust, fall baking, rustic tart, easy dessert, autumn recipes


