I’m going to be honest with you. I used to think that “three-ingredient” recipes were just clickbait. You know the ones. The ones that promise magic but deliver a sad, grainy puck that tastes like cardboard and regret. I’ve been burned enough times by those shortcuts that I stopped looking for them entirely.
That was until last Tuesday.
I was staring into the fridge at 8 PM, craving something chocolate. Not a snack. Not a fruit bowl. I wanted something dense, dark, and fudgy. But here’s the thing: I’m trying to cut back on sugar and grains. I didn’t have flour. I didn’t have refined sugar. And honestly? I didn’t want to spend forty minutes whipping up a complex batter when I just wanted a brownie.
So I threw together what I had: dark chocolate, eggs, and a little bit of sweetener. I expected a disaster. I expected a scrambled egg sandwich with chocolate.
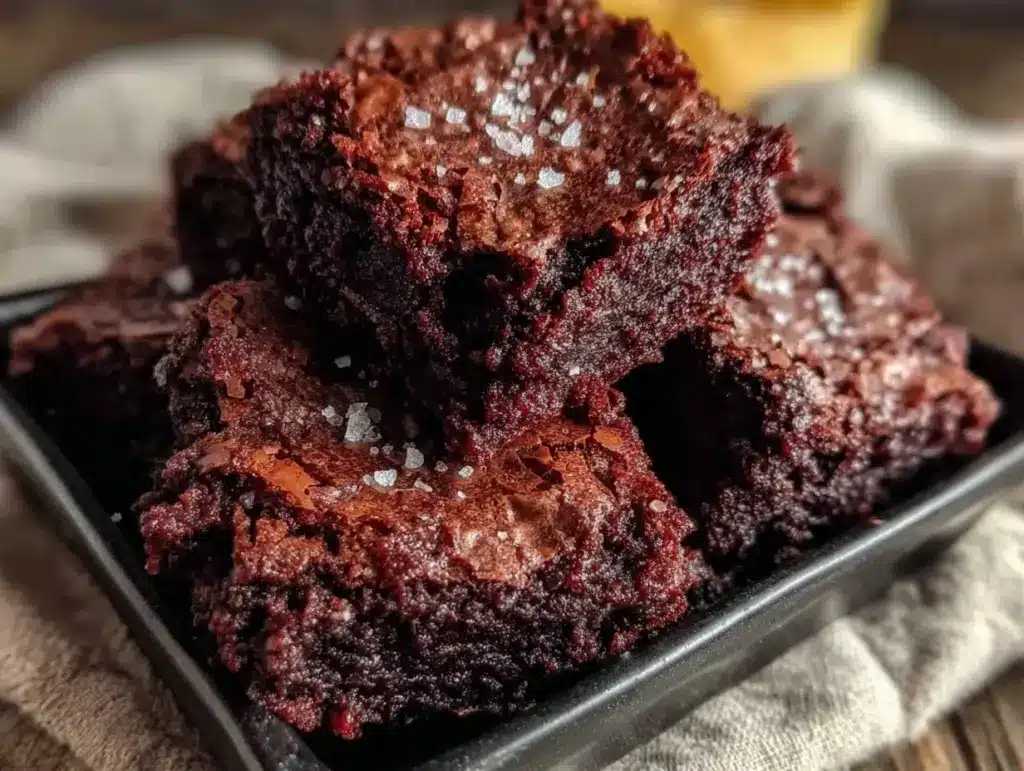
Instead, I got this.
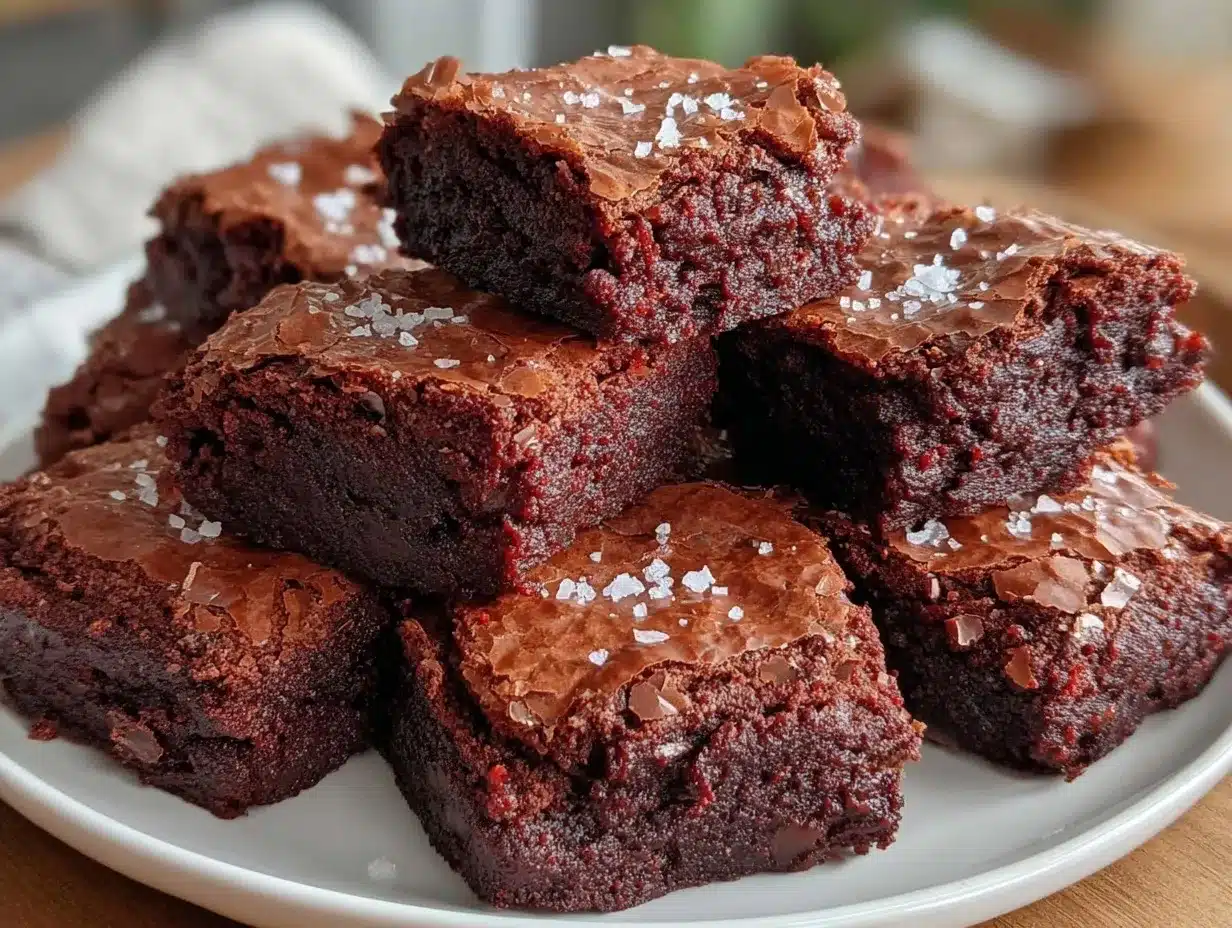
These small batch fudgy brownies for craving control are dense, chewy, and genuinely fudgy. They’re gluten-free by nature (no flour needed), they’re low-carb if you choose the right sweetener, and they take less time than it takes to order Uber Eats. Best part? They’re a small batch. Just four brownies. Enough to satisfy that late-night chocolate itch without derailing your week.
I’ve tested this recipe five times in the last two weeks. I’ve changed the sweetener, the chocolate type, and the baking time. And I’ve finally nailed the version that feels like a cheat code for your dessert cravings.
Why You’ll Love This Recipe
Look, I know what you’re thinking. “Three ingredients? Really?” But hear me out. This isn’t just a lazy hack; it’s a texture revolution. Here’s why this small batch fudgy brownies for craving control has replaced my usual go-to desserts:
- Actually Fudgy, Not Cakey — Most “healthy” brownies turn out dry or crumbly. Because there’s no flour to create gluten structure, these stay moist and dense. Think more like a lava cake core, less like a bakery box.
- Zero Flour, Zero Guilt — If you’re avoiding gluten or just cutting carbs, this is your best friend. It’s naturally gluten-free because it doesn’t use any. No almond flour, no coconut flour, no measuring cups of dry ingredients. Just pure chocolate flavor.
- Small Batch Perfection — I hate making desserts that require me to eat the same thing for five days. This recipe makes exactly four brownies. Perfect for one person, or two people sharing a moment. No leftovers to obsess over.
- Craving Control — The high fat content from the chocolate and eggs keeps you full. You don’t need three brownies to feel satisfied. You need one, really good one. This helps you stop eating when you’re done, rather than mindlessly finishing the whole pan.
- 5-Minute Prep — Seriously. Melt chocolate, whisk eggs, mix, bake. That’s it. If you can boil water, you can make these. I’ve made these while on a conference call. (Don’t tell my boss.)
This is my go-to when I want something sweet but know I shouldn’t be reaching for the salted caramel ice cream or the classic one-bowl brownies that are loaded with sugar. It’s the smart swap that doesn’t feel like a swap.
Ingredients You’ll Need
Here’s the beauty of this recipe: the ingredient list is shorter than my grocery list for coffee. But because there’s so little of it, the quality of each item matters more than usual. You can’t hide bad chocolate behind vanilla or flour here. So let’s talk specifics.
The Base
Dark Chocolate (4 oz / 113g) — This is the star. I recommend using chocolate with at least 60-70% cocoa. If you use baking chips, make sure they are unsweetened or semi-sweet. Avoid “baking bars” that are super bitter (90%+) unless you plan to adjust your sweetener significantly. I love Ghirardelli 60% Bittersweet for that perfect balance. Chop it roughly before melting—smaller pieces melt faster and more evenly.
Eggs (2 large) — Room temperature eggs are best here. They help emulsify the chocolate and fat into a smooth, glossy batter. If your eggs are cold, just set them in a bowl of warm water for 5 minutes while the chocolate melts. Don’t skip this; it affects the texture.
Sweetener (2-3 tablespoons) — This is where you control the “craving control” aspect. For low-carb/keto, I use powdered erythritol or allulose. Powdered is crucial because granular sweeteners won’t dissolve fully in such a small batch, leaving you with gritty brownies. For a lower-sugar but not keto option, coconut sugar or maple syrup works, but note that liquid sweeteners will make the brownies slightly cakier and less fudgy. I stick to powdered erythritol for that authentic fudge texture.
The Flavor Boosters (Optional but Recommended)
Salt (¼ teaspoon) — Fine sea salt. This is non-negotiable. Salt makes chocolate taste like chocolate. Without it, it just tastes sweet and flat. A pinch goes a long way.
Vanilla Extract (½ teaspoon) — Pure vanilla, not imitation. It adds depth and rounds out the harsh edges of the dark chocolate. I always keep a bottle of Nielsen-Massey in my pantry.
Espresso Powder (½ teaspoon) — Optional, but I swear by it. It doesn’t make the brownies taste like coffee; it just intensifies the chocolate flavor. If you hate coffee, skip it. But if you like pumpkin spice iced coffee, you’ll love this trick.
What About Add-Ins?
Since this is a small batch, I usually keep it plain. But if you want to get fancy, you can fold in:
- 1 tablespoon crushed walnuts or pecans (for crunch)
- 1 tablespoon sugar-free chocolate chips (if you’re feeling extra indulgent)
- A pinch of sea salt flakes on top before baking
But honestly? The plain version is so good that adding stuff might just distract from the pure chocolate experience.
Equipment Needed
You don’t need fancy gadgets for this. Here’s what I actually use:
Small Microwave-Safe Bowl orrame — I use a 1-cup measuring cup made of glass. It’s small enough to melt 4 oz of chocolate without overflowing but big enough to whisk. If you don’t have a small bowl, a microwave-safe mug works too.
Microwave or Double Boiler — I microwave. It’s faster. But if you’re nervous about burning chocolate, a double boiler (a heatproof bowl over a pot of simmering water) is foolproof. Chocolate burns easily, so low and slow is key.
Small Skillet or Loaf Pan — I use a 6-inch cast iron skillet or a small square glass baking dish. A standard 8×8 pan is too big—you’ll end up with a thin, crispy sheet instead of a fudgy brownie. The smaller surface area keeps the center thick and gooey.
Fork or Small Whisk — You don’t need an electric mixer. A fork works perfectly to whisk the eggs and combine them with the chocolate.
Parchment Paper — Line your small pan. These brownies are sticky. Trust me. You’ll thank me later when cleanup takes 10 seconds.
How to Make It: Step-by-Step
Alright, let’s make this! I’m walking you through exactly how I do it, including the little tricks I’ve picked up from my failed attempts.
Step 1: Prep Your Pan (1 minute)
Preheat your oven to 350°F (175°C). Line your small 6-inch skillet or square baking dish with parchment paper, leaving a little overhang on the sides. This “sling” makes it easy to lift the brownies out once they’re done. Spray it lightly with cooking spray or rub with a little butter for extra insurance.
Step 2: Melt the Chocolate (2-3 minutes)
Break your chocolate into chunks and put it in your microwave-safe bowl. Microwave on 50% power in 30-second intervals. Stir between each interval. This is crucial. If you blast it on high, the chocolate will seize and become grainy. You want it smooth and glossy. If you’re using a double boiler, just stir until melted. Set aside to cool for 2 minutes—it shouldn’t be hot, just warm.
Step 3: Whisk the Eggs (1 minute)
In a separate small bowl, whisk your eggs with the sweetener, salt, and vanilla (and espresso powder if using). Whisk vigorously for about 30 seconds. You want the mixture to become slightly pale and frothy. This incorporates air and helps create that fudgy, chewy texture rather than a dense, hard brick.
Step 4: Combine (1 minute)
Pour the egg mixture into the melted chocolate. Stir gently but thoroughly. The mixture will look a bit curdled at first—that’s normal. Keep stirring until it’s smooth and glossy again. It should look like thick, dark ganache. If you’re adding nuts or chips, fold them in now.
Step 5: Bake (12-14 minutes)
Pour the batter into your prepared pan. It should be about half an inch thick. Bake at 350°F (175°C) for 12-14 minutes. Here’s the tricky part: you want the edges to be set and the center to still look slightly underbaked. If you bake it until the center is firm, it will be cakey, not fudgy. The residual heat will finish cooking it as it cools.
Step 6: Cool Completely (30 minutes)
I know, I know. You want to eat it now. But these brownies are incredibly soft when hot. If you cut them while warm, they’ll fall apart and look messy. Let them cool in the pan for at least 30 minutes. They’ll firm up and become sliceable. If you can’t wait, chill them in the fridge for 15 minutes.
Total Time: About 45 minutes (5 minutes active, 40 minutes cooling).
Expert Tips & Tricks
Here’s everything I’ve learned from making these dozens of times. These tips will save you from my mistakes.
Don’t Overbake — This is the #1 mistake. Pull them out when the center still jiggles slightly. They continue to cook on the hot pan. Overbaking is the enemy of fudgy.
Use High-Quality Chocolate — Since there are only three ingredients, the chocolate is 80% of the flavor. If you use cheap, waxy chocolate chips, the brownies will taste like wax. Invest in a good bar of dark chocolate.
Powdered Sweetener is Key — If you use granular sweetener, the brownies will be gritty. I use a blender to grind my erythritol into a powder, or I buy “baking blend” sweeteners that are already powdered. It dissolves into the fat and egg, creating a smooth texture.
Room Temperature Eggs — Cold eggs can shock the warm chocolate and cause it to seize. If you forget to take them out, just run them under warm water for a minute.
The “Craving Control” Portion — Because these are so rich and dense, one brownie is a full serving. I usually cut them into four squares. It feels like a treat, but you’re not eating a whole pan. This psychological trick helps me stay on track.
Variations & Substitutions
Once you’ve nailed the basic version, here’s how you can mix it up. I’ve tried all of these.
Chocolate Chip Version — Add 1 tablespoon of sugar-free chocolate chips to the batter before baking. It adds little pockets of gooeyness. I love this version on rainy days.
Mint Brownies — Add ¼ teaspoon of peppermint extract to the egg mixture. It tastes like a thin mint cookie. Amazing with a dollop of whipped cream.
Maple Walnut — Swap the powdered sweetener for 2 tablespoons of maple syrup. Add 1 tablespoon of chopped walnuts. It’s less fudgy and more cake-like, but still delicious. Note: Maple syrup adds moisture, so reduce baking time by 1-2 minutes.
Dairy-Free — This recipe is already dairy-free if you use dairy-free chocolate. Just check the label—some dark chocolates have milk solids. I use Enjoy Life chocolate chips for this.
Gluten-Free — Naturally gluten-free. No modifications needed.
Keto/Low-Carb — Use powdered erythritol or allulose and ensure your chocolate is sugar-free. These fit perfectly into a keto lifestyle. I pair them with a cup of black coffee for the ultimate low-carb afternoon break.
Serving & Storage
How to Serve
I usually eat these plain. They’re rich enough on their own. But if you want to elevate them:
- With Coffee: A strong black coffee or pumpkin cream cold brew cuts through the richness perfectly.
- With Cream: A small dollop of whipped cream or a scoop of salted caramel ice cream (if you’re indulging) is heavenly.
- With Fruit: A few raspberries on the side add acidity and freshness.
Storage Instructions
Refrigerator: Store in an airtight container for up to 5 days. They actually get fudgier in the fridge. I like eating them cold—it’s like a chocolate truffle.
Freezer: Yes, these freeze well! Wrap each brownie individually in plastic wrap, then put them in a freezer bag. They last for 3 months. Thaw at room temperature for 10 minutes. Perfect for meal-prepping your desserts.
Room Temperature: They can sit out for 2 days, but I prefer them chilled because they hold their shape better.
Nutrition Information
I’m not a nutritionist, but here’s the breakdown if you’re tracking. This is an estimate based on using 70% dark chocolate and powdered erythritol.
Per Serving (1 brownie out of 4):
- Calories: ~180
- Protein: 5g
- Carbs: 8g (2g net carbs if using erythritol)
- Fiber: 3g
- Sugar: 4g (natural from chocolate)
- Fat: 14g
What’s Good: High in healthy fats, low in net carbs, high in fiber. It’s satiating.
What to Know: It’s calorie-dense because of the chocolate. Portion control is key. But compared to a slice of maple pecan sticky buns or a sticky toffee pudding, this is a much lighter option.
Final Thoughts
So that’s my go-to small batch fudgy brownies for craving control! I’ve probably talked your ear off at this point, but when you find a recipe that actually works, you want to share it.
This has saved me from so many late-night sugar spirals. I used to feel guilty about wanting dessert, so I’d skip it and end up bingeing later. Now, I have this. One brownie. It’s enough. It’s satisfying. And it fits into my lifestyle without feeling like a compromise.
Make it yours! Try different chocolates, add your favorite nuts, or just enjoy it plain. The best recipes are the ones that adapt to your needs.
If you make this, drop a comment and let me know what you think! I love hearing how recipes turn out in your kitchen. And if something doesn’t work, tell me that too—I’m here to help troubleshoot.
Happy cooking! And I hope your kitchen smells half as good as mine does right now.
Frequently Asked Questions
Q: Can I use milk chocolate instead of dark chocolate?
A: You can, but these won’t be “craving control” brownies anymore. Milk chocolate has more sugar and less cocoa, so the flavor will be sweeter and less intense. For the best fudgy texture and low-sugar profile, stick to dark chocolate (60% or higher). If you must use milk chocolate, reduce the sweetener entirely.
Q: Why did my brownies come out cakey?
A: Two reasons: either you overbaked them, or you used granular sweetener that didn’t dissolve. Make sure to pull them out when the center is still slightly jiggly. Also, ensure your sweetener is powdered. If you used granular, the texture will be grainy and the bake will be more cake-like.
Q: Can I make a full batch instead of small batch?
A: Yes, just double or triple the ingredients. But use a larger pan (like an 8×8 or 9×9) and increase the baking time by 5-10 minutes. Keep an eye on them, as larger batches can bake unevenly. I prefer the small batch because it’s fresher and I don’t have leftovers.
Q: Is this recipe keto-friendly?
A: Yes, if you use sugar-free chocolate and a keto-approved sweetener like erythritol or allulose. These ingredients have zero net carbs. Just check the labels to ensure there are no hidden sugars or maltodextrin.
Q: Can I use applesauce instead of eggs?
A: No. Eggs are structural here. They provide the protein and fat that create the fudgy texture. Applesauce will make them gummy and wet. If you’re vegan, this specific recipe doesn’t work well with egg substitutes. You’d need a different recipe, like my vegan chocolate avocado mousse for a dairy-free option.
Q: How do I store these if I’m meal prepping?
A> Freeze them! Wrap each brownie in plastic wrap and store in a freezer bag for up to 3 months. Take one out in the morning, and it’ll be thawed and ready by lunch. They taste great cold, too.
Pin This Recipe!
Small Batch Fudgy Brownies: 3-Ingredient Gluten-Free Treat
- Total Time: 45 minutes
- Yield: 4 servings 1x
Description
These small batch fudgy brownies are dense, chewy, and genuinely fudgy, made with just dark chocolate, eggs, and a sweetener. They are naturally gluten-free, low-carb, and perfect for satisfying late-night chocolate cravings without derailing your diet.
Ingredients
- 4 oz (113g) dark chocolate (60-70% cocoa), chopped
- 2 large eggs, room temperature
- 2–3 tablespoons powdered sweetener (e.g., erythritol or allulose)
- ¼ teaspoon fine sea salt
- ½ teaspoon pure vanilla extract
- ½ teaspoon espresso powder (optional)
Instructions
- Preheat oven to 350°F (175°C). Line a 6-inch cast iron skillet or small square baking dish with parchment paper, leaving an overhang for easy removal. Lightly grease the parchment.
- Break the dark chocolate into chunks and place in a microwave-safe bowl. Microwave on 50% power in 30-second intervals, stirring between each, until smooth and glossy. Let cool for 2 minutes.
- In a separate small bowl, vigorously whisk the eggs, sweetener, salt, vanilla, and espresso powder (if using) for about 30 seconds until slightly pale and frothy.
- Pour the egg mixture into the melted chocolate. Stir gently but thoroughly until the mixture is smooth and glossy, resembling thick dark ganache. Fold in any add-ins like nuts or chips if desired.
- Pour the batter into the prepared pan, ensuring it is about half an inch thick.
- Bake for 12-14 minutes. The edges should be set, but the center should still look slightly underbaked and jiggle slightly.
- Let the brownies cool completely in the pan for at least 30 minutes to firm up before slicing. For faster setting, chill in the fridge for 15 minutes.
- Cut into four squares and serve.
Notes
Do not overbake; the residual heat will finish cooking the center. Use powdered sweetener to avoid grittiness. Room temperature eggs help emulsify the batter. High-quality dark chocolate is essential for flavor. These brownies are very rich; one square is a full serving.
- Prep Time: 5 minutes
- Cook Time: 12-14 minutes
- Category: Dessert
- Cuisine: American
Nutrition
- Serving Size: 1 brownie square
- Calories: 180
- Sugar: 4
- Sodium: 45
- Fat: 14
- Saturated Fat: 8
- Carbohydrates: 8
- Fiber: 3
- Protein: 5
Keywords: small batch brownies, gluten-free brownies, low-carb dessert, keto brownies, fudgy brownies, 3-ingredient recipe, craving control, dark chocolate brownies


