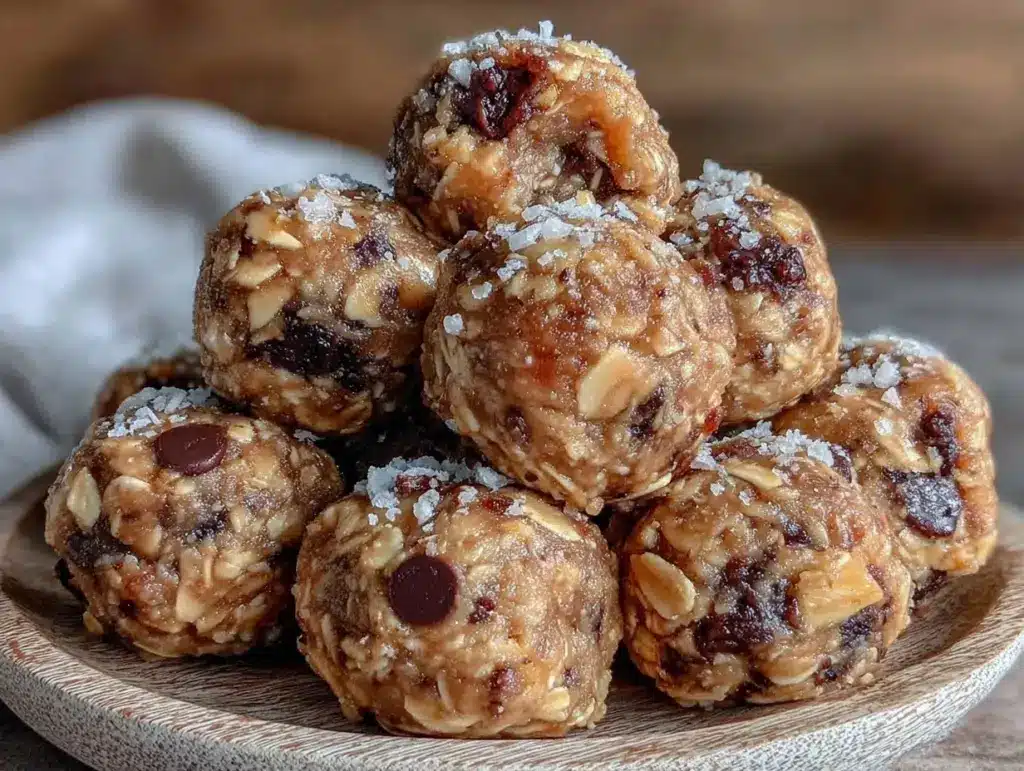
I was staring into the fridge at 5:30 PM, the light humming like a judgmental spotlight, and I had exactly one banana left. It was spotted, soft, and practically begging to be used up before it went brown. I didn’t have dinner planned. I didn’t have the energy to chop vegetables or turn on the oven. And my kids were already whining about snacks because, let’s be real, 5:30 PM is basically a crisis level for hunger.
So I grabbed a jar of peanut butter, some oats, and a handful of chocolate chips from the back of the pantry. I mixed them up in a bowl, rolled them into little balls, and threw them in the freezer. Twenty minutes later, they were firm, delicious, and gone. My kids thought I was a genius. I thought I was just lucky.
That was three months ago. Now, these no bake peanut butter banana energy bites are my emergency escape hatch. I make them every week. Sometimes I make two batches because I know they’ll be gone by Thursday. They’re sweet, they’re salty, they’re chewy, and they taste like a cookie but function like a snack. Plus, there’s zero baking involved. No preheating, no sticky pans, no cleanup except for one mixing bowl and a spoon.
If you’re looking for a quick way to use up that overripe banana or just need a healthy-ish snack that doesn’t involve turning on the stove, this is it. It’s my answer to “what’s for a snack?” when I have nothing planned and five minutes to spare.
Why You’ll Love This Recipe
I’ve made a lot of “healthy” snacks that turned out tasting like cardboard or regret. These are different. Here’s why these bites have earned a permanent spot in my kitchen routine:
Stupid Simple Ingredients — Seriously, five things. That’s it. Peanut butter, banana, oats, honey, and chocolate chips. If you can peel a banana, you can make this. I’ve made this while holding a toddler on my hip. It happens.
Zero Baking Required — The oven stays off. This is huge for me during summer or just when I’m tired. No heating up the kitchen, no waiting for cookies to bake, no guessing if they’re done. You mix, you roll, you chill.
Uses Up Ripe Bananas — We all have that one banana in the fruit bowl that’s turned completely brown. Most people throw it away. I save it. This recipe is the perfect way to rescue a banana that’s past its prime for eating raw. It’s basically banana bread in bite-sized form, but faster.
Grab-and-Go Convenience — I keep a container of these in the fridge for my kids’ after-school snack and one in the freezer for when we’re running out the door. They travel well in lunchboxes (if you keep them cool) and they don’t get squished like cookies do. They’re sturdy little powerhouses.
Customizable — Hate chocolate chips? Use raisins. Want more protein? Add a scoop of protein powder or swap the oats for crushed nuts. I like to swap in mini chocolate chips because they’re easier to roll, but regular ones work too. This recipe bends to your will.
This is my go-to when I need something sweet, something healthy-ish, and something that takes less time than it takes to order takeout. It’s reliable, delicious, and keeps the hunger demons at bay until dinner is ready.
Ingredients You’ll Need
Here’s the best part: you probably have all of this already. I don’t keep any special ingredients stocked just for this. It’s pantry-friendly and fridge-staple friendly.
Overripe Bananas (2 medium, about 1 cup mashed / 230g) — This is the binder. The riper the banana, the sweeter the bites. Look for bananas with brown spots or completely brown peels. They mash easier too. If your bananas are still yellow, they won’t be sweet enough and will be harder to mix.
Peanut Butter (½ cup / 128g) — I use natural creamy peanut butter. The kind that separates is fine, but make sure you stir it well before measuring. Some people prefer crunchy, but I find it makes rolling harder. If you have a nut allergy, sunflower seed butter works great here.
Old-Fashioned Rolled Oats (1 ½ cups / 120g) — Don’t use instant oats or steel-cut oats. Instant oats are too fine and will make the mixture mushy. Steel-cut are too hard and won’t soften up. You need the chewy texture of rolled oats. If you need gluten-free, make sure your oats are certified GF.
Honey (2 tablespoons / 42g) — This adds extra sweetness and helps bind everything together. Maple syrup works too if you want it vegan. I use honey because I like the flavor, but maple syrup is a good sub if you’re avoiding refined sugars.
Chocolate Chips (½ cup / 85g) — Mini chocolate chips are my preference because they distribute evenly in every bite. But regular chips work fine too, just chop them up a bit so they’re not giant chunks. Dark chocolate chips are great if you want less sugar.
Optional Add-ins:
- Vanilla Extract (1 teaspoon) — I almost always add this. It makes them taste more like dessert.
- Sea Salt (a pinch) — Just a tiny pinch enhances the peanut butter flavor. Don’t skip it.
- Flaxseed or Chia Seeds (1 tablespoon) — For extra fiber and omega-3s. I toss these in for the kids without them noticing.
Personal Tip: I keep a bag of frozen bananas in my freezer specifically for things like this. If you buy bananas in bunches and they turn brown too fast, peel them, break them in half, and freeze them in a bag. They’re perfect for smoothies, banana bread, and these energy bites.
Equipment Needed
You don’t need fancy gadgets. Here’s what I actually use:
Mixing Bowl — A medium-sized bowl is perfect. Anything too small will make it messy. I use a ceramic bowl because it’s heavy and doesn’t slide around.
Fork or Potato Masher — To mash the bananas. A fork works fine, but a masher is faster if you’re using really soft bananas.
Spoons — One for mixing, one for measuring. I just use whatever spoons are clean in the drawer.
Baking Sheet or Plate — To line with parchment paper. I use parchment because cleanup is easier, but you can just use a plate or wax paper.
Measuring Cups and Spoons — Standard stuff. I’m not super precise with this recipe, but if you’re new to it, measuring helps.
Freezer — Obviously. You need space in the freezer for these to set.
Optional but nice:
- Cookie Scoop — Makes them all the same size. I don’t always use it, but it helps if I want uniform bites.
- Parchment Paper — Makes cleanup a breeze. Just toss the paper when you’re done.
How to Make It: Step-by-Step
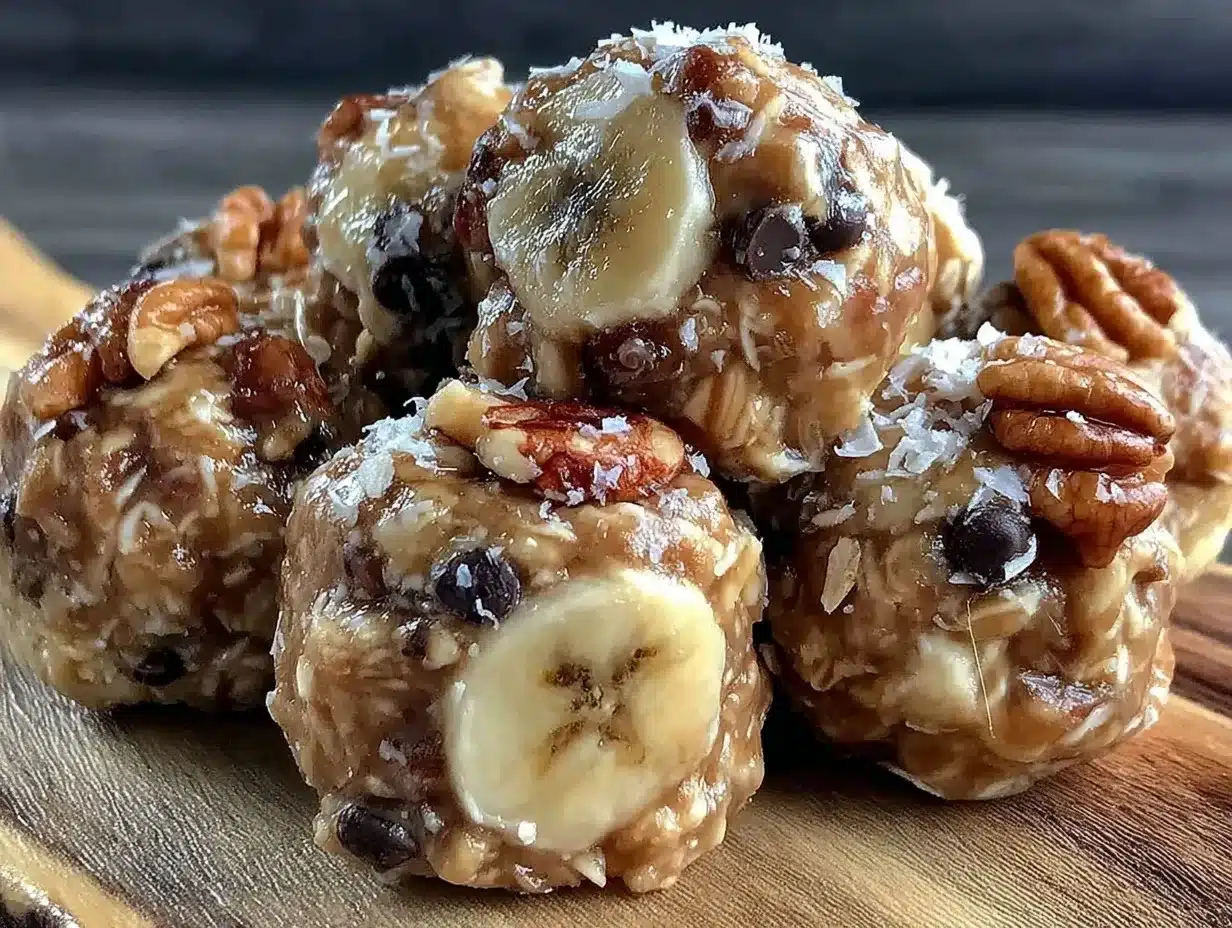
Alright, let’s make these! It takes about 10 minutes of active time, plus 20 minutes in the freezer. Here’s exactly how I do it.
Step 1: Mash the Bananas (2 minutes)
Peel your ripe bananas and put them in a medium mixing bowl. Mash them with a fork until they’re smooth. You want no big chunks left. If your bananas are really ripe, they should mash easily. If they’re a bit firm, press harder. The smoother the mash, the easier the mixture will bind together.
Step 2: Add the Wet Ingredients (1 minute)
Add the peanut butter and honey to the mashed bananas. Stir them together until well combined. The mixture should look creamy and uniform. If it looks too dry, add a teaspoon more honey. If it’s too wet, add a tablespoon more oats. You’re aiming for a sticky, dough-like consistency.
Step 3: Mix in the Oats (2 minutes)
Pour in the rolled oats. Stir them in until they’re fully coated and distributed. The mixture will start to look like cookie dough. It should be thick and hold together when you pinch it. If it’s crumbling, add a little more peanut butter or honey. If it’s soupy, add more oats.
Step 4: Fold in the Chocolate Chips (1 minute)
Stir in the chocolate chips (and any other add-ins like vanilla or flax seeds). Mix until evenly distributed. Now the fun part: rolling.
Step 5: Roll the Bites (5 minutes)
Line a baking sheet or plate with parchment paper. Take a small amount of the mixture (about 1 tablespoon) and roll it between your palms to form a ball. Place it on the lined sheet. Repeat with the rest of the mixture. You should get about 15-20 bites, depending on how big you make them. Don’t worry about them being perfect spheres. They don’t have to be cute. They just have to be tasty.
Step 6: Chill (20 minutes)
Place the baking sheet in the freezer for at least 20 minutes. This firms them up so they’re not sticky to handle. You can leave them in the fridge if you’re eating them soon, but the freezer gives them that nice, firm texture. If you’re meal prepping, you can leave them in the freezer for up to a month.
Step 7: Serve and Enjoy
Once they’re firm, transfer them to an airtight container. Keep them in the fridge for up to a week or in the freezer for longer storage. Grab one when you need a snack. They’re ready to eat straight out of the container.
Total Time: About 30 minutes (10 minutes active, 20 minutes chilling)
Troubleshooting Tips:
- Mixture is too wet: Add more oats, one tablespoon at a time. Wait a minute for the oats to absorb the moisture before adding more.
- Mixture is too dry: Add more peanut butter or honey. You want it sticky enough to hold together.
- Bites are too soft: They need more time in the freezer. Or they might be too warm. Make sure your kitchen isn’t too hot.
Expert Tips & Tricks
Here’s everything I’ve learned from making these dozens of times. These tips will save you from my early mistakes.
Use Ripe Bananas
This is non-negotiable. If your bananas are green or just barely spotted, they won’t be sweet enough and the texture will be off. You want them brown. Like, really brown. If you’re buying bananas specifically for this, let them sit on the counter until they’re almost black. It’s worth it.
Don’t Skip the Chill Time
I know you want to eat them now. But if you don’t chill them, they’ll be sticky and messy. The chill time firms up the peanut butter and sets the oats. If you’re in a huge rush, put them in the fridge for 30 minutes, but the freezer is faster and better.
Wet Hands Help
If the mixture is sticking to your hands, wet them slightly before rolling. Or dip them in a little water. This prevents the oats from sticking to your skin and keeps the bites smooth.
Store Properly
If you’re keeping them in the fridge, use an airtight container. They’ll last up to a week. If you’re keeping them in the freezer, use a freezer-safe bag or container. They’ll last up to a month. Just thaw them in the fridge for 10 minutes before eating if they’re frozen solid.
Pro Trick: Double Batch
I always make a double batch. These disappear fast. I freeze half immediately and keep the other half in the fridge for the week. It’s meal prep without the effort.
Variations & Substitutions
Once you’ve nailed the basic version, here’s how you can mix it up. I’ve tried all of these.
Almond Butter Version
Swap the peanut butter for almond butter. It’s a bit sweeter and has a different flavor, but it works great. I like it with dark chocolate chips.
Trail Mix Version
Instead of chocolate chips, use a mix of raisins, dried cranberries, and chopped nuts. It’s a bit more savory and less sweet. My husband prefers this version.
Coconut Version
Add ½ cup of shredded coconut to the mixture. Use coconut butter instead of peanut butter if you want a tropical vibe. It’s delicious with dark chocolate chips.
Protein Boost
Add a scoop of vanilla protein powder. You might need a little extra peanut butter or honey to bind it, but it makes these a great post-workout snack.
Gluten-Free
Just use certified gluten-free oats. Everything else is naturally gluten-free. I use Bob’s Red Mill GF oats and they work perfectly.
Nut-Free
Use sunflower seed butter or soy nut butter instead of peanut butter. It’s a bit lighter in flavor but works the same way. Great for school-safe snacks.
Serving & Storage
How to Serve:
I usually eat these straight out of the container as a snack. But they’re also great:
- With a glass of milk (sounds weird, but it’s good)
- Crumbled on top of yogurt
- As a dessert alternative after dinner
- For lunchboxes (just keep them cool)
Storage Instructions:
Refrigerator: Store in an airtight container for up to 1 week. They’ll stay soft and chewy.
Freezer: Store in a freezer-safe bag or container for up to 1 month. They might get a bit icy, but they thaw quickly.
Reheating: You don’t need to reheat these. If they’re frozen, just let them sit out for 10 minutes or thaw in the fridge. Eating them frozen is actually pretty nice, like a little ice cream bite.
Pro Tip: If you’re making these for a party, put them on a platter with a small bowl of extra chocolate chips for dipping. It’s a fun interactive snack.
Nutrition Information
I’m not a nutritionist, but here’s the breakdown if you’re tracking. These are estimates based on 20 bites.
Per Serving (1 bite):
- Calories: 90
- Protein: 3g
- Carbs: 12g
- Fiber: 1g
- Sugar: 7g
- Fat: 4g
- Sodium: 35mg
What’s Good: They have some protein from the peanut butter and fiber from the oats. They’re a better alternative to candy bars.
What to Know: They’re still high in sugar from the banana and honey. Portion control is key. They’re a snack, not a meal replacement.
My Take: Look, these are a treat. They’re sweet and tasty. But they’re made with whole food ingredients, so they’re better than processed snacks. I enjoy them as a mid-afternoon pick-me-up.
Final Thoughts
So that’s my go-to no bake peanut butter banana energy bites! I’ve probably talked your ear off at this point, but when you make a recipe this often, you have a lot to say about it.
This has saved my afternoons more times than I can count. It’s my answer to “what’s for a snack?” when I’m tired, don’t want to cook, and still want something that tastes good. My kids are happy, I’m happy because I’m not stressed, and the bananas aren’t going to waste.
Make it yours! Try different add-ins, swap in your favorite nut butter, adjust the sweetness. The best recipes are the ones you adapt to your family’s tastes.
If you make this, drop a comment and let me know what you think! I love hearing how recipes turn out in your kitchen. And if something doesn’t work, tell me that too—I’m here to help troubleshoot.
Happy snacking! And I hope your kitchen smells half as good as mine does right now (it smells like peanut butter and bananas).
Frequently Asked Questions
Can I use crunchy peanut butter?
Yes, you can. But it makes the mixture harder to roll into smooth balls. The chunks can break the shape. If you use crunchy, just roll them a bit more to distribute the chunks. I prefer creamy for easier handling.
Why did my bites fall apart?
This usually means the mixture was too dry. Bananas vary in moisture content. If your bananas were less ripe or smaller, they might not have added enough liquid. Add a little more peanut butter or honey to bind them. Also, make sure you’re using rolled oats, not instant.
Can I make these ahead of time?
Absolutely! This is the best part. Make them a week ahead and store them in the fridge. Or make a big batch and freeze them. They keep well for up to a month in the freezer. I meal prep these every Sunday.
Can I freeze them?
Yes! Freeze them in an airtight container or freezer bag for up to 1 month. They thaw quickly. I actually like eating them slightly frozen—they’re like little energy bites with a firm texture.
Are these healthy?
They’re a healthier alternative to candy or chips. They have natural sugars from the banana and honey, plus protein and fiber. But they’re still a snack, so enjoy them in moderation. They’re not a salad.
Can I use maple syrup instead of honey?
Yes, maple syrup works great. It’s a bit thinner, so you might need a tiny bit less or a tiny bit more oats. The flavor will be slightly different, but still delicious. Good for vegan versions.
How many bites does this make?
It makes about 15-20 bites, depending on how big you roll them. I usually roll mine about 1 tablespoon each. If you make them smaller, you’ll get more. If you make them bigger, you’ll get fewer. Adjust based on your appetite.
Pin This Recipe!
No Bake Peanut Butter Banana Energy Bites
- Total Time: 30 minutes
- Yield: 15-20 servings 1x
Description
A simple, 5-ingredient no-bake snack made with ripe bananas, peanut butter, oats, honey, and chocolate chips. Perfect for using up overripe bananas and ready in just 30 minutes.
Ingredients
- 2 medium overripe bananas (about 1 cup mashed / 230g)
- 1/2 cup creamy peanut butter (128g)
- 1 1/2 cups old-fashioned rolled oats (120g)
- 2 tablespoons honey (42g)
- 1/2 cup chocolate chips (85g)
- 1 teaspoon vanilla extract (optional)
- a pinch of sea salt (optional)
- 1 tablespoon flaxseed or chia seeds (optional)
Instructions
- Peel the ripe bananas and mash them in a medium mixing bowl until smooth.
- Add the peanut butter and honey to the mashed bananas and stir until well combined and creamy.
- Pour in the rolled oats and stir until fully coated and the mixture resembles cookie dough.
- Fold in the chocolate chips and any optional add-ins like vanilla extract or seeds.
- Line a baking sheet or plate with parchment paper.
- Roll the mixture into small balls (about 1 tablespoon each) and place them on the lined sheet.
- Place the baking sheet in the freezer for at least 20 minutes to firm up.
- Transfer the chilled bites to an airtight container for storage.
Notes
Use very ripe, spotted bananas for natural sweetness and easier mashing. If the mixture is too wet, add more oats; if too dry, add more peanut butter or honey. Wet hands can help prevent sticking while rolling. Store in the fridge for up to 1 week or freezer for up to 1 month.
- Prep Time: 10 minutes
- Cook Time: 0 minutes
- Category: Snack
- Cuisine: American
Nutrition
- Serving Size: 1 energy bite
- Calories: 90
- Sugar: 7
- Sodium: 35
- Fat: 4
- Saturated Fat: 1
- Carbohydrates: 12
- Fiber: 1
- Protein: 3
Keywords: no bake, energy bites, peanut butter, banana, healthy snack, gluten-free option, vegan option, quick snack, kid-friendly


