I have a confession to make. For years, I was terrified of cheesecake. Not because I didn’t love it—oh, I absolutely devoured it—but because I was convinced I couldn’t make it without it cracking, weeping water, or turning into a brick that shattered my teeth. I remember the first time I tried to make one for a holiday dinner. I watched it slowly collapse in the oven like a sad soufflé, developed a waterfall of cracks across the top, and served it to my family with a smile while internally screaming. It was dense, dry, and tasted more like disappointment than dessert.
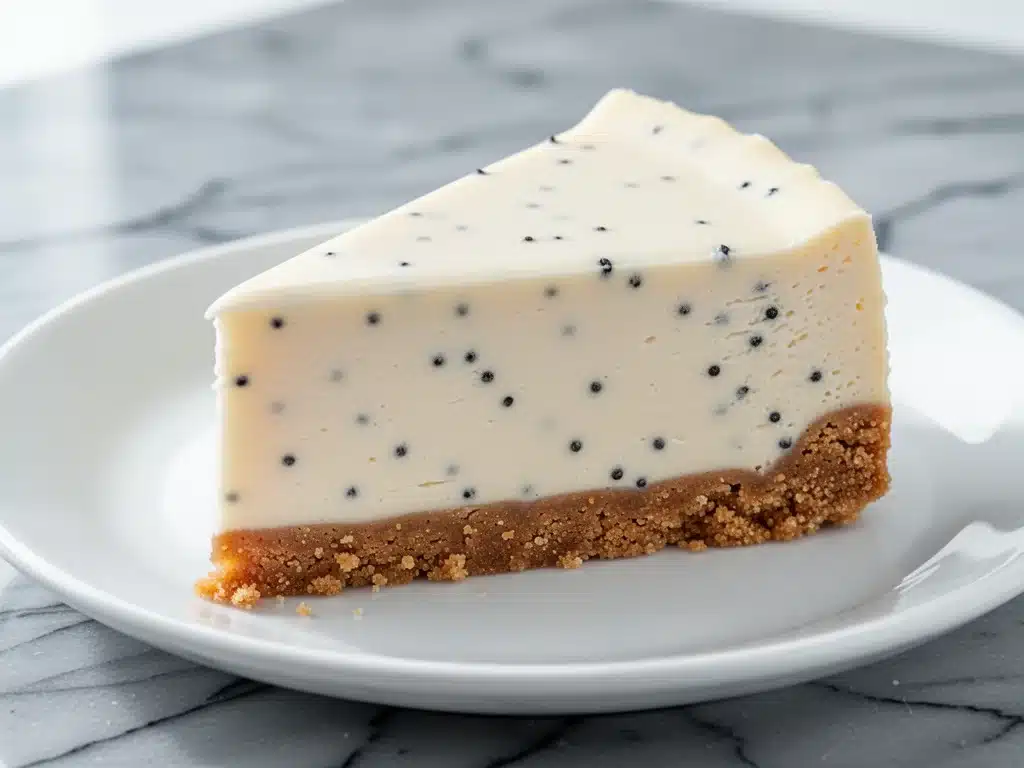
That was until I met the Never-Dry Vanilla Bean Cheesecake with Buttery Graham Crust. And I don’t say “met” lightly. This recipe didn’t just fix my cheesecake problem; it completely rewired my understanding of what a cheesecake should be. The first time I made this, I wasn’t even aiming for perfection. I was trying to salvage a batch of cream cheese that had been sitting in my fridge a day too long. I added a splash of heavy cream, a real vanilla bean, and decided to stop over-baking it. The result? Silky, impossibly creamy, and moist enough to make you question if it’s actually a cake or just edible clouds.
Since then, I’ve made this Never-Dry Vanilla Bean Cheesecake with Buttery Graham Crust at least fifteen times. I’ve served it at potlucks where people begged for the recipe, I’ve made it for my husband’s birthday (three times, because he keeps asking for it), and I’ve even tested it on my pickiest eaters who usually turn their noses up at “fancy” desserts. Every single time, the verdict is the same: this is the best cheesecake they’ve ever had. And the best part? It’s actually easier than you think. No water baths, no cracking nightmares, just pure, creamy vanilla goodness in a buttery crust that crumbles perfectly.
If you’ve been intimidated by cheesecake, or if you’ve had bad experiences with dry, crumbly versions, this is the one. This Never-Dry Vanilla Bean Cheesecake with Buttery Graham Crust is your new go-to. It’s the dessert that saves dinner parties, the treat that makes weekends feel special, and the recipe that finally lets you say, “I baked this myself.” Let’s get into why this specific combination of ingredients works so well, and how you can make it in your own kitchen.
Why You’ll Love This Cheesecake
There are a lot of cheesecake recipes out there. Seriously, if you search for “cheesecake” on Google, you’ll get more results than you can shake a spatula at. So why this one? Why this Never-Dry Vanilla Bean Cheesecake with Buttery Graham Crust over all the others? Here’s the honest truth about why this recipe has earned a permanent spot in my rotation.
- It’s Actually Moist — I’m not talking about “wet” or “runny.” I’m talking about that rich, creamy mouthfeel that melts on your tongue. Most cheesecakes dry out after a day in the fridge. This one stays lush and soft for days. I’ve kept slices in the fridge for five days, and the texture was still incredible. That’s the “never-dry” promise kept.
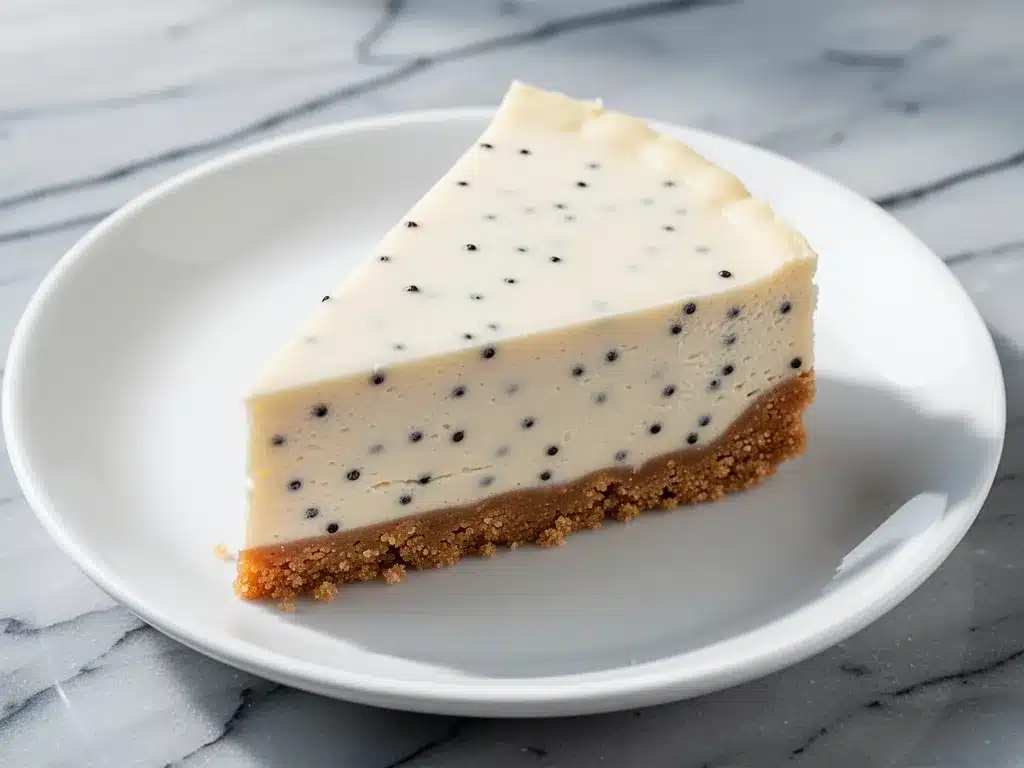
- Real Vanilla Flavor — You know those cheesecakes that taste like vanilla extract and nothing else? This one uses a real vanilla bean. The tiny black specks look gorgeous, but the flavor is what matters. It’s floral, deep, and aromatic. It tastes like a high-end bakery dessert, not a grocery store generic brand.
- Buttery Graham Crust That Stays Crunchy — Nothing ruins a good cheesecake faster than a soggy crust. I’ve learned the hard way that butter and sugar in the crust, baked lightly before adding the filling, creates a barrier that keeps the moisture out. This crust is sturdy enough to hold a big slice but tender enough to crumble in your mouth.
- No Cracks, No Stress — The secret to this Never-Dry Vanilla Bean Cheesecake with Buttery Graham Crust isn’t just the ingredients; it’s the baking method. We bake it low and slow, and we don’t open the oven door. No thermal shock means no cracks. It comes out smooth as glass.
- It Feels Fancy, But It’s Simple — You don’t need to be a pastry chef to make this. The technique is straightforward. You mix, you pour, you bake. The hardest part is waiting for it to chill. It’s the perfect balance of impressive and approachable.
This recipe has saved me from buying expensive, mediocre cheesecakes from the store. It’s my answer when I want to treat myself or my guests to something special without spending hours in the kitchen. It’s reliable, it’s delicious, and it’s consistently the star of the show.
Ingredients You’ll Need
One of the reasons I love this Never-Dry Vanilla Bean Cheesecake with Buttery Graham Crust is that the ingredient list is short. You don’t need exotic items or fancy gadgets. You just need good quality basics. Here’s what you’ll need to gather, along with my honest tips on what to look for.
For the Buttery Graham Crust
Graham cracker crumbs (1 ½ cups / 150g) — Don’t bother grinding your own graham crackers unless you have a food processor and like extra cleanup. Store-bought crumbs work perfectly fine. Just make sure they’re fine, not chunky.
Unsalted butter (6 tablespoons / 85g, melted) — This is key. The butter coats the crumbs and helps them bind. Use real butter, not margarine. The flavor difference is huge in a crust where the butter is the main star.
Granulated sugar (2 tablespoons / 25g) — Just a little bit to sweeten the crust and help it crisp up. Don’t skip this, or the crust will taste bland.
Salt (¼ teaspoon) — A pinch of salt balances the sweetness and enhances the buttery flavor. It’s subtle but necessary.
For the Never-Dry Filling
Full-fat cream cheese (32 ounces / 900g, 4 blocks) — This is the most important ingredient. Do not use low-fat or light cream cheese. It will not set properly and will taste grainy. Make sure it’s softened to room temperature. Cold cream cheese leads to lumps, and no one wants lumps in their cheesecake.
Granulated sugar (1 cup / 200g) — Standard white sugar. It dissolves easily and keeps the texture smooth. Some recipes use brown sugar, but I prefer white for this classic vanilla flavor.
Heavy cream (½ cup / 120ml) — This is the secret weapon for the “never-dry” texture. The extra fat and liquid keep the cheesecake lush and prevent it from becoming dense. Don’t swap this for milk or half-and-half; you need the full fat content.
Sour cream (½ cup / 120g) — Another moisture booster. The tang cuts through the richness of the cream cheese and adds a subtle complexity. Room temperature is best here too.
Eggs (4 large) — These provide structure. Again, room temperature eggs mix more evenly and prevent overmixing, which can incorporate too much air and cause cracking.
Vanilla extract (1 teaspoon) — For a backup flavor boost.
1 real vanilla bean (split and scraped) — This is what makes it special. If you can’t find fresh vanilla beans, you can use 2 teaspoons of high-quality vanilla bean paste, but the fresh bean is worth the hunt. The seeds add beautiful specks and a deeper flavor.
Equipment Needed
You don’t need a lot of fancy gear to make this Never-Dry Vanilla Bean Cheesecake with Buttery Graham Crust. Here’s what you’ll actually use:
9-inch springform pan — This is non-negotiable. The springform mechanism allows you to release the sides without flipping the cake. Make sure your pan is in good condition; a leaky pan is a disaster for cheesecake.
Food processor or blender — For grinding the graham crackers if you’re making your own crumbs. If using store-bought, you’ll just need a bowl.
Large mixing bowl — Or the bowl of a stand mixer. You need plenty of room to mix without splattering.
Electric mixer — Handheld or stand mixer. Mixing cream cheese by hand is possible but exhausting. Give your arms a break and use a mixer.
Rubber spatula — For scraping down the sides of the bowl. You want every bit of that creamy mixture in the pan.
Fork or pastry cutter — For mixing the crust crumbs with the butter.
Aluminum foil — To wrap the bottom of the springform pan if you’re using a water bath (though this recipe is designed to avoid the mess of a water bath, it’s good to have just in case).
How to Make It: Step-by-Step
Alright, let’s get baking. Making this Never-Dry Vanilla Bean Cheesecake with Buttery Graham Crust is a process, but it’s mostly hands-off. Here’s exactly how I do it to ensure success.
Step 1: Prep Your Pan and Oven (10 minutes)
Preheat your oven to 325°F (165°C). This lower temperature is crucial for even cooking without cracking. Grease the bottom and sides of your 9-inch springform pan with butter or non-stick spray. For extra insurance against leaks, wrap the outside bottom of the pan with two layers of heavy-duty aluminum foil.
Step 2: Make the Buttery Graham Crust (5 minutes)
In a medium bowl, combine the graham cracker crumbs, melted butter, sugar, and salt. Stir until the mixture looks like wet sand. It should hold together when you pinch it. Press this mixture firmly into the bottom and slightly up the sides of your springform pan. Use the bottom of a measuring cup to pack it down tightly. A tight crust prevents crumbling later. Bake the crust for 8-10 minutes until it smells fragrant. Let it cool completely while you make the filling.
Step 3: Whip the Cream Cheese (3 minutes)
In a large bowl, beat the softened cream cheese on medium speed until it is completely smooth and creamy. This might take 2-3 minutes. Scrape down the sides and bottom of the bowl. You want no lumps. If there are lumps, your cheesecake will have lumps. Be patient here.
Step 4: Add Sugar and Vanilla (2 minutes)
Add the sugar and scraped vanilla bean seeds (plus the pod if you want extra flavor, remove it later) to the cream cheese. Beat on low until combined. Scrape the bowl again. This step ensures the sugar is fully dissolved and the vanilla is evenly distributed.
Step 5: Incorporate Cream and Sour Cream (2 minutes)
Add the heavy cream and sour cream. Mix on low speed until just combined. Again, scrape the bowl. You want a smooth, homogeneous mixture. Don’t overmix at this stage.
Step 6: Add Eggs Last (2 minutes)
Add the eggs one at a time, mixing on low speed just until the yellow disappears. Overmixing eggs incorporates air, which leads to cracks and a domed top. Stop mixing as soon as the eggs are incorporated. The batter should be thick and glossy.
Step 7: Pour and Bake (1 hour 15 minutes)
Pour the filling over the cooled crust. Smooth the top with a spatula. Bake at 325°F for 1 hour and 15 minutes. The edges should be set, but the center should still jiggle slightly like Jell-O when you gently shake the pan. It will continue to set as it cools. Do not overbake, or it will dry out.
Step 8: Cool and Chill (4+ hours)
Turn off the oven and crack the door open. Let the cheesecake cool in the oven for 1 hour. This gradual cooling prevents cracking. Then remove it and let it cool completely on a wire rack. Once cool, cover with plastic wrap and refrigerate for at least 4 hours, preferably overnight. This chilling time is what allows the flavors to meld and the texture to become firm and creamy.
Expert Tips & Tricks
Here’s everything I’ve learned from making this Never-Dry Vanilla Bean Cheesecake with Buttery Graham Crust dozens of times. These tips will save you from my mistakes.
Room Temperature is Non-Negotiable — I cannot stress this enough. If your cream cheese, eggs, sour cream, and heavy cream are cold, your batter will be lumpy and difficult to mix evenly. Take everything out of the fridge 1-2 hours before you start. If you forget, you can soften cream cheese by microwaving it in short bursts, but be careful not to melt it.
Don’t Overmix — Once you add the eggs, mix only until combined. Air bubbles are the enemy of a smooth cheesecake. They expand in the oven and cause cracks. Mix gently and scrape the bowl frequently.
The Jiggle Test — Knowing when to take the cheesecake out of the oven is an art. The center should wobble slightly, like a gelatin mold, when you shake the pan. If it’s completely firm, it’s overbaked. If it’s liquid, it’s underbaked. Aim for the wobble.
Use a Real Vanilla Bean — I know vanilla beans can be expensive, but for a cake that is mostly vanilla flavor, it’s worth it. The flavor is incomparable to extract. If you can’t afford fresh beans, vanilla bean paste is a great alternative.
Patience with Cooling — The gradual cooling in the turned-off oven is crucial. It prevents the temperature shock that causes cracks. Don’t rush this step. If you’re impatient, you can leave it in the oven for up to 2 hours.
Variations & Substitutions
Once you’ve nailed the basic Never-Dry Vanilla Bean Cheesecake with Buttery Graham Crust, here’s how you can mix it up. I’ve tried these variations, and they all work.
Berry Swirl — Before baking, dollop ½ cup of your favorite berry jam (strawberry, raspberry, or blueberry) on top of the batter. Use a knife to swirl it into the cheesecake. It adds a beautiful marbled effect and a tart contrast to the sweet cream.
Chocolate Chip — Fold ½ cup of mini chocolate chips into the batter after adding the eggs. It’s like a cheesecake cookie. My kids love this version.
Lemon Vanilla — Add the zest of 1-2 lemons to the batter. The citrus brightens the vanilla flavor and cuts through the richness. It’s perfect for spring.
Gluten-Free — Use gluten-free graham crackers or a gluten-free crust mix. The filling is naturally gluten-free, so this is an easy swap.
Dairy-Free — This is trickier because cream cheese is the base. You can use dairy-free cream cheese, but the texture may be slightly different. Use coconut cream instead of heavy cream. It won’t be exactly the same, but it’s still delicious.
Serving & Storage
How to Serve: I usually serve this straight from the fridge. The cold temperature enhances the creamy texture. Slice it with a sharp knife dipped in hot water for clean cuts. Wipe the knife between slices. Top with fresh berries, whipped cream, or a drizzle of caramel sauce.
Storage: Store leftover cheesecake in an airtight container or covered tightly with plastic wrap in the fridge for up to 5 days. It actually gets better after a day or two as the flavors meld.
Freezing: Yes, you can freeze this cheesecake! Wrap the whole pan (or individual slices) tightly in plastic wrap and then in aluminum foil. Freeze for up to 2 months. Thaw in the fridge overnight before serving. The texture holds up well in the freezer.
Meal Prep: This is the ultimate make-ahead dessert. You can make it 2-3 days in advance, which is perfect for holiday planning. It relieves stress on the day of the event.
Nutrition Information
I’m not a nutritionist, but here’s the breakdown if you’re tracking. This is a rich dessert, so portion control is key.
Per Serving (1/12th of the cake):
| Nutrient | Amount |
|---|---|
| Calories | 380 |
| Total Fat | 28g |
| Saturated Fat | 16g |
| Cholesterol | 110mg |
| Sodium | 280mg |
| Total Carbs | 28g |
| Dietary Fiber | 0.5g |
| Sugars | 22g |
| Protein | 6g |
Look, this is a decadent dessert with cream cheese, butter, and sugar. It’s not a health food. But it’s homemade, so you know exactly what’s in it. When I make this, I enjoy a small slice and savor it. It’s worth the calories for the quality and taste.
Final Thoughts
So that’s my Never-Dry Vanilla Bean Cheesecake with Buttery Graham Crust. I’ve talked a lot about this recipe because it truly is a game-changer for me. It’s taken the stress out of dessert making and replaced it with confidence and joy. Whether you’re a seasoned baker or a beginner, this recipe will give you a beautiful, professional-looking cheesecake that tastes incredible.
Make it yours! Try different toppings, experiment with different crusts, or add your favorite mix-ins. The best recipes are the ones you adapt to your own tastes. And if you do make this, I’d love to hear about it. Drop a comment and let me know how it turned out in your kitchen. Did you use a vanilla bean? Did you add berries? I love hearing from you.
Happy baking! And I hope your kitchen smells as amazing as mine does right now.
Frequently Asked Questions
Why did my cheesecake crack?
Cracking is usually caused by overmixing (which incorporates air), overbaking (which dries out the edges), or sudden temperature changes. To prevent this, mix gently, bake until the center jiggles slightly, and cool gradually in the turned-off oven. This Never-Dry Vanilla Bean Cheesecake with Buttery Graham Crust is designed to minimize cracking, but technique still matters.
Can I use vanilla extract instead of a vanilla bean?
Yes, you can. Use 2 teaspoons of high-quality vanilla extract. The flavor won’t be quite as complex or beautiful as with a real bean, but it will still taste great. If you use extract, skip the vanilla bean seeds in the recipe.
Can I make this in a different size pan?
You can, but the baking time will change. For a 10-inch pan, the cheesecake will be thinner and bake faster (check it at 50 minutes). For two 8-inch pans, bake for the same time but check for doneness earlier. The filling quantity remains the same.
Why is my cheesecake watery?
If your cheesecake is watery, it might be underbaked or you might have added too much liquid. Make sure you’re using full-fat cream cheese and sour cream. Also, ensure you’re not adding extra liquid beyond the recipe. If it’s slightly watery on top, it might just be condensation from cooling. Wipe it off gently.
How long does this cheesecake last?
Stored in the fridge, it lasts up to 5 days. In the freezer, it lasts up to 2 months. It actually tastes better after a day or two as the flavors meld. Avoid freezing for longer than 2 months, as the texture may suffer.
Can I make this without a springform pan?
It’s very difficult without one. The springform pan allows you to release the sides without damaging the cake. If you don’t have one, you can use a regular round pan, but you’ll need to line it with parchment paper and invert the cake onto a plate to serve it. It’s not ideal, but it works in a pinch.
Is this similar to your classic New York Cheesecake?
It’s related! While my classic New York Cheesecake is dense and rich, this Never-Dry Vanilla Bean Cheesecake with Buttery Graham Crust is lighter and creamier due to the addition of heavy cream and sour cream. Both are delicious, but this one is more approachable for beginners.
Pin This Recipe!
Never-Dry Vanilla Bean Cheesecake with Buttery Graham Crust
- Total Time: 5 hours 40 minutes
- Yield: 12 servings 1x
Description
A silky, moist, and crack-free vanilla bean cheesecake with a buttery graham cracker crust. This recipe uses heavy cream and sour cream to ensure a lush texture that stays fresh for days.
Ingredients
- For the Crust:
- 1 ½ cups (150g) graham cracker crumbs
- 6 tablespoons (85g) unsalted butter, melted
- 2 tablespoons (25g) granulated sugar
- ¼ teaspoon salt
- For the Filling:
- 32 ounces (900g) full-fat cream cheese, softened to room temperature
- 1 cup (200g) granulated sugar
- 1 real vanilla bean, split and scraped (or 2 teaspoons vanilla bean paste)
- ½ cup (120ml) heavy cream
- ½ cup (120g) sour cream, room temperature
- 4 large eggs, room temperature
- 1 teaspoon vanilla extract
Instructions
- Preheat oven to 325°F (165°C). Grease a 9-inch springform pan and wrap the outside bottom with heavy-duty aluminum foil.
- In a medium bowl, combine graham cracker crumbs, melted butter, sugar, and salt. Mix until it resembles wet sand.
- Press the crust mixture firmly into the bottom and slightly up the sides of the springform pan. Bake for 8-10 minutes until fragrant. Let cool completely.
- In a large bowl, beat the softened cream cheese on medium speed until smooth and creamy (2-3 minutes). Scrape down the sides and bottom.
- Add sugar and vanilla bean seeds (and pod if using) to the cream cheese. Beat on low until combined. Scrape the bowl again.
- Add heavy cream and sour cream. Mix on low until just combined. Scrape the bowl.
- Add eggs one at a time, mixing on low speed just until the yellow disappears. Do not overmix.
- Pour the filling over the cooled crust and smooth the top.
- Bake at 325°F for 1 hour and 15 minutes. The edges should be set, but the center should jiggle slightly like Jell-O.
- Turn off the oven and crack the door open. Let the cheesecake cool in the oven for 1 hour.
- Remove from the oven and let cool completely on a wire rack.
- Cover with plastic wrap and refrigerate for at least 4 hours, preferably overnight, before serving.
Notes
Ensure all dairy ingredients (cream cheese, eggs, sour cream, heavy cream) are at room temperature to prevent lumps. Do not overmix the batter after adding eggs to avoid incorporating air, which causes cracking. The cheesecake must be chilled for at least 4 hours to set properly. It can be stored in the fridge for up to 5 days or frozen for up to 2 months.
- Prep Time: 25 minutes
- Cook Time: 1 hour 15 minutes
- Category: Dessert
- Cuisine: American
Nutrition
- Serving Size: 1/12th of the cake
- Calories: 380
- Sugar: 22
- Sodium: 280
- Fat: 28
- Saturated Fat: 16
- Carbohydrates: 28
- Fiber: 0.5
- Protein: 6
Keywords: cheesecake, vanilla bean, graham cracker crust, moist cheesecake, no crack cheesecake, dessert recipe, easy cheesecake


