
Here’s the thing about small kitchens: they have a very specific enemy. It’s not the lack of counter space, or the tiny refrigerator that hums louder than a jet engine. It’s the “one too many” problem. You make a batch of something delicious, maybe a casserole or a big pot of chili, and suddenly you’re eating the same meal for five days straight. Your taste buds revolt. You feel like you’re living in a monochrome world of leftovers.
I fell into this trap hard last winter. I made a huge batch of what I thought was the perfect roasted butternut squash soup. It was amazing. Until day four, when I looked at the orange sludge in my Tupperware and felt a deep, spiritual exhaustion. I didn’t hate the soup. I just hated that I couldn’t escape it.
That was the moment I realized I needed breakfast to be different. I needed something I could grab on Tuesday, freeze for Thursday, and have ready in three minutes on Saturday morning. But I didn’t want to make enough to feed a football team (see: tailgate pulled pork sliders for inspiration on portion control, though we’re keeping this way simpler). I needed meals for two. Just two.
These make-ahead freezer breakfast burritos are my answer. They’re right-sized. They’re flexible. And most importantly, you only make exactly what you’re going to eat. No more staring at a container of scrambled eggs wondering if you can stomach one more bite. This is the solution for anyone cooking for one or two who wants hot, homemade breakfast without the waste.
Why You’ll Love This Recipe
I’ve tested this burrito formula about ten times, tweaking the egg-to-cheese ratio and the wrap size, until I found the sweet spot. Here’s why these have completely changed my mornings:
- Perfectly Portioned — Each burrito is a full, satisfying meal for one person. Not a snack. Not a side. A real breakfast. I make four at a time, which lasts my partner and me exactly one week. That’s it.
- Freezer-Friendly Without Falling Apart — The biggest fear with freezer burritos is that they turn into a soggy mess when reheated. I use a specific wrapping technique (more on that below) that keeps the tortilla intact and the filling hot and fluffy.
- Sticky-Resistant — I’ve tried foil, plastic wrap, and parchment. Parchment paper is the winner. It doesn’t stick to the tortilla, even after freezing for three weeks.
- 3-Minute Reheat — You don’t need to thaw these. You just take them out of the freezer, unwrap the parchment, and zap them. They heat through evenly without drying out.
- Zero Waste — Because you only make four, you use exactly four eggs, four slices of cheese, and four tortillas. If you have an egg left over, use it for banana bread or just scramble it separately. No ingredients go to waste.
This is the kind of recipe that takes the stress out of mornings. You wake up, you grab a burrito, you heat it up, and you’re fed. No cooking required when you’re tired. Just reheating something you made when you had energy.
Ingredients You’ll Need
The best part about this recipe is how simple the ingredient list is. You probably have most of this in your fridge right now. I keep it cheap and accessible because, let’s be honest, breakfast doesn’t need to be fancy to be good.
For the Filling
Eggs (4 large) — I use large eggs. If you have organic or pasture-raised, go for it, but standard large eggs work perfectly. The key here is not over-whisking. We want fluffy curds, not omelet texture.
Milk or Cream (2 tablespoons) — Just a splash. I use whole milk because it’s what I always have. Heavy cream makes them richer, but milk keeps them lighter. Don’t skip it entirely, or the eggs will be dry.
Shredded Cheddar Cheese (½ cup) — Pre-shredded cheese has cornstarch to prevent clumping, which can make the texture grainy. If you can, buy a block and shred it yourself. It melts so much better. If you’re in a rush, pre-shredded works, but the texture isn’t as silky.
Breakfast Sausage (4 strips or ½ cup crumbled) — I use mild pork sausage links, sliced into coins. It adds fat and flavor. If you prefer turkey sausage, that works too, but it’s leaner so keep an eye on the moisture. For a vegetarian version, skip this and add extra veggies.
Onion (¼ medium, finely diced) — Just a quarter of an onion. Enough to give you that savory bite without overwhelming the burrito. Yellow onion is standard, but sweet onion is milder if you’re sensitive to strong flavors.
Butter (1 tablespoon) — For sautéing the sausage and onions. Olive oil works, but butter gives that classic breakfast flavor.
Salt and Pepper — To taste. Don’t be shy with the pepper. It cuts through the richness of the cheese and egg.
For the Wrap
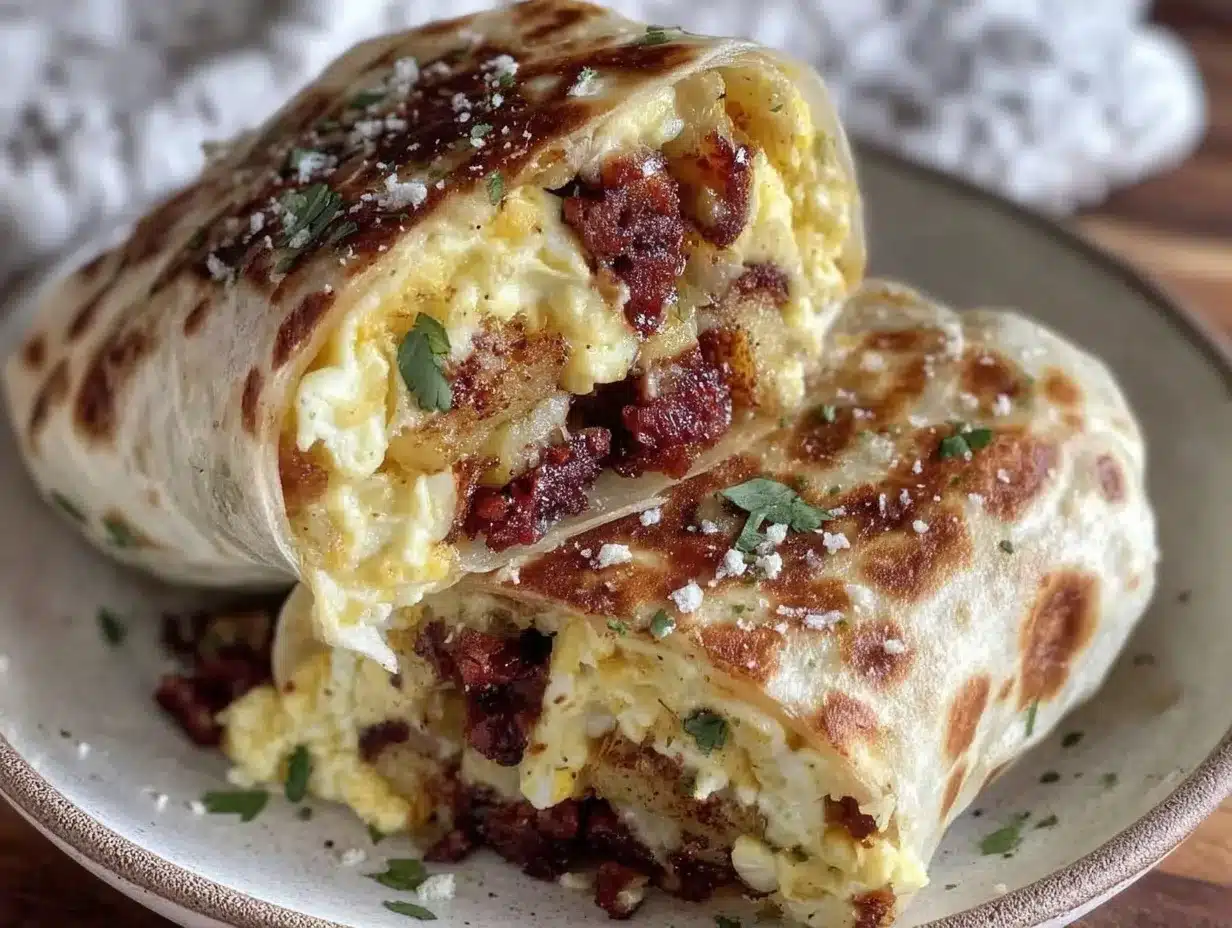
Flour Tortillas (4 large, 10-inch) — This is non-negotiable. Do not use small 6-inch tortillas. They are too small for a burrito this size and will burst. Do not use corn tortillas; they crack when frozen and reheated. You need soft, pliable flour tortillas. I like the ones from the refrigerated section, not the dry aisle.
Parchment Paper — Cut into 6×6 inch squares. This is your secret weapon for freezing. It keeps the burritos from sticking to each other and prevents freezer burn without the plastic taste.
Optional Add-Ins
Peppers — Diced bell peppers or jalapeños. I add these if I want a little kick. Sauté them with the onions.
Bacon Bits — If you don’t have sausage, crumbled bacon is delicious. Just make sure it’s cooked crispy so it doesn’t make the burrito soggy.
Hot Sauce — A few dashes inside the burrito adds brightness. I keep a bottle of Cholula or Tapatio in my fridge for this.
Equipment Needed
You don’t need a lot of gadgets for this. Small kitchen friendly, remember? Here’s what I actually use:
10-inch Skillet — This is the perfect size for cooking four eggs and sautéing a small amount of sausage. It fits easily in small kitchens and doesn’t take up much storage space. I use non-stick because eggs are sticky. Learn to love your non-stick pan.
Small Whisk or Fork — For beating the eggs. I use a fork because it’s faster to wash than a whisk.
Spatula — A silicone spatula is best for scraping the eggs out of the pan. It gets every bit of fluffy egg.
Cutting Board — Any size works. I use a small plastic one that fits in my tiny sink.
Parchment Paper — Essential for wrapping. If you run out, you can use plastic wrap, but parchment is better for reheating in the microwave.
Freezer-Safe Container or Ziploc Bag — To store the wrapped burritos. I use a large Ziploc bag, squeezing out as much air as possible.
How to Make It: Step-by-Step
Alright, let’s get cooking. This whole process takes about 20 minutes from start to finish. Once you’ve made them, assembly is quick.
Step 1: Sauté the Sausage and Onions (5 minutes)
Heat your skillet over medium heat. Add the butter. Once it’s melted and foaming, add the sausage. Break it up with your spatula if it’s in patties, or just toss in the coins. Cook for 3-4 minutes until browned. Add the diced onion and cook for another 2 minutes until soft and translucent. Drain any excess grease if there’s a lot of it. You want flavor, not a pool of oil at the bottom of your burrito.
Step 2: Scramble the Eggs (3 minutes)
Push the sausage and onions to one side of the pan (or remove them to a bowl if your pan is small). Pour in the beaten eggs (eggs + milk + salt + pepper). Let them sit for 10 seconds, then gently push them from the edges toward the center. Keep doing this until the eggs are mostly set but still slightly wet. They will continue cooking from residual heat. Remove the pan from the heat immediately. You want soft curds, not dry rubber.
Step 3: Combine and Cool (2 minutes)
Mix the sausage and eggs together in the pan. Taste and adjust seasoning. Now, here’s a crucial step: let them cool for just 2 minutes. If you assemble them while they’re piping hot, the steam will make the tortilla soggy and it will tear when you try to wrap it. We want warm, not hot.
Step 4: Assemble the Burritos (5 minutes)
Lay out your four tortillas on the counter. Place a sheet of parchment paper in the center of each. Divide the egg and sausage mixture evenly among the four tortillas. Sprinkle the cheese on top. If you’re adding hot sauce or peppers, do it now.
Now, the wrapping technique. This is where most people go wrong. Fold the bottom of the tortilla up over the filling. Fold in the left and right sides tightly. Then, roll it up from the bottom, tucking the filling in as you go. It should be a tight, neat package. If it’s loose, the filling will spill out in the microwave.
Step 5: Wrap for Freezing (2 minutes)
Wrap each burrito tightly in its sheet of parchment paper. Roll it around completely. This creates a barrier against freezer burn. Then, place all four wrapped burritos into a large freezer-safe Ziploc bag. Squeeze out as much air as you can before sealing. Label the bag with the date. They’ll last for up to 3 months, but honestly, they usually disappear in two weeks.
Expert Tips & Tricks
I’ve made enough of these to know what works and what doesn’t. Here’s how to ensure your burritos are perfect every time.
Don’t Overfill the Tortillas — It’s tempting to stuff them full, but tortillas have limits. If you overfill, they will burst when you heat them. Stick to about ½ cup of filling per burrito. It’s enough to be satisfying without risking a mess.
Cool the Filling Slightly — I can’t stress this enough. Hot filling = soggy tortilla. Let the eggs cool for 2-3 minutes before assembling. This small wait prevents the most common burrito failure.
Use Parchment, Not Plastic — Plastic wrap can leave a waxy taste and doesn’t breathe well. Parchment paper allows the burrito to “breathe” slightly and prevents sticking. Plus, you can microwave it directly if you remove the parchment. (Note: Always remove plastic wrap before microwaving.)
Reheat Correctly — Remove the parchment paper before microwaving. Wrap the burrito in a damp paper towel. This creates steam that keeps the tortilla soft. Microwave on high for 1 minute, then flip and microwave for another 30-60 seconds. It depends on your microwave’s power. The burrito should be hot all the way through.
Freezer Burn Prevention — If you’re storing these for more than a month, double-wrap. Wrap the parchment-wrapped burrito in a second layer of foil or another piece of parchment. This extra layer protects against freezer burn, which dries out the edges.
Variations & Substitutions
Once you’ve mastered the basic version, you can mix it up. These burritos are a canvas. Here are some variations I’ve tried:
Veggie-Loaded — Skip the sausage. Add diced spinach, mushrooms, and bell peppers to the eggs. Sauté the veggies first, then add the eggs. It’s lighter but still filling. I add a handful of spinach right at the end of cooking the eggs.
Bacon and Cheddar — Swap the sausage for crispy bacon bits. Bacon adds a smoky flavor that pairs beautifully with cheddar. Just make sure the bacon is crumbled into small pieces so it doesn’t tear the tortilla.
Ham and Swiss — Use diced ham instead of sausage and Swiss cheese instead of cheddar. This tastes a bit more like a breakfast sandwich. Add a little mustard inside for tang.
Spicy Jalapeño — Add diced jalapeños to the eggs and use pepper jack cheese. If you like heat, add a few dashes of hot sauce inside before wrapping. This is my favorite when I want a little zing.
Gluten-Free — Use gluten-free flour tortillas. Make sure they are the soft, pliable kind. Some GF tortillas are brittle and crack when frozen. I’ve had success with the “Tovari” brand, but check the package for “freezer-friendly” labels.
Egg-Free/Vegan — Use scrambled tofu with turmeric for color and nutritional yeast for flavor. Sauté the tofu with onions and peppers. Wrap in a tortilla with vegan cheese. It’s surprisingly close to the real thing.
Serving & Storage
These burritos are designed for convenience, but they can be enjoyed in a few different ways.
How to Reheat
Microwave (Fastest): Remove parchment. Wrap in a damp paper towel. Microwave on high for 1-2 minutes, flipping halfway. Let it sit for 30 seconds before eating—the filling will be molten hot.
Oven (Best Texture): Preheat oven to 350°F (175°C). Place the unwrapped burrito on a baking sheet. Bake for 15-20 minutes. This crisps up the tortilla slightly and heats it evenly. I prefer this method if I have time.
Air Fryer (Crispiest): Preheat air fryer to 350°F. Place the unwrapped burrito in the basket. Cook for 5-7 minutes, flipping halfway. The tortilla will get a nice crunch. This is my go-to when I want a breakfast that feels “cooked” rather than “heated.”
Storage
Freezer: Up to 3 months. Keep them flat in the bag so they don’t get crushed.
Refrigerator: If you plan to eat them within 3 days, you can store them in the fridge. But the texture is better frozen. I usually freeze them and only thaw what I need for the next day.
Don’t Refreeze: If you thaw a burrito and don’t eat it, don’t freeze it again. The texture will suffer. Just eat it or toss it.
Nutrition Information
I’m not a nutritionist, but here’s a rough estimate per burrito (based on 4 servings):
| Nutrient | Amount |
|---|---|
| Calories | 380 |
| Protein | 20g |
| Carbs | 28g |
| Fat | 22g |
| Fiber | 1g |
These are decent for a breakfast on the go. The protein keeps you full, and the carbs give you energy. If you want to lighten it up, use turkey sausage and reduced-fat cheese. But honestly? These are meant to be indulgent. They’re a treat that fits into a busy schedule.
Final Thoughts
So there you have it. Breakfast burritos that actually respect your small kitchen and your limited appetite. No more eating the same leftovers for five days. No more wasting ingredients. Just four perfect meals, ready when you are.
I’ve made these on busy mornings when I had to rush out the door, and on lazy weekends when I wanted something hot without turning on the stove. They work every time. And because you only make four, you always have fresh ingredients for the next batch.
Make them yours. Add your favorite veggies, swap the cheese, or keep it simple. The beauty of this recipe is that it’s yours. And if you try it, let me know how it goes. I’d love to hear what add-ins you come up with.
Happy cooking! And may your mornings be less stressful and your leftovers be fewer.
Frequently Asked Questions
Can I freeze the burritos unwrapped?
No. If you freeze them unwrapped, they will stick together and develop freezer burn. The parchment paper is essential. It keeps them separate and protects them from the cold air.
Why did my tortilla crack when I reheated it?
This usually happens if the tortilla was cold when you assembled it, or if you overfilled it. Always use room-temperature or slightly warmed tortillas for assembly. And don’t overfill! A tight wrap also helps prevent cracking.
Can I use corn tortillas?
I don’t recommend it. Corn tortillas are brittle and tend to crack when frozen and reheated. Flour tortillas are pliable and handle freezing much better. If you need gluten-free, look for soft GF flour tortillas.
How do I reheat without a microwave?
You can use an oven or air fryer. Wrap in foil for the oven to keep it moist. For the air fryer, leave it unwrapped for a crispier texture. Both methods take a bit longer than the microwave but yield better results.
Can I make these ahead and refrigerate instead of freezing?
Yes, but they’re best frozen. If you refrigerate them, eat them within 3 days. The tortilla will absorb moisture from the filling and become soggy. Freezing preserves the texture better.
Can I double this recipe?
Absolutely. Just scale up the ingredients and make more. I usually make eight at a time for a bigger freezer stash. Just make sure you have enough freezer space and parchment paper!
Pin This Recipe!
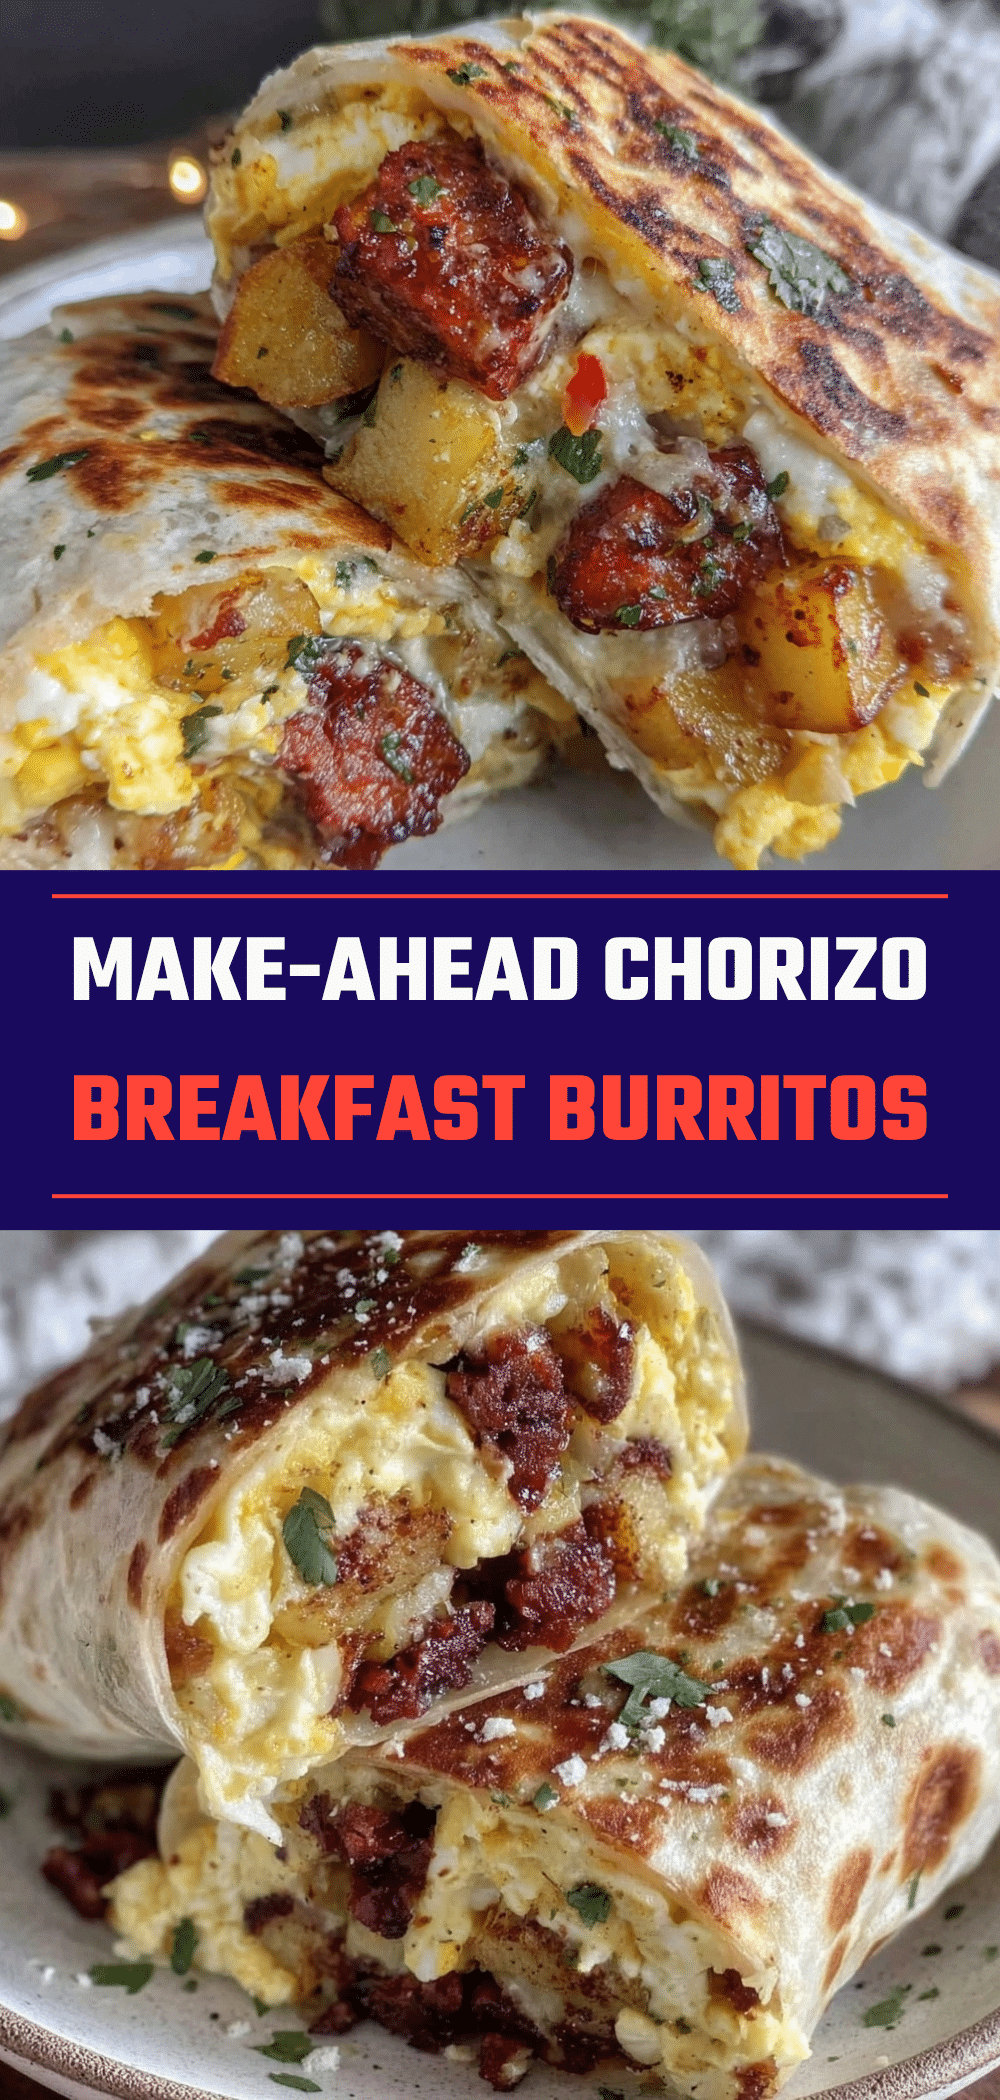

Make-Ahead Freezer Breakfast Burritos: 2-Person Meals Without Leftovers
- Total Time: 20 minutes
- Yield: 4 servings 1x
Description
Perfectly portioned, freezer-friendly breakfast burritos designed for one or two people. These meals allow you to make exactly what you need without leftovers, featuring a simple egg and sausage filling wrapped in soft flour tortillas.
Ingredients
- 4 large eggs
- 2 tablespoons milk or cream
- ½ cup shredded cheddar cheese
- 4 strips mild pork sausage (or ½ cup crumbled)
- ¼ medium onion, finely diced
- 1 tablespoon butter
- Salt and pepper to taste
- 4 large flour tortillas (10-inch)
- Parchment paper (cut into 6×6 inch squares)
Instructions
- Heat a 10-inch skillet over medium heat and melt the butter.
- Add the sausage and cook for 3-4 minutes until browned. Add the diced onion and cook for another 2 minutes until soft. Drain excess grease if necessary.
- Push sausage and onions to one side (or remove to a bowl). Pour in beaten eggs mixed with milk, salt, and pepper.
- Let eggs sit for 10 seconds, then gently push from edges to center until mostly set but still slightly wet. Remove from heat immediately.
- Mix sausage and eggs together. Let the mixture cool for 2 minutes to prevent soggy tortillas.
- Lay out tortillas with parchment paper in the center. Divide the egg mixture evenly among the four tortillas.
- Sprinkle cheese on top. Fold the bottom up, fold in sides tightly, and roll up from the bottom, tucking filling in.
- Wrap each burrito tightly in parchment paper.
- Place wrapped burritos in a freezer-safe bag, squeeze out air, label with date, and freeze.
Notes
Use soft, pliable flour tortillas; corn tortillas will crack. Do not overfill the tortillas to prevent bursting. Cool the filling slightly before assembling to avoid soggy tortillas. Use parchment paper instead of plastic wrap to prevent sticking and freezer burn. Reheat in microwave with a damp paper towel, or in oven/air fryer for crispier texture.
- Prep Time: 15 minutes
- Cook Time: 5 minutes
- Category: Breakfast
- Cuisine: American
Nutrition
- Serving Size: 1 burrito
- Calories: 380
- Sugar: 2
- Sodium: 600
- Fat: 22
- Saturated Fat: 8
- Carbohydrates: 28
- Fiber: 1
- Protein: 20
Keywords: freezer breakfast, breakfast burritos, meal prep, small kitchen recipes, make ahead breakfast, egg burritos, quick breakfast


