It was 5:30 PM on a Tuesday, and I was staring into the abyss of my open refrigerator. The light buzzed like a judgmental fluorescent bulb. Inside, there was a lonely half-onion, some sad spinach leaves, and two raw chicken breasts that looked like they’d been waiting for me to notice them for three days. My kids were already at the dinner table, negotiating over who got the last cracker. My husband was asking that dreaded question: “What’s for dinner?”
I could have ordered takeout. I could have made grilled cheese again. But I had this Instant Pot sitting there, humming quietly, waiting to save me. I grabbed those chicken breasts, tossed in some canned beans, a can of fire-roasted corn, and a bunch of spices from my cupboard. I hit the button, went to change into comfy clothes, and twenty minutes later, my house smelled like a cozy Mexican restaurant.
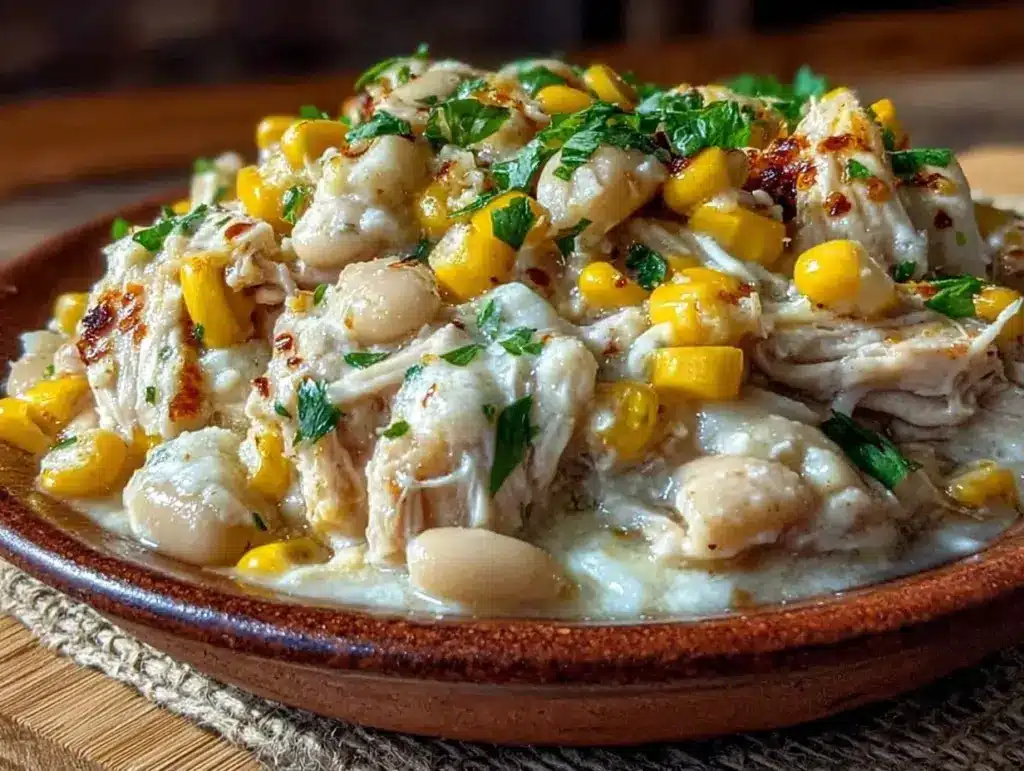
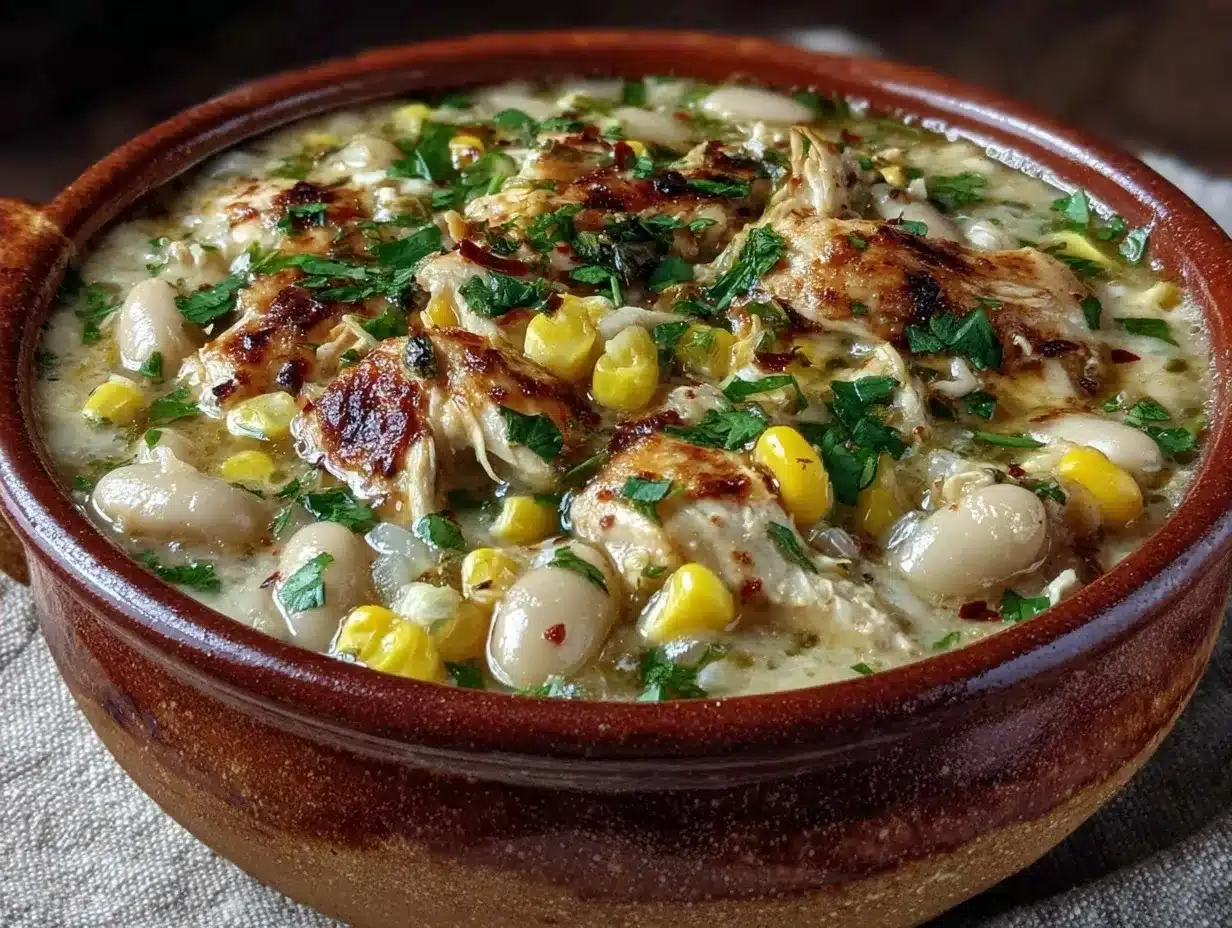
This Instant Pot white chicken chili is exactly that kind of win. It’s creamy, it’s comforting, and it uses fire-roasted corn to add this incredible smoky sweetness that makes it taste like you spent hours simmering it on the stove. But you don’t. You spend about 15 minutes of active prep, and the rest is just the pressure cooker doing the heavy lifting.
I’ve made this recipe probably a dozen times in the last month alone. It’s my go-to when I’m tired, when the grocery store is far, and when I need dinner to just work. It’s perfect for busy weeknights, but honestly? It’s great for lazy weekends too. If you’ve ever felt trapped by the 5 PM clock, this one-pot garlic butter chicken and rice is another lifesaver in the same vein, but this chili is lighter, creamier, and packed with more veggies.
Why You’ll Love This Recipe
Look, I don’t have hours to spend chopping and stirring. I have a life, a job, and kids who need to eat. This Instant Pot white chicken chili fits into my life like a glove. Here’s why it keeps coming back to my rotation:
It’s Actually Fast — I know, I know, people say “instant pot means instant.” It doesn’t. There’s pressure build-up time and release time. But from the moment I start chopping to the moment I eat? About 45 minutes. That’s faster than waiting for a delivery driver who’s “5 minutes away.”
One Pot, Zero Stress — The beauty of this method is that everything goes in one pot. No browning chicken in a separate pan, no sautéing onions in a separate skillet. Just dump, press button, clean up later. I love a good spinach mushroom stuffed chicken breast for date night, but for Tuesday? One pot is my religion.
Creamy Without the Heavy Lifting — Traditional white chili can be heavy with cream cheese or sour cream. This version gets its creaminess from blending some of the beans and corn right in the pot. It creates this velvety texture that feels indulgent but is mostly just beans and corn. You won’t miss the extra dairy.
Fire-Roasted Corn is the Secret Weapon — This isn’t just corn. It’s corn that’s been roasted until it has a little char and a smoky kick. It adds depth that regular corn just can’t match. It’s the difference between “okay dinner” and “hey, can you make this again tomorrow?”
Freezer Friendly — This recipe doubles easily. I often make two batches. One for dinner, one for the freezer. When I’m too tired to cook on a Wednesday night, I pull a container out of the freezer, thaw it overnight, and reheat it. It tastes just as good reheated as it does fresh.
Ingredients You’ll Need
Here’s the best part: you probably have most of this already. This isn’t a recipe that requires a special trip to a specialty store. It’s pantry-friendly, freezer-staple friendly, and very forgiving.
Chicken Breasts or Thighs (1.5 lbs / 680g) — Boneless, skinless. I use breasts because they’re lean, but thighs are juicier. If you use thighs, you might need to reduce the cooking time by a minute or two. Don’t use frozen chicken straight from the freezer unless you adjust the time significantly.
White Beans (2 cans / 15 oz each) — Cannellini or Great Northern beans. These are the backbone of the “white” in white chili. They’re mild, creamy, and blend beautifully. Rinse and drain them well. If you skip this step, the chili will taste metallic.
Fire-Roasted Corn (1 can / 15 oz) — This is non-negotiable for flavor. Look for the can that says “fire-roasted.” It has that charred taste. If you can’t find it, use regular corn plus a teaspoon of smoked paprika, but the canned fire-roasted version is easier and tastes great.
Chicken Broth (32 oz / 1 quart) — Low-sodium is best so you can control the salt. Chicken broth adds savory depth. Vegetable broth works if you want a lighter version, but chicken is more traditional.
Green Chilies (1 can / 4-7 oz) — Mild green chilies. This gives it that classic chili kick without making it a fire-breathing dragon. If you like heat, add a diced jalapeño with the seeds in.
Onion (1 medium, diced) — Yellow or white onion. Yellow is sweeter when cooked. White is sharper. I use yellow because it melts into the sauce nicely.
Garlic (4 cloves, minced) — Fresh garlic. Please. Jarred garlic just doesn’t have the punch for this. Four cloves is a lot, but white chili needs that garlic backbone. It mellows out in the pressure cooker.
Ground Cumin (2 teaspoons) — The earthy, warm spice that defines chili. Don’t skip it. It’s what makes it taste like chili and not just chicken soup.
Chili Powder (1 teaspoon) — Not the hot sauce kind. The actual spice blend. It adds color and mild flavor.
Smoked Paprika (1 teaspoon) — This boosts the smokiness from the corn. If you don’t have it, use regular paprika, but smoked is better.
Olive Oil (1 tablespoon) — For sautéing the aromatics. Avocado oil works too.
Salt and Black Pepper — To taste. Always taste before you serve. The saltiness of the broth and beans varies by brand.
Optional Toppings — Sour cream, shredded cheese (cheddar or Monterey Jack), fresh cilantro, lime wedges, avocado slices. These aren’t in the pot, but they’re in the soul of the dish.
Equipment Needed
You don’t need fancy gadgets for this. Here’s what I actually use:
Instant Pot or Electric Pressure Cooker — I have the Duo 6-quart. It’s the standard size. If you have a 3-quart, cut the recipe in half. If you have an 8-quart, this recipe fits easily. Just make sure you don’t fill it past the 2/3 mark.
Measuring Cups and Spoons — Standard stuff. I keep a set on my counter so I don’t have to dig them out.
Wooden Spoon or Silicone Spatula — For stirring. Silicone is easier for scraping the bottom of the pot.
Knife and Cutting Board — For the onion and garlic. Keep it simple.
Can Opener — Obviously. But seriously, check yours. Nothing kills the mood like a can opener that doesn’t work.
Blender or Immersion Blender — Optional but recommended. I use an immersion blender to blend half the beans and corn right in the pot. It’s faster than cleaning a blender. If you don’t have one, just mash some of the beans with a potato masher against the side of the pot.
How to Make It: Step-by-Step
Alright, let’s make this! I’m walking you through exactly how I do it, including the little tricks I’ve picked up so you don’t end up with a pot of watery chicken soup.
Step 1: Sauté the Aromatics (5 minutes)
Turn your Instant Pot to the “Sauté” function. Let it heat up for a minute, then add the olive oil. Add the diced onion and cook for 3-4 minutes until it’s soft and translucent. Add the minced garlic and cook for just 30 seconds. Garlic burns fast, so watch it like a hawk. You want it fragrant, not brown.
Step 2: Add the Chicken and Spices (2 minutes)
Stir in the cumin, chili powder, and smoked paprika. Let them toast in the oil for 30 seconds—that releases their oils and makes the flavor pop. Then, add the chicken breasts. Stir to coat them in the spice mixture. You’re not cooking them through yet, just flavoring them.
Step 3: Deglaze the Pot (1 minute)
This is the most important step. Pour in the chicken broth. Use your wooden spoon to scrape up any browned bits stuck to the bottom of the pot. If you don’t do this, the Instant Pot might give you a “Burn” warning. Those browned bits are flavor gold, but they can trigger the sensor. Scrape, scrape, scrape.
Step 4: Add the Solids (1 minute)
Toss in the fire-roasted corn (don’t drain it—the liquid adds flavor), the green chilies, and the rinsed white beans. Stir everything together. The chicken should be submerged in the liquid. If it’s not, add a little more broth or water.
Step 5: Pressure Cook (15 minutes)
Lock the lid. Make sure the valve is set to “Sealing.” Select “Manual” or “Pressure Cook” on High for 15 minutes. The pot will take about 10-15 minutes to come to pressure. Don’t worry about the timer starting yet; it doesn’t start until pressure is reached.
Step 6: Release Pressure (10 minutes)
Once the timer beeps, let the pressure release naturally for 10 minutes. Then, carefully turn the valve to “Venting” to release any remaining steam. This gentle release helps keep the chicken tender. If you quick-release immediately, the chicken can get tough.
Step 7: Blend and Thicken (5 minutes)
Remove the lid. Take out the chicken breasts and set them on a cutting board. Use an immersion blender to blend about half of the beans and corn directly in the pot. This creates the creamy base. If you don’t have an immersion blender, ladle half the mixture into a blender, blend, and pour back in.
Step 8: Shred and Finish (5 minutes)
Shred the chicken with two forks. Stir it back into the pot. Turn the Instant Pot back to “Sauté” for 2-3 minutes to let the chili simmer and thicken up a bit more. Taste it. Add salt and pepper as needed. If you want it creamier, stir in a half-cup of sour cream or cream cheese now. Serve hot with your favorite toppings.
Expert Tips & Tricks
Here’s everything I’ve learned from making this dozens of times. These tips will save you from my mistakes.
Don’t Skip the Deglaze — I cannot stress this enough. If there are burnt bits on the bottom, the pot will burn the food before it pressurizes. Scrape it clean. It takes 30 seconds and saves you from a disaster.
Shred, Don’t Dice — Shredded chicken absorbs more sauce and feels more like chili. Diced chicken can feel like you’re eating chicken nuggets in soup. Two forks make quick work of it.
Blend for Creaminess — You don’t need heavy cream to make this creamy. Blending some of the beans and corn creates a natural thickener. It’s healthier and tastes more like a real chili than a soup.
Adjust the Heat — Green chilies vary in heat. If you’re sensitive to spice, use mild chilies and add a pinch of cayenne later if you want more kick. If you like it hot, add a diced jalapeño in Step 1.
Let It Simmer — After shredding the chicken, let it simmer on Sauté for a few minutes. This melds the flavors and thickens the sauce. If you serve it immediately, it might taste a bit thin.
Variations & Substitutions
Once you’ve nailed the basic version, here’s how you can mix it up. I’ve tried all of these.
Slow Cooker Version — You can make this in a slow cooker too. Sauté onions in a pan first, then add everything to the slow cooker. Cook on Low for 6-8 hours or High for 3-4 hours. Shred and blend at the end. It’s less hands-off but still easy.
Vegetarian Version — Swap chicken broth for vegetable broth and omit the chicken. Add a can of diced potatoes or extra beans for bulk. It’s still hearty and delicious. I make this for my vegetarian friend, and she loves it.
Spicy White Chicken Chili — Add a diced jalapeño, a teaspoon of cayenne, or a splash of hot sauce. Serve with extra jalapeños on top. This is for when you want to feel the heat.
Chicken and Rice — If you want it heartier, add ½ cup of uncooked white rice in Step 4. Cook for 10 minutes instead of 15. The rice will absorb the liquid and make it more like a stew. This is similar to the vibe of cheesy ground beef taco pasta, but with a different flavor profile.
Gluten-Free — This recipe is naturally gluten-free. Just double-check your broth and canned goods to make sure they’re certified GF. Most are, but labels vary.
Serving & Storage
This chili is best served fresh, but it’s forgiving. Here’s how to handle leftovers.
How to Serve — I usually serve this straight from the pot with a dollop of sour cream, a sprinkle of cheddar cheese, and fresh cilantro. Lime wedges on the side are a must—the acidity cuts through the richness. It pairs beautifully with spicy chipotle corn if you want extra corn flavor, or some crusty bread for dipping.
Refrigerator — Store in an airtight container for up to 4 days. The flavors actually get better on day 2. It thickens up in the fridge, which is normal.
Reheating — Add a splash of broth or water when reheating. The chili will be thick, and the liquid will bring it back to a soupy consistency. Heat on the stove over medium-low, stirring frequently. Microwave works too, but stir every minute to prevent hot spots.
Freezing — This freezes well for up to 3 months. Cool it completely, then freeze in portions. Thaw in the fridge overnight. Note: If you add sour cream or cheese before freezing, it might separate when reheated. Add dairy after reheating.
Nutrition Information
I’m not a nutritionist, but here’s the breakdown if you’re tracking. These are estimates based on chicken breasts and low-sodium broth.
Per Serving (based on 6 servings):
Calories: 320
Protein: 35g
Carbs: 25g
Fiber: 6g
Sugar: 4g
Fat: 8g
Sodium: 600mg (varies by broth)
This is a high-protein, fiber-rich meal. The beans and corn provide complex carbs, and the chicken keeps you full. It’s comfort food that doesn’t leave you feeling sluggish. If you add sour cream and cheese, add about 100 calories and 5g of fat per serving.
Final Thoughts
So that’s my go-to Instant Pot white chicken chili! I’ve probably talked your ear off at this point, but when you make a recipe this often, you have a lot to say about it. This has saved weeknight dinners more times than I can count. It’s my answer to “what’s for dinner” when I’m tired, don’t want takeout, and still want something that tastes really good. My kids are happy, my husband’s happy, and I’m happy because I’m not stressed about cooking.
Make it yours! Try different add-ins, swap in your favorite vegetables, adjust the heat. The best recipes are the ones you adapt to your family’s tastes. If you make this, drop a comment and let me know what you think! I love hearing how recipes turn out in your kitchen. And if something doesn’t work, tell me that too—I’m here to help troubleshoot.
Happy cooking! And I hope your kitchen smells half as good as mine does right now.
Frequently Asked Questions
Can I use frozen chicken?
Yes, but you need to adjust the time. If you use frozen chicken breasts, cook for 20 minutes instead of 15. Make sure the chicken reaches an internal temperature of 165°F. Also, you’ll need to let it rest a bit longer before shredding, as frozen chicken can be harder to shred immediately. Thawing is always better for texture, but frozen works in a pinch.
Why did my Instant Pot give me a “Burn” warning?
This usually happens if there are thick ingredients (like tomato paste or undiluted spices) stuck to the bottom, or if you didn’t deglaze properly. The bottom of the pot gets hot enough to burn the food before the pressure builds. Always deglaze after sautéing. If you get the warning, turn off the pot, let it cool slightly, open the lid, stir everything up, and add a little more liquid. You can often restart it.
Can I make this in a slow cooker?
Absolutely. Sauté the onions and garlic in a pan first, then add everything to the slow cooker. Cook on Low for 6-8 hours. Shred the chicken and blend the beans at the end. It’s less hands-off than the Instant Pot, but the flavor is the same. I use this method when I’m meal-prepping on Sunday.
Is this chili spicy?
It’s mild by default. The green chilies add a little kick, but it’s not hot. If you want it spicier, add a diced jalapeño, a teaspoon of cayenne, or some red pepper flakes. If you’re sensitive to spice, stick to mild green chilies and skip the extra heat. It’s very customizable.
Can I double this recipe?
Yes, but make sure your Instant Pot is big enough. This recipe fits in a 6-quart pot. If you double it, you might need an 8-quart pot. Don’t fill it past the 2/3 mark, or it won’t pressurize properly. If you double it, you might need to increase the cooking time by 2-3 minutes.
What’s the best topping for this chili?
I’m a big fan of sour cream, shredded cheddar cheese, fresh cilantro, and a squeeze of lime. Avocado slices are also amazing. Some people like crushed tortilla chips for crunch. It’s like a loaded baked potato meets chili. Go wild with toppings!
Pin This Recipe!


Instant Pot White Chicken Chili: Easy One-Pot Weeknight Dinner
- Total Time: 45 minutes
- Yield: 6 servings 1x
Description
A creamy, comforting, and fast one-pot white chicken chili made in the Instant Pot. Using fire-roasted corn and blended beans for thickness, this recipe delivers restaurant-quality flavor with minimal active prep time.
Ingredients
- 1.5 lbs boneless, skinless chicken breasts
- 2 cans (15 oz each) white beans (Cannellini or Great Northern), rinsed and drained
- 1 can (15 oz) fire-roasted corn, undrained
- 32 oz low-sodium chicken broth
- 1 can (4-7 oz) mild green chilies
- 1 medium yellow onion, diced
- 4 cloves garlic, minced
- 2 teaspoons ground cumin
- 1 teaspoon chili powder
- 1 teaspoon smoked paprika
- 1 tablespoon olive oil
- Salt and black pepper to taste
- Optional toppings: Sour cream, shredded cheddar or Monterey Jack cheese, fresh cilantro, lime wedges, avocado slices
Instructions
- Turn the Instant Pot to ‘Sauté’ function. Add olive oil and heat for 1 minute.
- Add diced onion and cook for 3-4 minutes until soft and translucent. Add minced garlic and cook for 30 seconds until fragrant.
- Stir in cumin, chili powder, and smoked paprika. Toast spices for 30 seconds.
- Add chicken breasts and stir to coat in the spice mixture.
- Pour in chicken broth and scrape the bottom of the pot to deglaze, removing any browned bits.
- Add fire-roasted corn (with liquid), green chilies, and rinsed white beans. Stir to combine. Ensure chicken is submerged.
- Lock the lid, set valve to ‘Sealing’, and select ‘Pressure Cook’ on High for 15 minutes.
- Once finished, allow a natural pressure release for 10 minutes, then vent remaining steam.
- Remove chicken breasts and set aside. Use an immersion blender to blend about half of the beans and corn directly in the pot to create a creamy base.
- Shred the chicken with two forks and stir it back into the pot.
- Turn Instant Pot back to ‘Sauté’ and simmer for 2-3 minutes to thicken. Season with salt and pepper to taste.
- Serve hot with desired toppings.
Notes
[“Deglazing the pot is crucial to prevent the ‘Burn’ warning; ensure no spices are stuck to the bottom.”, ‘Shredding the chicken rather than dicing helps it absorb more sauce.’, ‘Blending some of the beans and corn creates a natural thickener without heavy cream.’, ‘If using frozen chicken, increase cooking time to 20 minutes.’, ‘For slow cooker version: Sauté aromatics separately, then cook on Low for 6-8 hours.’, ‘Freezes well for up to 3 months; add dairy toppings after reheating.’]
- Prep Time: 15 minutes
- Cook Time: 30 minutes
- Category: Main Course
- Cuisine: Mexican
Nutrition
- Serving Size: 1 bowl
- Calories: 320
- Sugar: 4
- Sodium: 600
- Fat: 8
- Saturated Fat: 2
- Carbohydrates: 25
- Fiber: 6
- Protein: 35
Keywords: Instant Pot, White Chicken Chili, One Pot Meal, Weeknight Dinner, Pressure Cooker, Creamy Chili, Healthy Dinner, Gluten Free