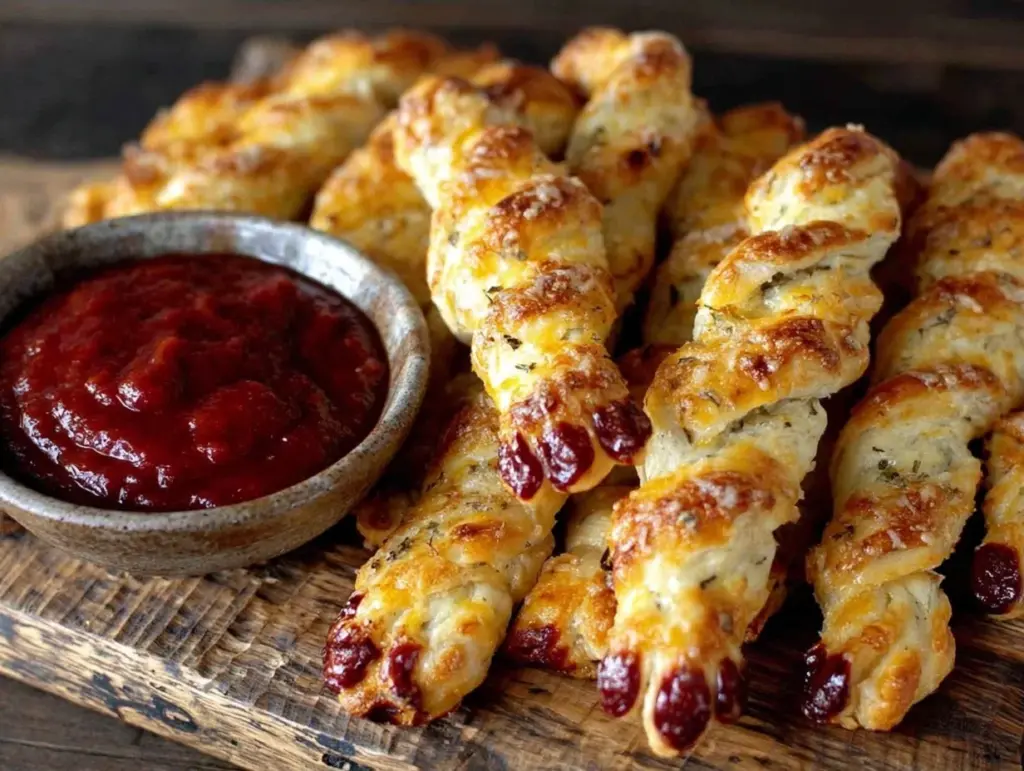
Last October, I stood in my kitchen at 11 PM on the 30th, staring at a half-empty pantry and a grocery list that felt impossible to fulfill. My friends were coming over in six hours for a Halloween party, and I had nothing but panic and a bag of frozen dough. I realized then that I was doing it wrong. I was trying to be the spontaneous hostess, but I’m actually an organized meal-prepper at heart. I don’t do last-minute chaos. I do “make it once, eat it four times.” I do systems. I do prep work that lets me relax while everyone else is running around looking for the good ketchup.
That night, I threw together a batch of what I now call Halloween Witch Finger Breadsticks. They’re eerie, they’re delicious, and most importantly, they are incredibly forgiving. But here’s the real secret: I don’t just make them for the party. I make a double batch, freeze four portions for the party, and keep the rest in the freezer for random Tuesday nights when I need a quick, impressive snack. This recipe isn’t just about spooky fun; it’s about strategic planning. It’s about having a “win” ready to go in the freezer, so you never have to stress about party food again. If you’re someone who loves efficient cooking—like my air fryer cinnamon sugar churro bites—you’ll appreciate how little active time this takes versus the huge payoff.
I’ve tested this method so many times that I can do it in my sleep. The dough comes together in minutes, the shaping is satisfying (almost therapeutic), and the freezing process is foolproof. You shape them, flash freeze them, bag them up, and boom—you have party food ready for any occasion, not just Halloween. It’s the ultimate “make it once, eat it four times” strategy. Let’s get prepping.
Why You’ll Love This Freeze-Ahead Strategy
There are about ten reasons I keep making these witch finger breadsticks, but let’s be real: the main reason is efficiency. Here’s why this method works so well for busy people who want to look good without spending all day in the kitchen.
Strategic Freezing — Seriously, this is the game-changer. You shape the dough, freeze it solid, then bake it fresh when you need it. The texture stays fluffy and warm, not stale. I’ve made batches that sat in the freezer for three weeks, and they baked up perfectly. It’s like having fresh bread on demand.
Minimal Active Time — If you can roll a rope of dough, you can make these. The actual hands-on time is about 20 minutes. The rest is rising or freezing. I make these while listening to a podcast, and I’m done before I know it. It’s perfect for meal-prepping Sunday.
Grab-and-Go Portions — I portion these into sets of four (for the “freeze 4 portions” title, obviously) in freezer bags. One bag for the party, one for a movie night, one for a quick lunch side, and one for “I need a treat.” No more guessing how much to make. You pull out exactly what you need.
Visual Impact — They look incredibly fancy and thematic, which makes you look like a hero host. The “fingernails” (almond slivers) and “blood” (strawberry jam or red glaze) are easy to do but look like you spent hours. Guests will ask for the recipe, and you’ll just smile and say, “Oh, it’s easy. I make them all the time.”
Make-Ahead Friendly — This is my favorite part. I can shape these on Saturday, freeze them, and bake them on Sunday night for a Monday party. Or bake them fresh on the day of. The flexibility is unmatched. It’s the perfect solution for anyone who wants to avoid the 5 PM dinner panic.
This is my go-to when I need a party appetizer that just works. No complicated techniques, no weird ingredients, just reliable, delicious food that makes everyone happy and keeps my schedule intact.
Ingredients You’ll Need
Here’s the best part: you probably have most of this already in your pantry and fridge. I’m particular about three ingredients here, and I’ll tell you exactly why. This recipe uses basic bread dough, which is super versatile. If you like my crispy baked pretzel bites, you’ll find the dough process very similar, just with a sweeter twist.
For the Dough
Warm water (1 cup / 240ml) — This needs to be warm, not hot. Think bathwater temperature. If it’s too hot, it kills the yeast. If it’s too cold, the yeast won’t activate. I use a thermometer to be precise, but if you don’t have one, test it on your wrist—it should feel warm but not hot.
Active dry yeast (2 teaspoons / 1 packet) — This is what makes the dough rise. Make sure it’s not expired. I keep a stash in the fridge because I’m always prepping. If your yeast is old, your breadsticks will be flat. Don’t risk it.
Granulated sugar (2 tablespoons) — Feeds the yeast and adds a little sweetness to the dough. Brown sugar works too, but white sugar keeps the color lighter, which is better for the “finger” look.
Salt (1 teaspoon) — Essential for flavor. Don’t skip it. The salt also controls the yeast rise, so it’s structural too.
All-purpose flour (2.5 to 3 cups / 300-360g) — I start with 2.5 cups and add more as needed. The exact amount depends on your humidity and how you measure. The dough should be soft and slightly tacky, but not sticky. If it sticks to your hands, add more flour. If it’s dry, add a splash of water.
Unsalted butter (2 tablespoons, melted) — Adds richness and tenderness. You can use olive oil, but butter tastes better. Melt it and let it cool slightly before adding.
For the Shaping and Decoration
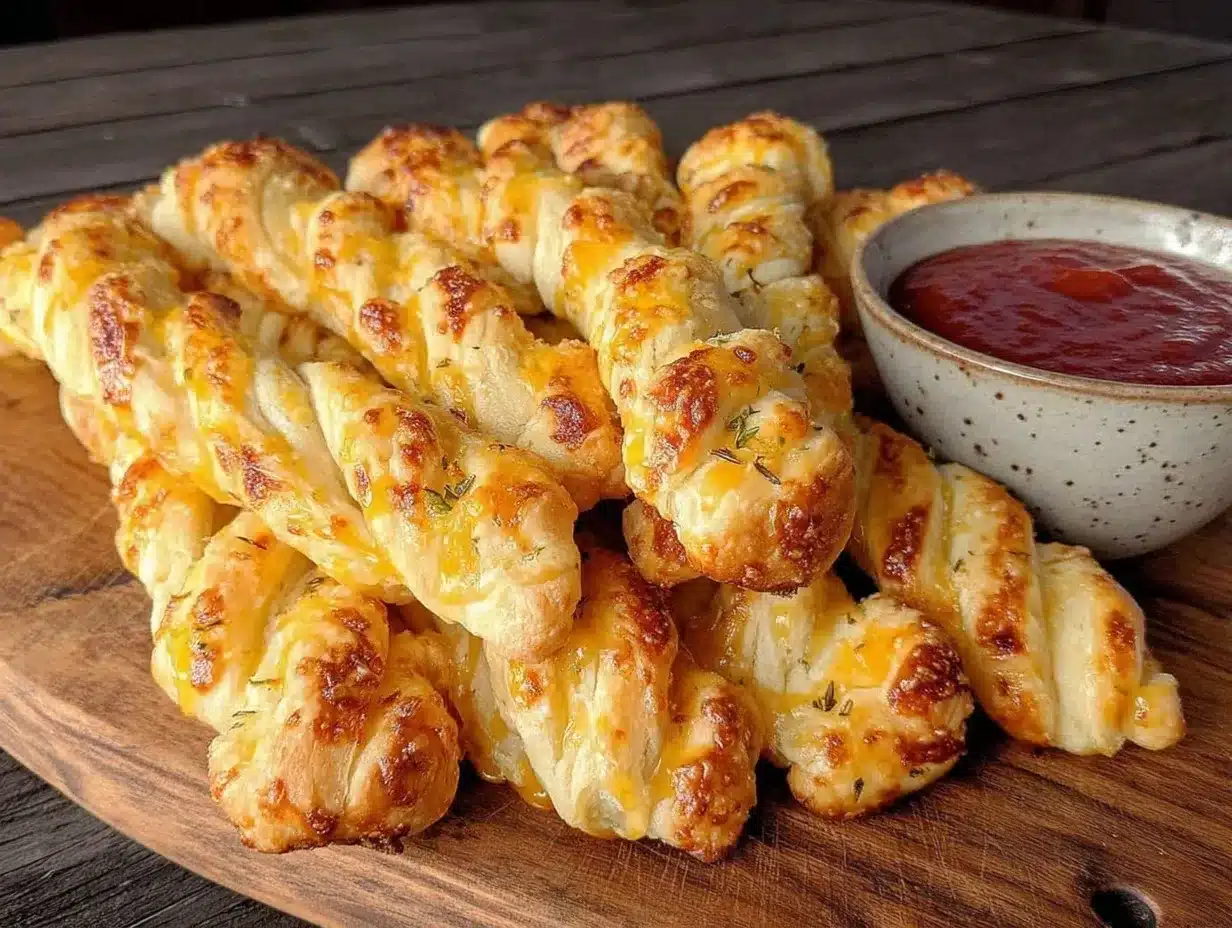
Egg wash (1 egg beaten with 1 tablespoon water) — This helps the dough brown nicely. I brush it on before baking. It gives that professional bakery shine.
Slivered almonds (for fingernails) — These are the creepy nails. Slivered almonds are perfect because they’re thin and look realistic. You can also use chocolate chips or red candy melts, but almonds look more like actual fingernails.
Strawberry jam or red glaze (for “blood”) — This is the optional but highly recommended part. Warm up some jam with a teaspoon of water until it’s runny. Brush it on the tips for a bloody effect. It’s gross and fun.
Everything bagel seasoning or sesame seeds (optional) — If you want a savory version, sprinkle these on before baking. But for the Halloween look, skip it.
Tip: I buy my almonds in bulk and keep them in the freezer. They stay fresh forever, and I always have them on hand for recipes like this.
Equipment Needed
You don’t need fancy equipment for this. Here’s what I actually use. I’m all about efficiency, so I stick to what works.
Bowl — A large mixing bowl for the dough. I use a 4-quart glass bowl because I can see through it to check the yeast activation.
Measuring cups and spoons — Standard stuff. Dollar store versions work fine. Just make sure they’re accurate.
Parchment paper — For lining the baking sheet. This is non-negotiable for easy cleanup. I use it for everything.
Baking sheets — Two standard 13×18 inch sheets. I can fit about 8-10 fingers per sheet. If you have smaller sheets, you’ll need more.
Freezer-safe bags — Quart-sized ziplock bags. I label these with a marker: “Witch Fingers – Freeze Date.” This is crucial for my meal-prep system.
Pastry brush — For the egg wash and jam. Silicone brushes are great because they’re easy to clean.
Knife — For slicing the almonds if they’re too big. Or just buy slivered almonds to save time.
Optional but nice: A kitchen scale. I weigh my flour to be precise. It takes the guesswork out of the dough consistency.
How to Make It: Step-by-Step
Alright, let’s make this! I’m walking you through exactly how I do it, including the little tricks I’ve picked up from years of meal prepping. This is designed to be done in one session, with the second half frozen for later.
Step 1: Activate the Yeast (5 minutes)
In a large bowl, combine the warm water and sugar. Sprinkle the yeast on top and stir gently. Let it sit for 5-10 minutes. You’ll see it foam up. If it doesn’t foam, your yeast is dead. Start over. This is the first checkpoint in my process. I don’t move on until I see bubbles.
Step 2: Make the Dough (5 minutes)
Add the melted butter and salt to the yeast mixture. Gradually add the flour, one cup at a time, stirring with a wooden spoon or dough hook. Once it gets too thick to stir, switch to your hands. Knead the dough on a lightly floured surface for 5-7 minutes. The dough should be smooth and elastic. It should pass the “windowpane test”—stretch a small piece thin; if it stretches without tearing, it’s ready. This takes practice, but once you get it, it’s easy.
Step 3: First Rise (1 hour)
Place the dough in a greased bowl, cover it with plastic wrap or a damp towel, and let it rise in a warm place for 1 hour, or until doubled in size. I usually put my bowl in a turned-off oven with the light on. The residual heat is perfect. While it rises, prep your baking sheets with parchment paper.
Step 4: Shape the Fingers (15 minutes)
Punch down the dough gently. Divide it into two equal portions. This is where you decide: bake half now, freeze half later. Take one portion and divide it into 8-10 equal pieces. Roll each piece into a long, tapered rope. One end should be thick (the knuckle), and the other end should be thin (the tip). This mimics a finger shape. It’s surprisingly fun to do. If you’re feeling creative, you can add a small indentation near the tip for the “joint” of the finger.
Step 5: Add the Details (5 minutes)
Press a slivered almond into the thin tip of each finger to create the fingernail. Gently press it in so it sticks. If you’re making the “bloody” version, you’ll do this after baking, but I prefer pressing the almond in raw so it bakes into the dough.
Step 6: Second Rise (20 minutes)
Place the shaped fingers on the parchment-lined baking sheets, leaving space between them. Cover loosely and let them rise for another 20 minutes. They should puff up slightly. This step is crucial for fluffy breadsticks. Don’t skip it.
Step 7: Bake (15-18 minutes)
Preheat your oven to 375°F (190°C). Brush the risen fingers with egg wash. Bake for 15-18 minutes, or until golden brown. They should sound hollow when tapped on the bottom. Remove from the oven and let cool on the pan for 5 minutes.
Step 8: The “Blood” Finish (Optional)
While the breadsticks cool, warm up the strawberry jam with a teaspoon of water in the microwave for 10 seconds. It should be runny. Use a pastry brush to dab a little “blood” onto the tip of each finger, around the almond. It’s messy and fun. This is the part that makes them spooky.
Step 9: Freeze for Later
If you baked half, enjoy them! If you have the other half shaped but unbaked (or baked and cooled), here’s how to freeze them. For unbaked dough: Place the shaped fingers on a baking sheet and flash freeze for 1 hour. Once solid, transfer them to a freezer bag. They can be baked straight from frozen (add 5 minutes to bake time). For baked breadsticks: Let them cool completely, then bag them. Reheat in the oven at 350°F for 5-10 minutes to crisp them up. This is how I prep for the whole month.
Expert Tips & Tricks
Here’s everything I’ve learned from making this dozens of times. These tips will save you from my mistakes and ensure your meal prep goes smoothly.
Label Everything
In my kitchen, unlabeled freezer bags are a crime. Write the date and contents on every bag. I use a permanent marker. It looks neat, and I know exactly what I’m grabbing when I’m hungry at 2 AM.
Don’t Overwork the Dough
When kneading, stop as soon as it’s smooth. Over-kneading can make the breadsticks tough. You want them soft and fluffy, like dinner rolls, not chewy like bagels.
Flash Freezing is Key
If you freeze the unbaked dough on the sheet first, they won’t stick together in the bag. This is a pro tip for anyone who preps in bulk. It keeps the shape intact.
Egg Wash Matters
Don’t skip the egg wash. It gives that golden, bakery-style color. If you’re vegan, use oat milk or almond milk for the wash. It still browns nicely.
Jam Consistency
If the jam is too thick, it won’t brush on smoothly. Warm it up and thin it with water. You want it to look like blood, not glue. A little goes a long way.
Bake from Frozen
If you freeze the unbaked dough, you don’t need to thaw it. Just put it in the oven and add a few minutes. It saves time and keeps the dough fresh.
Variations & Substitutions
Once you’ve nailed the basic version, here’s how you can mix it up. I’ve tried all of these, and they work great for different tastes.
Savory Garlic Version
Skip the sugar in the dough. Add minced garlic and dried parsley to the dough. After baking, brush with melted garlic butter and sprinkle with parmesan. This is perfect for game day, similar to my loaded nacho cheese fries vibe but in breadstick form.
Cinnamon Sugar Version
After baking, brush with melted butter and roll in cinnamon sugar. This is a sweet treat, great for breakfast or dessert. If you like my chewy brown sugar snickerdoodles, you’ll love this combo.
Chocolate Chip Version
Add chocolate chips to the dough before shaping. It’s like a sweet breadstick. Great for kids’ parties.
Gluten-Free
Use a 1:1 gluten-free flour blend. The texture will be slightly different, but it still works. I’ve used Bob’s Red Mill, and it holds up well.
Dairy-Free
Use olive oil instead of butter in the dough, and use water or plant milk for the egg wash. The jam should be checked for gelatin (most are vegan, but some aren’t).
Serving & Storage
How to Serve:
Serve these warm, straight from the oven. They’re best enjoyed with a dipping sauce. I like marinara for the savory version, or chocolate syrup for the sweet version. For the Halloween theme, serve with a side of ranch or blue cheese dressing for the “blood” effect.
Side Dishes:
Pair these with a simple salad or soup. They’re great with my creamy roasted butternut squash soup for a cozy fall meal.
Refrigerator:
Store baked breadsticks in an airtight container for up to 3 days. They’ll soften, so reheat them to crisp up.
Reheating:
Best method: Oven at 350°F for 5-10 minutes. This restores the crispiness. Microwave works in a pinch, but they’ll get chewy.
Freezing:
This is where the magic happens. Freeze unbaked dough for up to 3 months. Freeze baked breadsticks for up to 1 month. I usually make a double batch and freeze half immediately. It’s the ultimate “make it once, eat it four times” strategy.
Pro tip: If you’re prepping for a party, freeze the unbaked dough 2 days before. On the day of, take them out, let them rise, and bake. Fresh out of the oven, every time.
Nutrition Information
I’m not a nutritionist, but here’s the breakdown if you’re tracking. Keep in mind that these are appetizers, so portion control is key.
Per Serving (2 breadsticks):
– Calories: 180
– Protein: 5g
– Carbs: 30g
– Fiber: 1g
– Sugar: 4g
– Fat: 4g
– Saturated Fat: 1g
– Cholesterol: 15mg
– Sodium: 250mg
What’s Good:
– Low in fat
– Good source of carbohydrates for energy
– Can be made savory to reduce sugar
What to Know:
– Contains gluten and dairy (unless modified)
– Sodium can be high if you use salted butter
My Take:
Look, these are fun party food. They’re not a health food. But they’re better than store-bought frozen breadsticks because you control the ingredients. When I make them, I use whole wheat flour sometimes to add fiber. But usually? I just enjoy them as a treat.
Final Thoughts
So that’s my go-to Halloween Witch Finger Breadsticks! I’ve probably talked your ear off at this point, but when you make a recipe this often, you have a lot to say about it. This has saved my sanity more times than I can count. It’s my answer to “what’s for the party?” when I’m tired, don’t want to shop, and still want something that looks impressive. My friends are happy, my kids are happy, and I’m happy because I’m not stressed about cooking.
Make it yours! Try different toppings, swap in your favorite jams, or adjust the dough. The best recipes are the ones you adapt to your lifestyle. If you make this, drop a comment and let me know what you think! I love hearing how recipes turn out in your kitchen. And if something doesn’t work, tell me that too—I’m here to help troubleshoot.
Happy cooking! And I hope your kitchen smells half as good as mine does right now.
Frequently Asked Questions
Can I use instant yeast instead of active dry?
Yes, you can. Instant yeast doesn’t need to be activated in water first. Just mix it directly with the flour. The result is the same, but the timing might be slightly faster. I always keep active dry on hand because I like seeing the foam, but instant is fine.
Why did my breadsticks turn out flat?
Usually means your yeast was dead or the water was too hot/cold. Check your yeast expiration date. Also, make sure you let the dough rise long enough. If it didn’t double in size, it won’t rise in the oven. Patience is key.
Can I make these ahead for a dinner party?
Absolutely. This is the best part. Shape them, flash freeze, and store in bags. On the day of the party, take them out, let them rise, and bake. They’ll be fresh and warm. I do this all the time. It’s the ultimate meal-prep win.
Can I freeze the baked breadsticks?
You can, but they’re best baked fresh. If you freeze baked breadsticks, they’ll lose some crispiness. Reheat them in the oven to restore texture. But for the best results, freeze the unbaked dough.
Can I use almond slivers for other things?
Yes! They’re great in salads, baked goods, or as a garnish. I keep a bag in my pantry for random recipes. They add a nice crunch and look fancy.
How do I reheat leftovers without them getting stale?
Wrap them in foil and heat in the oven at 350°F for 5-10 minutes. This keeps them moist. If you microwave them, they’ll get chewy. Oven is best.
Can I double this recipe?
Yes! Double everything and use two bowls if needed. The cooking times stay the same. I do this when I’m meal-prepping for the whole week. Just make sure your baking sheets are big enough.
Pin This Recipe!
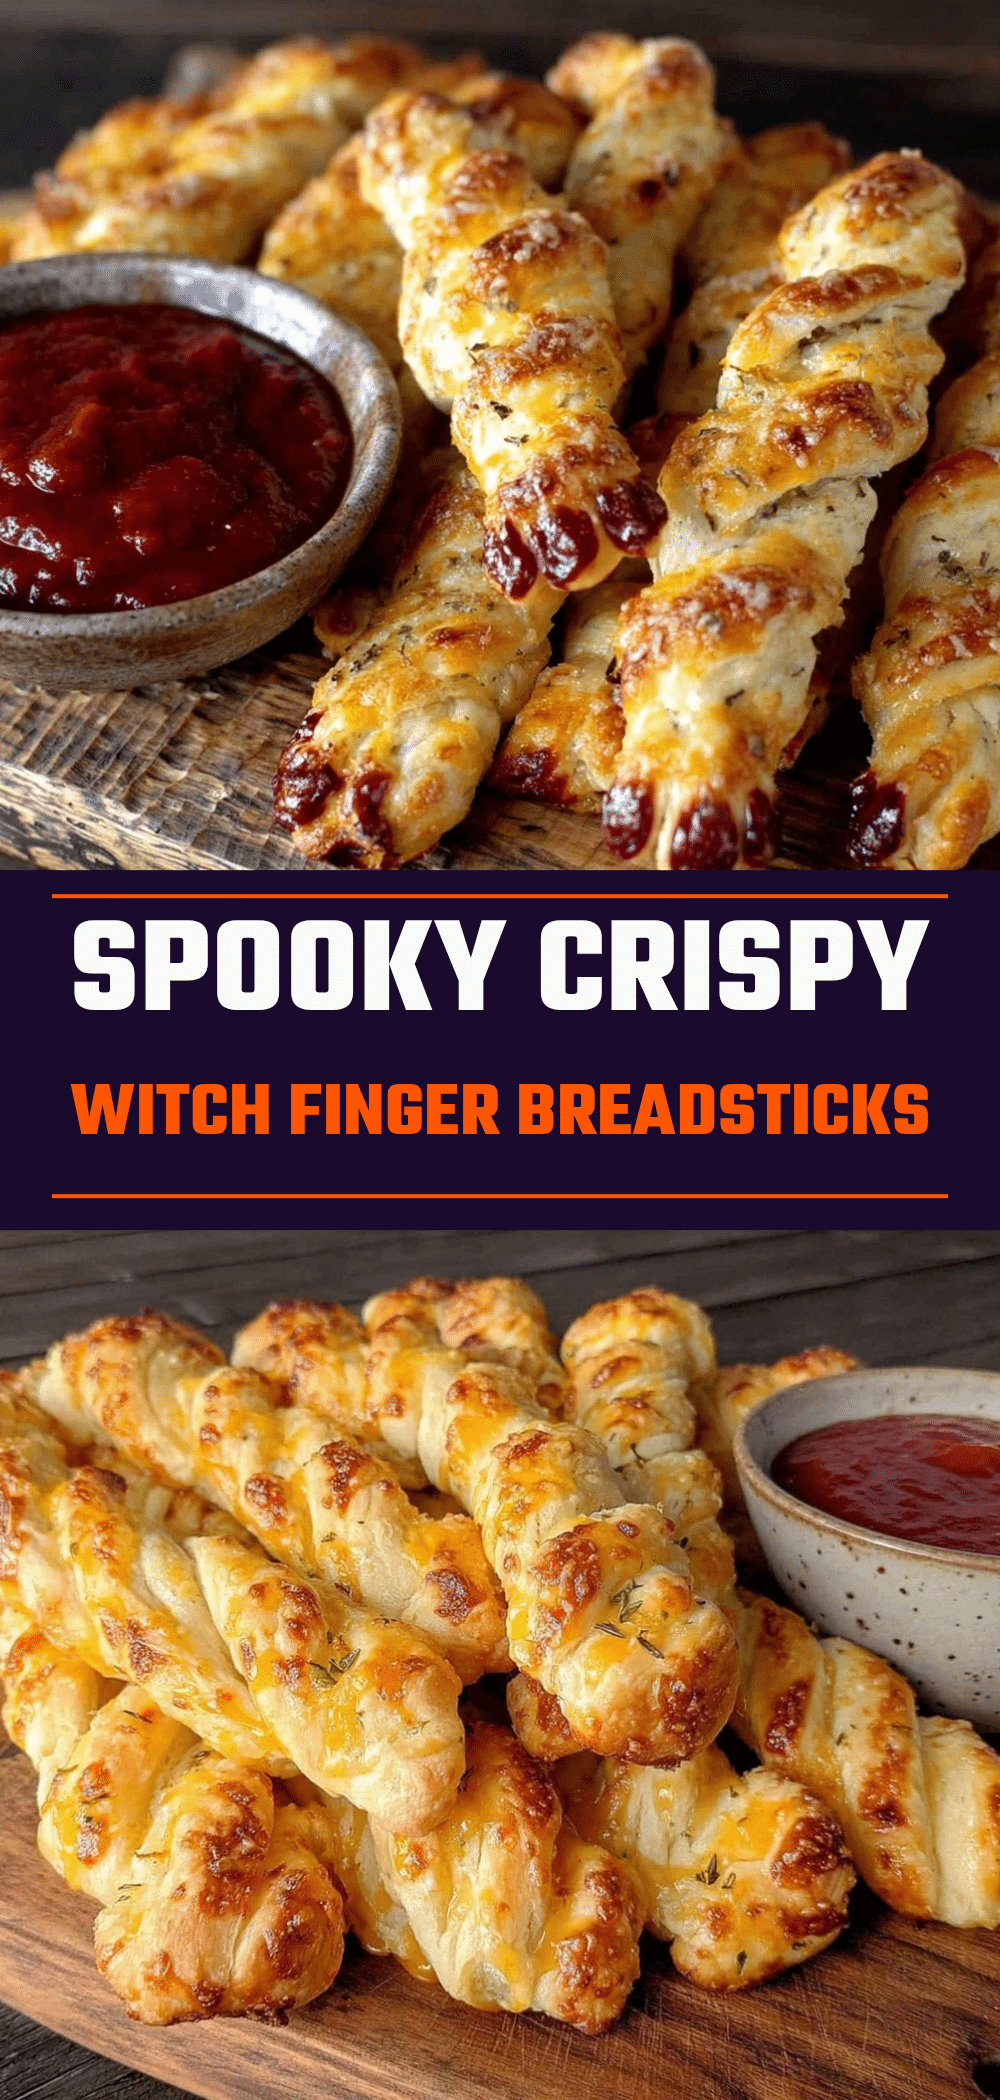
Halloween Witch Finger Breadsticks: Freeze 4 Portions
- Total Time: 45 minutes
- Yield: 8-10 breadsticks 1x
Description
These spooky and delicious Halloween Witch Finger Breadsticks are designed for strategic meal prepping. Shape the dough, freeze portions for later, and bake fresh whenever you need a quick, impressive, and thematic snack or appetizer.
Ingredients
- 1 cup warm water
- 2 teaspoons active dry yeast
- 2 tablespoons granulated sugar
- 1 teaspoon salt
- 2.5 to 3 cups all-purpose flour
- 2 tablespoons unsalted butter, melted
- 1 egg beaten with 1 tablespoon water (for egg wash)
- Slivered almonds (for fingernails)
- Strawberry jam or red glaze (for ‘blood’)
- Everything bagel seasoning or sesame seeds (optional, for savory version)
Instructions
- In a large bowl, combine warm water and sugar. Sprinkle yeast on top and stir gently. Let sit for 5-10 minutes until foamy.
- Add melted butter and salt to the yeast mixture. Gradually add flour, one cup at a time, stirring until too thick for a spoon. Knead on a floured surface for 5-7 minutes until smooth and elastic.
- Place dough in a greased bowl, cover, and let rise in a warm place for 1 hour or until doubled in size.
- Punch down dough and divide into two equal portions. Divide one portion into 8-10 equal pieces. Roll each piece into a long, tapered rope resembling a finger.
- Press a slivered almond into the thin tip of each finger to create a fingernail.
- Place shaped fingers on parchment-lined baking sheets. Cover loosely and let rise for another 20 minutes.
- Preheat oven to 375°F (190°C). Brush risen fingers with egg wash.
- Bake for 15-18 minutes or until golden brown. Let cool on the pan for 5 minutes.
- Optional: Warm strawberry jam with a teaspoon of water. Brush onto the tips of the cooled breadsticks for a ‘bloody’ effect.
- To freeze unbaked dough: Flash freeze shaped fingers on a baking sheet for 1 hour, then transfer to freezer bags. Bake from frozen, adding 5 minutes to bake time.
Notes
Ensure water is warm but not hot to avoid killing the yeast. For best results, flash freeze unbaked dough to prevent sticking. Can be made savory by skipping sugar and adding garlic/parsley, or sweet with cinnamon sugar. Gluten-free and dairy-free adaptations are possible.
- Prep Time: 20 minutes
- Cook Time: 15-18 minutes
- Category: Appetizer
- Cuisine: American
Nutrition
- Serving Size: 2 breadsticks
- Calories: 180
- Sugar: 4
- Sodium: 250
- Fat: 4
- Saturated Fat: 1
- Carbohydrates: 30
- Fiber: 1
- Protein: 5
Keywords: Halloween, breadsticks, witch fingers, meal prep, freeze ahead, party food, spooky snacks, make ahead


