
There is a specific kind of chaos that happens in a kitchen when three kids, a bag of powdered sugar, and a piping bag collide. It’s messy. It’s loud. And honestly? It’s the best part of the holiday season.
Last week, I found myself staring at an empty box of store-bought cookie dough, feeling that familiar pang of guilt. I didn’t want to buy pre-made dough. I wanted the magic. I wanted the flour dusting on the counter, the giggles when the frosting turned purple (oops, too much gel color), and the pride on my six-year-old’s face when he successfully piped a spider web that didn’t look like a plate of spaghetti.
That was the moment I decided we were making Halloween sugar cookies with black cocoa royal icing from scratch. I knew it was a lot of work. I knew it would take all afternoon. But I also knew that these aren’t just cookies; they are a memory-maker. And after testing this recipe about a dozen times (yes, we ate a lot of trial cookies), I’ve perfected a method that’s sturdy enough for little hands, safe for kids to help with, and delicious enough to make you want to make them every October.
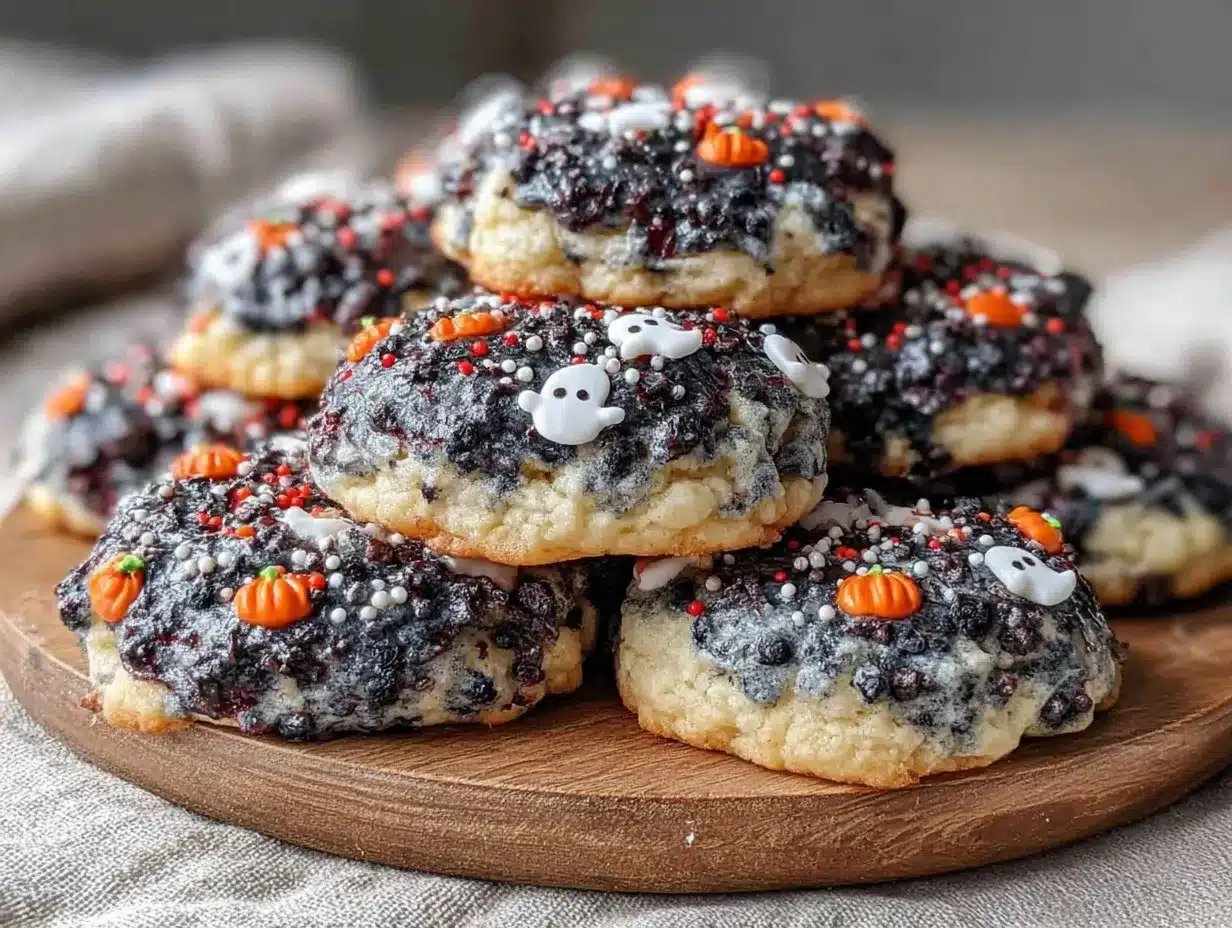
This Halloween sugar cookies with black cocoa royal icing you’ll make on repeat isn’t about perfection. It’s about getting your hands messy, laughing at the lopsided ghosts, and creating a treat that tastes like homemade magic. Plus, the black cocoa gives it that spooky, dramatic dark look that screams Halloween without needing a trip to a specialty store.
Why You’ll Love This Kid-Friendly Baking Project
Look, I get it. Baking with kids usually ends up looking like a crime scene. But this recipe is designed specifically for that reality. It’s forgiving. It’s fun. And the result? Stunning cookies that look like they came from a high-end bakery but taste like grandma’s kitchen.
Here’s why this Halloween sugar cookies with black cocoa royal icing you’ll make on repeat is going to become your autumn tradition:
- Kids Can Actually Help (Safely) — The dough is soft but not sticky. Kids can roll it out, use cutters, and even help mix the icing. No hot ovens or sharp knives required for the main steps. It’s safe, messy fun.
- The Black Cocoa Factor — Regular cocoa powder gives you brown cookies. Black cocoa? That’s deep, dark, almost black. It looks incredibly professional and spooky. It’s the secret weapon that makes these cookies stand out on any treat table.
- Sturdy Icing for Decorations — Royal icing is perfect for kids because it dries hard. They can pipe designs, add sprinkles, or even attach small candy pieces (like chocolate chips for eyes) without the frosting sliding off. It’s edible art.
- Make-Ahead Friendly — You can bake the cookies a week before Halloween. The icing dries completely in a day. This means you’re not stressed on October 31st, scrambling to finish decorations while the neighborhood kids ring your doorbell.
- It’s a Shared Activity — This isn’t a “feed them dinner” recipe. It’s a “sit together, listen to spooky music, and create something” experience. It’s quality time that tastes like sugar and cocoa.
Forget those chewy brown sugar snickerdoodles for a moment. While those are great for a quick snack, this project is about the *process*. It’s about the afternoon spent together, creating something beautiful. And trust me, the cleanup is worth every minute.
Ingredients You’ll Need
Before we start, let’s talk about what goes into these Halloween sugar cookies with black cocoa royal icing you’ll make on repeat. I’ve broken it down into the cookie dough and the icing, because you’ll make them separately. Don’t worry—most of this is pantry staples.
For the Spooky Dough
Unsalted butter (1 cup / 225g, softened) — This needs to be softened but still cool. If it’s melting, it’s too soft. Cold butter makes the cookies spread too much. I usually leave mine on the counter for an hour before starting.
Granulated sugar (1 ½ cups / 300g) — Regular white sugar. Don’t substitute with brown sugar here; we want that crisp edge and sweet flavor. The sugar also helps create that slight crunch on the outside.
Egg (1 large) — Room temperature is best. It helps the dough bind together smoothly. If you’re in a rush, pop it in warm water for 5 minutes.
Vanilla extract (2 teaspoons) — Use real vanilla. I know it’s expensive, but in a sugar cookie with no chocolate to mask it, the vanilla flavor is everything. I use pure extract, not imitation.
All-purpose flour (3 cups / 375g) — The backbone. Spoon it into your measuring cup and level it off. Don’t scoop directly from the bag, or you’ll pack it down and get dry cookies. If you’re using gluten-free almond flour for other recipes, stick to AP flour here for the right texture.
Black cocoa powder (¼ cup / 25g) — This is the star. Dutch-processed black cocoa (like Ghirardelli or Droste) has a deep, dark color and a mild chocolate flavor. It’s not as bitter as regular cocoa. If you can’t find it, you can mix 2 tablespoons regular cocoa with 2 tablespoons flour, but the color won’t be as dramatic.
Baking powder (1 teaspoon) — Helps the cookies puff up slightly so they aren’t too hard.
Salt (½ teaspoon) — Enhances the chocolate flavor. Don’t skip it.
For the Royal Icing
Confectioners’ sugar (3 cups / 360g, sifted) — Sifting is non-negotiable. You want smooth icing, not lumpy. If you don’t sift, you’ll have little white specks in your black icing that ruin the spooky look.
Meringue powder (3 tablespoons) — This is the key to safe, kid-friendly royal icing. It uses pasteurized egg whites, so there’s no risk of salmonella. You *can* use raw egg whites, but I’m a paranoid parent, and meringue powder is safer for little hands to lick off the spoon.
Warm water (4-5 tablespoons) — Adjust for consistency. You want it thick but pipeable.
Black gel food coloring (1-2 teaspoons) — Gel coloring is essential. Liquid coloring will make the icing too runny. Use a black gel like Wilton or Americolor. It’s potent, so start with a little and add more.
Optional: White icing — You’ll need a small batch of white royal icing for details like spider eyes or ghost faces. Just use the base recipe without the black coloring.
Equipment Needed
You don’t need fancy gadgets for this. Here’s what I actually use when my kids are helping:
Stand mixer or hand mixer — For creaming the butter and sugar. My stand mixer makes it easier, but a hand mixer works fine. If you’re doing it by hand, bring your arm muscles.
Rolling pin — A standard wooden one is fine. I like one with handles so my kids can grip it safely without their fingers getting too close to the counter.
Halloween cookie cutters — Ghosts, pumpkins, bats, spiders. Get a variety of sizes. I buy plastic ones because they’re cheaper and easier for kids to handle than metal. They don’t cut as sharply, but that’s safer for little hands.
Piping bags and tips — I use disposable piping bags with a round tip (like a #2 or #3). Kids can practice squeezing without the mess of a reusable bag. For intricate designs, I use a star tip.
Baking sheets — Two large sheets. I line them with parchment paper. No need for silicone mats here; parchment is easier for kids to peel cookies off of once they cool.
Cooling racks — Essential. You need the cookies completely cool before icing. If they’re warm, the icing will melt and slide off. I use a wire rack, but a clean counter works if you’re short on space.
How to Make It: Step-by-Step
Alright, let’s get baking! I’m walking you through exactly how I do it, including the little tricks that keep my kids engaged and the dough from sticking.
Step 1: Cream the Butter and Sugar (5 minutes)
In a large bowl, beat the softened butter and granulated sugar together until it’s light and fluffy. This takes about 2-3 minutes with a mixer. If you’re doing it by hand, it’ll take 5 minutes of arm workout. This step incorporates air, which helps the cookies rise. Tell your kids to watch for the color change—it goes from dense to pale yellow.
Step 2: Add Wet Ingredients (2 minutes)
Add the egg and vanilla extract. Beat until combined. The mixture might look slightly curdled at first; that’s normal. Just keep beating for another minute until it’s smooth.
Step 3: Mix in Dry Ingredients (3 minutes)
In a separate bowl, whisk together the flour, black cocoa powder, baking powder, and salt. Gradually add this to the wet mixture, mixing on low speed. Stop as soon as the flour disappears. Overmixing makes tough cookies. The dough will look dark and rich. If it’s too dry, add a teaspoon of milk. If it’s too sticky, add a tablespoon of flour.
Step 4: Chill the Dough (1 hour)
This is the hardest part for kids. The dough needs to be cold to hold its shape. Divide the dough in half, flatten into disks, wrap in plastic, and refrigerate for at least 1 hour (or freeze for 30 minutes). While it chills, your kids can wash their hands and get ready for the fun part.
Step 5: Roll and Cut (15 minutes)
Preheat your oven to 350°F (175°C). On a lightly floured surface, roll out one disk of dough to about ¼-inch thickness. Use cookie cutters to cut shapes. If the dough sticks, sprinkle a little more flour. Place cutouts on parchment-lined baking sheets, leaving an inch between them. Re-roll the scraps and cut again. This is a great time for kids to be creative—mix and match cutters, or make “mistakes” that turn into unique shapes.
Step 6: Bake (10-12 minutes)
Bake one sheet at a time for 10-12 minutes. The cookies are done when the edges are just barely set but still soft. They will firm up as they cool. Do not overbake! You want them tender, not crunchy. Let them cool on the baking sheet for 5 minutes, then transfer to a wire rack to cool completely.
Step 7: Make the Royal Icing (10 minutes)
In a clean, dry bowl, whisk the meringue powder and 3 tablespoons of warm water until foamy. Add the sifted confectioners’ sugar gradually, mixing on low speed. Once combined, beat on high for 3-5 minutes until stiff peaks form. The icing should be thick and glossy. If it’s too thick, add water, one teaspoon at a time. If too thin, add more sugar.
Step 8: Color the Icing
Divide the icing into two bowls. Add black gel food coloring to one bowl and mix until uniformly dark. For the white icing, leave it plain. Cover both bowls with damp towels to prevent drying out.
Step 9: Decorate (30+ minutes)
Transfer the black icing to a piping bag. Let your kids pipe designs onto the completely cool cookies. They can make spider webs, bat wings, or simple faces. For the white icing, use a smaller tip for details like eyes or highlights. Let the icing dry completely for 4-6 hours (or overnight) before storing.
Expert Tips & Tricks
Here’s everything I’ve learned from making these Halloween sugar cookies with black cocoa royal icing you’ll make on repeat. These tips will save you from my mistakes.
Keep the Dough Cold — If the dough gets too warm while rolling, pop it back in the fridge for 10 minutes. Warm dough spreads and loses its shape. Cold dough holds the cut-out edges perfectly.
Sift Your Sugar — I cannot stress this enough. Lumpy icing is the enemy of good decorations. Sift the confectioners’ sugar before mixing. It makes the icing silky and smooth.
Use Gel Coloring — Liquid food coloring adds water, which ruins the icing consistency. Gel coloring is concentrated and keeps the icing thick. It’s worth the extra cost.
Let Them Dry Completely — Royal icing needs time to harden. If you stack them before they’re dry, they’ll stick together. I usually decorate the night before Halloween so they’re ready to go.
Storage is Key — Store cookies in an airtight container at room temperature. They’ll keep for up to 2 weeks. If you’re freezing them, freeze the baked cookies first, then add the icing later. Thaw before decorating.
Variations & Substitutions
Once you’ve nailed the basic version, here’s how you can mix it up. I’ve tried all of these.
Orange Icing — Swap the black coloring for orange gel. Great for pumpkins. You can pipe orange icing and add green stems with a toothpick.
Green Icing — Perfect for monsters or slime. Add a few drops of yellow to make it brighter.
Glitter Dust — After the icing is dry, dust with edible gold or silver glitter. It adds a spooky shimmer. Use a dry brush to apply it.
Candy Toppings — While the icing is still wet, press in candy eyes, mini chocolate chips, or sprinkles. Kids love this tactile step.
Dairy-Free Option — The dough is naturally dairy-free if you use a dairy-free butter alternative. The meringue powder icing is also dairy-free. Check your cocoa powder label to ensure it’s vegan.
Serving & Storage
These Halloween sugar cookies with black cocoa royal icing you’ll make on repeat are perfect for Halloween parties, school treats, or just a cozy afternoon with the family.
How to Serve: Arrange them on a platter with other treats. They look great stacked or laid out flat. If you’re giving them as gifts, tie them with a black ribbon and add a tag.
Storage: Keep in an airtight container at room temperature for up to 2 weeks. Do not refrigerate, as the humidity can make the icing sticky. If you’re traveling with them, pack them in a single layer with parchment paper between layers.
Freezing: Freeze the baked cookies (without icing) for up to 3 months. Thaw at room temperature before decorating. Do not freeze decorated cookies, as the icing may crack or become sticky.
Pro Tip: If the icing dries out in the bag, add a drop of water and knead the bag to soften it. It works like a charm.
Nutrition Information
I’m not a nutritionist, but here’s the breakdown if you’re tracking. Keep in mind that these are treats, so enjoy them in moderation.
Per Cookie (approx. 2-inch size):
- Calories: 120
- Protein: 1g
- Carbs: 18g
- Fat: 5g
- Sugar: 12g
- Sodium: 30mg
What’s Good: They’re a fun treat that kids can help make, which often leads to better eating habits. The black cocoa has antioxidants, though the amount is small.
What to Know: High in sugar and carbs. If you’re watching sugar intake, consider making smaller cookies or using a sugar substitute in the dough (though it may affect texture).
Final Thoughts
So that’s my go-to Halloween sugar cookies with black cocoa royal icing you’ll make on repeat! I’ve probably talked your ear off at this point, but when you make a recipe this often, you have a lot to say about it.
This project has saved my sanity during the holidays. It’s my answer to “what do we do for Halloween?” when I want something meaningful but not overwhelming. My kids are happy, I’m happy because I’m not stressed about buying store-bought treats, and we have a beautiful memory to show for it.
Make it yours! Try different colors, different cutters, or even different flavors in the dough. The best recipes are the ones you adapt to your family’s tastes. And remember, the cookies don’t have to be perfect. The lopsided ghost with the wonky smile is often the favorite.
If you make this, drop a comment and let me know what you think! I love hearing how recipes turn out in your kitchen. And if something doesn’t work, tell me that too—I’m here to help troubleshoot.
Happy baking! And I hope your kitchen smells half as good as mine does right now.
Frequently Asked Questions
Can I use regular cocoa powder instead of black cocoa?
You can, but the cookies won’t be as dark. Regular cocoa gives a brown color. If you want the spooky black look, black cocoa is essential. You can mix 2 tablespoons regular cocoa with 2 tablespoons flour for a darker brown, but it won’t be jet black.
Why did my royal icing crack?
Cracking usually happens if the icing is too thick or if the cookies moved while drying. Make sure your icing is smooth and pipeable. Also, don’t touch the cookies while the icing is drying. Give it 4-6 hours to set completely.
Can I make the dough ahead?
Yes! The dough can be refrigerated for up to 3 days or frozen for up to 3 months. Thaw in the fridge overnight before rolling. This is great for planning ahead.
How do I fix runny royal icing?
If the icing is too thin, add more sifted confectioners’ sugar, one tablespoon at a time, until it reaches the right consistency. If it’s too thick, add water, one teaspoon at a time.
Can I use raw egg whites for royal icing?
Technically yes, but I don’t recommend it for kids. Meringue powder is pasteurized and safe for raw consumption. Raw egg whites carry a risk of salmonella. For peace of mind, stick with meringue powder.
How do I store the decorated cookies?
Store them in an airtight container at room temperature. Do not refrigerate. They will keep for up to 2 weeks. If stacking, use parchment paper between layers to prevent sticking.
Can I freeze the cookies with icing?
I don’t recommend it. The icing can become sticky or crack when thawed. Freeze the baked cookies first, then decorate them fresh. This ensures the best texture and appearance.
Pin This Recipe!


Halloween Sugar Cookies with Black Cocoa Royal Icing
- Total Time: 1 hour 30 minutes
- Yield: Approximately 24 cookies 1x
Description
A kid-friendly Halloween baking project featuring spooky black cocoa sugar cookies and sturdy royal icing that is safe for children to help decorate.
Ingredients
- 1 cup (225g) unsalted butter, softened
- 1 ½ cups (300g) granulated sugar
- 1 large egg, room temperature
- 2 teaspoons vanilla extract
- 3 cups (375g) all-purpose flour
- ¼ cup (25g) black cocoa powder
- 1 teaspoon baking powder
- ½ teaspoon salt
- 3 cups (360g) confectioners’ sugar, sifted
- 3 tablespoons meringue powder
- 4–5 tablespoons warm water
- 1–2 teaspoons black gel food coloring
- Optional: White icing for details
Instructions
- Cream the softened butter and granulated sugar together in a large bowl until light and fluffy (2-3 minutes with mixer).
- Add the egg and vanilla extract, beating until combined and smooth.
- Whisk together flour, black cocoa powder, baking powder, and salt in a separate bowl.
- Gradually add dry ingredients to the wet mixture on low speed, mixing just until flour disappears.
- Divide dough in half, flatten into disks, wrap in plastic, and refrigerate for at least 1 hour.
- Preheat oven to 350°F (175°C). Roll dough to ¼-inch thickness on a floured surface.
- Cut shapes with cookie cutters and place on parchment-lined baking sheets.
- Bake for 10-12 minutes until edges are barely set. Cool on sheet for 5 minutes, then transfer to wire rack to cool completely.
- Whisk meringue powder and 3 tablespoons warm water until foamy.
- Gradually add sifted confectioners’ sugar, mixing on low then high for 3-5 minutes until stiff peaks form.
- Divide icing; add black gel food coloring to one portion. Cover bowls with damp towels.
- Pipe designs onto completely cool cookies using piping bags.
- Let icing dry completely for 4-6 hours or overnight before storing.
Notes
Ensure dough is cold before rolling to prevent spreading. Sift confectioners’ sugar for smooth icing. Use gel food coloring, not liquid, to maintain consistency. Do not refrigerate decorated cookies as humidity makes icing sticky. Store in airtight container at room temperature for up to 2 weeks.
- Prep Time: 1 hour 15 minutes
- Cook Time: 10-12 minutes
- Category: Dessert
- Cuisine: American
Nutrition
- Serving Size: 1 cookie (approx. 2-
- Calories: 120
- Sugar: 12
- Sodium: 30
- Fat: 5
- Saturated Fat: 3
- Carbohydrates: 18
- Fiber: 1
- Protein: 1
Keywords: Halloween cookies, sugar cookies, black cocoa, royal icing, kid-friendly baking, Halloween treats, spooky cookies


