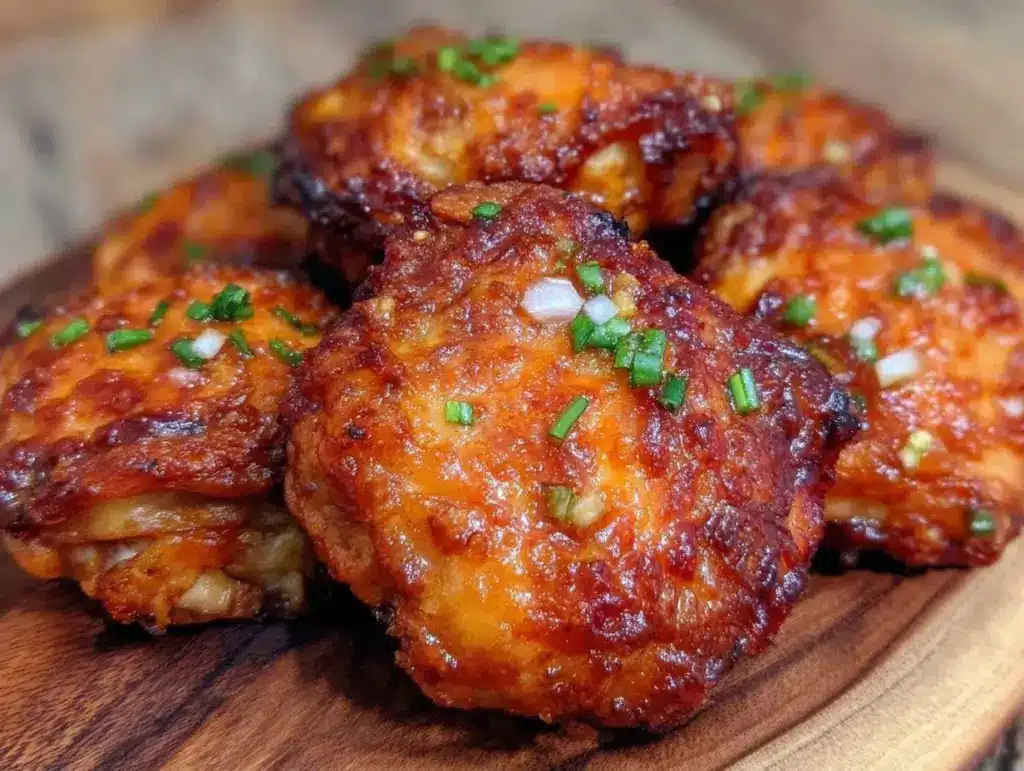
It’s 5:00 PM. The sun is starting to dip, my inbox is blowing up, and I’m staring into the fridge like it owes me money. There’s a half-empty jar of pickles, some sad-looking spinach, and a package of chicken thighs I bought three days ago and totally forgot about. This is the moment where most people cave and order takeout. But not today. Because today, I remembered this crispy honey garlic chicken thighs recipe that saves my sanity on a weekly basis.
I’ve tested this version of crispy honey garlic chicken thighs more times than I care to admit. Like, maybe 30 times? Somewhere between 2019 and now, I stopped trying to make complicated dinners that looked good on Instagram but tasted like cardboard. I started looking for one thing: dinner on the table in 30 minutes that actually makes my family ask for seconds. This recipe hits that sweet spot. It’s sweet, it’s savory, it’s got that addictive crispy skin, and it requires almost zero prep work.
Here’s the thing about chicken thighs. People always talk about chicken breasts like they’re the gold standard, but thighs? Thighs are the real MVP. They stay juicy even if you overcook them slightly. They crisp up better. And when you toss them in this sticky honey garlic sauce? It’s a game-changer. I’ve made this for dinner parties, for lazy Tuesdays, and even for my mom when she visited. Everyone loves it. If you’re tired of dry, boring weeknight meals, you need to stop scrolling and start cooking.
Why You’ll Love This Honey Garlic Chicken
There are about a dozen reasons I keep coming back to this recipe, but let’s be real—you probably just want to know why it’s worth the 30 minutes you’ll spend in the kitchen. Here’s the truth:
It’s Actually Crispy — I know, I know. “Crispy chicken” usually means breading that falls off or a deep fryer mess. Not here. We use a light dusting of cornstarch. That’s the secret. It creates this incredible, shatteringly crisp exterior that holds up to the sauce without getting soggy. I’ve tried flour, rice flour, and breadcrumbs. Cornstarch is the only way to go for that restaurant-quality crunch.
Sauce in Under 5 Minutes — The sauce comes together in a single bowl while the chicken cooks. Honey, soy sauce, garlic, ginger, a little vinegar, and a touch of chili flakes. You whisk it once, pour it over the chicken, and boom—sticky, glossy perfection. It’s basically impossible to mess up.
One Pan Cleanup — This is huge for me. I cook after work. I do not have the energy to wash a dozen pots and pans. This recipe uses one large skillet. You cook the chicken, you make the sauce in the same pan (or a small bowl), you toss it all together. One pan. That’s it. My husband thinks I’m a genius when I say, “Dinner is done, and I only washed one plate.”
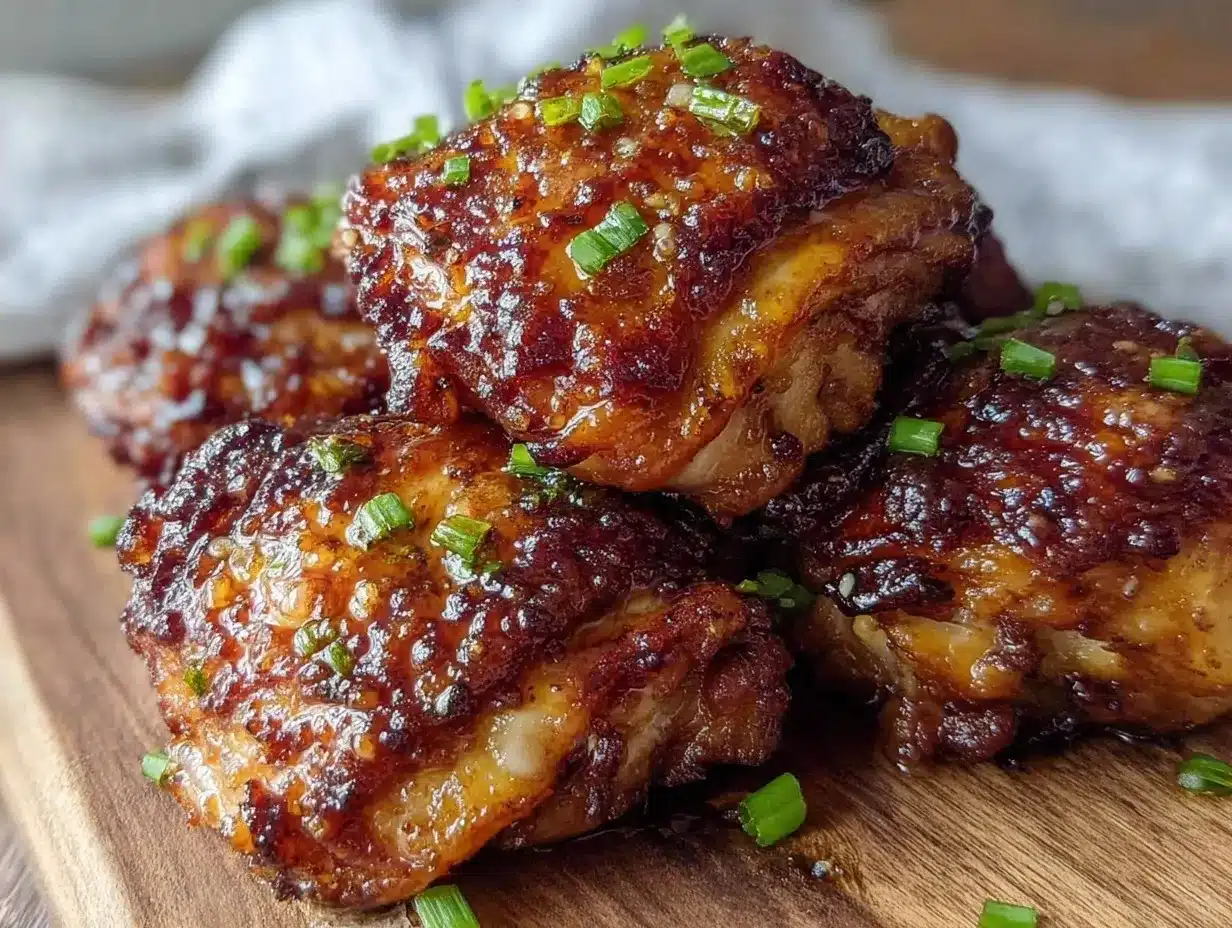
It Feels Fancy But Isn’t — When this hits the table, it looks like something you’d order from a high-end Asian fusion spot. The glaze is glossy, the chicken is golden, and the aroma fills the whole house. But the ingredients? They’re from the standard grocery store aisle. No trip to a specialty market needed.
Perfect for Meal Prep — Honestly, this tastes even better the next day. The chicken soaks up the sauce and gets even stickier. I often make a double batch on Sunday so I have lunch sorted for three days. It reheats beautifully in the microwave without drying out.
This is my go-to when I need dinner to just work. No fancy techniques, no weird ingredients, just reliable, delicious food that makes everyone happy.
Ingredients You’ll Need
Here’s the best part: you probably have most of this already. I’m not asking you to buy five different types of exotic sauce. This is pantry-friendly cooking.
Chicken Thighs (2 pounds / 900g) — Boneless, skin-on thighs are best here. The skin renders down and keeps the meat moist. If you can only find boneless, skinless, that works too, but you’ll need to reduce the cook time by a minute or two. I buy them in the bulk pack from Costco—it’s way cheaper per pound.
Cornstarch (3 tablespoons) — This is the magic dust. It draws out moisture and creates that crispy crust. Don’t use flour. Flour gets doughy. Cornstarch gets crunchy.
Neutral Oil (2 tablespoons) — I use avocado oil or vegetable oil. Olive oil has a lower smoke point and might burn when we’re searing the chicken at high heat. Keep it simple.
Garlic (6 cloves, minced) — Yes, six cloves. Fresh only. No jarred garlic in this recipe. It’s too sharp and tastes metallic. I mince them by hand because I like to feel like I’m doing something productive while watching TV.
Fresh Ginger (1 tablespoon, grated) — Fresh ginger makes a massive difference compared to powder. It adds that bright, zesty kick that cuts through the sweetness of the honey. If you really hate ginger, you can skip it, but I don’t recommend it.
Honey (½ cup / 120ml) — Don’t cheap out here. Use real honey. If you use high-fructose corn syrup, it’ll be too sweet and cloying. Clover or wildflower honey works great.
Soy Sauce (¼ cup / 60ml) — I use low-sodium soy sauce so I can control the saltiness. Regular soy sauce is fine, but you might want to reduce the salt in the rest of the dish.
Rice Vinegar (1 tablespoon) — This adds acidity to balance the sweet. If you don’t have rice vinegar, apple cider vinegar works, but it’s a bit fruitier. Avoid white distilled vinegar—it’s too harsh.
Chicken Broth (¼ cup / 60ml) — Just a splash to help deglaze the pan and thin the sauce slightly. Vegetable broth works if you’re keeping it vegetarian.
Red Pepper Flakes (½ teaspoon) — Optional, but I love a little heat. It balances the sweetness perfectly. If you’re cooking for kids, leave it out or use just a pinch.
Sesame Oil (1 teaspoon) — Added at the end. It’s not for cooking; it’s for flavor. A little goes a long way.
Sesame Seeds (1 tablespoon) — For garnish. Toasted sesame seeds are nicer, but regular works fine. It adds a nice nutty crunch and makes it look professional.
Green Onions (2 stalks, sliced) — For garnish. Adds color and a fresh onion bite to cut through the rich sauce.
Equipment Needed
You don’t need fancy equipment for this. Here’s what I actually use.
Large Skillet or Wok — I use a 12-inch cast iron skillet. It holds heat beautifully, which helps the chicken crisp up. Stainless steel works too. Just make sure it’s big enough to fit all the chicken in a single layer. Crowding the pan steams the chicken instead of frying it.
Pro tip: If you don’t have a 12-inch pan, cook in two batches. I learned this the hard way with a smaller pan, and the chicken was sad and soggy.
Mixing Bowls — One small bowl for the sauce, one medium bowl for tossing the chicken in cornstarch. You don’t need fancy glass bowls; plastic or metal works fine.
Whisk — For the sauce. A small whisk is perfect. Fork works in a pinch.
Tongs — Essential for flipping the chicken without piercing it. Forks pierce the skin and let the juices escape. Tongs keep the meat juicy.
Sharp Knife — For mincing garlic and slicing green onions. Dull knives make you cry more—learned this the hard way.
I’m obsessed with my garlic press from IKEA—it’s like $3 and makes life easier, but for this recipe, I prefer mincing by hand for the freshest flavor.
Measuring Spoons and Cups — Pretty standard stuff. Dollar store versions work fine.
Colander — Not strictly needed unless you rinse the chicken (which I don’t recommend, but some people do). If you pat dry your chicken, you’re good.
How to Make It: Step-by-Step
Alright, let’s make this! I’m walking you through exactly how I do it, including the little tricks I’ve picked up.
Step 1: Prep the Chicken (5 minutes)
Pat the chicken thighs dry with paper towels. This is crucial. If the chicken is wet, it won’t crisp. It’ll steam. I know it’s a pain, but dry chicken = crispy chicken. Toss the chicken pieces in the bowl with the cornstarch. You want a light, even coating. Shake off any excess. You don’t want a thick batter, just a dusting.
Step 2: Sear the Chicken (10-12 minutes)
Heat the oil in your large skillet over medium-high heat. Once the oil shimmers, add the chicken pieces skin-side down. Do not crowd the pan! Cook for 5-6 minutes without touching them. Let that skin get golden and crispy. Then flip and cook for another 4-5 minutes until the chicken is cooked through (internal temp of 165°F / 74°C). Transfer to a plate and set aside. Don’t clean the pan yet—that chicken fat and browned bits are flavor gold.
Step 3: Make the Sauce (2 minutes)
In a small bowl, whisk together the honey, soy sauce, rice vinegar, chicken broth, minced garlic, grated ginger, and red pepper flakes. It should look like a thin, glossy liquid. Taste it? It should be sweet, salty, and a little tangy. Adjust if needed.
Step 4: Combine and Glaze (3 minutes)
Reduce the heat to medium. Pour the sauce into the same skillet with the chicken drippings. It will bubble and sizzle immediately. Let it simmer for 1 minute to thicken slightly. Then, toss the chicken back into the pan. Use your tongs to coat every piece in the sauce. The sauce will cling to the crispy skin, creating this amazing sticky glaze. Cook for another 1-2 minutes until the sauce is thick and glossy.
Step 5: Finish and Serve (1 minute)
Remove from heat. Drizzle with sesame oil and toss once more. Transfer to a serving platter. Sprinkle with toasted sesame seeds and sliced green onions. Serve immediately while it’s hot and crispy.
Total Time: About 25-30 minutes (10 minutes active, 20 minutes mostly hands-off)
Built-in Troubleshooting:
- Sauce too thin? Let it simmer longer. The starches in the chicken will also help thicken it.
- Sauce too thick? Add a splash more chicken broth or water.
- Chicken not crispy? You likely overcrowded the pan or didn’t pat the chicken dry enough. Next time, cook in batches.
Expert Tips & Tricks
Here’s everything I’ve learned from making this dozens of times. These tips will save you from my mistakes.
Pat Dry, Always
I can’t stress this enough. Moisture is the enemy of crispiness. If your chicken thighs are wet, they will not crisp. Use paper towels and really press down. It takes 30 seconds but makes a huge difference.
Don’t Skip the Cornstarch
Some people try to skip this to save a step. Don’t. The cornstarch creates a barrier that keeps the skin crispy even when it hits the wet sauce. It’s the science of good food.
High Heat for Searing
Start with medium-high heat to get that golden crust. If the pan isn’t hot enough, the chicken will stick and release its juices instead of searing. Wait until the oil shimmers before adding the chicken.
Toast Your Sesame Seeds
If you have an extra minute, toast the sesame seeds in a dry pan for 2 minutes before sprinkling them on top. It releases their oils and makes them nuttier. It’s a small detail that elevates the dish.
Room Temperature Sauce
If your honey is crystallized or hard, warm it up slightly before mixing the sauce. Cold honey is hard to whisk. I just microwave the measuring cup with the honey for 10 seconds.
Common Mistakes (and how to avoid them):
- Mistake: Chicken is dry Fix: You cooked it too long. Thighs are forgiving, but if you sear them for 10 minutes on each side, they’ll dry out. 5-6 minutes per side is plenty.
- Mistake: Sauce is too sweet Fix: Add more soy sauce or rice vinegar. Balance the flavors. Taste as you go.
- Mistake: Sauce is too salty Fix: Use low-sodium soy sauce. If you used regular, add a splash of water or honey to balance it.
Variations & Substitutions
Once you’ve nailed the basic version, here’s how you can mix it up. I’ve tried all of these.
Spicy Honey Garlic
Add 1 tablespoon of gochujang or sriracha to the sauce. This is great if you like heat. It pairs well with the sweetness. I make this version when I want something with a kick.
Veggie-Packed
Add broccoli florets or bell pepper strips to the pan after you remove the chicken. Sauté them for 3-4 minutes, then toss the chicken back in with the sauce. It adds volume and nutrients without much extra effort.
One-Pot Rice Version
If you want a complete meal, serve this over steamed jasmine rice. The sauce soaks into the rice and makes it incredible. It’s like a deconstructed fried rice bowl.
Dietary Modifications:
- Gluten-Free: Use tamari instead of soy sauce. Everything else is naturally gluten-free.
- Lower Sugar: Use a sugar-free honey alternative like Lakanto. It works surprisingly well.
- Keto: Skip the cornstarch and use xanthan gum or just skip the coating. Serve over cauliflower rice instead of regular rice.
For another easy chicken dinner, check out my crispy honey mustard baked pork chops—similar sweet and savory vibes, but with pork.
Serving & Storage
How to Serve:
I usually serve this straight from the skillet at the dinner table—it looks rustic and stays warm. But here are other ways I’ve enjoyed it:
- Over Rice: Steamed jasmine or brown rice. The sauce is perfect for soaking up.
- Over Noodles: Soba noodles or udon work great.
- With Veggies: Steamed broccoli or roasted snap peas.
- In Wraps: Serve with lettuce cups and hoisin sauce for a lighter option.
Storage Instructions:
Refrigerator: Store in an airtight container for up to 4 days. The chicken will get softer as it sits, but the flavor gets better. I actually prefer it the next day.
Reheating: Best method: Reheat in a skillet over medium heat with a splash of water to loosen the sauce. Microwave works but can make the skin less crispy. If you microwave, do it in 30-second bursts and stir.
Freezing: This doesn’t freeze well. The texture of the chicken changes, and the sauce can separate. Make it fresh or store in the fridge for up to 4 days.
For a side dish that goes perfectly with this, try my labor day spicy chipotle corn—it’s a bit of a holiday name, but it’s delicious any time of year and adds a nice smoky contrast to the sweet chicken.
Nutrition Information
I’m not a nutritionist, but here’s the breakdown if you’re tracking.
Per Serving (based on 4 servings):
- Calories: 450
- Protein: 35g
- Carbs: 32g
- Fiber: 1g
- Sugar: 24g
- Fat: 22g
- Sodium: 650mg
What’s Good:
- High protein from the chicken thighs
- Gluten-free option available
- Comforting and filling
What to Know:
- Higher in sugar due to the honey
- Contains soy (soy sauce)
- Calorie-dense from the oil and chicken skin
Look, this is comfort food with honey and soy sauce. It’s not a diet recipe. But it’s way better than takeout, costs less, and I know exactly what’s in it. When I want to make it lighter, I skip the skin and use less honey. But usually? I just eat a reasonable portion and enjoy it.
Final Thoughts
So that’s my go-to crispy honey garlic chicken thighs! I’ve probably talked your ear off at this point, but when you make a recipe this often, you have a lot to say about it.
This has saved weeknight dinners more times than I can count. It’s my answer to “what’s for dinner” when I’m tired, don’t want takeout, and still want something that tastes really good. My kids are happy, my husband’s happy, and I’m happy because I’m not stressed about cooking.
Make it yours! Try different add-ins, swap in your favorite vegetables, adjust the garlic (though more is always better in my opinion). The best recipes are the ones you adapt to your family’s tastes.
If you make this, drop a comment and let me know what you think! I love hearing how recipes turn out in your kitchen. And if something doesn’t work, tell me that too—I’m here to help troubleshoot.
Happy cooking! And I hope your kitchen smells half as good as mine does right now.
Frequently Asked Questions
Q: Can I use chicken breasts instead of thighs?
A: You can, but the results will be different. Chicken breasts are leaner and can dry out faster. If you use breasts, reduce the cook time by 2-3 minutes per side. I still prefer thighs because they stay juicy and crisp better, but breasts work in a pinch.
Q: Why did my chicken stick to the pan?
A: Two reasons: either the pan wasn’t hot enough when you added the chicken, or you moved it too soon. Let the chicken sear undisturbed for 5 minutes. If it sticks, it’s trying to tell you it’s not ready to flip. Wait a minute, and it should release easily.
Q: Can I make the sauce ahead of time?
A: Yes! Mix the sauce ingredients in a jar and store it in the fridge for up to 3 days. It actually tastes better after the flavors have melded. Just give it a shake before using.
Q: Is this recipe spicy?
A: Not really. The red pepper flakes add a hint of warmth, but it’s mostly sweet and savory. If you want it spicier, add more flakes or a dash of sriracha. If you want it mild, leave the flakes out completely.
Q: Can I use agave nectar instead of honey?
A: Yes, agave nectar works as a 1:1 substitute. It’s slightly thinner, so you might need to simmer the sauce a minute longer to thicken it. The flavor is milder, so you might miss some of that honey tang, but it’s still delicious.
Q: How do I reheat leftovers without it getting dry?
A: Add a splash of water or broth to a skillet, add your leftover chicken, and heat gently over low heat, stirring frequently. The extra liquid brings back the saucy texture. Microwave sort of works but tends to dry it out. If you do microwave, definitely add a splash of water first and heat in short bursts, stirring between.
Q: Can I double this recipe?
A: Absolutely! Double everything and use your biggest skillet. The cooking times stay the same. I do this when I’m meal-prepping or feeding a crowd. Just make sure your skillet is big enough for the sauce—you might need to use two pans or a very large skillet. Don’t crowd the pan, or the chicken won’t crisp!
Pin This Recipe!


Crispy Honey Garlic Chicken Thighs: Best Easy 5pm Dinner
- Total Time: 25-30 minutes
- Yield: 4 servings 1x
Description
A quick, 30-minute weeknight dinner featuring juicy chicken thighs with a shatteringly crisp cornstarch crust, tossed in a sticky, sweet, and savory honey garlic sauce. It’s a one-pan meal that is perfect for meal prep and feels fancy without the effort.
Ingredients
- 2 pounds boneless, skin-on chicken thighs
- 3 tablespoons cornstarch
- 2 tablespoons neutral oil (avocado or vegetable)
- 6 cloves garlic, minced
- 1 tablespoon fresh ginger, grated
- ½ cup honey
- ¼ cup soy sauce (low-sodium recommended)
- 1 tablespoon rice vinegar
- ¼ cup chicken broth
- ½ teaspoon red pepper flakes (optional)
- 1 teaspoon sesame oil
- 1 tablespoon sesame seeds (toasted)
- 2 stalks green onions, sliced
Instructions
- Pat the chicken thighs dry with paper towels to ensure crispiness. Toss the chicken in a bowl with cornstarch until lightly coated, shaking off any excess.
- Heat the neutral oil in a large skillet over medium-high heat. Once the oil shimmers, add the chicken pieces skin-side down in a single layer (cook in batches if necessary).
- Sear the chicken for 5-6 minutes without moving it to develop a golden crust. Flip and cook for another 4-5 minutes until the internal temperature reaches 165°F (74°C). Transfer chicken to a plate and set aside.
- In a small bowl, whisk together honey, soy sauce, rice vinegar, chicken broth, minced garlic, grated ginger, and red pepper flakes.
- Reduce skillet heat to medium. Pour the sauce into the same skillet with the chicken drippings and simmer for 1 minute to thicken slightly.
- Return the chicken to the skillet and toss to coat evenly in the sauce. Cook for 1-2 minutes until the sauce is thick and glossy.
- Remove from heat, drizzle with sesame oil, and toss once more.
- Serve immediately, garnished with toasted sesame seeds and sliced green onions.
Notes
Patting the chicken dry is crucial for crispiness. Do not overcrowd the pan, or the chicken will steam instead of sear. For a gluten-free version, substitute soy sauce with tamari. The dish reheats best in a skillet with a splash of water to maintain texture.
- Prep Time: 5 minutes
- Cook Time: 20 minutes
- Category: Main Course
- Cuisine: Asian Fusion
Nutrition
- Serving Size: 1 chicken thigh with
- Calories: 450
- Sugar: 24
- Sodium: 650
- Fat: 22
- Carbohydrates: 32
- Fiber: 1
- Protein: 35
Keywords: honey garlic chicken, crispy chicken thighs, easy weeknight dinner, 30 minute meals, one pan dinner, honey garlic sauce, chicken thigh recipes, meal prep chicken