Last Tuesday morning, I was standing in my kitchen at 6:45 AM, staring into the open fridge like it held the secrets to the universe. My daughter had her backpack zipped, her water bottle full, and was vibrating with enough energy to power a small city. I had exactly twelve minutes before I needed to drop her at the bus stop, and my brain was completely empty. No meal plan. No leftover strategy. Just panic and the realization that I couldn’t send her out with a bag of chips and hope for the best.
I don’t know about you, but I have a specific anxiety about the “3 PM Slump.” You know the one. That moment when the kids are hungry, hangry, and the only thing within reach is something that doesn’t actually nourish them. I wanted something that felt special—like a treat—but was actually just raw vegetables and a dip. Something that would make her feel like she was getting a rainbow instead of a cardboard box of crackers.
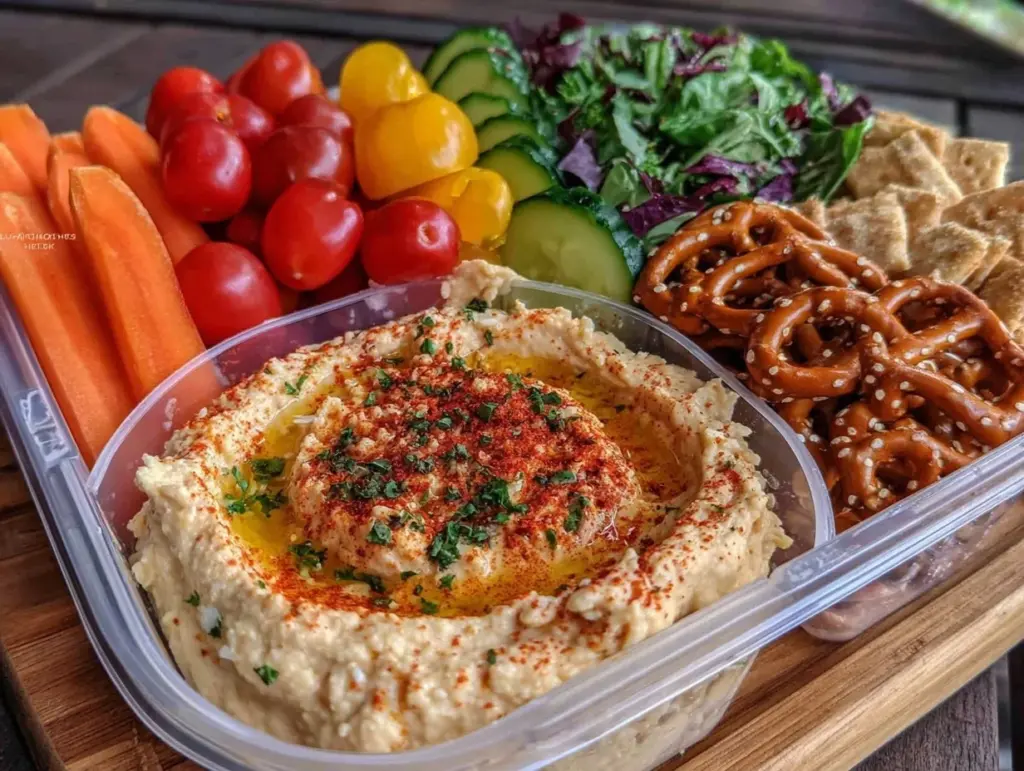
That’s when I decided to build these Back to School Rainbow Veggie and Hummus Snack Boxes. It took me four minutes. Four. Minutes. I grabbed whatever colorful veggies were hiding in the crisper drawer, grabbed a tub of hummus (okay, I made my own because I was feeling fancy, but store-bought works totally fine), and arranged them like a little art project. She ate every single piece. Not a single carrot stick went back in the trash.
Since then, these boxes have become our holy grail. I’ve made them for lunchboxes, for soccer practice snacks, for post-school fuel, and even as a light dinner when my husband comes home late from work. They’re healthy, they’re pretty, and they’re stupidly easy. If you’re dreading the daily snack struggle, trust me on this. This is your new best friend.
Why You’ll Love This Recipe
I know what you’re thinking. “Another veggie box? Really?” But hear me out. This isn’t just a sad pile of celery. This is a strategy. It’s a system that saves your sanity and keeps your kids fed without you needing to be a culinary artist. Here’s why I keep making these Back to School Rainbow Veggie and Hummus Snack Boxes on repeat:
- Zero Cooking Required — Seriously. No chopping onions that make you cry, no heating up the oven, no dirty pots. If you can open a jar and wash a cucumber, you can make this. It is the ultimate low-effort, high-reward snack.
- The “Eat Everything” Factor — I’ve tried sending plain broccoli florets before. They get rejected. But when you arrange them in a colorful grid with a creamy, savory dip? Suddenly, vegetables are delicious. The hummus acts like a flavor magnet, making even the pickiest eaters try the bell peppers.
- Customizable Chaos — My daughter loves carrots. My son? Not so much. With these boxes, I can customize each one without making two separate meals. I just swap out the veggies based on who’s eating it. It’s the perfect solution for households with mixed tastes.
- Prep-Ahead Friendly — I wash and chop all my veggies on Sunday night. By Wednesday, I just have to scoop the hummus and arrange them. It takes 60 seconds per box. This is how I survive the busy week without resorting to granola bars.
- Actually Healthy — We’re talking fiber, vitamins, and healthy fats. No processed sugars, no weird preservatives. Just real food that keeps their energy steady until dinner time. Plus, it’s way cheaper than buying those pre-packaged snack packs at the store.
This is my go-to when I need dinner to just work—or in this case, a snack that just works. No complicated techniques, no weird ingredients, just reliable, delicious food that makes everyone happy.
Ingredients You’ll Need
Here’s the best part: you probably have most of this already. I’m particular about two things here—the quality of the hummus and the freshness of the veggies—but otherwise, this is a pantry-and-fridge raid.
For the Rainbow Veggies
Red Bell Pepper (1 medium) — Cut into thin strips. Red peppers are sweeter and more appealing to kids than green ones. If your kids are brave, you can use green, but red is the crowd-pleaser.
Orange Bell Pepper (1 medium) — Cut into thin strips. Adds that bright orange pop. It’s like a carrot’s crunchy cousin but with a milder flavor.
Yellow Bell Pepper (1 medium) — Cut into thin strips. These are super sweet. I usually save these for the kids who are extra picky.
Carrots (1 bunch, or 2 large) — Peeled and cut into sticks. I use a peeler to make flat sticks, which are easier for little hands to grab. If you’re short on time, buy pre-cut baby carrots, but the fresh sticks taste way better.
Cucumber (1 English cucumber) — Cut into half-moons or spears. English cucumbers are less seedy and have thinner skins, so they don’t need peeling. Regular cucumbers work too, just peel them first.
Cherry Tomatoes (1 pint) — Leave whole or halve them if your kids are younger. I usually leave them whole because they’re like little flavor bombs. Make sure they’re dry before packing so the box doesn’t get soggy.
Cherry Radishes (1 small bunch) — Washed and halved. These add a nice peppery crunch. If your kids hate radishes, skip them. I use them because I like the color contrast.
For the Dip
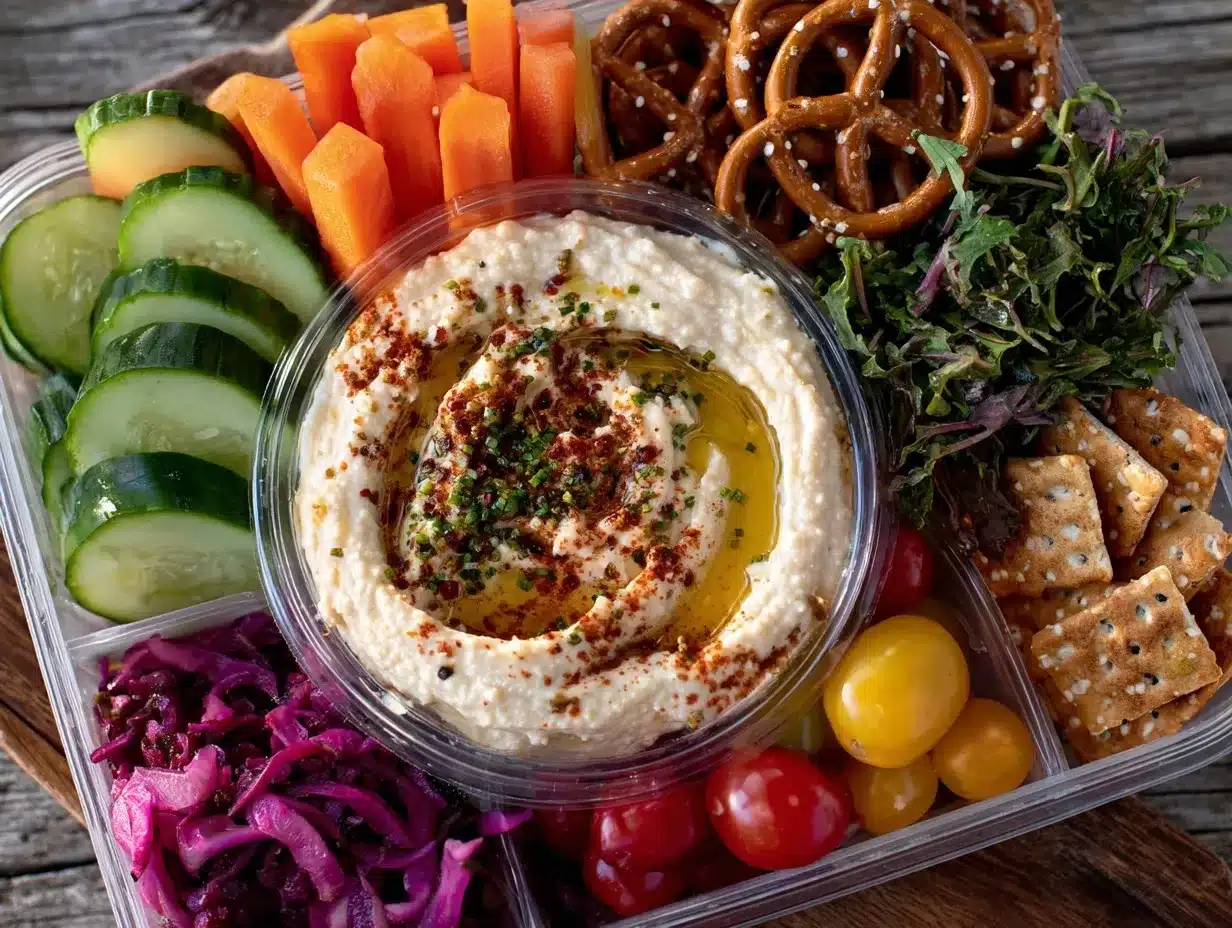
Hummus (1 cup) — This is the star. I love classic tahini hummus, but roasted garlic or spinach artichoke hummus works great too. If you’re making your own (which I do sometimes when I have extra chickpeas), it’s super simple. But honestly? The store-bought kind is totally fine. I use the tubs, not the glass jars, because they’re easier to scoop.
Optional: Olive Oil & Paprika — A tiny drizzle of olive oil and a sprinkle of paprika on top of the hummus makes it look fancy. It’s purely for aesthetics, but it feels nice.
Optional Add-ins
Feta Cheese (¼ cup, crumbled) — Sprinkle on top for a salty, tangy kick. Goes great with the Mediterranean vibe.
Kalamata Olives (a handful, pitted) — For the adults. Kids usually turn their noses up at olives, but they’re a nice addition for you.
Whole Wheat Pita Chips (a handful) — If you need a bit of crunch or carbs, add a few chips on the side. It makes it feel more like a meal.
Equipment Needed
You don’t need fancy equipment for this. Here’s what I actually use:
Sharp Knife — For slicing the peppers and cucumbers. A dull knife is dangerous and frustrating. I use my 8-inch chef’s knife for everything.
Peeler — For the carrots. I prefer a Y-peeler because it’s easier to control. It makes flat carrot sticks that are perfect for dipping.
Cutting Board — Any size works. I use a medium plastic one for veggies so I don’t ruin my wood board.
Snack Boxes or Containers — I use bento-style boxes with compartments. They’re great for keeping the veggies separate so they don’t get soggy. If you don’t have bento boxes, regular Tupperware or even muffin tins work perfectly. I’ve even used ice cube trays for really small kids.
Spoons — For scooping the hummus. A small ice cream scoop works wonders for getting perfect mounds.
Colander — For washing the veggies. Or just rinse them under the tap. Keep it simple.
Clean Kitchen Towel — To dry the veggies. Wet veggies = soggy snacks. Dry them well.
How to Make It: Step-by-Step
Alright, let’s make this! I’m walking you through exactly how I do it, including the little tricks I’ve picked up.
Step 1: Wash and Dry Everything (5 minutes)
Rinse all your vegetables under cold water. This is crucial. If you skip drying them, your snack box will turn into a soup. Use a clean kitchen towel or paper towels to pat everything dry. I usually do this while the water is running to save time. Make sure the cherry tomatoes are completely dry, or they’ll burst and make a mess.
Step 2: Prep the Veggies (5-8 minutes)
Start with the bell peppers. Slice off the tops, remove the seeds and white ribs, and slice them into thin strips. Aim for uniform sizes so they look neat. Next, peel the carrots and cut them into sticks. If you’re using an English cucumber, slice it in half lengthwise, then cut each half into 3-4 spears. For the radishes, just wash them and slice them in half. Leave the cherry tomatoes whole.
Step 3: Assemble the Boxes (3 minutes)
Take your snack box or container. I like to start with the veggies that hold up best. Place the cucumber spears and carrot sticks in the largest compartments. They’re sturdy and won’t get soggy quickly. Then, add the bell pepper strips. They’re also pretty durable. Finally, place the cherry tomatoes and radishes in the smaller compartments. These are more delicate, so they go in last.
Step 4: Add the Hummus (2 minutes)
Scoop the hummus into the smallest compartment. If you’re using a bento box, there’s usually a dedicated spot for dips. If you’re using a regular container, you can put the hummus in a small separate cup or just make a well in the veggies (though I don’t recommend this, as it can make the veggies soggy). Smooth the top of the hummus with the back of the spoon. If you want to be fancy, drizzle a little olive oil and sprinkle paprika on top.
Step 5: Pack and Go (1 minute)
Close the lid tightly. Check for any loose pieces that might have fallen out. If you’re packing these for school, make sure the box is sealed well to prevent spills. If you’re having them for lunch, add a napkin and a fork (if needed). These Back to School Rainbow Veggie and Hummus Snack Boxes are ready to eat!
Total Time: About 15 minutes (mostly washing and chopping, but very little active effort).
Servings: 4-6 snack boxes (depending on box size).
Expert Tips & Tricks
Here’s everything I’ve learned from making these dozens of times. These tips will save you from my mistakes.
Keep It Dry
I can’t stress this enough. Moisture is the enemy of a good veggie box. If your veggies are wet, they’ll get slimy. Pat them dry. If you’re prepping ahead, store the veggies in a container with a paper towel at the bottom to absorb any excess moisture.
Use Seasonal Veggies
Don’t be afraid to swap veggies based on what’s in season. In the summer, add sliced zucchini or yellow squash. In the fall, try jicama sticks or apple slices (with a lemon squeeze to prevent browning). The concept stays the same; the ingredients change.
Make Your Own Hummus
If you have time, make a batch of hummus on Sunday. It’s just chickpeas, tahini, lemon juice, garlic, and olive oil. Blend it up. It’s cheaper and tastes fresher than store-bought. But again, store-bought is totally fine. I’m not judging.
Prep in Batches
I wash and chop all my veggies for the week on Sunday. I store them in separate containers in the fridge. When I need a snack box, I just grab what I need and assemble it. It takes 2 minutes instead of 15.
Add a Protein Boost
If your kids are extra hungry, add some hard-boiled eggs, edamame, or chickpeas to the box. It makes it more filling and keeps them satisfied longer.
Variations & Substitutions
Once you’ve nailed the basic version, here’s how you can mix it up. I’ve tried all of these.
Mediterranean Style
Add kalamata olives, crumbled feta cheese, and a drizzle of olive oil. Use tzatziki instead of hummus if you want a yogurt-based dip. This is great for adults or older kids.
Asian-Inspired
Swap the hummus for a peanut sauce or edamame puree. Add snap peas, julienned carrots, and cucumber. Sprinkle with sesame seeds. It’s a different vibe but equally delicious.
Tex-Mex Style
Use salsa or queso dip instead of hummus. Add bell peppers, corn, and black beans. Add some tortilla chips on the side. My kids love this variation.
Summer Berry Box
Swap the veggies for berries, melon balls, and grapes. Use a yogurt dip or honey. It’s a sweet version of the same concept. Great for summer.
Gluten-Free
This recipe is naturally gluten-free. Just make sure your hummus and any add-ins (like pita chips) are certified gluten-free.
Dairy-Free
Hummus is naturally dairy-free. Just avoid adding cheese if you’re serving dairy-free kids.
Serving & Storage
How to Serve:
I usually serve these straight from the fridge. They’re best cold. If you’re packing them for school, they’ll stay fresh for a few hours. If you’re having them for lunch, add a side of fruit or a whole grain roll if you need more carbs.
Side Dishes:
These boxes are complete on their own, but if you want to expand the meal, try pairing them with a piece of fruit, a handful of nuts, or a glass of milk. I also like to serve them alongside a simple protein like grilled chicken or fish.
Storage Instructions:
Refrigerator: Store prepped veggies in airtight containers for up to 5 days. Hummus lasts about a week in the fridge. Assemble the boxes the morning of or the night before for best texture.
Reheating:
No reheating needed! These are meant to be eaten cold or room temperature. Heating them up will make the veggies limp and the hummus weird.
Freezing:
I don’t recommend freezing these. The veggies will get mushy when thawed. Hummus can be frozen, but the texture changes. Better to make fresh.
Nutrition Information
I’m not a nutritionist, but here’s the breakdown if you’re tracking. This is per box (assuming 6 boxes from the ingredients listed).
| Nutrient | Amount |
|---|---|
| Calories | 120 |
| Protein | 4g |
| Carbs | 12g |
| Fiber | 4g |
| Sugar | 5g |
| Fat | 6g |
| Sodium | 150mg |
What’s Good:
High in fiber and vitamins. Low in sugar. Good source of healthy fats from the hummus. It’s a balanced snack that won’t spike blood sugar.
What to Know:
Calories can vary based on the amount of hummus used. If you use a low-fat hummus, the calories will be lower. If you add cheese or nuts, the calories will go up.
My Take:
Look, this isn’t a diet food. It’s a healthy snack. But it’s way better than chips or candy. It’s real food. When I want to make it lighter, I use less hummus and more veggies. But usually? I just enjoy it. It’s nourishing and satisfying.
Final Thoughts
So that’s my go-to Back to School Rainbow Veggie and Hummus Snack Boxes! I’ve probably talked your ear off at this point, but when you make a recipe this often, you have a lot to say about it.
This has saved my mornings more times than I can count. It’s my answer to “what’s for a snack?” when I’m tired, don’t want to cook, and still want something that tastes really good. My kids are happy, I’m happy because I’m not stressed about cooking, and we’re all getting some veggies in. Win-win-win.
Make it yours! Try different veggies, swap the dip, add some protein. The best recipes are the ones you adapt to your family’s tastes. If you make this, drop a comment and let me know what you think! I love hearing how recipes turn out in your kitchen. And if something doesn’t work, tell me that too—I’m here to help troubleshoot.
Happy snacking! And I hope your kitchen smells half as good as mine does right now (it smells like fresh veggies and hummus, which is pretty great).
Frequently Asked Questions
Q: Can I use a different dip instead of hummus?
A: Absolutely! You can use tzatziki, ranch, salsa, queso, or even nut butter. The concept is just raw veggies + dip. Feel free to experiment. I’ve used peanut butter with apple slices (not veggies, but same idea) and it was delicious.
Q: How long do these last in the fridge?
A: The veggies last about 5 days if stored properly in airtight containers. The hummus lasts about a week. I recommend assembling the boxes the morning of or the night before to keep them fresh.
Q: Can I prep these for the whole week?
A: You can prep the veggies for the week, but I don’t recommend assembling the boxes more than a day in advance. The veggies can get soggy, especially if they’re next to the hummus. Prep the veggies, store them, and assemble daily.
Q: My kids don’t like hummus. What can I use?
A: Try a different dip! Ranch, tzatziki, or salsa are good alternatives. You can also try making your own hummus with different flavors, like roasted red pepper or garlic. Sometimes a different taste profile makes all the difference.
Q: Can I freeze these snacks?
A: No, I don’t recommend freezing them. The veggies will get mushy when thawed. Hummus can be frozen, but the texture changes. Better to make fresh.
Q: Is this recipe gluten-free?
A: Yes, this recipe is naturally gluten-free. Just make sure your hummus and any add-ins (like pita chips) are certified gluten-free.
Q: Can I make this for adults?
A: Definitely! Adults love these boxes too. Just add some fancy dips, olives, cheese, or nuts. It’s a great appetizer or light lunch option. I often serve these at parties with different dips and veggies.
Pin This Recipe!
Back to School Rainbow Veggie & Hummus Boxes
- Total Time: 15 minutes
- Yield: 4-6 servings 1x
Description
A quick, healthy, and customizable snack box featuring colorful raw vegetables and creamy hummus, designed to keep kids energized and happy without the 3 PM slump.
Ingredients
- 1 medium Red Bell Pepper, cut into thin strips
- 1 medium Orange Bell Pepper, cut into thin strips
- 1 medium Yellow Bell Pepper, cut into thin strips
- 1 bunch Carrots (or 2 large), peeled and cut into sticks
- 1 English Cucumber, cut into half-moons or spears
- 1 pint Cherry Tomatoes, left whole or halved
- 1 small bunch Cherry Radishes, washed and halved
- 1 cup Hummus (classic, roasted garlic, or spinach artichoke)
- Optional: 1/4 cup Feta Cheese, crumbled
- Optional: A handful of Kalamata Olives, pitted
- Optional: A handful of Whole Wheat Pita Chips
- Optional: Olive Oil and Paprika for garnish
Instructions
- Wash all vegetables under cold water and pat them completely dry with a clean kitchen towel or paper towels to prevent sogginess.
- Slice the bell peppers by removing tops, seeds, and white ribs, then cut into thin, uniform strips.
- Peel the carrots and cut them into sticks; slice the cucumber into spears and halve the radishes.
- Arrange the sturdiest vegetables (cucumber and carrots) in the largest compartments of the snack box.
- Add the bell pepper strips to the next available compartments.
- Place the delicate vegetables (cherry tomatoes and radishes) in the smallest compartments.
- Scoop the hummus into the smallest compartment or a separate cup.
- Optionally drizzle with olive oil and sprinkle paprika for aesthetics.
- Close the lid tightly and pack for school or serve immediately.
Notes
Moisture is the enemy of a good veggie box; ensure all vegetables are thoroughly dried before packing. For meal prep, wash and chop veggies on Sunday and store in airtight containers with a paper towel to absorb excess moisture. Assemble boxes the morning of or the night before for best texture. Do not freeze, as vegetables will become mushy upon thawing.
- Prep Time: 15 minutes
- Cook Time: 0 minutes
- Category: Snack
- Cuisine: Mediterranean
Nutrition
- Serving Size: 1 snack box
- Calories: 120
- Sugar: 5
- Sodium: 150
- Fat: 6
- Saturated Fat: 1
- Carbohydrates: 12
- Fiber: 4
- Protein: 4
Keywords: back to school snacks, healthy kids snacks, veggie boxes, hummus recipe, lunchbox ideas, gluten-free snacks, dairy-free snacks, quick snacks, rainbow veggies