It was 4:45 PM on a Tuesday, and my brain was completely fried. You know that feeling? Where you’ve been staring at a spreadsheet for six hours, your eyes are dry, and the thought of cooking anything other than toast makes you want to cry. Then my kid ran into the kitchen, eyes wide, and said, “Mom, it’s my friend’s birthday tomorrow. Can we get him a cake?”
Here’s the thing: I had no cake mix. I had no time to go to the store. And I definitely had no patience for a complicated baking project that required three bowls, a stand mixer, and a degree in pastry arts.
But I did have vanilla beans. And I did have a desire to not look like a bad friend who buys a gas station cupcake.
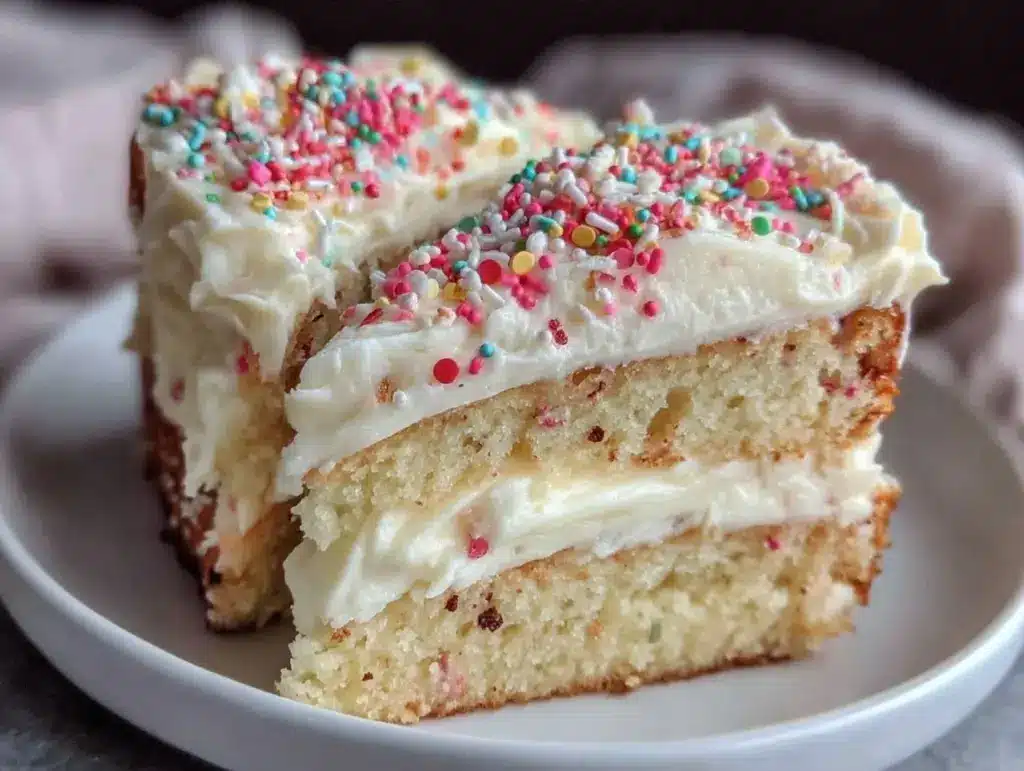
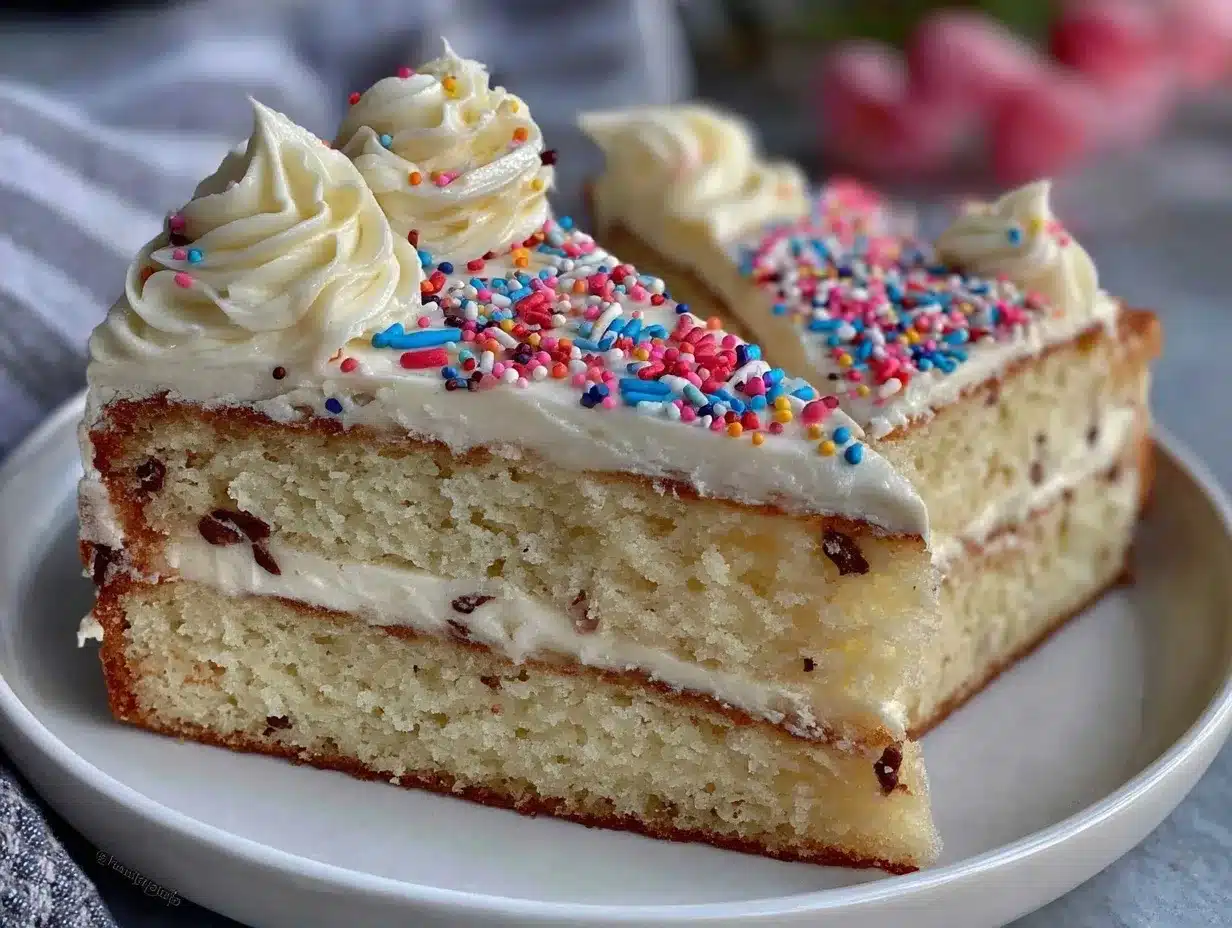
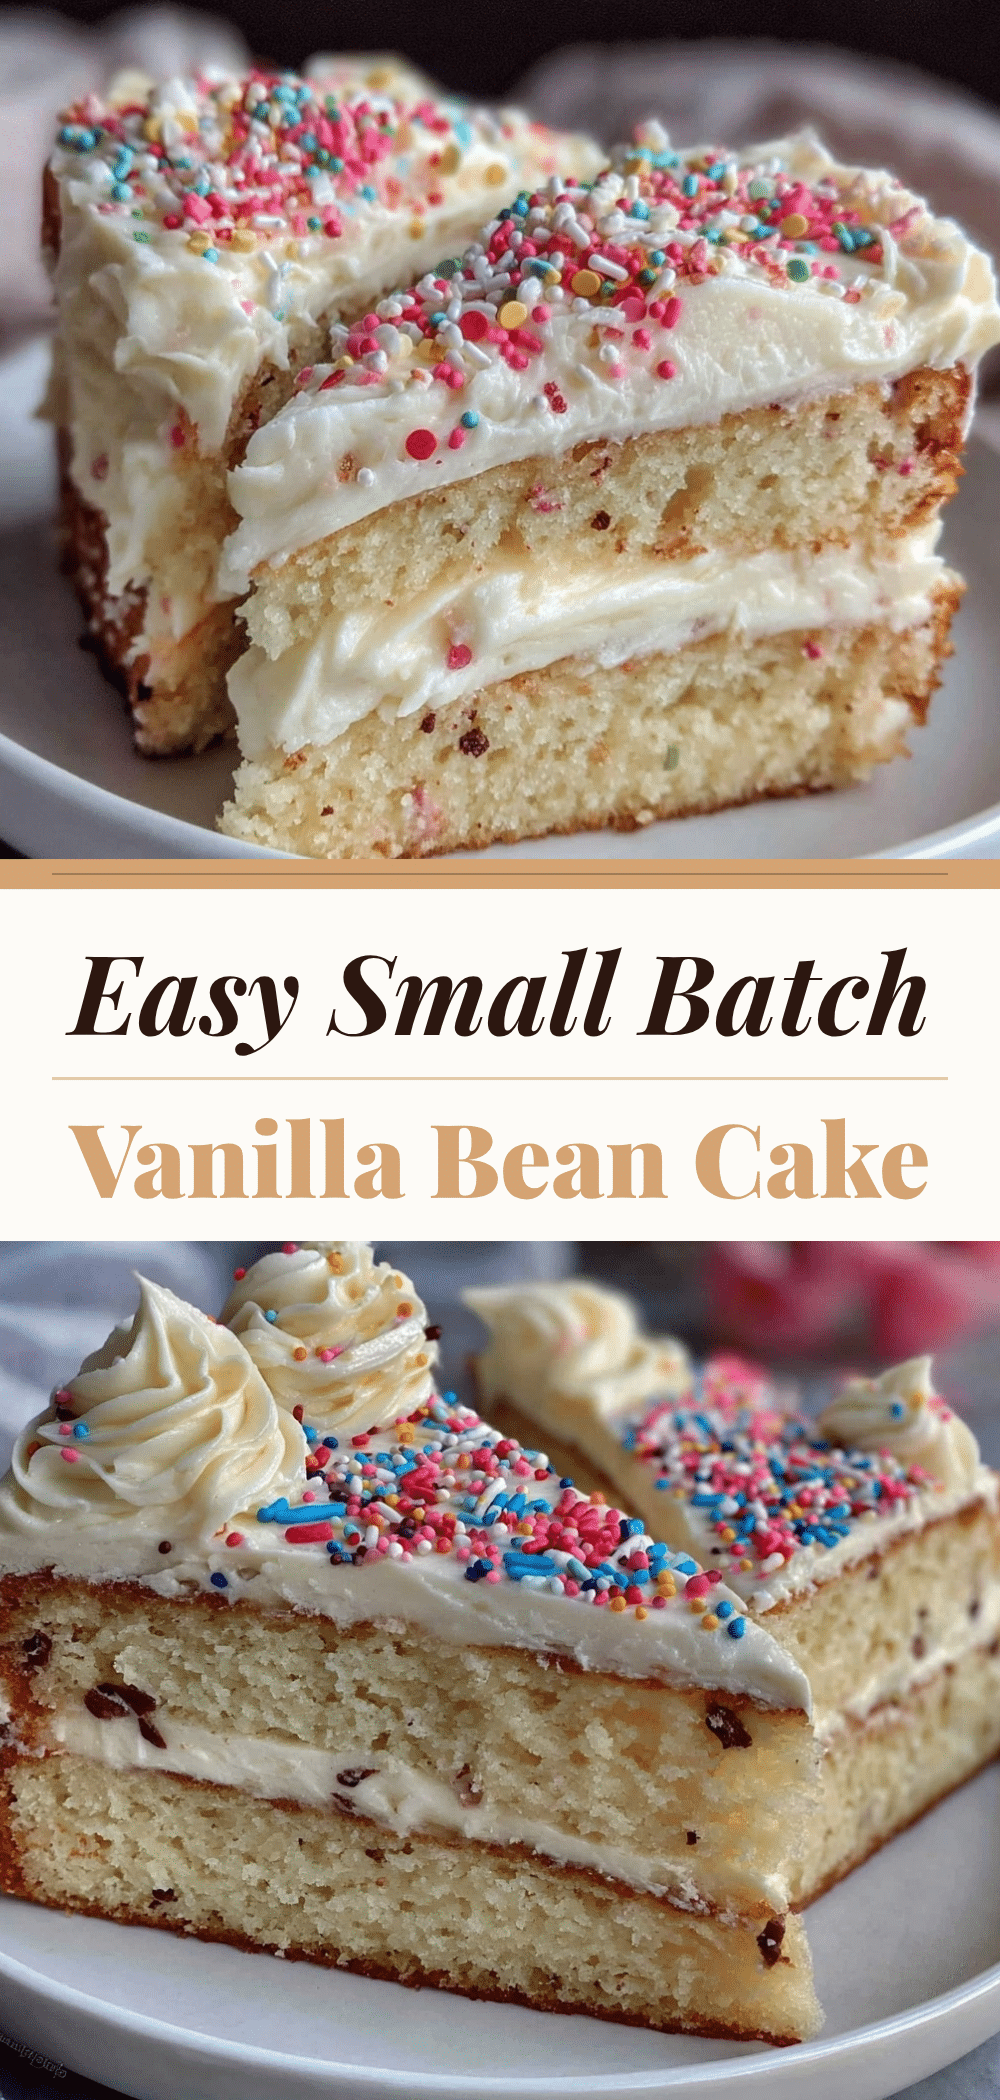
So I threw together what I thought would be a mediocre little cake. Twenty minutes later, the kitchen smelled like a Parisian bakery, and my kid was already eating the batter out of the bowl with a spoon. We baked it in a small pan, frosted it with sprinkles because that’s what birthdays are really about, and it was hands-down the best small batch vanilla bean birthday cake with sprinkles you’ll make on repeat. Seriously. It’s moist, it’s vanilla-forward, and it takes less time than ordering delivery.
I’ve made this cake at least a dozen times since that Tuesday panic. Sometimes for actual birthdays, sometimes just because I wanted dessert and didn’t want to buy a whole cake from the store. It’s my secret weapon for last-minute celebrations, random Tuesday treats, or when you just need a win before dinner is even on the table. And trust me, when you’re running on empty, a win is exactly what you need.
Why You’ll Love This Recipe
This isn’t just another vanilla cake. It’s the one I reach for when I need something reliable, delicious, and incredibly fast. There are about ten reasons I keep making this, but here are the big ones that keep me coming back.
It’s Actually a Small Batch — Seriously. Most vanilla cake recipes feed a crowd of ten. This one feeds four to six people comfortably. No giant leftovers sitting in your fridge for three days while you wonder if it’s still safe to eat. Just enough cake for you and your family, with maybe a slice or two for tomorrow’s breakfast.
Real Vanilla Flavor — Not that artificial vanilla extract taste that smells like medicine. This uses actual vanilla bean paste (or scraped seeds), so you get those tiny black specks everywhere. It looks fancy, tastes incredible, and makes you feel like a pro baker. Even if you’re baking in your pajamas at 5 PM.
One Bowl Magic — I know, I know. You’re skeptical. But this cake mixes in literally one bowl. No creaming butter and sugar separately. No folding egg whites. Just dump, whisk, bake. If you can whisk, you can make this. I’ve made it while holding my toddler and answering work emails. It’s that easy.
Lightning Fast — From start to finish, this takes about 35 minutes. Ten minutes of prep, twenty-five minutes in the oven. That’s faster than waiting for a pizza delivery. And the cleanup? One bowl, one whisk, one pan. I can handle that even on my worst days.
Perfectly Moist — Some small cakes dry out in the oven because they’re too thin. Not this one. The ratio of wet to dry ingredients is spot-on, so every bite is tender and soft. It stays moist for days, too. (Though it rarely lasts that long.)
Sprinkles Are Non-Negotiable — Let’s be honest. A vanilla cake without sprinkles is just a sad sponge. The sprinkles add color, texture, and that childhood joy we all crave. I use rainbow jimmies because they melt slightly into the frosting and look festive. But honestly? Any sprinkle works. Even the chocolate ones if you’re feeling rebellious.
This is my go-to when I need dessert to just work. No stress, no fancy equipment, just reliable, delicious food that makes everyone smile. And honestly? That’s all any of us really want.
Ingredients You’ll Need
Here’s the best part: you probably have most of this already in your pantry. This isn’t a recipe that requires a special trip to the store for three obscure ingredients. It’s simple, straightforward baking.
All-Purpose Flour (1 cup / 120g) — The base of the cake. Don’t use self-rising flour unless you adjust the baking powder and salt. I measure by weight if I can, but scooping and leveling works fine too. Just don’t pack it down.
Granulated Sugar (3/4 cup / 150g) — Not too sweet, not too bland. This amount gives you a nice tender crumb. If you prefer sweeter cake, bump it to 1 cup, but I like it balanced.
Baking Powder (1 teaspoon) — Fresh baking powder is crucial. If yours is older than six months, toss it. Old baking powder makes flat, dense cakes. I keep a new can in my pantry specifically for this.
Salt (1/2 teaspoon) — Yes, salt in a cake. It enhances the vanilla flavor and balances the sweetness. Don’t skip it. I learned this the hard way with a bland cake that tasted like… well, just sugar.
Unsalted Butter (1/2 cup / 113g, softened) — Softened means room temperature. You should be able to indent it with your finger easily. If it’s cold, microwave it for 10 seconds. Don’t melt it, though. Melted butter makes a different kind of cake.
Eggs (2 large, room temperature) — Room temperature eggs mix better and create a lighter batter. I take them out of the fridge 30 minutes before baking. If I forget, I soak them in warm water for 5 minutes.
Vanilla Bean Paste (2 teaspoons) — This is the star. You can use scraped seeds from half a vanilla bean, or vanilla extract if that’s all you have. But paste gives you those beautiful specks and deeper flavor. I use Nielsen-Massey brand because it’s thick and potent.
Whole Milk (1/2 cup / 120ml) — Adds moisture and richness. You can use any milk, but whole milk gives the best texture. Buttermilk works too if you want a tangier, softer crumb.
Sprinkles (1/4 cup / 30g) — Rainbow jimmies are classic, but feel free to use whatever you have. I love the contrast of colorful sprinkles against white frosting. It’s pure joy.
For the Frosting:
Butter (1/2 cup / 113g, softened) — Same as above. Room temperature is key for smooth frosting.
Powdered Sugar (2 cups / 240g) — Sifted if it’s clumpy. I usually just whisk it in the bowl before adding to the butter to avoid lumps.
Vanilla Extract (1 teaspoon) — Complements the bean paste in the cake. Use good quality here.
Milk (1-2 tablespoons) — To thin the frosting to your desired consistency. Start with 1 tablespoon, add more if needed.
Salt (a pinch) — Balances the sweetness of the powdered sugar. Don’t skip it.
Pro Tip: I keep vanilla bean paste in my pantry specifically for small cakes like this. It’s pricey, but a little goes a long way. If you can’t find it, vanilla extract works, but you won’t get those pretty specks.
Equipment Needed
You don’t need fancy equipment for this. Here’s what I actually use.
8-inch Round Cake Pan — I use a standard 8-inch pan. You can use a 6-inch if you want a taller, denser cake, but the baking time will be slightly longer. Grease it well with butter or cooking spray.
Mixing Bowl — A medium-sized bowl, about 3-4 quarts. Big enough to mix everything without splashing everywhere. I use a glass bowl because I can see the consistency.
Whisk — A simple wire whisk. No need for a hand mixer or stand mixer. This recipe is designed to be mixed by hand. It’s easier and you get to feel the batter.
Measuring Cups and Spoons — Standard stuff. Dollar store versions work fine. Just be accurate with the flour.
Spatula — A rubber spatula for scraping the bowl and smoothing the frosting. I have a few from IKEA that are cheap and work perfectly.
Cooling Rack — Optional but helpful. If you don’t have one, just let the cake cool in the pan for 10 minutes, then flip it onto a plate. It works fine.
Knife — For leveling the cake if it domes. I usually just trim the top with a serrated knife so the frosting sits flat.
Tool Tip: Don’t have a cooling rack? Just turn the cake out onto a clean kitchen towel or plate. It’ll cool faster than in the pan, which prevents soggy bottoms.
How to Make It: Step-by-Step
Alright, let’s make this! I’m walking you through exactly how I do it, including the little tricks I’ve picked up.
Step 1: Prep Your Pan and Oven (5 minutes)
Preheat your oven to 350°F (175°C). Grease your 8-inch cake pan with butter or cooking spray, then dust it with a little flour. Tap out the excess. This ensures the cake doesn’t stick. I’ve burned my fingers trying to get a stuck cake out, so trust me on this step.
Step 2: Mix Dry Ingredients (2 minutes)
In your mixing bowl, whisk together the flour, baking powder, and salt. Do this first so you don’t forget it later. I usually do this while the oven is preheating. It’s a good way to kill two birds with one stone.
Step 3: Cream Butter and Sugar (3 minutes)
Add the softened butter and sugar to the dry ingredients. Whisk them together until they’re combined and look like wet sand. This doesn’t need to be fluffy like a meringue—just mixed. The sugar will coat the butter, which helps create a tender crumb.
Step 4: Add Eggs and Vanilla (2 minutes)
Crack in the eggs one at a time, whisking well after each addition. Add the vanilla bean paste (or scraped seeds) now. Whisk until the batter is smooth and pale. It should look creamy and uniform. If it looks curdled, don’t panic. Just keep whisking.
Step 5: Add Milk (1 minute)
Pour in the milk and whisk until fully incorporated. The batter should be smooth, thick, and pourable. If it’s too thick, add a splash more milk. If it’s too thin, add a tablespoon of flour. But usually, this ratio is perfect.
Step 6: Bake (25 minutes)
Pour the batter into your prepared pan. Smooth the top with a spatula. Bake for 22-25 minutes, or until a toothpick inserted into the center comes out clean or with a few moist crumbs. Don’t overbake! Overbaked cake is dry cake. I check at 22 minutes because ovens vary.
Step 7: Cool (15 minutes)
Let the cake cool in the pan for 10 minutes, then flip it onto a plate or cooling rack. Let it cool completely before frosting. If you frost a warm cake, the butter will melt and it’ll be a mess. I’ve done this. It’s not pretty.
Step 8: Make Frosting (5 minutes)
While the cake cools, beat the softened butter until creamy. Add the powdered sugar, vanilla extract, and salt. Beat on low speed until combined, then increase speed and beat for 2 minutes until fluffy. Add milk 1 tablespoon at a time until you reach your desired consistency. It should be smooth and spreadable.
Step 9: Frost and Sprinkle (5 minutes)
Once the cake is cool, spread the frosting over the top. Use a spatula or knife to create swirls or a smooth finish. Then, immediately add the sprinkles while the frosting is still wet. They’ll stick better. Press them in gently if needed.
Total Time: About 35 minutes (10 minutes active, 25 minutes mostly hands-off)
Built-in Troubleshooting:
- Cake domes: It’s normal. Just level the top with a serrated knife before frosting.
- Frosting is too thick: Add more milk, 1 teaspoon at a time.
- Frosting is too thin: Add more powdered sugar, 1 tablespoon at a time.
Expert Tips & Tricks
Here’s everything I’ve learned from making this dozens of times. These tips will save you from my mistakes.
Room Temperature Ingredients Matter
I can’t stress this enough. Cold butter and eggs don’t mix well. They create a lumpy batter that bakes unevenly. Take your butter and eggs out of the fridge 30 minutes before you start. If you forget, the warm water trick works for eggs, and 10 seconds in the microwave for butter.
Don’t Overmix the Batter
Once you add the flour, mix until just combined. Overmixing develops gluten, which makes the cake tough. You want a tender, soft crumb. It’s okay if there are a few small lumps. The baking will take care of them.
Use Real Vanilla
This is a vanilla cake. The vanilla flavor should shine. Don’t skimp on the vanilla bean paste or extract. It’s the difference between a cake that tastes like “cake” and a cake that tastes like “dessert.” I use paste because it’s convenient and flavorful. But any good vanilla works.
Check Your Oven
Ovens lie. My oven runs hot, so I check my cakes 3 minutes before the timer goes off. Use the toothpick test, not just the timer. If the toothpick comes out clean, it’s done. If it has wet batter, give it 2 more minutes.
Frost Only When Cool
I know you want to eat it now. But warm cake + cold frosting = melted mess. Let it cool completely. If you’re impatient, put it in the fridge for 15 minutes to speed things up. I’ve done this. It works.
Sprinkles Stick Better When Fresh
Add sprinkles immediately after frosting. If the frosting sets before you add them, they’ll fall off. I usually frost one side, sprinkle, then frost the other side if I’m doing a full cake. But for this small batch, top-only is fine.
Make-Ahead Strategy
You can bake the cake up to 2 days ahead. Store it in an airtight container at room temperature. Frost it the day you plan to serve it. This actually helps the cake stay moist. I do this all the time for parties.
Variations & Substitutions
Once you’ve nailed the basic version, here’s how you can mix it up. I’ve tried all of these.
Strawberry Vanilla
Add 1/2 cup pureed strawberries to the batter. Reduce the milk by 2 tablespoons. It adds a nice pink color and fruity flavor. My kids love this version.
Lemon Vanilla
Add the zest of 1 lemon to the batter. It brightens everything up. Great for spring and summer. I pair this with a lemon frosting instead of vanilla.
Chocolate Sprinkles
Swap rainbow sprinkles for chocolate jimmies. It looks more sophisticated and tastes like a birthday cake from a bakery. I use this for adult parties.
Gluten-Free
Use a 1:1 gluten-free flour blend. Everything else stays the same. I’ve used Bob’s Red Mill and it works great. The texture is slightly different but still delicious.
Dairy-Free
Use dairy-free butter and milk. There are many good brands now. The frosting might be slightly softer, so chill it before frosting. It still tastes amazing.
Mini Cupcakes
Pour the batter into a muffin tin lined with paper cups. Bake for 15-18 minutes. Makes about 12 cupcakes. Perfect for individual servings.
Double the Recipe
You can double this and bake it in a 9×13 pan. Increase baking time to 30-35 minutes. Great for feeding a crowd. I do this for family gatherings.
Serving & Storage
How to Serve:
I usually serve this straight from the plate at the dinner table. It looks rustic and homemade. But here are other ways I’ve enjoyed it:
- With Coffee: A slice with a hot coffee is my favorite afternoon treat.
- With Ice Cream: Top it with vanilla ice cream and a drizzle of caramel. It’s like a bakery dessert.
- With Whipped Cream: If you want something lighter, top with fresh whipped cream instead of buttercream.
Storage Instructions:
Refrigerator: Store in an airtight container for up to 4 days. The frosting will firm up in the fridge. Let it sit at room temperature for 15 minutes before serving for the best texture.
Freezing: This doesn’t freeze well with frosting on. Bake the cake, wrap it tightly in plastic wrap, and freeze for up to 2 months. Thaw overnight, then frost when you’re ready to serve.
Room Temperature: If you’re serving it the same day, keep it on the counter in an airtight container. It stays fresh for 2 days.
Pro Tip: If leftovers are drying out, microwave a slice for 10 seconds. It’ll be soft and moist again. Just don’t overdo it.
Nutrition Information
I’m not a nutritionist, but here’s the breakdown if you’re tracking. This is per slice (based on 6 servings).
- Calories: 380
- Protein: 4g
- Carbs: 52g
- Fiber: 1g
- Sugar: 38g
- Fat: 16g
- Saturated Fat: 10g
- Cholesterol: 65mg
- Sodium: 220mg
What’s Good:
- Small portion size means you can enjoy it without overindulging.
- Real vanilla adds flavor without extra sugar.
- It’s homemade, so you know exactly what’s in it.
What to Know:
- Higher in sugar from the frosting and cake.
- Contains dairy and gluten.
- Moderate calories, but easy to control portions.
My Take: Look, this is dessert. It’s not a diet food. But it’s way better than store-bought, costs less, and I know exactly what’s in it. When I want to make it lighter, I reduce the sugar in the cake and use less frosting. But usually? I just eat one slice and enjoy it.
Final Thoughts
So that’s my go-to small batch vanilla bean birthday cake with sprinkles! I’ve probably talked your ear off at this point, but when you make a recipe this often, you have a lot to say about it.
This has saved me more times than I can count. It’s my answer to “what’s for dessert?” when I’m tired, don’t want to go to the store, and still want something that tastes really good. My kids are happy, my husband’s happy, and I’m happy because I’m not stressed about baking.
Make it yours! Try different sprinkles, add fruit puree, or swap the vanilla for almond extract. The best recipes are the ones you adapt to your family’s tastes. And if you want to try another easy cake, check out my lemon blueberry pound cake or my soft carrot cake with cream cheese frosting. Both are easy and delicious.
If you make this, drop a comment and let me know what you think! I love hearing how recipes turn out in your kitchen. And if something doesn’t work, tell me that too—I’m here to help troubleshoot.
Happy baking! And I hope your kitchen smells half as good as mine does right now.
Frequently Asked Questions
Can I use vanilla extract instead of vanilla bean paste?
Yes, absolutely. Use 1 teaspoon of good quality vanilla extract. You won’t get the pretty black specks, but the flavor will still be excellent. I use extract when I’m in a pinch.
Why did my cake turn out dense?
Usually, this means you overmixed the batter or used old baking powder. Whisk until just combined, and make sure your baking powder is fresh. Also, don’t pack the flour into the measuring cup. Scoop and level instead.
Can I make this ahead for a party?
Yes! Bake the cake up to 2 days ahead. Store it in an airtight container at room temperature. Frost it the day you plan to serve it. This actually helps the cake stay moist.
Why did my frosting separate?
This usually happens if the butter was too warm or the powdered sugar was too cold. Make sure your butter is room temperature but not melted. If it separates, chill it for 10 minutes, then beat it again. It should come back together.
Can I double this recipe?
Absolutely! Double everything and use a 9×13 pan. Bake for 30-35 minutes. Check with a toothpick to ensure it’s done. I do this for family gatherings.
How do I store leftovers?
Store in an airtight container at room temperature for up to 2 days. Or in the fridge for up to 4 days. Let it come to room temperature before serving for the best texture.
Can I freeze this cake?
You can freeze the unfrosted cake. Wrap it tightly in plastic wrap and foil, then freeze for up to 2 months. Thaw overnight at room temperature, then frost when ready to serve. Don’t freeze the frosted cake.
Pin This Recipe!
Small Batch Vanilla Bean Birthday Cake: 5 PM Win
- Total Time: 35 minutes
- Yield: 6 servings 1x
Description
A quick, one-bowl vanilla bean cake that serves 4-6 people. It uses real vanilla bean paste for authentic flavor and is topped with festive sprinkles, making it perfect for last-minute celebrations.
Ingredients
- 1 cup (120g) All-Purpose Flour
- 3/4 cup (150g) Granulated Sugar
- 1 teaspoon Baking Powder
- 1/2 teaspoon Salt
- 1/2 cup (113g) Unsalted Butter, softened
- 2 large Eggs, room temperature
- 2 teaspoons Vanilla Bean Paste
- 1/2 cup (120ml) Whole Milk
- 1/4 cup (30g) Sprinkles
- 1/2 cup (113g) Butter, softened (for frosting)
- 2 cups (240g) Powdered Sugar (for frosting)
- 1 teaspoon Vanilla Extract (for frosting)
- 1–2 tablespoons Milk (for frosting)
- A pinch of Salt (for frosting)
Instructions
- Preheat oven to 350°F (175°C). Grease an 8-inch round cake pan with butter or cooking spray and dust with flour.
- In a medium mixing bowl, whisk together the flour, baking powder, and salt.
- Add the softened butter and granulated sugar to the dry ingredients. Whisk until combined and resembling wet sand.
- Crack in the eggs one at a time, whisking well after each addition. Add the vanilla bean paste and whisk until the batter is smooth and pale.
- Pour in the milk and whisk until fully incorporated. The batter should be smooth and pourable.
- Pour the batter into the prepared pan and smooth the top with a spatula.
- Bake for 22-25 minutes, or until a toothpick inserted into the center comes out clean or with a few moist crumbs.
- Let the cake cool in the pan for 10 minutes, then flip it onto a plate or cooling rack to cool completely.
- While the cake cools, beat the softened frosting butter until creamy. Add powdered sugar, vanilla extract, and a pinch of salt. Beat on low until combined, then increase speed and beat for 2 minutes until fluffy.
- Add milk 1 tablespoon at a time to the frosting until it reaches a smooth, spreadable consistency.
- Spread the frosting over the cooled cake and immediately add sprinkles while the frosting is still wet.
- Slice and serve.
Notes
Ensure ingredients are at room temperature for best results. Do not overmix the batter to avoid a tough cake. Check the cake at 22 minutes as oven temperatures vary. Frosting should only be applied when the cake is completely cool to prevent melting. Sprinkles stick best when added immediately after frosting.
- Prep Time: 10 minutes
- Cook Time: 25 minutes
- Category: Dessert
- Cuisine: American
Nutrition
- Serving Size: 1 slice
- Calories: 380
- Sugar: 38
- Sodium: 220
- Fat: 16
- Saturated Fat: 10
- Carbohydrates: 52
- Fiber: 1
- Protein: 4
Keywords: small batch cake, vanilla bean cake, birthday cake, one bowl cake, easy dessert, vanilla cake with sprinkles, quick baking