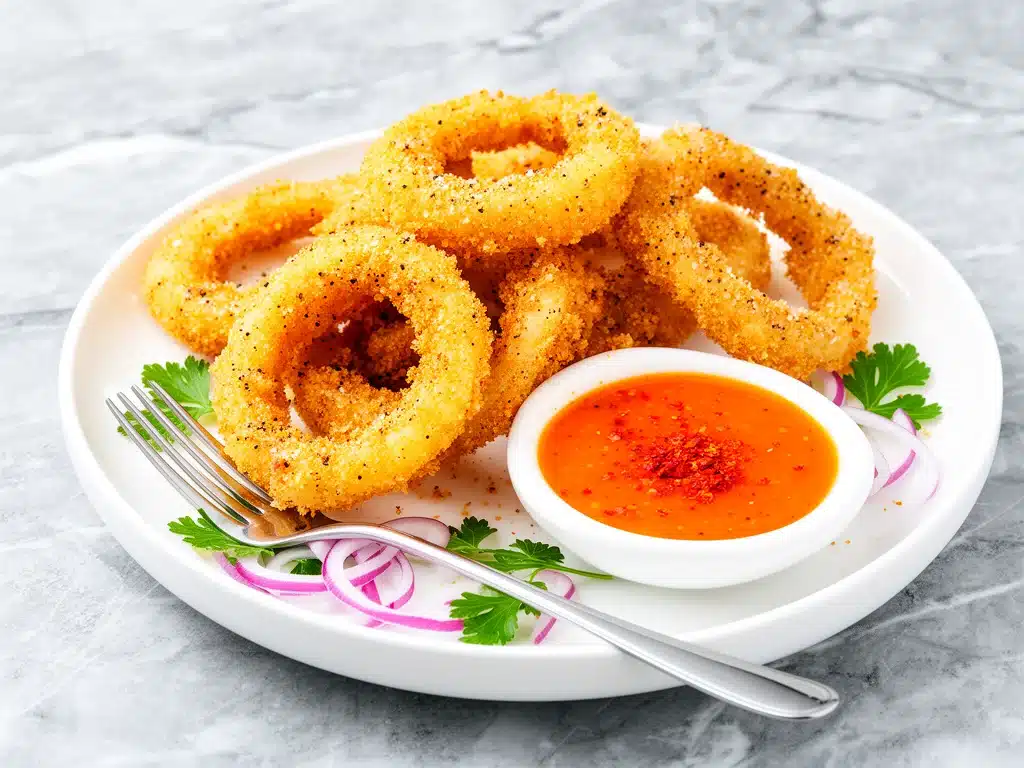
I have a confession to make: I used to think homemade onion rings were a waste of time. Why bother when you can just grab a bag from the freezer or order them at a dive bar? But then I had a rainy Sunday in November where the house felt cold, the kids were bored, and I desperately wanted something crunchy, salty, and slightly spicy. I pulled out an onion, a bowl of flour, and a packet of panko. I wasn’t expecting much. I was ready for soggy, bland rings.
Thirty minutes later, I was staring at a plate of golden, shattering-crisp onion rings that looked nothing like the frozen stuff. My teenager took one bite, paused, and asked, “Wait, you made these?” That was the moment I knew I had struck gold. These crispy onion rings with spicy dipping sauce aren’t just a snack; they are a game-changer. They are better than anything I’ve ordered at a pub, and they take less effort than you think.
I’ve tested this recipe at least twelve times over the last six months. I’ve tried different flours, different batters, and different frying methods. I’ve even tried baking them (don’t bother—unless you like disappointment). This specific method—the double-dip in seasoned flour, the buttermilk bath, and the panko crust—creates that impossibly crunchy exterior while keeping the onion sweet and tender inside. And that spicy dipping sauce? It’s the kind of tangy, heat-kick you can’t get anywhere else.
This isn’t just a recipe; it’s my go-to for dinner parties, game day, or just when I need to feel like a culinary genius in my own kitchen. Once you make these, you’ll never look at a frozen bag of onion rings the same way again. Trust me on this one.
Why You’ll Love This Recipe
There are about ten reasons I keep making these onion rings, but here are the big ones that keep me coming back to the stove every weekend.
Insane Crunch Factor — Seriously, the sound they make when you bite into them is satisfying. The panko breadcrumbs create a shatteringly crisp shell that stays crunchy for a good twenty minutes, even if you’re not eating them immediately. I’ve served these to friends who swear they’re from a high-end restaurant, and they are shocked when I tell them I made them in my pajamas.
Spicy Dipping Sauce That Steals the Show — Most onion ring recipes forget about the dip. Not this one. The spicy mayo (which is basically a fancy name for mayo mixed with hot sauce, ketchup, and spices) adds a creamy, tangy, heat-driven element that balances the savory onion perfectly. It’s addictive. I usually have to hide the bowl because my kids will eat it straight off the plate with a spoon.
Simple Ingredients You Already Have — You don’t need a trip to the specialty store. You need onions, flour, buttermilk, eggs, panko, and a few spices. If you have these in your pantry, you can make this tonight. It’s not about fancy techniques; it’s about technique done right.
Impressive Presentation — These look gorgeous. Golden brown, tall, and crispy. They look like you spent hours preparing them, but they actually take about 45 minutes from start to finish (mostly soaking and resting time). It’s the perfect ratio of effort to reward.
Perfect for Sharing — These are ultimate party food. They travel well, they stay warm in the oven, and they disappear fast. I’ve made this batch for housewarming parties, Super Bowl gatherings, and casual Friday dinners. Everyone loves them. Everyone asks for the recipe. It’s my secret weapon for being the “good host.”
Ingredients You’ll Need
Here’s the best part: you probably have most of this already. The beauty of this recipe is that it relies on pantry staples, but the quality of those staples matters. I’m particular about three things here: the onion, the panko, and the oil. Let’s break it down.
For the Onion Rings
Large Yellow Onions (2 large) — This is non-negotiable. You need large, firm onions that hold their shape. Sweet onions like Vidalia are great if you want less bite, but standard yellow onions give that classic onion ring flavor. Look for ones that are heavy for their size and have dry, papery skins. Avoid onions that are soft or sprouting.
All-Purpose Flour (1 cup / 120g) — This is the base of your dredge. It helps the batter stick to the onion. I use regular all-purpose flour. No need for fancy bread flour here; you want a light coating, not a thick dough.
Panko Breadcrumbs (2 cups / 150g) — This is the secret weapon. Regular breadcrumbs are dense and can get soggy. Panko is light, airy, and creates those big, crunchy flakes. I always buy the Japanese-style panko. It’s worth the extra dollar. If you can’t find panko, you can pulse regular breadcrumbs in a food processor until they’re coarse, but panko is best.
Buttermilk (1 cup / 240ml) — This is crucial. Buttermilk tenderizes the onion and adds a slight tang that cuts through the richness of the frying oil. If you don’t have buttermilk, you can make a substitute by adding 1 tablespoon of lemon juice or white vinegar to a measuring cup, then filling the rest with regular milk. Let it sit for 10 minutes until it curdles slightly. It won’t be exactly the same, but it works in a pinch.
Eggs (2 large) — These act as the glue between the buttermilk and the panko. Whisk them well so there are no lumps.
Vegetable or Canola Oil (for frying, about 2-3 cups) — You need an oil with a high smoke point. Vegetable, canola, or peanut oil are all great choices. Avoid olive oil (unless it’s refined) because it has a lower smoke point and can burn, giving your rings a bitter taste.
Seasonings — Salt, black pepper, garlic powder, and smoked paprika. I add these to the flour mixture. It’s not just salt on top; it’s seasoned all the way through. The smoked paprika adds a subtle depth that makes the rings taste more complex.
For the Spicy Dipping Sauce
Mayonnaise (½ cup / 120g) — I use Hellmann’s or Duke’s. It needs to be creamy and rich. If you’re using a lighter mayo, the sauce might taste thin.
Ketchup (2 tablespoons) — Adds sweetness and body to the sauce. Don’t skip this; it balances the heat.
Hot Sauce (1-2 tablespoons) — I use Frank’s RedHot or Crystal Hot Sauce. They have a vinegar kick that works better than thick, sweet hot sauces. Adjust this based on how much spice you can handle.
Garlic Powder (½ teaspoon) — Adds a savory punch without the risk of burning fresh garlic.
Lemon Juice (1 teaspoon) — Just a splash to brighten up the heavy mayo and ketchup mix.
Equipment Needed
You don’t need fancy equipment for this. Here’s what I actually use in my home kitchen.
Deep Fryer or Heavy-Bottomed Pot — I prefer a Dutch oven or a heavy-bottomed saucepan. It holds heat better than a thin pot, which means the oil temperature stays stable when you add the cold onion rings. If you have a deep fryer, use it! It’s set-it-and-forget-it. I use a candy/deep fry thermometer because guessing oil temperature is how you end up with greasy, soggy rings.
Three Shallow Bowls — You need three bowls for the dredging station: one for the flour mixture, one for the buttermilk/egg wash, and one for the panko. Wide, shallow bowls work best because they make it easier to coat the rings evenly without having to dig them out of a deep bowl.
Wire Rack and Baking Sheet — After frying, you need somewhere for the rings to drain. A wire rack set over a baking sheet is ideal because it allows air to circulate underneath, keeping the bottom crispy. Paper towels work too, but they can trap steam and make the bottom soggy. I learned this the hard way with a batch of sad, wet rings.
Sharp Knife and Cutting Board — You need to slice the onions into even rings. A sharp chef’s knife is essential for safety and precision. Dull knives slip and cause accidents. Also, have a bowl of ice water ready for the onion slices.
Tongs — For handling the rings in the hot oil. Metal tongs give you the best control. Chopsticks work if you’re skilled, but tongs are safer.
How to Make It: Step-by-Step
Alright, let’s make this! I’m walking you through exactly how I do it, including the little tricks I’ve picked up over the years. This process might seem long, but it’s mostly hands-off. The active cooking time is only about 15 minutes.
Step 1: Prep the Onions (10 minutes)
Peel the onions and trim the ends. Slice them into ½-inch thick rings. You want them thick enough to hold their shape but thin enough to cook through. Separate the rings into individual pieces. If you have some smaller rings that fell apart, save them for snacking or adding to salads—they’re still delicious.
Immediately place the onion rings in a bowl of ice water. This step is critical. It stops the onions from bleeding their sulfur compounds, which makes them less pungent and sweeter. Let them soak for at least 30 minutes. I usually do this while I set up my dredging station. The cold also helps the coating stick better later.
Step 2: Set Up Your Dredging Station (5 minutes)
Get your three bowls ready. In the first bowl, whisk together the flour, salt, pepper, garlic powder, and smoked paprika. Make sure the spices are evenly distributed. In the second bowl, whisk the buttermilk and eggs until smooth. In the third bowl, spread out the panko breadcrumbs.
Pat the onion rings dry with paper towels. This is important! Any moisture on the onion will make the flour slide off. You want them dry but cold.
Step 3: The Double-Dip Method (10 minutes)
This is the secret to the perfect crust. First, dredge the onion rings in the seasoned flour, shaking off any excess. Then, dip them into the buttermilk mixture, letting the excess drip off. Finally, press them firmly into the panko breadcrumbs. Make sure to coat all sides, and press the crumbs into the onion so they adhere.
Place the coated rings on a wire rack or plate. Do not skip this resting step. Let them sit for at least 15-20 minutes. This allows the coating to set and hydrate slightly. If you fry them immediately, the coating will fall off in the oil. I know it’s tempting, but patience pays off.
Step 4: Heat the Oil (10 minutes)
Pour about 2-3 inches of oil into your Dutch oven or heavy pot. Heat it over medium-high heat to 350°F (175°C). Use a thermometer to monitor the temperature. If you don’t have a thermometer, stick the end of a wooden spoon into the oil. If bubbles form around the wood and rise steadily, it’s ready.
While the oil heats, make your spicy dipping sauce. Whisk together the mayo, ketchup, hot sauce, garlic powder, and lemon juice. Taste and adjust the heat. Add more hot sauce if you want it spicier, or more mayo if you want it creamier. Set aside.
Step 5: Fry the Rings (10 minutes)
Carefully lower 3-4 onion rings into the hot oil. Do not overcrowd the pot! Frying too many at once drops the oil temperature, leading to greasy rings. Fry for 2-3 minutes per side, or until they are golden brown and crispy. Flip them halfway through to ensure even cooking.
Use tongs to remove the rings and place them on the wire rack set over a baking sheet. Sprinkle immediately with a tiny pinch of salt while they are still hot and oily—the salt sticks better this way.
Step 6: Keep Warm and Serve
If you’re making a large batch, keep the finished rings warm in a 200°F (95°C) oven while you fry the rest. Serve immediately with the spicy dipping sauce. The contrast between the hot, crispy rings and the cool, creamy sauce is pure magic.
Expert Tips & Tricks
Here’s everything I’ve learned from making these dozens of times. These tips will save you from my mistakes.
Maintain Oil Temperature
This is the most common mistake. When you add cold onion rings to hot oil, the temperature drops. If it drops below 325°F, the rings absorb oil and become greasy. If it goes above 375°F, they burn before cooking through. Fry in small batches to keep the temperature stable. Let the oil return to 350°F between batches.
Don’t Skip the Ice Bath
I know it seems like an extra step, but the ice bath makes a huge difference. It firms up the onion structure, preventing it from falling apart in the oil. It also reduces the sulfur smell, making the onions milder and sweeter. If you’re short on time, at least soak them in cold water for 10 minutes.
Press the Panko Firmly
When you coat the rings in panko, press down with your hand. You want the crumbs to embed into the buttermilk layer. If they’re just sitting on top, they’ll fall off in the fryer. A tight crust is a happy crust.
Use a Thermometer
I cannot stress this enough. Guessing oil temperature is risky. A cheap instant-read thermometer or a dedicated deep-fry thermometer is worth every penny. It takes the guesswork out and guarantees crispy results every time.
Make the Sauce Ahead
The spicy dipping sauce actually tastes better if you let it sit in the fridge for an hour before serving. The flavors meld together, and the heat mellows slightly. Make it while the onions are soaking in the ice water.
Variations & Substitutions
Once you’ve nailed the basic version, here’s how you can mix it up. I’ve tried all of these, and they all work.
Baked Onion Rings
For a lighter version, you can bake these instead of frying. Preheat your oven to 400°F (200°C). Place the coated rings on a wire rack sprayed with cooking oil. Bake for 20 minutes, flip, and bake for another 15-20 minutes until golden. They won’t be as crispy as fried, but they’re much healthier. I serve these with the same spicy sauce.
Jalapeño Onion Rings
Add a slice of fresh jalapeño inside the onion ring before dredging. It adds a fresh, sharp heat that complements the creamy sauce. My friend Sarah loves this variation. It’s great for people who like a bit of kick.
Cajun Seasoned Coating
Swap the smoked paprika and garlic powder for Cajun seasoning. It adds a complex blend of herbs and spices that gives the rings a Southern flair. This pairs perfectly with the spicy mayo sauce.
Beer Batter Variation
Instead of the flour/panko method, you can use a beer batter. Mix 1 cup flour, 1 cup beer, 1 egg, and spices into a batter. Dip the onions in the batter and fry. This creates a lighter, crispier crust. I like this method for a more traditional pub-style ring. Note: The panko method is easier for beginners, but the beer batter is delicious if you’re comfortable with wet batters.
Gluten-Free Option
Use gluten-free flour for the dredge and gluten-free panko breadcrumbs. Most brands of panko are naturally gluten-free, but check the label. The rest of the ingredients are gluten-free, so this is an easy swap.
Serving & Storage
How to Serve
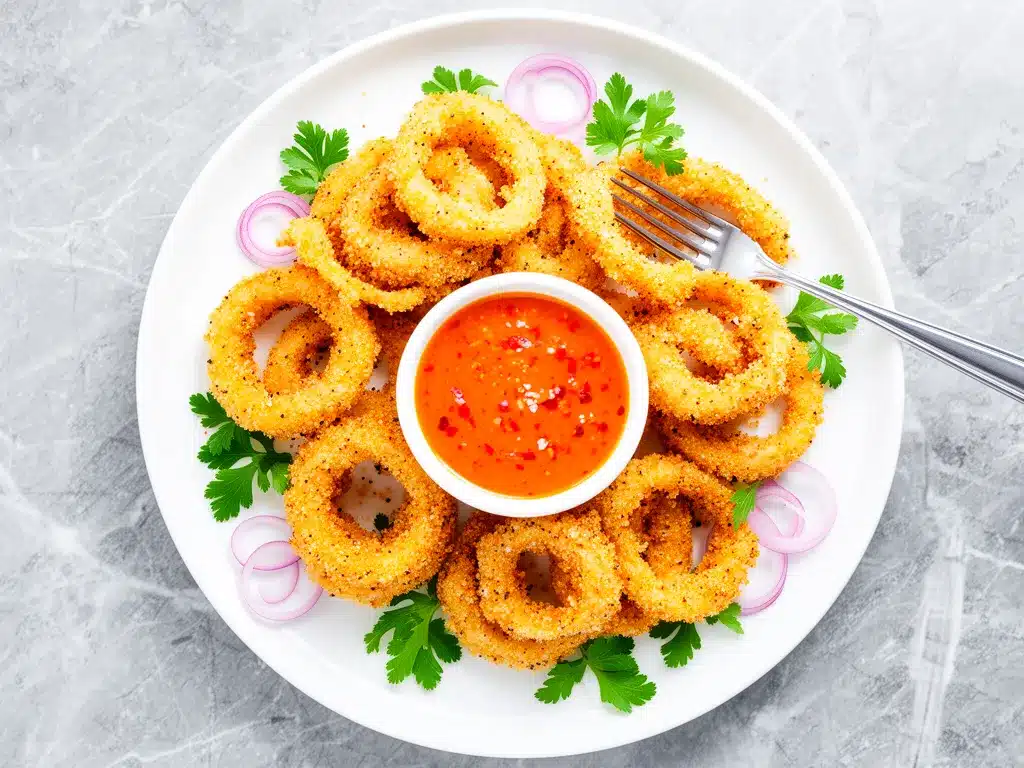
I usually serve these straight from the rack, piled high on a platter with the spicy dipping sauce in a small bowl in the center. It looks rustic and inviting. I also like to garnish with chopped fresh parsley or chives for a pop of color. These are perfect as an appetizer, a side dish for burgers or fried chicken, or even a main course if you’re hungry enough.
Side Dishes
These pairs well with grilled meats, burgers, or a simple green salad. If you’re making a full meal, I recommend serving them with make-ahead breakfast muffin cups for a brunch spread, or alongside some no-bake peanut butter banana energy bites for a sweet-and-savory contrast if you’re hosting a party with multiple snacks.
Storage Instructions
Store leftovers in an airtight container in the refrigerator for up to 2 days. They will lose some crispiness in the fridge, but they’re still good.
Reheating
Do not microwave these! They will become soggy and chewy. The best way to reheat is in an air fryer at 375°F for 3-4 minutes, or in a conventional oven at 400°F for 10 minutes. This will restore the crunch. If you don’t have an air fryer, a toaster oven works well too.
Freezing
You can freeze the coated, uncooked onion rings. Place them on a baking sheet in the freezer until solid, then transfer to a freezer bag. They can be frozen for up to 3 months. Fry them directly from frozen, adding 1-2 minutes to the cooking time. This is great for meal prep! I often freeze extra batches so I have a quick snack ready to go.
Nutrition Information
I’m not a nutritionist, but here’s the breakdown if you’re tracking. Keep in mind that this is a fried food, so it’s higher in calories and fat. It’s meant to be an indulgent treat, not a daily staple.
Per Serving (based on 6 servings, approx. 6 rings per serving):
- Calories: 380
- Protein: 8g
- Carbs: 45g
- Fiber: 2g
- Sugar: 4g
- Fat: 18g
- Saturated Fat: 3g
- Cholesterol: 45mg
- Sodium: 420mg
What’s Good:
- Onions are a good source of vitamin C and B6.
- The sauce provides some protein from the mayo.
What to Know:
- High in carbohydrates from the flour and panko.
- High in fat due to frying.
- Contains gluten and dairy.
My Take:
Look, this is comfort food. It’s crispy, salty, and spicy. It’s not a diet recipe. But it’s way better than takeout, costs less, and you know exactly what’s in it. When I want to make it lighter, I bake them instead of frying. But usually? I just enjoy a reasonable portion and appreciate the crunch.
Final Thoughts
So that’s my go-to crispy onion rings with spicy dipping sauce! I’ve probably talked your ear off at this point, but when you make a recipe this often, you have a lot to say about it.
This has saved dinner parties more times than I can count. It’s my answer to “what can I bring to the potluck?” or “what’s a fun snack for the kids?” It’s easy to make, impressive to serve, and delicious to eat. My family loves them, my friends request them, and I’m happy because I’m not stressed about cooking something complicated.
Make it yours! Try different hot sauces, add different spices to the flour, or serve them with a different dip. The best recipes are the ones you adapt to your family’s tastes. If you make this, drop a comment and let me know what you think! I love hearing how recipes turn out in your kitchen. And if something doesn’t work, tell me that too—I’m here to help troubleshoot.
Happy cooking! And I hope your kitchen smells half as good as mine does right now.
Frequently Asked Questions
Can I use sweet onions instead of yellow onions?
Yes! Sweet onions like Vidalia or Walla Walla are actually great for onion rings because they have less sulfur and more natural sugar. They caramelize beautifully and have a milder bite. If you prefer a stronger onion flavor, stick with yellow onions. Both work well.
Why did my onion rings fall apart in the oil?
This usually happens if the onions weren’t dry before dredging, or if you didn’t let them rest after coating. Moisture prevents the flour from sticking, and skipping the rest step means the coating hasn’t set. Make sure to pat the onions dry, press the panko firmly, and let them rest for 15-20 minutes before frying.
Can I make the spicy dipping sauce ahead of time?
Absolutely! In fact, it tastes better if you let it sit. The flavors meld together, and the heat mellows slightly. You can make it up to 3 days in advance and store it in the fridge. Just stir it well before serving.
How do I keep the oil temperature stable?
Fry in small batches. Adding too many cold rings at once drops the temperature significantly. Fry 3-4 rings at a time, and let the oil return to 350°F between batches. Using a heavy-bottomed pot or Dutch oven also helps maintain heat better than a thin pot.
Can I use regular breadcrumbs instead of panko?
You can, but the texture will be different. Regular breadcrumbs are denser and can become soggy faster. Panko creates a lighter, airier, and crispier crust. If you must use regular breadcrumbs, pulse them in a food processor to make them coarser, but panko is highly recommended for the best results.
Is there a non-fried option?
Yes, you can bake them! Preheat your oven to 400°F (200°C). Place the coated rings on a wire rack sprayed with cooking oil. Bake for 20 minutes, flip, and bake for another 15-20 minutes until golden. They won’t be as crispy as fried, but they’re much healthier and still tasty.
Can I freeze the onion rings?
Yes! Freeze the coated, uncooked rings on a baking sheet until solid, then transfer to a freezer bag. They can be frozen for up to 3 months. Fry them directly from frozen, adding 1-2 minutes to the cooking time. This is great for meal prep!
Pin This Recipe!
Crispy Onion Rings: Easy Best Recipe for 5 Stars
- Total Time: 45 minutes
- Yield: 6 servings 1x
Description
These homemade crispy onion rings feature a double-dip coating of seasoned flour, buttermilk, and panko breadcrumbs for an impossibly crunchy exterior. Served with a tangy, spicy dipping sauce, they are better than pub-style rings and take less effort than you think.
Ingredients
- 2 large yellow onions
- 1 cup all-purpose flour
- 2 cups panko breadcrumbs
- 1 cup buttermilk
- 2 large eggs
- Vegetable or canola oil (for frying, about 2-3 cups)
- Salt
- Black pepper
- Garlic powder
- Smoked paprika
- 1/2 cup mayonnaise
- 2 tablespoons ketchup
- 1–2 tablespoons hot sauce
- 1/2 teaspoon garlic powder
- 1 teaspoon lemon juice
Instructions
- Peel onions and slice into 1/2-inch thick rings. Separate into individual pieces and place in a bowl of ice water for at least 30 minutes.
- Set up a dredging station with three shallow bowls: one with flour mixed with salt, pepper, garlic powder, and smoked paprika; one with whisked buttermilk and eggs; and one with panko breadcrumbs.
- Pat onion rings dry with paper towels. Dredge in seasoned flour, dip in buttermilk mixture, then press firmly into panko breadcrumbs.
- Place coated rings on a wire rack and let rest for 15-20 minutes to allow the coating to set.
- Heat oil in a Dutch oven or heavy-bottomed pot to 350°F (175°C).
- Whisk together mayonnaise, ketchup, hot sauce, garlic powder, and lemon juice to make the spicy dipping sauce. Set aside.
- Fry onion rings in small batches (3-4 at a time) for 2-3 minutes per side until golden brown and crispy.
- Remove rings with tongs and place on a wire rack set over a baking sheet. Sprinkle with a tiny pinch of salt while hot.
- Keep finished rings warm in a 200°F oven while frying remaining batches.
- Serve immediately with the spicy dipping sauce.
Notes
For a lighter version, bake coated rings at 400°F for 20 minutes, flip, and bake another 15-20 minutes. Do not microwave leftovers; reheat in an air fryer at 375°F for 3-4 minutes or in a conventional oven at 400°F for 10 minutes to restore crunch. You can freeze uncooked coated rings for up to 3 months.
- Prep Time: 30 minutes
- Cook Time: 15 minutes
- Category: Appetizer
- Cuisine: American
Nutrition
- Serving Size: Approximately 6 ring
- Calories: 380
- Sugar: 4
- Sodium: 420
- Fat: 18
- Saturated Fat: 3
- Carbohydrates: 45
- Fiber: 2
- Protein: 8
Keywords: crispy onion rings, homemade onion rings, spicy dipping sauce, panko onion rings, party food, game day snacks, fried onion rings


