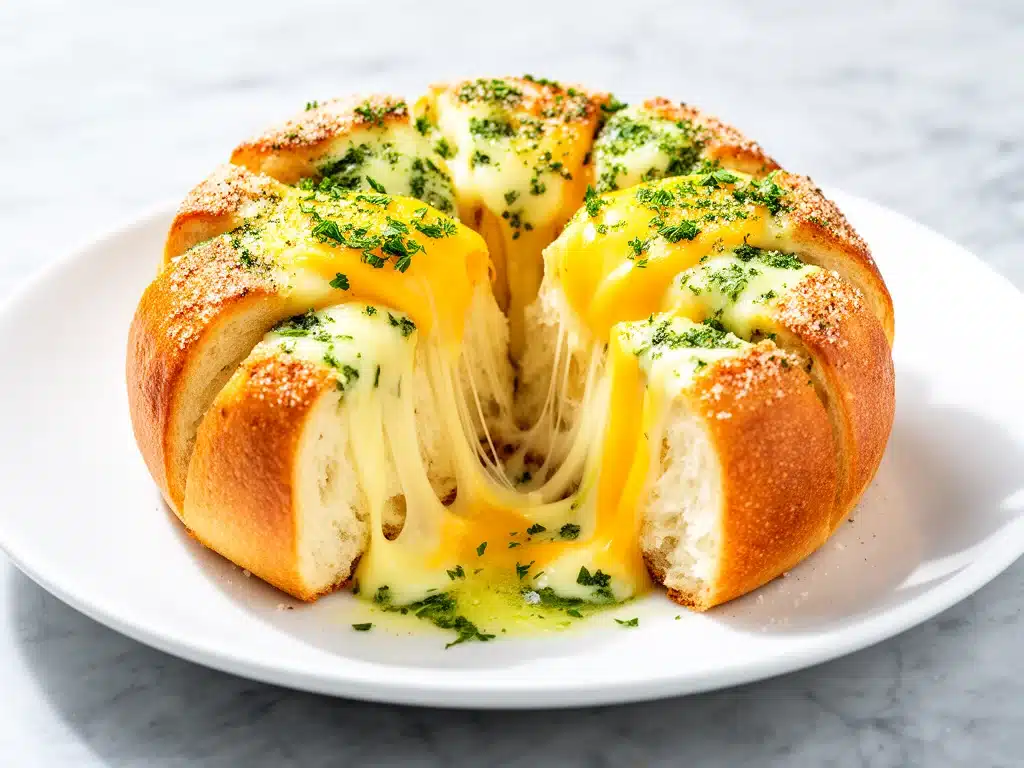
There is a specific kind of magic that happens when you pull apart warm, buttery bread. It’s not just about the taste—it’s the ritual. The way the steam escapes, the stretch of melted cheese, the smell that fills the entire house and makes everyone wander into the kitchen like moths to a flame. I’ve been making this cheesy garlic pull-apart bread for years, and let me tell you, it has completely ruined me for any other bread basket.
Last Thanksgiving, my family showed up expecting me to buy bread from the bakery. I’ve always been the “I’ll just grab something quick” person, but this year I decided to try a homemade version. I wasn’t sure if it would hold up against my sister’s famous sourdough, but I was desperate to avoid the $8 bakery markup. What came out of the oven was so good, my dad actually asked for the recipe before he even sat down. He’s not known for being easily impressed by carbs, so that’s saying something.
The truth is, store-bought bread baskets are often stale or bland by the time dinner starts. This cheesy garlic pull-apart bread with herb butter is different. It’s hot, it’s gooey, and it’s loaded with flavor. It’s the kind of side dish that disappears before the main course even arrives. And the best part? It’s incredibly easy. You don’t need to be a baker. You just need a loaf of bread, some butter, garlic, and cheese.
I’ve tested this recipe about a dozen times, tweaking the butter ratios and cheese blends, until I landed on the perfect balance. It’s crispy on the outside, soft on the inside, and packed with garlicky goodness. If you’re looking for a way to upgrade your dinner party spread or just want to treat yourself to something indulgent, this is it. It’s better than takeout, cheaper than the bakery, and tastes like you spent hours in the kitchen (even though it takes less than 30 minutes).
Why You’ll Love This Recipe
There are plenty of bread recipes out there, but this cheesy garlic pull-apart bread stands out for a few specific reasons. Here’s why I keep coming back to it, and why your family will too:
- Zero Kneading Required — Seriously. If you can slice a loaf of bread, you can make this. I’ve made this while holding a toddler and while my dog was barking at the mailman. It’s that forgiving.
- Restaurant-Quality Flavor — The herb butter mixture is the secret weapon. It’s not just melted butter; it’s infused with garlic, parsley, and a hint of oregano. It tastes like the bread basket at your favorite Italian restaurant, but better because it’s fresh.
- Perfect for Crowds — Need to feed a party? This bread scales easily. I’ve made three loaves for holiday gatherings, and it’s always the first thing to vanish. It’s a crowd-pleaser that works for appetizers, sides, or even breakfast.
- Customizable Cheese — Want mozzarella for the stretch? Go for it. Want cheddar for the sharpness? Do that. I love mixing them because you get the best of both worlds. It’s your canvas.
- Great Leftovers — Okay, let’s be real, leftovers are rare. But if you have any, they’re amazing toasted the next day. The flavors actually deepen overnight, making it even more garlicky and rich.
This recipe has saved me more times than I can count. Whether it’s a last-minute dinner party or just a Tuesday night craving, this pull-apart bread is my go-to. It’s reliable, delicious, and always makes people happy.
Ingredients You’ll Need
The beauty of this recipe is how simple the ingredient list is. You probably have most of this already in your pantry or fridge. Here’s what you need to make the magic happen:
For the Bread Base
French Baguette or Italian Loaf (1 large, about 24 inches) — This is the foundation. I prefer a French baguette because it’s long and thin, making it easier to slice into even pieces. A standard Italian loaf works too, but you might need to adjust your baking time slightly. Avoid dense breads like sourdough or rye; you want something airy and soft.
For the Herb Butter
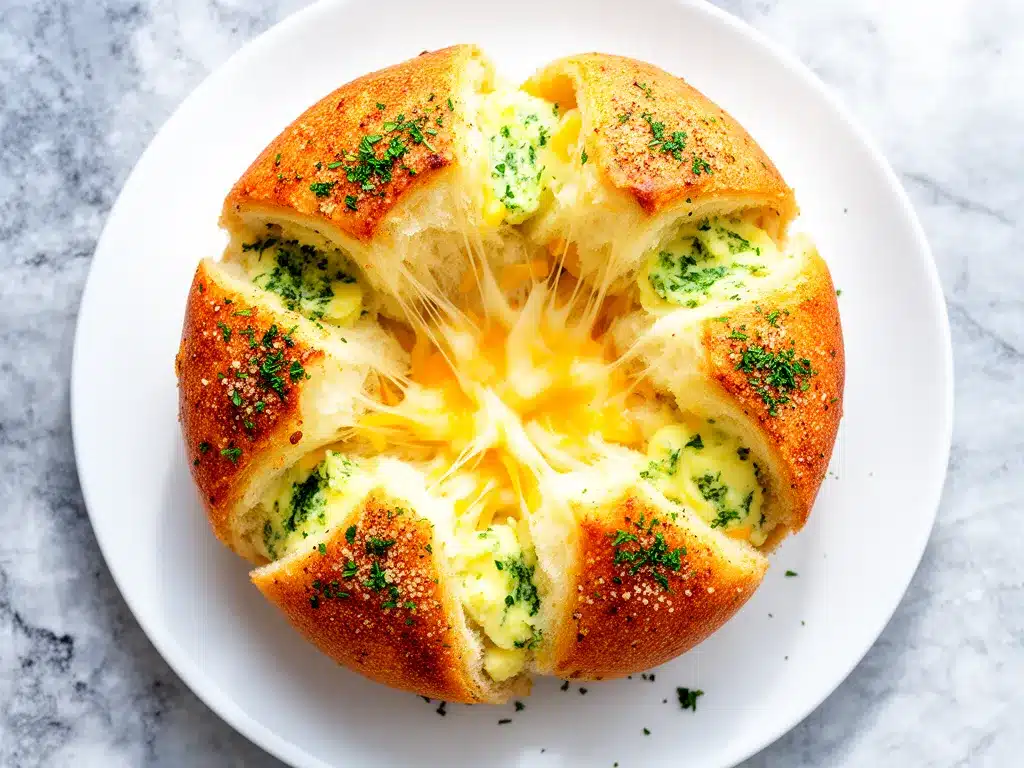
Unsalted Butter (1 stick / 113g) — Softened to room temperature. This is crucial. Cold butter won’t mix well with the herbs. If you’re in a rush, microwave it for 10-15 seconds, but don’t melt it completely. You want it creamy, not liquid.
Garlic (4-5 cloves, minced) — Fresh garlic is non-negotiable here. Jarred garlic has a metallic taste that really shows up in butter. Mince it fine so it distributes evenly. If you’re a garlic lover (and I assume you are), don’t be shy. I usually use 5 cloves.
Fresh Parsley (2 tablespoons, chopped) — This adds a fresh, grassy note that cuts through the richness of the butter and cheese. Dried parsley works in a pinch, but use half the amount. Fresh is best.
Dried Oregano (1 teaspoon) — Adds a subtle earthy depth. It’s an Italian classic that pairs perfectly with garlic.
Red Pepper Flakes (½ teaspoon) — Optional, but I recommend it. It adds a tiny kick that keeps the flavor from being too heavy. Adjust to your spice tolerance.
Salt (½ teaspoon) — Since we’re using unsalted butter, this helps bring out all the flavors. Taste the butter mixture before spreading—it should taste savory and aromatic.
For the Cheese Filling
Mozzarella Cheese (1 cup, shredded) — The stretchy king. Shred your own from a block for the best melt. Pre-shredded cheese has anti-caking agents that can make it grainy.
Parmesan Cheese (½ cup, grated) — Adds a salty, nutty punch. Freshly grated is best, but the pre-grated kind works in a pinch. Mix it with the mozzarella for a more complex flavor.
Cheddar Cheese (½ cup, shredded) — Optional, but I love adding this for color and sharpness. A sharp cheddar contrasts nicely with the mild mozzarella.
Pro Tip: I always buy a block of mozzarella and grate it myself. It melts so much smoother and tastes fresher. It takes about 2 minutes, and the difference is worth it.
Equipment Needed
You don’t need fancy gadgets for this. Here’s what I actually use:
- Baking Sheet — A standard 13×9 inch sheet is perfect. I line mine with parchment paper for easy cleanup.
- Serrated Knife — Essential for slicing the baguette without squishing it. A regular knife will crush the bread.
- Small Bowl — For mixing the herb butter.
- Pastry Brush or Spoon — To spread the butter mixture into the cuts.
- Oven — Standard convection or conventional works fine.
Note: If you don’t have a baking sheet, a large oven-safe skillet works too. Just make sure it fits in your oven.
How to Make Cheesy Garlic Pull-Apart Bread
Alright, let’s get cooking! This is super straightforward. Here’s exactly how I do it, step by step.
Step 1: Prep Your Oven and Bread
Preheat your oven to 350°F (175°C). Line a baking sheet with parchment paper. Take your baguette and place it on a cutting board. Using a serrated knife, slice the loaf horizontally almost all the way through, creating a top and bottom half. Then, slice vertically every 1 inch, but don’t cut all the way through. You want to create a grid of bread cubes that are still attached at the bottom. Think of it like a deck of cards—each card is separate but connected.
Step 2: Make the Herb Butter
In a small bowl, combine the softened butter, minced garlic, chopped parsley, oregano, red pepper flakes, and salt. Mix well until it forms a smooth paste. Taste it. It should smell amazing. If it needs more salt or garlic, add it now. This mixture is the flavor bomb of the recipe.
Step 3: Stuff the Bread
This is the fun part. Use a small spoon or your fingers to spread the herb butter into every cut and crevice of the bread. Get in there. Make sure every slice gets some butter. Then, sprinkle the cheese mixture evenly over the top and into the cuts. You want to distribute the cheese well so every piece gets some.
Step 4: Wrap and Bake
Wrap the entire loaf tightly in aluminum foil. This steams the bread slightly, making it soft and warm inside. Place it on the baking sheet and bake for 15 minutes. Then, carefully unwrap the foil. The bread should be warm and soft. Bake for another 10-15 minutes, or until the cheese is melted, bubbly, and slightly golden brown. Keep an eye on it so the cheese doesn’t burn.
Step 5: Serve
Let it cool for 5 minutes before pulling it apart. This allows the cheese to set slightly so it doesn’t slide out immediately. Serve warm. It’s best eaten fresh, but leftovers are great too.
Expert Tips for Success
Here’s everything I’ve learned from making this dozens of times. These tips will save you from my mistakes.
- Don’t Skip the Butter — The butter keeps the bread moist and adds flavor. Don’t try to cut it out; it’s essential.
- Use Fresh Herbs — Dried herbs work, but fresh parsley makes a huge difference in flavor and presentation.
- Shred Your Own Cheese — Pre-shredded cheese contains cellulose, which prevents melting. Grate your own for the best texture.
- Watch the Oven — Ovens vary. Check your bread after 10 minutes of unwrapping. You want golden, not black.
- Let It Rest — Letting it cool for 5 minutes makes it easier to handle and prevents burns.
Variations and Substitutions
Once you’ve nailed the basic version, here’s how you can mix it up. I’ve tried all of these:
- Jalapeño Popper — Add diced jalapeños and cream cheese to the filling. Spicy and creamy.
- Spinach and Artichoke — Add chopped spinach and artichoke hearts. Tastes like dip in bread form.
- Bacon and Cheddar — Add cooked, crumbled bacon. Smoky and savory.
- Vegan Version — Use vegan butter and vegan cheese. It’s not the same, but it works.
Serving and Storage
This bread is best served warm, straight out of the oven. It pairs perfectly with pasta, salads, or soups. For storage, wrap leftovers in foil and refrigerate for up to 3 days. Reheat in the oven at 350°F for 10 minutes to restore crispiness.
Nutrition Information
Per serving (based on 8 servings): Calories: 320, Protein: 12g, Carbs: 35g, Fat: 16g, Sodium: 450mg. This is a rich, indulgent side dish, so enjoy in moderation.
Final Thoughts
This cheesy garlic pull-apart bread has become a staple in my kitchen. It’s easy, delicious, and always a hit. Whether you’re hosting a party or just want a treat, give this recipe a try. You won’t regret it.
Frequently Asked Questions
Can I use a different type of bread?
Yes, but French baguette or Italian loaf is best because of its airy texture. Dense breads won’t pull apart as well.
Can I make this ahead of time?
You can prep it and refrigerate it for up to 24 hours. Bake it straight from the fridge, adding 5-10 minutes to the cooking time.
Why is my bread soggy?
Too much butter or not enough baking time. Make sure you unwrap the foil for the second half of baking to crisp up the bread.
Can I freeze this?
It’s best fresh, but you can freeze unbaked bread. Wrap tightly and freeze for up to 1 month. Thaw and bake as directed.
Pin This Recipe!
Cheesy Garlic Pull-Apart Bread: Best Homemade Recipe
- Total Time: 45 minutes
- Yield: 8 servings 1x
Description
A homemade cheesy garlic pull-apart bread that is crispy on the outside, soft on the inside, and packed with garlicky herb butter and melted cheese. It’s an easy, crowd-pleasing side dish or appetizer that requires zero kneading.
Ingredients
- 1 large French baguette or Italian loaf (about 24 inches)
- 1 stick (113g) unsalted butter, softened to room temperature
- 4–5 cloves garlic, minced
- 2 tablespoons fresh parsley, chopped
- 1 teaspoon dried oregano
- 1/2 teaspoon red pepper flakes (optional)
- 1/2 teaspoon salt
- 1 cup mozzarella cheese, shredded
- 1/2 cup parmesan cheese, grated
- 1/2 cup cheddar cheese, shredded (optional)
Instructions
- Preheat oven to 350°F (175°C). Line a 13×9 inch baking sheet with parchment paper.
- Place the baguette on a cutting board. Slice horizontally almost all the way through to create a top and bottom half, then slice vertically every 1 inch without cutting all the way through to create a connected grid.
- In a small bowl, mix the softened butter, minced garlic, parsley, oregano, red pepper flakes, and salt until a smooth paste forms.
- Spread the herb butter mixture into every cut and crevice of the bread.
- Sprinkle the shredded cheese mixture evenly over the top and into the cuts.
- Wrap the entire loaf tightly in aluminum foil and place on the baking sheet.
- Bake for 15 minutes. Carefully unwrap the foil.
- Bake for another 10-15 minutes until the cheese is melted, bubbly, and slightly golden brown.
- Let cool for 5 minutes before serving.
Notes
Shred your own cheese for better melting. If using pre-shredded cheese, note that anti-caking agents may affect texture. For leftovers, reheat in the oven at 350°F for 10 minutes to restore crispiness. Can be prepped and refrigerated for up to 24 hours before baking.
- Prep Time: 15 minutes
- Cook Time: 25-30 minutes
- Category: Side Dish
- Cuisine: Italian
Nutrition
- Serving Size: 1 piece from the loa
- Calories: 320
- Sugar: 2
- Sodium: 450
- Fat: 16
- Saturated Fat: 8
- Carbohydrates: 35
- Fiber: 2
- Protein: 12
Keywords: cheesy garlic bread, pull apart bread, homemade bread basket, garlic herb butter, easy appetizer, side dish recipe


