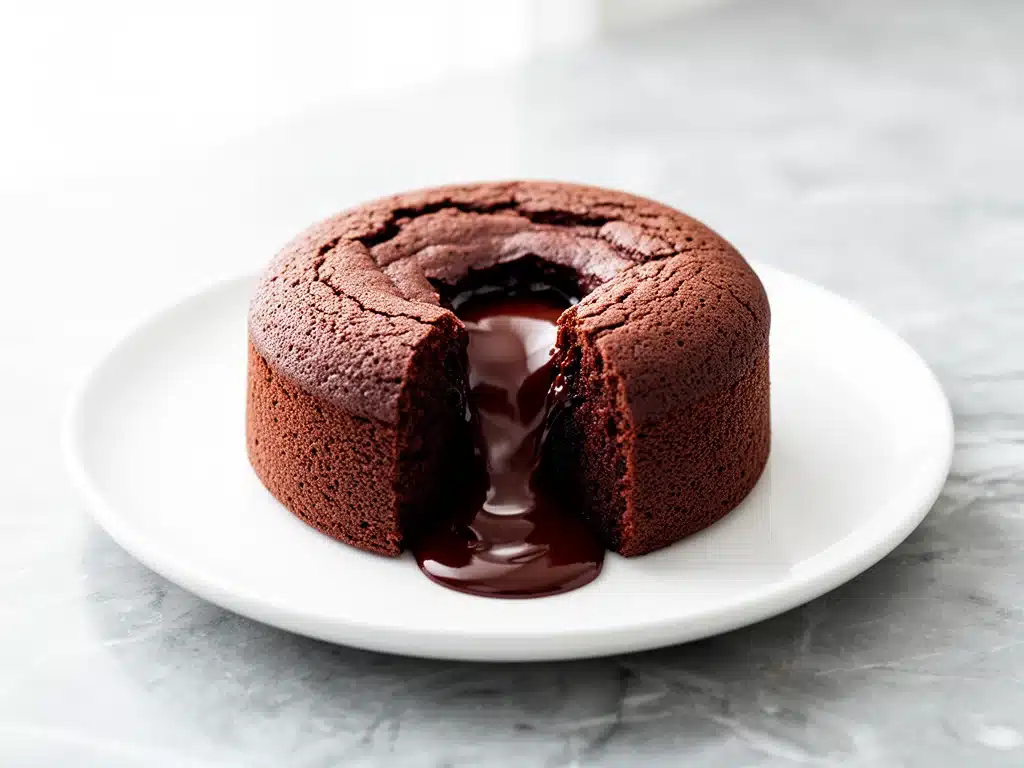
Last Friday night, I was supposed to be impressing my partner’s boss. You know the drill. The kind of dinner where you spend three hours marinating steak, worrying about wine pairings, and stressing over whether your centerpiece is too loud. I had a perfectly good plan. Then, disaster struck. A power outage knocked out my oven mid-roast.
Panic set in. I had guests arriving in forty minutes. I couldn’t cook a main course. I couldn’t even boil water for pasta. But I did have eggs, chocolate, butter, and flour. I remembered a recipe I’d seen years ago—something small, individual, and forgiving. I whipped up four chocolate lava cakes. They took ten minutes to bake. I served them warm, with a scoop of slightly melted vanilla ice cream.
My partner’s boss looked at the small ramekins, then at me, and said, “This is the best dessert I’ve had all year.”
Here’s the thing: I wasn’t trying to be fancy. I was trying to survive. But those fudgy chocolate lava cakes became the highlight of the evening. It turns out, people don’t always want the most complicated dish. They want something that tastes like pure comfort, served hot, with a gooey center that makes them close their eyes for a second.
Since that night, I’ve made these fudgy chocolate lava cakes dozens of times. For date nights. For last-minute guests. For when I just need a hug in dessert form. And I’ve perfected the timing so the center is always perfectly molten, never undercooked, never overdone.
Most people think making lava cakes is hard. They think it requires chocolate work, tempering, and a culinary degree. It doesn’t. It requires a bowl, a whisk, and about 12 minutes of your life. If you can melt chocolate and mix batter, you can make these. And trust me, the payoff is worth every second.
Why You’ll Love These Fudgy Chocolate Lava Cakes
I’ve tested this recipe with dark chocolate, semi-sweet, milk chocolate, and even chocolate chips. The results are always good, but there’s a specific reason these fudgy chocolate lava cakes have taken over my kitchen (and my heart).
- They’re actually fast. Not “prep-heavy” fast. I mean, from start to finish, these are ready in under 15 minutes. The active prep is maybe 5 minutes. The rest is just waiting for the oven. I make these on weeknights when I’m tired but still want something special.
- Zero failure rate. Unlike soufflés or meringues, these don’t collapse if you look at them wrong. The structure is simple. The chemistry is forgiving. If you overbake them by 30 seconds, they’re just dense brownies. If you underbake them, they’re soupy. Find that sweet spot, and you’re golden.
- They feel fancy but aren’t. Serving individual ramekins makes any meal look like you went to a high-end restaurant. But the ingredients? Butter, sugar, eggs, chocolate, flour. Things you already have. It’s the ultimate cheat code for impressing people without the stress.
- Customizable forever. Want to add espresso powder? Do it. Throw in some sea salt on top? Yes. Swap the chocolate for peanut butter? Absolutely. These are a blank canvas for your cravings.
- They solve the “what’s for dessert?” crisis. I keep this recipe in my back pocket for every occasion. Unexpected guests? Done. Kids came home hungry? Done. Just had a bad day and need sugar? Done. It’s the dessert equivalent of no-bake peanut butter banana energy bites—quick, reliable, and universally loved.
Real talk: I’ve made these for picky eaters who claim they “don’t like dessert,” and they’ve gone back for seconds. There’s something about that hot, gooey center that just wins people over. It’s not complicated. It’s just chocolate, done right.
Ingredients You’ll Need
Here’s the good news: you don’t need a specialty store run. The ingredients for these fudgy chocolate lava cakes are basic pantry staples. I’m particular about a few things, though, and I’ll tell you exactly why.
For the Batter
Dark chocolate (6 ounces / 170g) — This is the star. Use high-quality chocolate with 60-70% cocoa solids. Ghirardelli or Lindt work great. Avoid baking chips if you can; they have stabilizers that keep them from melting smoothly. You want it to melt like silk. If you use chips, chop them up first to help them melt evenly.
Unsalted butter (½ cup / 113g) — Room temperature is ideal, but not strictly necessary. I cut it into cubes so it melts faster with the chocolate. Salted butter works, but reduce the added salt in the recipe slightly.
Eggs (2 large + 2 yolks) — This is the secret weapon. Using whole eggs plus extra yolks gives you the structure you need to hold the cake together, but the extra yolks add that rich, fudgy, custard-like texture. Don’t skip the extra yolks. They make the difference between a cake and a lava cake.
Granulated sugar (½ cup / 100g) — Standard white sugar. It dissolves easily into the warm chocolate mixture. Brown sugar works too, but it adds moisture that might change the texture. Stick to white for the classic result.
All-purpose flour (2 tablespoons / 15g) — Just enough to give structure. Too much flour, and you get a dense bread-like texture. Too little, and it’s just chocolate soup. Measure carefully.
Salt (¼ teaspoon) — Enhances the chocolate flavor. Don’t skip it. Chocolate and salt are best friends.
For Prep and Serving
Butter and cocoa powder — For greasing the ramekins. I use cocoa powder instead of flour because it doesn’t leave a white residue and adds a hint of chocolate flavor. If you don’t have cocoa powder, flour works fine.
Vanilla ice cream (optional) — The classic pairing. The cold creaminess contrasts with the hot lava. But whipped cream, fresh berries, or even just a dusting of powdered sugar works too.
Espresso powder (optional, 1 teaspoon) — Not for coffee flavor, but to deepen the chocolate taste. It’s a pro trick. If you don’t have it, skip it. The cake is still amazing.
Equipment You’ll Need
You don’t need fancy gear for this. Here’s what I actually use:
6 Ramekins (6-ounce size) — Standard ceramic ramekins work best. They conduct heat evenly. If you use metal or glass, keep an eye on them—they might cook faster or slower. I use Le Creuset ones because they’re pretty, but any 6-ounce ramekin will do.
Microwave-safe bowl or double boiler — For melting chocolate and butter. I use the microwave because it’s faster. 30-second intervals, stirring in between, prevents burning.
Mixing bowls — Two medium bowls. One for the chocolate mixture, one for whisking eggs and sugar.
Whisk — Essential for aerating the eggs and sugar. You want that mixture pale and fluffy. It takes about 2-3 minutes of vigorous whisking.
Spatula — For folding the flour into the chocolate. Gentle folds keep the air in the batter, which helps the cakes rise.
Baking sheet — Place your ramekins on a baking sheet before putting them in the oven. It makes transferring them in and out easier and catches any potential drips.
How to Make It: Step-by-Step
Alright, let’s make these fudgy chocolate lava cakes! I’m walking you through exactly how I do it, including the little tricks I’ve picked up over the years. This process is simple, but timing is everything.
Step 1: Prep Your Ramekins (2 minutes)
Preheat your oven to 425°F (220°C). This needs to be hot enough to set the edges quickly while leaving the center raw. While the oven heats, butter the inside of your 6 ramekins thoroughly. Use your fingers or a pastry brush to get into the corners. Then, dust with cocoa powder. Tap out the excess. You want a thin, even coating. This prevents sticking and adds flavor. If you skip this step, you’ll be scraping chocolate out of the ramekin with a spoon, and nobody wants that.
Step 2: Melt the Chocolate and Butter (3 minutes)
Chop your chocolate into small pieces. This helps it melt evenly. Place the chocolate and butter in a microwave-safe bowl. Microwave on high for 30 seconds. Stir. If it’s not fully melted, microwave for another 15-20 seconds. Stir until smooth and glossy. Let it cool for a minute so it doesn’t cook the eggs when you add them. If you’re using a double boiler, melt over simmering water, stirring constantly. Same result, just slower.
Step 3: Whisk Eggs and Sugar (2 minutes)
In a separate bowl, whisk the whole eggs and egg yolks with the sugar and salt. This is the most important step for texture. Whisk vigorously for 2-3 minutes until the mixture is pale, thick, and slightly fluffy. It should leave a ribbon trail when you lift the whisk. This incorporates air, which helps the cakes rise and creates that tender crumb. Don’t rush this. It’s the difference between a dense brick and a light, fudgy cake.
Step 4: Combine Wet Ingredients (1 minute)
Pour the warm chocolate mixture into the egg mixture. Whisk gently to combine. The mixture will look thick and glossy. It’s okay if it’s not perfectly smooth yet; you’ll fold in the flour next.
Step 5: Fold in Flour (1 minute)
Sift the flour (and espresso powder, if using) over the batter. Using a spatula, gently fold the flour into the chocolate mixture. Fold until just combined. Do not overmix. You want to keep the air you whipped into the eggs. Overmixing deflates the batter, and your lava cakes won’t rise properly. Stop as soon as you see no more white streaks of flour.
Step 6: Fill the Ramekins (1 minute)
Distribute the batter evenly among the 6 prepared ramekins. Use your spatula to smooth the tops. They should be about ¾ full. If you fill them too high, they’ll overflow. If you fill them too low, they’ll be too dense.
Step 7: Bake (12-14 minutes)
Place the ramekins on a baking sheet and put them in the preheated oven. Bake for 12-14 minutes. This is the critical window. At 12 minutes, the edges will be set and puffed, but the center will still be jiggly. At 14 minutes, the center will be slightly more set but still soft. If you bake for 15+ minutes, the center will cook through, and you’ll just have chocolate cakes. Start checking at 12 minutes. The top should look dry, but the center should jiggle slightly when you shake the ramekin.
Step 8: Rest and Serve (2 minutes)
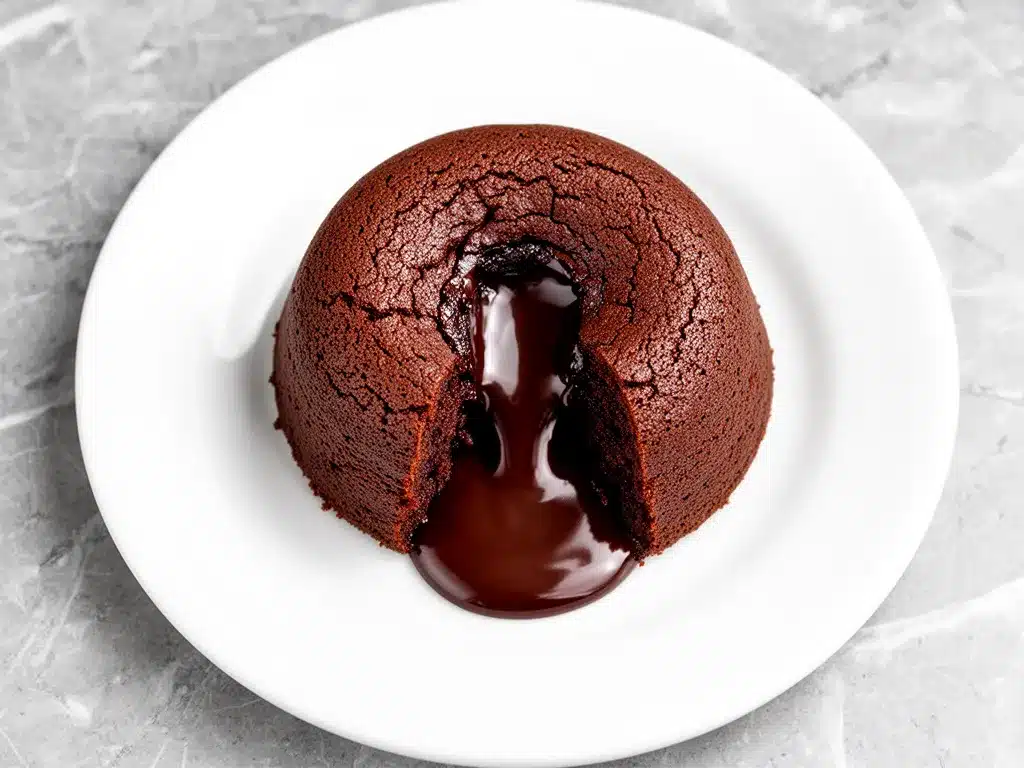
Remove the ramekins from the oven and let them rest for 1 minute. This allows the center to set just enough so it doesn’t spill out when you invert them. Then, run a knife around the edge to loosen. Place a small plate over the ramekin and flip it over quickly. Tap the ramekin gently, and the cake should slide out. The center should be warm and gooey. Serve immediately with ice cream or whipped cream.
Total Time: About 15 minutes (5 minutes prep, 12 minutes bake, 1 minute rest)
Expert Tips & Tricks
Here’s everything I’ve learned from making these dozens of times. These tips will save you from my mistakes.
Timing is Everything
The difference between a lava cake and a chocolate cake is 2 minutes. Use a timer. Set it for 12 minutes. Check it. If the center is still very liquid, give it 1 more minute. If it’s just jiggly, pull it out. The residual heat will continue to cook it slightly as it rests. I’ve burned so many cakes by waiting too long. Set the timer and trust it.
Room Temperature Eggs
If your eggs are cold, they can seize the chocolate mixture when you add it. Take them out of the fridge 15 minutes before you start. Warm eggs whisk up better too, creating a lighter batter. I learned this the hard way when my first batch was dense and heavy.
Don’t Skip the Resting Time
I know you’re excited to eat it. But let the ramekins rest for 1 minute after baking. This stabilizes the structure. If you invert them immediately, the center might spill out completely, and you’ll have a chocolate mess on your plate instead of a contained lava flow.
Make Ahead Option
Want to prep ahead? Fill the ramekins with batter and refrigerate for up to 24 hours. When ready to bake, take them out of the fridge and let them sit at room temperature for 10 minutes. Then bake as directed, adding 1-2 minutes to the baking time because the batter is cold. This is great for dinner parties. I do this all the time. It’s like having make-ahead breakfast muffin cups but for dessert—stress-free and impressive.
The Knife Test
If you’re unsure if they’re done, insert a toothpick into the center. It should come out with moist crumbs, not clean batter (undercooked) and not completely clean (overcooked). Moist crumbs are the sweet spot.
Quality Chocolate Matters
I’ve used cheap chocolate chips, and the result is waxy and less flavorful. Good chocolate melts smoother and tastes richer. You don’t need the most expensive stuff, but avoid the lowest shelf. Ghirardelli 60% or 70% is a reliable, affordable choice.
Variations & Substitutions
Once you’ve nailed the basic version, here’s how you can mix it up. I’ve tried all of these, and they’re all winners.
Flavor Variations
Peppermint Lava Cakes
Add ½ teaspoon peppermint extract to the egg mixture. Top with crushed peppermint candies. Great for holidays.
Coffee Lava Cakes
Add 1 tablespoon instant espresso powder to the flour. The coffee flavor intensifies the chocolate. Perfect for morning dessert or with a cup of coffee.
Orange Chocolate
Add 1 teaspoon orange zest to the batter. Serve with a dollop of orange-infused whipped cream. Bright and sophisticated.
Salted Caramel
Cut a small square of store-bought salted caramel and drop it into the center of the batter before baking. The caramel melts into the center, creating a double lava effect. My favorite variation.
Dietary Modifications
Gluten-Free
Swap the all-purpose flour for a 1:1 gluten-free flour blend. The result is identical. I’ve used Bob’s Red Mill and King Arthur, and both work great.
Dairy-Free
Use dairy-free chocolate (check the label) and replace butter with coconut oil or a dairy-free butter alternative. The texture might be slightly less rich, but it’s still delicious. Serve with coconut whipped cream.
Lower Sugar
Reduce the sugar to ¼ cup. The cake will be less sweet and more intensely chocolatey. You can add a drizzle of sugar-free syrup or serve with sugar-free ice cream if needed.
Protein Boost
Chocolate Protein Lava Cakes
Replace 2 tablespoons of flour with chocolate protein powder. Add an extra egg white to compensate for the dryness. They’re less gooey but still satisfying. Good for post-workout treats.
Serving & Storage
These fudgy chocolate lava cakes are best served immediately. They don’t store well in the traditional sense because the texture changes as they cool. But here’s how to handle them.
How to Serve
I usually serve these straight from the inverted ramekin onto a small dessert plate. The contrast of the warm cake and cold ice cream is essential. But here are other ways I’ve enjoyed them:
- With fresh berries — Raspberries or strawberries add acidity that cuts through the richness.
- With whipped cream — Homemade is best, but canned works in a pinch.
- With a drizzle of caramel — Adds sweetness and visual appeal.
- With a sprinkle of sea salt — Flaky salt on top enhances the chocolate flavor.
Storage Instructions
Refrigerator: If you have leftovers (unlikely, but possible), store the cooled cakes in an airtight container for up to 2 days. Reheat in the microwave for 10-15 seconds to soften the center. They won’t be as gooey, but they’ll be warm.
Freezing: You can freeze the unbaked batter in the ramekins. Freeze them solid, then transfer to a bag. When ready to eat, bake from frozen, adding 2-3 minutes to the baking time. Thawed, baked cakes do not freeze well—they become dry and crumbly.
Make-Ahead Strategy: As mentioned, prep the batter and refrigerate the filled ramekins. This is the best way to manage time for a dinner party. Just remember to adjust baking time for cold batter.
Nutrition Information
I’m not a nutritionist, but here’s the breakdown if you’re tracking. Keep in mind, this is a rich, indulgent dessert, so portion control is key.
Per Serving (1 cake, without toppings):
- Calories: 280
- Protein: 6g
- Carbs: 32g
- Fiber: 2g
- Sugar: 24g
- Fat: 16g
- Saturated Fat: 9g
- Cholesterol: 140mg
- Sodium: 120mg
What’s Good:
- Decent protein from eggs
- Antioxidants from dark chocolate
- Quick energy from sugar
What to Know:
- High in sugar and saturated fat
- Contains dairy and gluten (unless modified)
- Calorie-dense due to chocolate and butter
My Take:
Look, this is dessert. It’s meant to be indulgent. It’s not a health food. But it’s better than store-bought because you control the ingredients. When I want to make it slightly lighter, I use 70% dark chocolate and reduce the sugar. But usually? I just enjoy one and move on. Balance is key.
Final Thoughts
So that’s my go-to fudgy chocolate lava cakes! I’ve probably talked your ear off at this point, but when you make a recipe this often, you have a lot to say about it.
This has saved dinner parties more times than I can count. It’s my answer to “I want something special but I don’t want to spend all night cooking.” My guests are always impressed, and I’m always happy because I’m not stressed in the kitchen.
Make it yours! Try different chocolates, add your favorite mix-ins, or serve it with something unexpected. The best recipes are the ones you adapt to your tastes. And remember, if you mess up the timing, it’s still chocolate. You can’t really lose.
If you make this, drop a comment and let me know how it turned out! I love hearing how recipes work in your kitchen. And if something doesn’t work, tell me that too—I’m here to help troubleshoot.
Happy cooking! And I hope your kitchen smells half as good as mine does right now.
Frequently Asked Questions
Can I make these ahead of time?
Yes! Fill the ramekins with batter and refrigerate for up to 24 hours. When ready to bake, let them sit at room temperature for 10 minutes, then bake as directed, adding 1-2 minutes to the baking time. This is perfect for dinner parties.
Why did my lava cakes turn out like regular cakes?
You likely overbaked them. The key is to pull them out when the center is still jiggly. If you bake for 15+ minutes, the center will set completely. Start checking at 12 minutes. The residual heat will finish cooking them as they rest.
Can I use milk chocolate instead of dark chocolate?
You can, but the result will be sweeter and less intense. Dark chocolate (60-70%) provides the best balance of sweetness and richness. If you use milk chocolate, reduce the sugar slightly.
What if I don’t have ramekins?
You can use a muffin tin! Grease the cups well and bake for 12-14 minutes. The result will be slightly different in shape, but the taste and texture will be the same. Just make sure the cups are large enough to hold the batter.
Can I freeze the baked cakes?
Not recommended. The texture changes as they cool, and freezing makes them dry and crumbly. It’s better to freeze the unbaked batter in the ramekins and bake from frozen.
Can I make these in the air fryer?
Yes! Place the ramekins in the air fryer basket (you may need to do this in batches). Cook at 350°F (175°C) for 10-12 minutes. Keep a close eye on them, as air fryers vary in intensity.
Why did my cakes stick to the ramekins?
You probably didn’t grease them well enough. Make sure to butter every inch of the inside, including the corners. Dusting with cocoa powder helps create a non-stick surface. If they still stick, run a knife around the edge carefully before inverting.
Pin This Recipe!
Fudgy Chocolate Lava Cakes: 5-Minute Easy Dessert
- Total Time: 15 minutes
- Yield: 6 servings 1x
Description
Quick and easy individual chocolate lava cakes with a molten center, ready in under 15 minutes. Perfect for impressing guests or satisfying a last-minute sweet craving.
Ingredients
- 6 ounces (170g) high-quality dark chocolate (60-70% cocoa solids), chopped
- ½ cup (113g) unsalted butter, cubed
- 2 large eggs
- 2 egg yolks
- ½ cup (100g) granulated sugar
- 2 tablespoons (15g) all-purpose flour
- ¼ teaspoon salt
- Butter and cocoa powder for greasing ramekins
- 1 teaspoon espresso powder (optional)
Instructions
- Preheat oven to 425°F (220°C). Butter the inside of 6 ramekins thoroughly and dust with cocoa powder, tapping out excess.
- Chop chocolate into small pieces. Combine with butter in a microwave-safe bowl. Microwave on high for 30 seconds, stir, then microwave in 15-20 second intervals until smooth. Let cool slightly.
- In a separate bowl, whisk eggs, egg yolks, sugar, and salt vigorously for 2-3 minutes until pale, thick, and fluffy.
- Pour the warm chocolate mixture into the egg mixture and whisk gently to combine.
- Sift flour (and espresso powder if using) over the batter. Gently fold in with a spatula until just combined; do not overmix.
- Divide batter evenly among prepared ramekins, filling them about ¾ full.
- Place ramekins on a baking sheet and bake for 12-14 minutes. Edges should be set but center jiggly.
- Let rest for 1 minute. Run a knife around the edge, invert onto a plate, and serve immediately.
Notes
Timing is critical; bake for 12-14 minutes to ensure a molten center. Use room temperature eggs for better texture. Can be made ahead by refrigerating filled ramekins for up to 24 hours, adding 1-2 minutes to bake time. For gluten-free, swap flour for a 1:1 gluten-free blend. For dairy-free, use dairy-free chocolate and coconut oil or butter alternative.
- Prep Time: 5 minutes
- Cook Time: 12 minutes
- Category: Dessert
- Cuisine: American
Nutrition
- Serving Size: 1 cake
- Calories: 280
- Sugar: 24
- Sodium: 120
- Fat: 16
- Saturated Fat: 9
- Carbohydrates: 32
- Fiber: 2
- Protein: 6
Keywords: chocolate lava cake, molten chocolate cake, easy dessert, 15 minute dessert, fudgy chocolate cake, individual desserts, date night dessert


