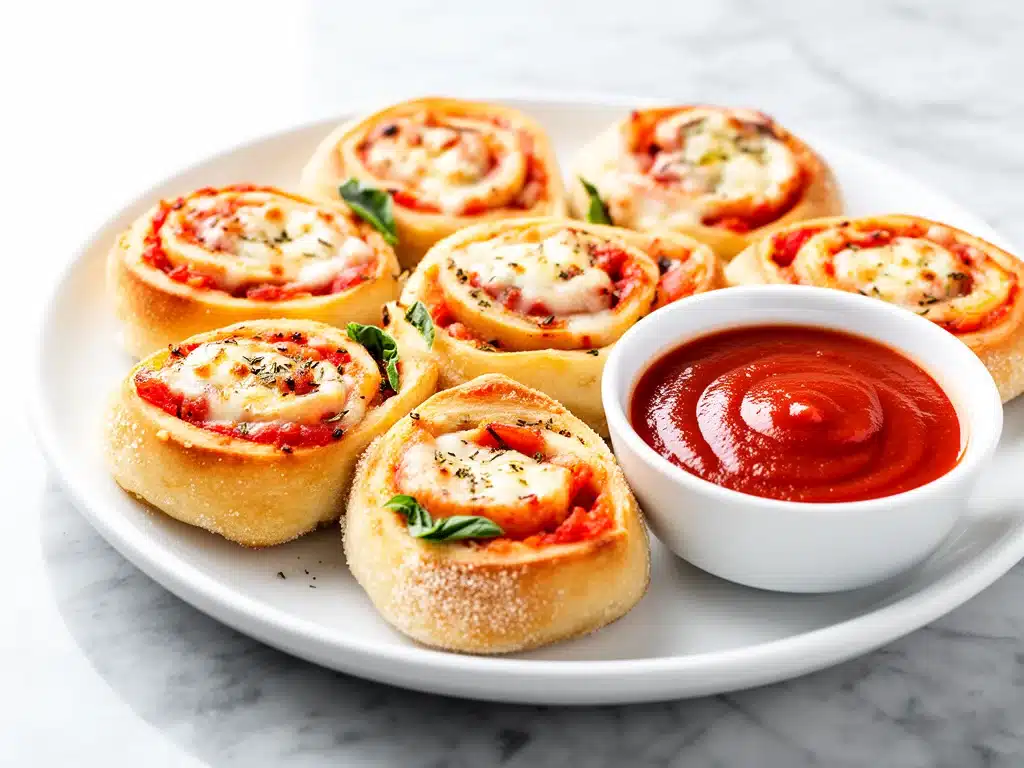
Last Tuesday, I walked into the kitchen at 4:15 PM to find my three kids standing in a line, staring at the pantry like it held the secrets to the universe. It was that specific kind of hungry where “what’s for dinner?” isn’t a question anymore—it’s a demand. My husband had been stuck at work, the grocery run was delayed, and my energy reserves were officially at zero. I didn’t have time to roast vegetables, chop meat, or wrestle with a complicated sauce. All I had was a package of refrigerated pizza rolls, a tub of ricotta cheese, and a box of tortillas I’d bought for tacos that were never going to happen.
I threw them together on a whim, rolling them up like giant, cheesy burritos and baking them until they were golden and crispy. The result? Pure magic. My kids devoured them so fast I barely had time to take a photo. That was the birth of these after-school pizza pinwheels. They aren’t just a snack; they are a weeknight dinner savior. I’ve made them at least a dozen times since that chaotic Tuesday, and they’ve become the go-to solution for those “I’m tired, I’m hungry, and I don’t want takeout” moments.
What I love most about this recipe is how it bridges the gap between a snack and a meal. It’s familiar—everyone loves pizza—but it’s portable, easy to eat with your hands, and uses ingredients you probably already have in your fridge. It’s not fancy. It’s not gourmet. But it is reliable, delicious, and takes less than 30 minutes from start to finish. If you’re a parent who has ever stared at an empty clock wondering how to feed a growing family with five minutes left in the day, you need this recipe in your rotation.
These pinwheels are my answer to the 4 PM slump. They are crispy on the outside, gooey on the inside, and customizable enough that even the pickiest eaters can’t complain. I’ve tested this method with different cheeses, different sauces, and different add-ins, and I’ve found the perfect balance that works every single time. So, let’s get into the details of why these are about to become your new best friend.
Why You’ll Love This Recipe
I’m not exaggerating when I say these pizza pinwheels have completely changed our after-school routine. Before this, we were stuck in a cycle of cereal for dinner or ordering expensive delivery because we were too tired to cook. Now, we have a hot, satisfying meal that comes together while I’m unpacking the car. Here’s why I keep making them:
- Stupid Simple Assembly — Seriously, if you can spread sauce on a tortilla, you can make this. I’ve walked my teenage son through the process over FaceTime when he was home alone. There’s no chopping, no sautéing, and no complex techniques. Just roll, slice, and bake.
- Lightning Fast — 25 minutes from start to finish, and only 10 of those are active prep. The rest is just baking time where you can actually sit down for two minutes. I make these on weeknights when I get home at 5:30 PM and need food on the table by 6:00.
- Pantry-Friendly Ingredients — You probably have 90% of these ingredients already. Tortillas, jarred pizza sauce, shredded mozzarella, and pepperoni are staples in my house. I keep them stocked specifically so I can throw these together on a whim.
- Crowd-Pleaser — I’ve served these to my vegetarian sister, my neighbor’s toddler, and my husband who claims he “doesn’t like snacks for dinner.” Everyone loved them. The flavor profile is classic pizza, which is universally liked.
- Makes Amazing Leftovers — Actually tastes great cold or reheated. I deliberately make extra for my kids’ next-day lunches. They pack well in a lunchbox and don’t get soggy like regular pizza slices might.
- Budget-Smart — Feeds 4-6 people for under $10. That’s less than half the cost of one medium pizza from a delivery chain. It’s comfort food that doesn’t break the bank.
This is my go-to when I need dinner to just work. No complicated techniques, no weird ingredients, just reliable, delicious food that makes everyone happy. It’s the kind of recipe that reduces stress instead of adding to it.
Ingredients You’ll Need
Here’s the best part: this recipe relies on basic, affordable ingredients. You don’t need to go to a specialty store or order online. Here is what I use and why each item matters in the final result.
- Large Flour Tortillas (8-inch / 20cm, 4-6 sheets) — These are your base. You need large, flexible tortillas that won’t crack when you roll them. I prefer the ones labeled “burrito size” or “large flour” because they have enough surface area to hold the filling. If you use small tortillas, you’ll end up with too many layers and they’ll fall apart.
- Pizza Sauce (1 cup / 240g) — I use a good-quality jarred marinara or pizza sauce. It saves time compared to making sauce from scratch. Look for one that isn’t too watery; you want a thick sauce so the tortillas don’t get soggy. I like brands with a slightly sweet tomato flavor.
- Shredded Mozzarella Cheese (2 cups / 200g) — The star of the show. I buy pre-shredded for convenience, but if you have time, grate a block yourself. It melts more evenly and has better flavor. Pre-shredded cheese has anti-caking agents, which can make the texture slightly grainy, but for pinwheels, it’s usually fine.
- Pepperoni Slices (1 small pack / 100g) — Classic pizza flavor. I use the regular round slices, not the cup-shaped ones. If your kids hate pepperoni, you can skip this or swap it for cooked bacon bits. The pepperoni gets crispy in the oven, which adds a great texture contrast.
- Italian Seasoning (1 teaspoon) — Adds that classic pizza aroma. If you don’t have Italian seasoning, use a mix of dried oregano and basil. It’s a small detail, but it makes a big difference in the flavor profile.
- Butter (2 tablespoons, melted) — We brush the tops with melted butter before baking. This gives them that bakery-style golden crust and helps the seasoning stick. It’s optional, but I never skip it.
- Garlic Powder (½ teaspoon) — A little kick of garlic flavor. Don’t use fresh garlic here; it’ll burn in the oven. Powder distributes evenly and adds flavor without changing the texture.
Optional Add-ins:
- Shredded Parmesan — Sprinkle a little on top for extra savory flavor.
- Red Pepper Flakes — For a bit of heat. Great for adult palates.
- Spinach — I sometimes add a handful of fresh spinach leaves under the cheese. It wilts down and adds nutrients without changing the taste much.
Shopping Shortcut:
I always buy the pre-shredded mozzarella and jarred sauce when I’m in a rush. It saves 15 minutes of prep. But if I’m feeling fancy, I grate my own cheese and use fresh basil. The trade-off is worth it if you have the time.
Equipment Needed
You don’t need fancy equipment for this. Here’s what I actually use in my kitchen:
- Baking Sheet — I use a standard half-sheet pan. Make sure it’s large enough to hold all the pinwheels in a single layer with a little space between them. I prefer non-stick, but any sheet works.
- Pastry Brush — For brushing the melted butter on top. A silicone brush is easier to clean, but a regular one works fine. I use it to get that even golden color.
- Rolling Pin — Optional, but helpful. If your tortillas are stiff, gently rolling over them with a pin makes them more pliable and easier to roll up. I do this if it’s a cold day in my kitchen.
- Sharp Knife or Pizza Cutter — A pizza cutter is ideal for slicing the rolls into pinwheels. It gives clean cuts without squishing the filling. If you don’t have one, a sharp chef’s knife works, but be gentle.
- Small Bowl — For mixing the butter and garlic powder. Doesn’t need to be fancy.
Tool Tip:
If you don’t have a pizza cutter, use a serrated bread knife. It cuts through the cheese and tortilla cleanly. Just wipe the blade between cuts to keep things tidy.
How to Make It: Step-by-Step

Alright, let’s make these pinwheels! I’m walking you through exactly how I do it, including the little tricks I’ve picked up to ensure they don’t fall apart.
Step 1: Prep the Oven and Pan (5 minutes)
Preheat your oven to 375°F (190°C). Line a large baking sheet with parchment paper or a silicone baking mat. This prevents sticking and makes cleanup a breeze. I always line my pan because cheese melts and sticks, and I don’t want to scrub my pan later.
Step 2: Lay Out the Tortillas (2 minutes)
Lay the tortillas flat on a clean surface. If they are stiff, gently roll over them with a rolling pin to soften them. This makes them easier to roll up without cracking. Overlap them slightly if needed to create one large sheet, or keep them separate for individual pinwheels. I usually keep them separate for easier handling.
Step 3: Spread the Sauce (3 minutes)
Spread a thin layer of pizza sauce over each tortilla, leaving a ½-inch border around the edges. Don’t overload the sauce! Too much sauce makes the tortillas soggy and hard to roll. I use about 2-3 tablespoons per tortilla. It should be an even, light coat.
Step 4: Add the Cheese and Toppings (3 minutes)
Sprinkle the shredded mozzarella evenly over the sauce. Add the pepperoni slices on top. If you’re adding other toppings like spinach or bacon, add them now. The cheese acts as the glue, so make sure it covers the sauce completely.
Step 5: Roll Them Up (5 minutes)
Starting from one long edge, tightly roll the tortilla up into a log. Use your fingers to tuck in the filling as you roll to keep it secure. Once rolled, use your hands to pinch the seam closed. I roll them tightly so they hold their shape in the oven. If they’re loose, they’ll unroll.
Step 6: Slice into Pinwheels (5 minutes)
Using a sharp knife or pizza cutter, slice each log into 1-inch thick rounds. Place them cut-side up on the prepared baking sheet, leaving a little space between them so they can expand. You should get about 4-6 pinwheels per tortilla.
Step 7: Brush and Bake (15 minutes)
Mix the melted butter with garlic powder and Italian seasoning. Brush this mixture generously over the tops of the pinwheels. Bake for 12-15 minutes, or until the tortillas are golden brown and the cheese is bubbly. I rotate the pan halfway through for even browning. They’re done when the edges are crispy and the cheese is melting nicely.
Step 8: Cool and Serve
Let them cool for 2-3 minutes on the pan. This helps them set so they don’t fall apart when you pick them up. Serve warm with extra marinara sauce for dipping. They’re best eaten fresh out of the oven.
Total Time: About 25 minutes (10 minutes active, 15 minutes baking)
Troubleshooting:
- Pinwheels unrolled? Your roll wasn’t tight enough. Next time, roll tighter and pinch the seam.
- Sauce leaking? You used too much sauce. Stick to a thin layer.
- Not crispy? Your oven might be cool. Check with an oven thermometer and bake for an extra 2-3 minutes.
Expert Tips & Tricks
Here’s everything I’ve learned from making these dozens of times. These tips will save you from my mistakes.
Don’t Overfill
This is the #1 mistake people make. If you pile on too much cheese and sauce, the pinwheel will burst in the oven. Less is more. A thin, even layer of sauce and a light sprinkle of cheese works best. I learned this the hard way with a mess of melted cheese on my oven floor.
Roll Tightly
The key to a good pinwheel is a tight roll. Start at one edge and roll firmly. Use your thumbs to tuck the filling in as you go. If it’s loose, it will unroll. I practice this on my first tortilla and get the hang of it quickly.
Use a Pizza Cutter
A sharp knife works, but a pizza cutter gives the cleanest slices. It slices through the cheese and tortilla without squishing the roll. If you use a knife, saw gently back and forth. Don’t press down hard.
Brush with Butter
Brushing the tops with butter ensures they get that golden, bakery-style crust. It also helps the seasoning stick. Don’t skip this step! It makes a huge difference in the final texture and flavor.
Cool Before Serving
Let them cool for a few minutes after baking. The cheese is molten hot and will burn your mouth. Plus, cooling helps the pinwheel set so it holds its shape when you pick it up.
Common Mistakes
- Mistake: Soggy tortillas Fix: Use less sauce and make sure your cheese is dry, not wet.
- Mistake: Burnt garlic Fix: Use garlic powder, not fresh garlic. Fresh garlic burns at 375°F.
- Mistake: Uneven baking Fix: Rotate the pan halfway through. Ovens have hot spots.
Variations & Substitutions
Once you’ve nailed the basic version, here’s how you can mix it up. I’ve tried all of these.
Breakfast Pinwheels
Swap pizza sauce for scrambled eggs and bacon. Add cheddar cheese and roll them up. Bake as usual. These are great for a quick breakfast or brunch. They pair well with my make-ahead breakfast muffin cups for a full meal.
Veggie Loaded
Add sliced bell peppers, mushrooms, and olives. Sauté the veggies first to remove excess moisture, then add them to the roll. This adds nutrients and flavor without making the tortillas soggy.
BBQ Chicken
Use BBQ sauce instead of pizza sauce. Add shredded cooked chicken and red onion. Top with gouda cheese. It’s a totally different vibe but just as delicious.
Spinach and Feta
Skip the tomato sauce. Spread cream cheese on the tortilla, then add fresh spinach and crumbled feta. Roll and bake. It’s lighter and has a Mediterranean flavor.
Gluten-Free
Use gluten-free tortillas. Most brands work well, but check the flexibility. Some GF tortillas crack when rolled. You might need to warm them slightly before rolling.
Dairy-Free
Use dairy-free cheese and butter. There are many good vegan mozzarella options that melt well. Use olive oil instead of butter for brushing.
Serving & Storage
These pinwheels are versatile and easy to serve. Here’s how I enjoy them:
How to Serve
I usually serve them straight from the baking sheet at the dinner table. They look rustic and stay warm. But here are other ways I’ve enjoyed them:
- With Dipping Sauce Extra marinara, ranch, or garlic butter for dipping. Kids love dipping.
- With a Side Salad A simple green salad with balsamic vinaigrette balances the richness of the cheese.
- With Soup Tomato soup is the perfect companion for these pinwheels. It’s a classic combo.
Storage Instructions
Refrigerator: Store leftovers in an airtight container for up to 3 days. They will stay soft but still tasty.
Reheating: Best method: Reheat in a 350°F oven for 5-7 minutes to crisp them up. Microwave works but makes them chewy. I avoid the microwave unless I’m in a huge rush.
Freezing: You can freeze unbaked pinwheels. Place them on a baking sheet, freeze until solid, then transfer to a freezer bag. Bake from frozen, adding 5 minutes to the cook time. They freeze well!
Pro Tip: If you’re meal prepping, make a big batch and freeze them unbaked. You can bake a few whenever you need a quick snack. It’s like having homemade pizza rolls on hand.
Nutrition Information
I’m not a nutritionist, but here’s the breakdown if you’re tracking. These are estimates based on standard ingredients.
Per Pinwheel (based on 6 pinwheels per tortilla, 4 tortillas total):
- Calories: 180
- Protein: 8g
- Carbs: 22g
- Fat: 8g
- Sodium: 350mg
What’s Good:
- Decent protein from cheese and pepperoni
- Calcium from the cheese
- Easy to customize with veggies for more nutrients
What to Know:
- Higher in sodium from pepperoni and sauce
- Contains gluten and dairy
- Can be made lighter by using less cheese and turkey pepperoni
My Take:
Look, these are comfort food. They’re not a diet recipe. But they’re way better than store-bought frozen pizza rolls, which are full of preservatives. These have real ingredients, and you control what goes in them. When I want to make them lighter, I use less cheese and add more veggies. But usually? I just eat a reasonable portion and enjoy them.
Final Thoughts
So that’s my after-school pizza pinwheels! I’ve probably talked your ear off at this point, but when you make a recipe this often, you have a lot to say about it.
This has saved weeknight dinners more times than I can count. It’s my answer to “what’s for dinner” when I’m tired, don’t want takeout, and still want something that tastes really good. My kids are happy, my husband’s happy, and I’m happy because I’m not stressed about cooking.
Make it yours! Try different add-ins, swap in your favorite vegetables, adjust the spice level. The best recipes are the ones you adapt to your family’s tastes. And if you’re looking for another quick snack, check out these no-bake peanut butter banana energy bites for a sweet treat.
If you make this, drop a comment and let me know what you think! I love hearing how recipes turn out in your kitchen. And if something doesn’t work, tell me that too—I’m here to help troubleshoot.
Happy cooking! And I hope your kitchen smells half as good as mine does right now.
Frequently Asked Questions
Q: Can I use whole wheat tortillas?
A: Yes, but they can be a bit stiffer. Warm them up in the microwave for 10 seconds before rolling to make them more pliable. They have a nuttier flavor that works well with the pizza sauce.
Q: Why did my pinwheels fall apart?
A: Usually means the roll wasn’t tight enough or there was too much filling. Next time, roll tighter and use less sauce and cheese. Also, let them cool for a few minutes before handling.
Q: Can I make these ahead of time?
A: Yes! Assemble them and store them in the fridge for up to 24 hours before baking. Or freeze them unbaked for longer storage. Bake directly from the fridge or freezer, adding a few minutes to the cook time.
Q: Can I use fresh mozzarella?
A: You can, but it has more moisture. Pat it dry with a paper towel before shredding it, or use small balls and tear them into pieces. Pre-shredded is easier and melts more evenly.
Q: How do I reheat leftovers?
A: The oven is best for crispiness. Reheat at 350°F for 5-7 minutes. The microwave works but makes them chewy. I avoid the microwave unless I’m in a huge rush.
Q: Can I double this recipe?
A: Absolutely! Just use two baking sheets or bake in batches. The cooking time stays the same. I do this when I’m meal-prepping or feeding a crowd.
Q: Are these good for lunch?
A: Yes! They pack well in a lunchbox and taste great cold or room temperature. They’re a much better option than chips or crackers.
Pin This Recipe!


After-School Pizza Pinwheels: 5-Minute Easy Dinner
- Total Time: 25 minutes
- Yield: 16-24 pinwheels (serves 4-6) 1x
Description
A quick and easy weeknight dinner or snack made with tortillas, pizza sauce, mozzarella, and pepperoni. These pinwheels are crispy on the outside, gooey on the inside, and ready in just 25 minutes.
Ingredients
- 4–6 large flour tortillas (8-inch / 20cm)
- 1 cup (240g) pizza sauce or marinara
- 2 cups (200g) shredded mozzarella cheese
- 100g pepperoni slices
- 1 teaspoon Italian seasoning
- 2 tablespoons butter, melted
- 1/2 teaspoon garlic powder
- Optional: Shredded Parmesan, red pepper flakes, fresh spinach
Instructions
- Preheat oven to 375°F (190°C). Line a large baking sheet with parchment paper or a silicone baking mat.
- Lay tortillas flat on a clean surface. If stiff, gently roll over them with a rolling pin to soften.
- Spread a thin layer of pizza sauce over each tortilla, leaving a 1/2-inch border around the edges.
- Sprinkle shredded mozzarella evenly over the sauce. Add pepperoni slices on top.
- Starting from one long edge, tightly roll each tortilla into a log. Pinch the seam closed.
- Slice each log into 1-inch thick rounds using a sharp knife or pizza cutter.
- Place pinwheels cut-side up on the prepared baking sheet, leaving space between them.
- Mix melted butter with garlic powder and Italian seasoning. Brush generously over the tops of the pinwheels.
- Bake for 12-15 minutes, rotating the pan halfway through, until tortillas are golden brown and cheese is bubbly.
- Let cool for 2-3 minutes before serving to allow them to set.
Notes
Do not overfill the tortillas to prevent bursting. Roll tightly to ensure they hold their shape. Use garlic powder instead of fresh garlic to prevent burning. For crispier results, reheat leftovers in the oven rather than the microwave.
- Prep Time: 10 minutes
- Cook Time: 15 minutes
- Category: Main Course
- Cuisine: American
Nutrition
- Serving Size: 4-6 pinwheels per pe
- Calories: 180
- Sugar: 2
- Sodium: 350
- Fat: 8
- Saturated Fat: 4
- Carbohydrates: 22
- Fiber: 1
- Protein: 8
Keywords: pizza pinwheels, easy dinner, weeknight meals, kid-friendly recipes, quick snacks, tortilla recipes, family dinner


