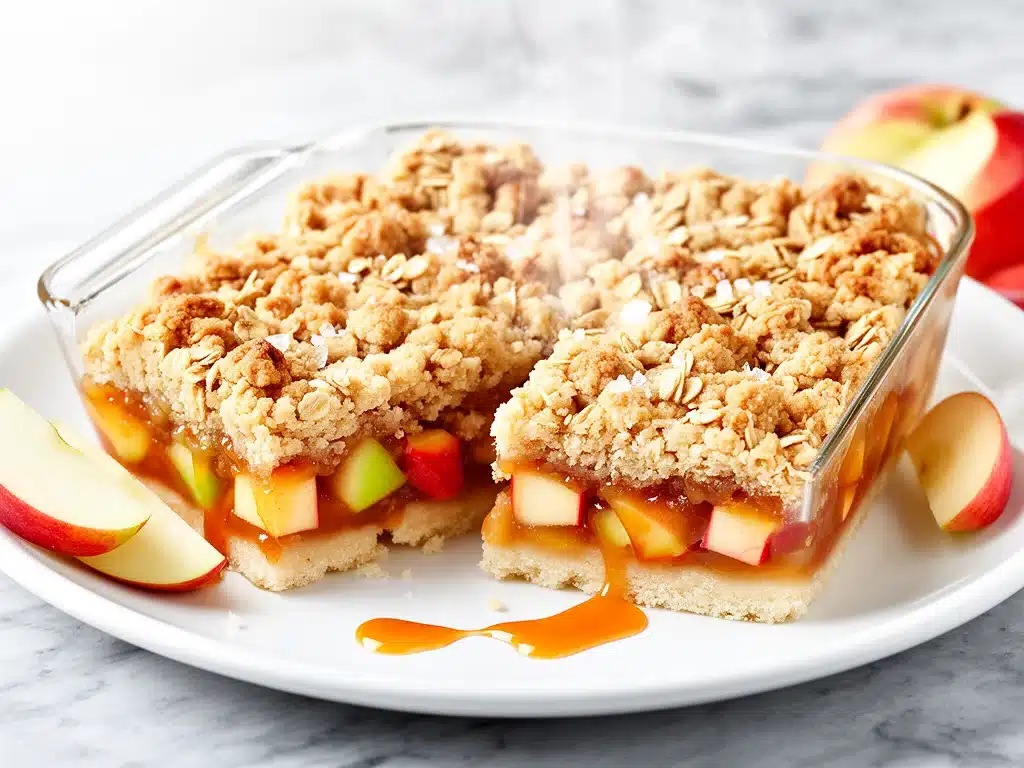
Last November, I was staring at an empty parking lot at a local orchard. I had just spent forty dollars on six pounds of Honeycrisp apples, convinced I was going to become the queen of apple pie. Then reality hit. I couldn’t bake three pies in a week. I couldn’t even finish one before they started going soft in the fridge. And honestly? I was tired of the crust. Don’t get me wrong, I love a flaky pie crust, but I also love sleep, and rolling dough at 6 AM on a Saturday is not my idea of a good time.
That’s when I decided to pivot. I wanted something that captured all the cozy, buttery, cinnamon-kissed vibes of a classic apple crumble but in a format that was actually manageable. I wanted bars. Chewy, gooey, caramel-drenched bars that I could slice, stack in a Tupperware, and hand to anyone who walked through the door. I needed something that looked fancy enough for a holiday potluck but was simple enough to throw together on a random Tuesday.
I tried about five different versions of this recipe in October. The first batch was too dry. The second batch had a crust that fell apart like a sandcastle in a rainstorm. The third batch… well, let’s just say the salted caramel was undercooked and sticky in a way that made my teeth hurt for hours. But the fourth batch? The fourth batch was magic. Perfectly chewy shortbread base, tender apples that still held their shape, and a caramel layer that was salty, sweet, and absolutely irresistible.
These 4 easy dessert bars have become my secret weapon. I’ve served them to my picky-eater nephew, my health-conscious sister (who took one bite and didn’t say a word, just went back for a second), and my book club. Everyone loves them. They’re the kind of dessert that makes people ask, “Did you buy these from that fancy bakery downtown?” When you tell them you made them in your own kitchen in under an hour, they don’t believe you. That’s the power of a good crumble bar.
Why You’ll Love This Recipe
I’ve made this Salted Caramel Apple Crumble Bars recipe so many times that I can probably make it with my eyes closed. But even with all that practice, I still get excited about them. Here’s why they’ve earned a permanent spot in my rotation:
- Zero Pie Crust Stress — Say goodbye to soggy bottoms and shattering edges. This recipe uses a simple, press-in shortbread crust. If you can mix flour and butter, you can make this crust. No rolling pins required.
- Make-Ahead Friendly — This is the ultimate make-ahead dessert. In fact, I think they taste better the next day after the flavors have melded together. I usually make these on Sunday and they last all week. It’s way easier than my make-ahead breakfast muffin cups in terms of prep time, but just as convenient.
- Perfect Balance of Flavors — The tartness of the apples cuts through the richness of the butter, and the salted caramel ties it all together. It’s not just sweet; it’s complex. The salt stops it from being cloying.
- Portable and Mess-Free — Unlike a slice of pie that slides off the plate, these bars hold their shape. They’re perfect for picnics, office parties, or just eating with a fork while standing at the kitchen counter.
- Uses Seasonal or Frozen Apples — You don’t need expensive, perfect-looking apples. I often use frozen apple pie filling or slightly bruised apples that are too ugly for a fruit basket but perfect for baking. It saves money and reduces food waste.
Real talk? These bars have saved me more times than I can count. When I need to bring a dessert to a neighbor’s house and I’m running on fumes, I grab the apples and the caramel. Thirty minutes later, I have a beautiful, impressive treat. It’s comfort food in bar form.
Ingredients You’ll Need
Here’s the thing about this recipe: the ingredient list looks long, but most of it is pantry staples. I’m particular about three things here, though. The butter quality matters, the apple choice changes the texture, and the caramel needs to be right.
For the Shortbread Base
Unsalted butter (1/2 cup / 113g, softened) — This needs to be room temperature so it creams easily with the sugar. If it’s too cold, you’ll get lumps. If it’s melted, the crust will be greasy. Softened is the sweet spot.
Granulated sugar (1/3 cup / 70g) — Just standard white sugar. Don’t try to substitute with brown sugar here; you want that crisp, shortbread texture, not a chewy cookie base.
All-purpose flour (1 1/2 cups / 190g) — The backbone of the crust. Sift it if it’s been sitting in the pantry for a while to avoid dense bars.
Cornstarch (1 tablespoon) — This is the secret ingredient. It tenderizes the crust, making it melt-in-your-mouth rather than hard and crunchy.
Salt (1/4 teaspoon) — Even though we’re using unsalted butter, a pinch of salt enhances the flavor.
For the Apple Layer
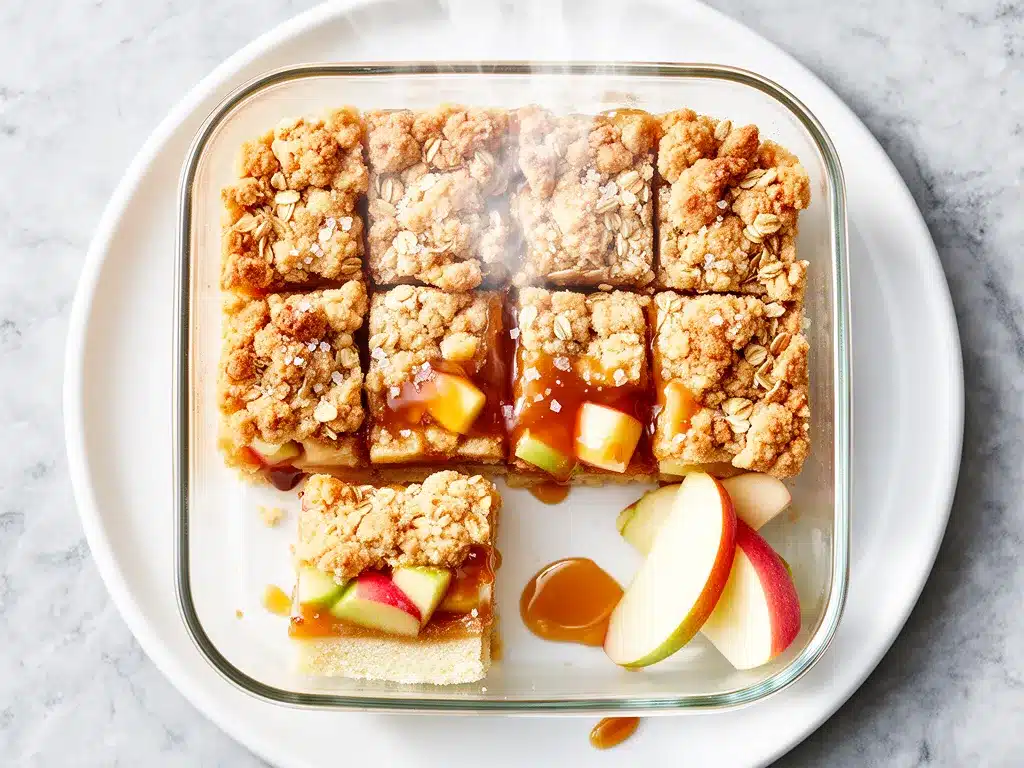
Apples (3 large / about 600g) — I recommend a mix of Granny Smith and Honeycrisp. Granny Smith holds its shape, Honeycrisp adds sweetness. Avoid Red Delicious—they turn to mush. Peel them if you don’t like skin, but leaving it on adds color.
Granulated sugar (2 tablespoons) — To sweeten the apples.
Ground cinnamon (1 teaspoon) — Don’t skimp. Cinnamon is the soul of apple dessert.
Ground nutmeg (1/4 teaspoon) — Just a hint. It adds warmth without overpowering.
Lemon juice (1 teaspoon) — Prevents browning and adds brightness.
Butter (1 tablespoon, melted) — Toss the apples in this before spreading. It helps them caramelize slightly.
For the Salted Caramel
Heavy cream (1/2 cup / 120ml) — Must be room temperature. Adding cold cream to hot caramel can cause it to splatter violently. I learned this the hard way on a white shirt.
Brown sugar (1 cup / 200g, packed) — Dark brown sugar has more molasses, which gives a deeper flavor. Light brown works too.
Butter (1/4 cup / 56g, cubed) — Adds richness to the caramel sauce.
Sea salt (1/2 teaspoon) — Flaky sea salt on top for garnish is non-negotiable. It’s what makes it “salted” caramel.
Optional Toppings
Vanilla ice cream — For serving. You need it. I don’t make the rules.
Whipped cream — If you’re feeling fancy.
Equipment Needed
You don’t need a fancy kitchen for this. Here’s what I actually use:
9×9 inch baking pan — This is the ideal size. You can use an 8×8 if you want thicker bars, but they’ll take longer to bake. Line it with parchment paper leaving an overhang on the sides. This is crucial for lifting the bars out later.
Mixing bowls — Two medium bowls. One for the crust, one for the apples.
Small saucepan — For making the caramel. A light-colored pan is best so you can see the color change.
Pastry cutter or fork — To mix the crust. I use a fork because it’s faster and easier to wash.
Measuring cups and spoons — Standard stuff.
Whisk — For the caramel to ensure it’s smooth.
How to Make It: Step-by-Step
Alright, let’s make these Salted Caramel Apple Crumble Bars! I’m walking you through exactly how I do it, including the little tricks I’ve picked up over the years.
Step 1: Prep Your Pan and Oven (5 minutes)
Preheat your oven to 350°F (175°C). Line your 9×9 inch baking pan with parchment paper. Leave a generous overhang on the long sides—this acts as a handle to lift the finished bars out later. Grease the parchment lightly with butter or cooking spray.
Step 2: Make the Shortbread Crust (5 minutes)
In a medium bowl, mix the softened butter and granulated sugar until combined. It doesn’t need to be fluffy, just creamy. Stir in the flour, cornstarch, and salt. The mixture will look like wet sand. Press this firmly and evenly into the bottom of your prepared pan. Use the bottom of a measuring cup to pack it down tight. If it’s loose, the bars will crumble apart later.
Step 3: Blind Bake the Crust (15 minutes)
Bake the crust for 15 minutes. You want it lightly golden, not dark. Remove from the oven but leave the oven on. This pre-bake ensures the bottom doesn’t get soggy when you add the wet apple layer. Let it cool slightly while you prep the apples.
Step 4: Prepare the Apple Filling (5 minutes)
Peel, core, and dice your apples into 1/2-inch cubes. Smaller cubes cook faster and distribute better. In a bowl, toss the diced apples with sugar, cinnamon, nutmeg, lemon juice, and melted butter. Make sure every piece is coated. Spread this evenly over the warm crust. Don’t worry if it looks messy; it will settle.
Step 5: Make the Salted Caramel (10 minutes)
In a small saucepan over medium heat, combine the brown sugar, butter, and heavy cream. Whisk constantly. It will bubble up and look like it’s going to boil over. Don’t panic. Keep whisking. Bring it to a gentle simmer and cook for 3-4 minutes until it thickens slightly. It should coat the back of a spoon. Remove from heat and stir in the sea salt. If you’re feeling lazy, you can use store-bought caramel sauce, but homemade is worth the 10 minutes.
Step 6: Assemble and Bake (30 minutes)
Pour the warm caramel sauce over the apples. Use a spatula to spread it evenly, trying to get it into the corners. Return the pan to the oven and bake for 30 minutes. The edges should be bubbling and golden brown, and the caramel should look glossy and set.
Step 7: Cool Completely (Crucial Step)
This is where most people fail. Do not cut these bars while they are hot. The caramel will be liquid, and the bars will fall apart. Let them cool in the pan on a wire rack for at least 1 hour. Ideally, let them cool completely and then refrigerate for 2 hours. This firms up the caramel and makes slicing clean and easy.
Step 8: Slice and Serve
Lift the bars out of the pan using the parchment paper. Slice into 9 or 12 squares. Dust with a little extra flaky sea salt if you want to impress. Serve with vanilla ice cream.
Expert Tips & Tricks
Here’s everything I’ve learned from making these dozens of times. These tips will save you from my mistakes.
Don’t Skip the Blind Bake
I tried skipping the pre-bake once. The crust was raw and doughy in the middle. Always blind bake the shortbread. It creates a barrier between the wet apples and the crust.
Apple Selection Matters
Avoid apples that turn to mush like Red Delicious or McIntosh (unless you like applesauce). Stick to firm apples like Granny Smith, Honeycrisp, Fuji, or Braeburn. They hold their shape during the long bake time.
Caramel Consistency
When making the caramel, don’t walk away. It burns quickly. If it gets too dark, it will taste bitter. You want a medium amber color. If it looks too thick, add a splash more cream. If it’s too thin, cook it 30 seconds longer.
Cooling is Non-Negotiable
I know the smell is intoxicating. I know you want to cut a piece immediately. Don’t. If you cut them hot, you’ll get a caramel mess on your knife and a broken bar on your plate. Patience pays off. The texture improves dramatically after chilling.
Storage for Freshness
These bars actually improve after a day in the fridge. The flavors meld. Store them in an airtight container in the refrigerator for up to 5 days. They also freeze well for up to 3 months. Wrap individual bars in plastic wrap, then put them in a freezer bag.
Variations & Substitutions
Once you’ve nailed the basic version, here’s how you can mix it up. I’ve tried all of these.
Pumpkin Spice Version
Swap the cinnamon and nutmeg for pumpkin pie spice. Use canned pumpkin puree instead of diced apples. It’s a great fall twist.
Cherry Almond
Replace apples with pitted cherries and add 1/2 cup sliced almonds to the crust. Add a teaspoon of almond extract to the caramel. Delicious.
Chocolate Drizzle
After the bars cool, melt 1/2 cup of chocolate chips with a teaspoon of coconut oil. Drizzle over the top. The salted caramel and chocolate combo is insane.
Gluten-Free
Use a 1:1 gluten-free flour blend in the crust. The cornstarch helps with texture, so this works surprisingly well. The rest of the recipe is naturally gluten-free.
Dairy-Free
Use dairy-free butter in the crust and caramel. Use coconut cream instead of heavy cream. The flavor will be slightly coconutty, but still delicious.
Serving & Storage
How to Serve:
I usually serve these slightly chilled, straight from the fridge. The cold caramel contrasts beautifully with the warm apple flavor. A scoop of vanilla bean ice cream is the classic pairing. If you want to elevate it, add a drizzle of salted caramel sauce on the plate.
Side Dishes:
These bars are rich and sweet, so they don’t need much else. But if you’re serving a large group, pair them with a light fruit salad or some roasted nuts to balance the heaviness.
Storage Instructions:
Refrigerator: Store in an airtight container for up to 5 days. They will firm up in the fridge.
Freezer: Freeze for up to 3 months. Thaw in the fridge overnight before serving.
Reheating: You can warm them in the microwave for 15-20 seconds if you prefer a gooey, warm caramel. Just be careful—they are hot!
Pro Tip:
If you’re bringing these to a party, keep them in the pan covered with foil until you arrive. Then cut and serve. It’s easier than transporting loose bars.
Nutrition Information
I’m not a nutritionist, but here’s the breakdown if you’re tracking. Keep in mind this is an estimate based on standard ingredients.
Per Serving (1 of 9 bars):
Calories: 320
Protein: 3g
Carbs: 42g
Fiber: 1g
Sugar: 28g
Fat: 16g
Saturated Fat: 10g
Cholesterol: 40mg
Sodium: 180mg
What’s Good:
– Contains fruit (apples)
– Portion control is easier with bars than a whole pie
– Can use less sugar if desired
What to Know:
– High in sugar from caramel and apples
– High in saturated fat from butter and cream
– Not suitable for low-fat or low-sugar diets without significant modification
My Take:
Look, this is a dessert. It’s meant to be indulgent. Enjoy it as a special treat. If you want to lighten it up, use half the caramel sauce or switch to a sugar-free caramel. But honestly? The joy of this recipe is in the richness. Don’t overthink it.
Final Thoughts
So that’s my go-to Salted Caramel Apple Crumble Bars! I’ve probably talked your ear off at this point, but when you make a recipe this often, you have a lot to say about it.
This has saved me more times than I can count. It’s my answer to “what’s for dessert” when I’m tired, don’t want takeout, and still want something that tastes really good. My kids are happy, my husband’s happy, and I’m happy because I’m not stressed about cooking.
Make it yours! Try different apples, swap the spices, or add nuts. The best recipes are the ones you adapt to your family’s tastes.
If you make this, drop a comment and let me know what you think! I love hearing how recipes turn out in your kitchen. And if something doesn’t work, tell me that too—I’m here to help troubleshoot.
Happy cooking! And I hope your kitchen smells half as good as mine does right now.
Frequently Asked Questions
Can I use apple pie filling instead of fresh apples?
Yes, you can! Use one 21-ounce can of apple pie filling. Drain off any excess syrup to prevent the bars from being too wet. Spread it over the crust as directed. This is a great shortcut if you’re in a hurry or don’t want to peel and dice apples.
Why did my caramel turn out hard instead of gooey?
If the caramel hardened into a candy-like texture, you likely cooked it too long on the stove. For these bars, you want a soft caramel sauce, not hard crack stage. Cook it only until it thickens slightly (3-4 minutes). If you want a firmer caramel, cook it a minute longer, but be careful not to overdo it.
Can I make these bars ahead of time?
Absolutely. In fact, they taste better the next day. Make them up to 2 days ahead and store in the fridge. You can also freeze them for up to 3 months. Thaw in the fridge overnight before serving. This makes them perfect for holiday meal prep.
Why did my crust fall apart when I cut the bars?
This usually happens if the crust wasn’t pressed down firmly enough, or if you cut the bars while they were still warm. Make sure to pack the crust down tightly with a measuring cup. Also, wait until the bars are completely cool, preferably chilled, before slicing.
Can I use salted butter instead of unsalted?
You can, but reduce the added salt in the crust and caramel by half. Salted butter varies in salt content, so it’s hard to control the final flavor. Unsalted butter gives you better control, but if that’s all you have, just use it and taste as you go.
How do I store leftovers?
Store in an airtight container in the refrigerator for up to 5 days. They will firm up in the fridge. If you prefer a softer texture, let them sit at room temperature for 15 minutes before eating. They also freeze well for up to 3 months.
Can I double this recipe?
Yes, but you’ll need a 9×13 inch pan. Double all ingredients and increase the baking time by about 5-10 minutes. Keep an eye on the edges to ensure they don’t burn. The cooling time remains the same.
Pin This Recipe!
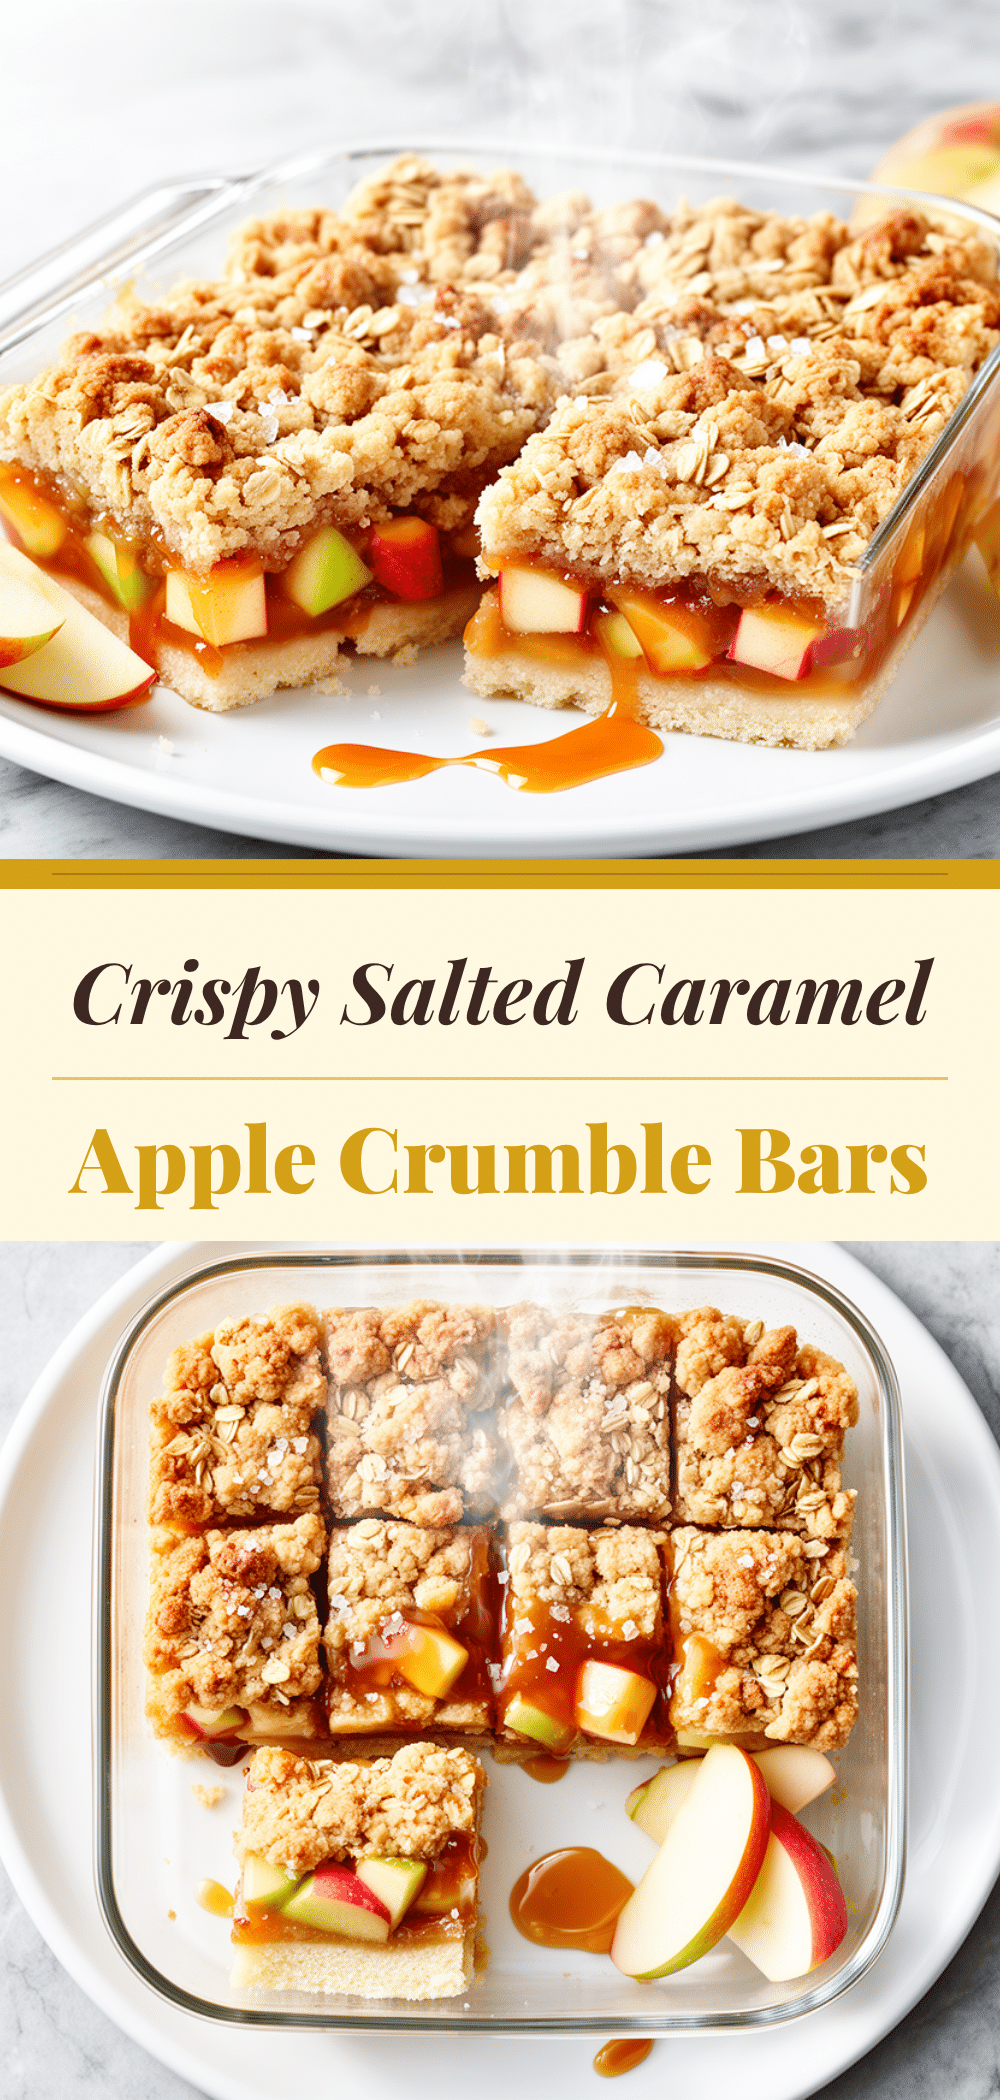
Salted Caramel Apple Crumble Bars
- Total Time: 1 hour 5 minutes
- Yield: 9 servings 1x
Description
Chewy, gooey dessert bars featuring a press-in shortbread crust, tender spiced apples, and a rich salted caramel layer. These make-ahead friendly bars are easy to slice and perfect for holidays or potlucks.
Ingredients
- 1/2 cup unsalted butter, softened
- 1/3 cup granulated sugar
- 1 1/2 cups all-purpose flour
- 1 tablespoon cornstarch
- 1/4 teaspoon salt
- 3 large apples (Granny Smith and Honeycrisp mix), peeled and diced
- 2 tablespoons granulated sugar
- 1 teaspoon ground cinnamon
- 1/4 teaspoon ground nutmeg
- 1 teaspoon lemon juice
- 1 tablespoon butter, melted
- 1/2 cup heavy cream, room temperature
- 1 cup packed brown sugar
- 1/4 cup butter, cubed
- 1/2 teaspoon sea salt
- Vanilla ice cream or whipped cream, for serving (optional)
Instructions
- Preheat oven to 350°F (175°C). Line a 9×9 inch baking pan with parchment paper, leaving an overhang on the sides, and grease lightly.
- In a medium bowl, mix softened butter and 1/3 cup granulated sugar until creamy. Stir in flour, cornstarch, and salt until the mixture resembles wet sand.
- Press the crust mixture firmly and evenly into the bottom of the prepared pan using the bottom of a measuring cup.
- Blind bake the crust for 15 minutes until lightly golden. Remove from oven but leave the oven on.
- Toss diced apples with 2 tablespoons sugar, cinnamon, nutmeg, lemon juice, and melted butter until coated.
- Spread the apple mixture evenly over the warm baked crust.
- In a small saucepan over medium heat, combine brown sugar, cubed butter, and heavy cream. Whisk constantly until it bubbles and thickens slightly (3-4 minutes). Remove from heat and stir in sea salt.
- Pour the warm caramel sauce over the apples and spread evenly.
- Return to the oven and bake for 30 minutes until edges are bubbling and golden.
- Cool completely in the pan on a wire rack for at least 1 hour, then refrigerate for 2 hours to firm up before slicing.
- Lift bars out using parchment paper and slice into 9 or 12 squares. Serve with vanilla ice cream if desired.
Notes
Do not cut the bars while hot, as the caramel will be liquid and the bars will fall apart. For best results, chill completely before slicing. The crust must be pressed firmly to prevent crumbling. You can substitute apple pie filling (drained) for fresh apples.
- Prep Time: 20 minutes
- Cook Time: 45 minutes
- Category: Dessert
- Cuisine: American
Nutrition
- Serving Size: 1 bar
- Calories: 320
- Sugar: 28
- Sodium: 180
- Fat: 16
- Saturated Fat: 10
- Carbohydrates: 42
- Fiber: 1
- Protein: 3
Keywords: apple crumble bars, salted caramel dessert, shortbread crust, make-ahead dessert, fall baking, easy dessert bars


