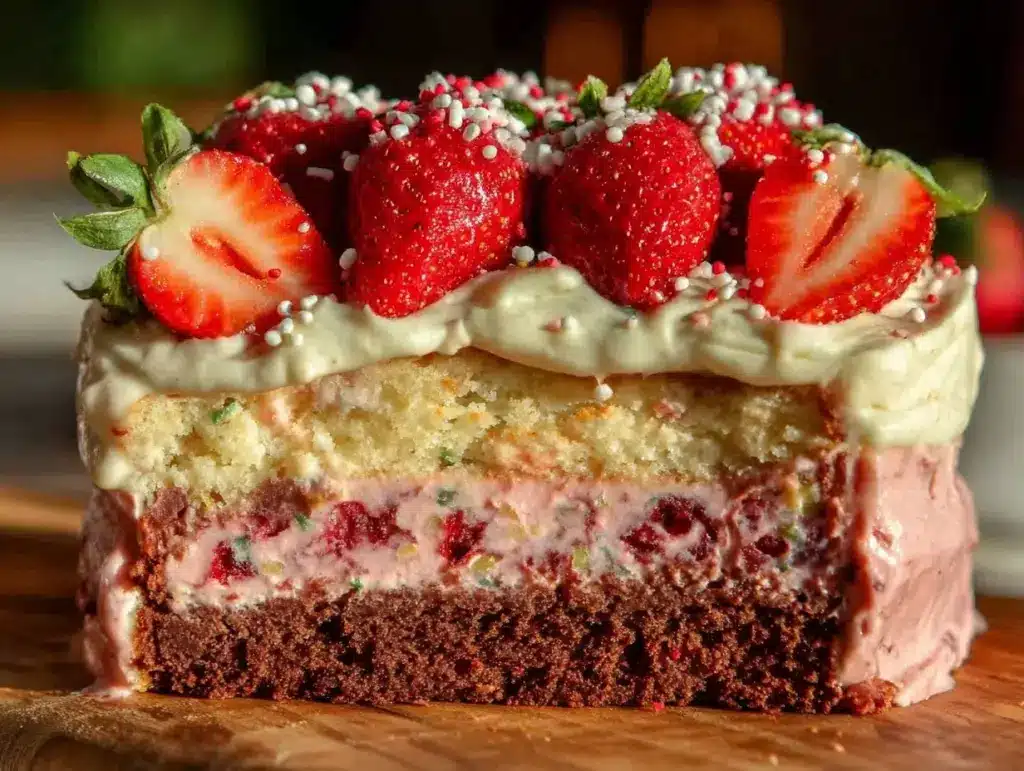
I still remember the first time I made a Neapolitan cake for my niece’s birthday. I was twenty-two, convinced that baking was some kind of alchemy reserved for people with French degrees and perfect kitchens. I wanted to make something that looked like the little milk cartons we all grew up with—red, white, and pink stripes. But what came out of my oven looked less like a nostalgic treat and more like three separate disasters stacked on top of each other. The red part was too dense. The chocolate part tasted like burnt plastic. And the strawberry frosting? Well, let’s just say it wept.
I was embarrassed. But I wasn’t done. I kept going back to that recipe, tweaking it, failing again, and trying one more time. Fast forward to last month, when my neighbor asked for a simple, classic cake for her daughter’s school fundraiser. I pulled out my updated version. And you know what? It was perfect. Moist, fluffy, with layers that actually stayed together, and a strawberry buttercream that tasted like actual strawberries, not artificial candy.
This isn’t a complicated showstopper. It’s a Neapolitan Layer Cake that is genuinely foolproof. If you can mix batter and spread frosting, you can make this. It’s the kind of cake that brings people together without bringing you down. It’s beginner-friendly, forgiving, and honestly? It’s the only cake recipe you’ll ever need for birthdays, potlucks, or just because it’s Tuesday.
I’ve tested this version at least ten times. I’ve used different types of vanilla extract (yes, it matters). I’ve tried different strawberry purées. I’ve even baked it in different pans to figure out the exact timing so you don’t end up with sunken middles. And here’s the thing: it just works. It’s reliable. It’s delicious. And once you take that first bite of the creamy strawberry frosting with the tender vanilla crumb, you’ll understand why I’m obsessed.
Why You’ll Love This Neapolitan Layer Cake
There are a lot of cakes out there. Some are fancy. Some require tempering chocolate or whipping egg whites to stiff peaks. This Neapolitan Layer Cake with Fresh Strawberry Buttercream is different. It’s about comfort. It’s about that specific joy of seeing red, white, and pink come together. But beyond the nostalgia, here’s why this recipe has earned a permanent spot in my rotation:
- It’s Actually Beginner-Friendly — Seriously. I’ve walked my teenage cousin through this over FaceTime. He didn’t burn the house down, and the cake was beautiful. The method is straightforward: mix, bake, cool, frost. No weird techniques. No fancy equipment.
- Fresh Strawberry Flavor — Most Neapolitan cakes use artificial flavoring for the pink layer. Not this one. I use real strawberry puree in the cake and a fresh strawberry buttercream that tastes like summer. It’s bright, not cloying.
- Moist and Tender Crumb — The biggest complaint people have with homemade cakes is dryness. This batter uses buttermilk and oil (plus butter for flavor) to stay incredibly moist for days. It’s softer than a lemon blueberry loaf and just as tender.
- Classic Nostalgia — It tastes like childhood, but elevated. It’s the same vibe as a classic banana pudding or a good one-bowl brownie—simple ingredients, big results.
- Beautiful Without Being Fancy — You don’t need to be a cake decorator to make this look good. A few dollops of frosting and a sprinkle of fresh berries on top? It looks professional. It looks like you tried. (Spoiler: You didn’t try hard. It’s easy.)
This is my go-to when I want to impress people without stressing myself out. It’s a confidence-builder. You’ll walk into a room with this cake, and everyone will assume you bought it from a fancy bakery. They won’t know it’s made in a standard 9-inch pan with ingredients from the grocery store.
Ingredients You’ll Need
Here’s the best part: you probably have most of this already. The ingredient list is short, simple, and uses standard baking staples. I’m particular about a few things here, so pay attention to the notes.
For the Vanilla Cake Layers
All-purpose flour (2 ½ cups / 315g) — Spoon and level this. Don’t scoop straight from the bag, or you’ll pack in too much flour and get a dense cake. I use Gold Medal or King Arthur.
Baking powder (2 teaspoons) — Make sure it’s fresh. If your baking powder is older than six months, toss it. Old baking powder = flat cakes. I keep a fresh canister just for baking days.
Salt (1 teaspoon) — Enhances flavor. Don’t skip it.
Unsalted butter (1 cup / 2 sticks / 226g, softened) — Room temperature is key. If you press your finger into it, it should leave an indent but not feel greasy. Cold butter won’t cream properly.
Granulated sugar (1 ½ cups / 300g) — Standard white sugar. It helps create that tender crumb.
Eggs (4 large, room temperature) — Again, room temp. Cold eggs can cause the butter mixture to seize. Take them out of the fridge 30 minutes before you start.
Vanilla extract (2 teaspoons) — Use real vanilla. I love McCormick or Nielsen-Massey. Vanilla bean paste is amazing here if you want those little black specks, but extract works perfectly fine.
Buttermilk (1 cup / 240ml) — This is the secret to the tender texture. If you don’t have buttermilk, make your own: add 1 tablespoon of lemon juice or white vinegar to a measuring cup, then fill with milk to the 1-cup line. Let it sit for 5 minutes until it curdles.
For the Strawberry Cake Layer
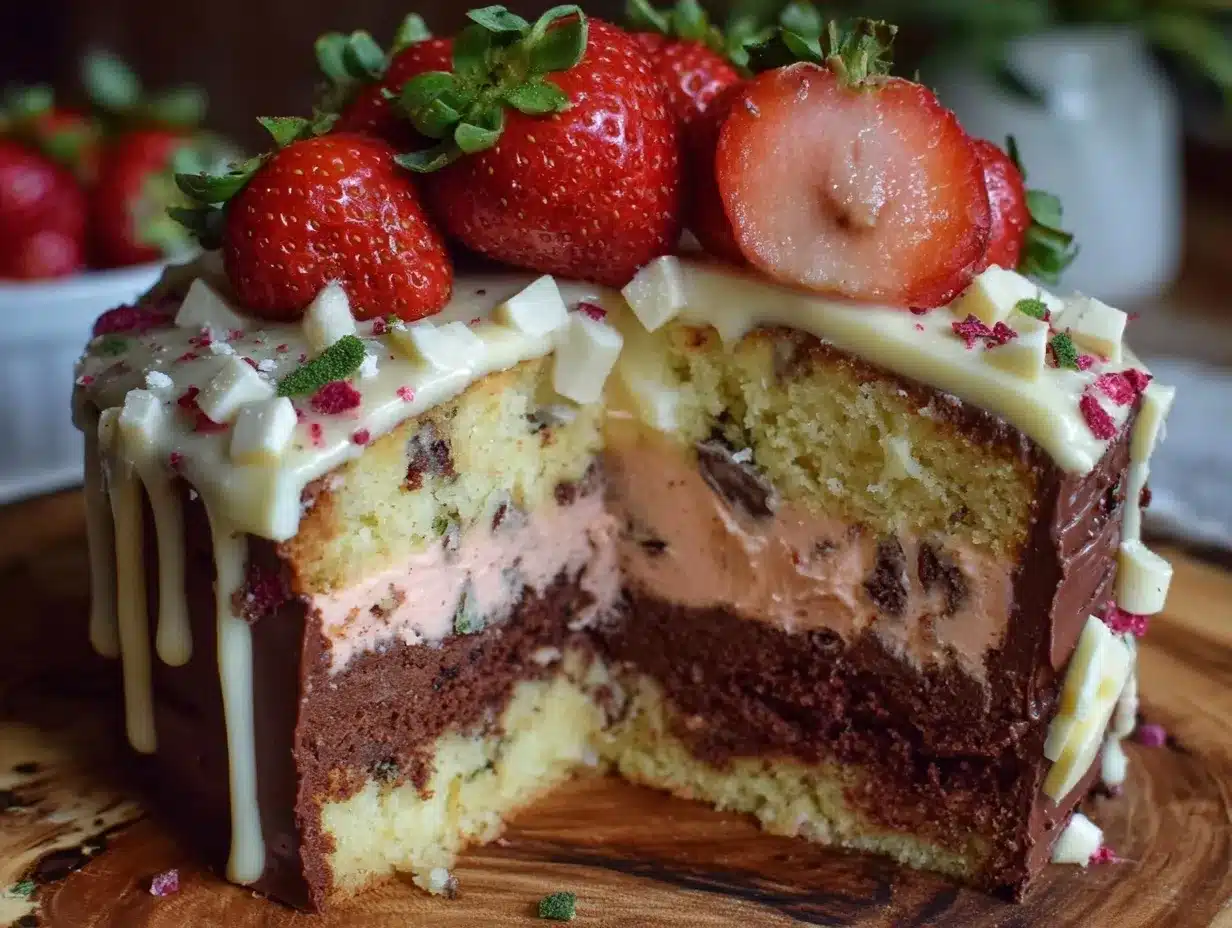
Strawberry puree (½ cup / 120g) — Blend fresh or frozen strawberries until smooth, then strain out the seeds if you want a smooth pink layer. I usually just blend them and leave the seeds in; they’re tiny and add texture. Use about 1 pound of fresh strawberries for this amount.
Strawberry gelatin (1 envelope / 0.3 oz) — This is my trick. A little unflavored or strawberry gelatin helps stabilize the pink layer and intensifies the flavor without making it taste like Jell-O. It’s optional but recommended for that classic Neapolitan pink.
For the Chocolate Cake Layer
Unsweetened cocoa powder (½ cup / 50g) — Use good quality cocoa. Hershey’s is fine, but Guittard or Ghirardelli taste richer. Sift this to remove lumps.
Hot coffee or hot water (½ cup / 120ml) — Hot liquid “blooms” the cocoa, making it taste more chocolatey. I use hot coffee because it enhances the chocolate flavor without making it taste like coffee. If you’re baking for kids, hot water works too.
For the Fresh Strawberry Buttercream
Unsalted butter (1 cup / 2 sticks / 226g, softened) — Same as before. Room temperature.
Powdered sugar (4-5 cups / 480-600g) — Sift this! Lumpy powdered sugar will ruin your smooth frosting. I sift twice if I’m feeling particular.
Strawberry puree (¼ cup / 60g) — For the frosting, you want it thick. If your puree is watery, simmer it in a pan for 5 minutes to reduce it, then let it cool completely before adding to the butter. Watery puree = runny frosting.
Vanilla extract (1 teaspoon)
Salt (½ teaspoon)
Fresh strawberries (for garnish)
Equipment Needed
You don’t need fancy gadgets. Here’s what I actually use. If you don’t have something, there’s almost always a workaround.
Three 9-inch round cake pans — This is the standard size. Grease them well and line the bottoms with parchment paper. This is non-negotiable if you want the cakes to release cleanly. I buy parchment rounds or cut my own.
Electric mixer — A hand mixer or stand mixer is best. Creaming the butter and sugar by hand is possible but takes arm strength and patience. I use my KitchenAid, but a cheap hand mixer works just as well.
Bowl scraper or spatula — For scraping down the sides of the bowl. You want all the batter mixed in evenly.
Cooling rack — Cakes need to cool completely before frosting. If you frost a warm cake, the buttercream will melt and slide off. A simple wire rack works.
Blender or food processor — For making the strawberry puree. If you don’t have one, you can mash the strawberries with a fork, but the texture won’t be as smooth.
Offset spatula — For spreading the frosting. A regular table knife works in a pinch, but an offset spatula gives you more control.
Pastry bag (optional) — If you want to pipe decorative borders, a pastry bag helps. But honestly? A spoon or knife looks rustic and charming too. Don’t stress about piping.
How to Make It: Step-by-Step
Alright, let’s make this! I’m walking you through exactly how I do it. It’s straightforward, and I’ve included the little tricks that keep it from going wrong.
Step 1: Prep Your Pans and Oven (10 minutes)
Preheat your oven to 350°F (175°C). Grease your three 9-inch cake pans with butter or non-stick spray. Then, line the bottoms with parchment paper circles. This is the #1 way to ensure your cakes don’t stick. Dust the pans lightly with flour and tap out the excess. Set aside.
Step 2: Mix the Dry Ingredients (5 minutes)
In a medium bowl, whisk together the flour, baking powder, and salt. Set this aside. You want these distributed evenly so you don’t get a bite of pure baking powder.
Step 3: Cream the Butter and Sugar (3-4 minutes)
In a large bowl, beat the softened butter and sugar on medium-high speed for about 3 minutes. You’re looking for a light, fluffy texture. It should look pale yellow and airy. This step incorporates air, which helps the cake rise. Don’t rush this.
Step 4: Add Eggs and Vanilla (2 minutes)
Add the eggs one at a time, beating well after each addition. Scrape down the sides of the bowl. Add the vanilla extract. The mixture might look slightly curdled at this point—that’s normal. It will come together in the next step.
Step 5: Combine Wet and Dry (2 minutes)
Reduce mixer speed to low. Add the dry ingredients in three parts, alternating with the buttermilk in two parts. Start and end with the dry ingredients. Mix just until combined. Overmixing develops gluten and makes the cake tough. Stop as soon as you don’t see streaks of flour.
Step 6: Divide and Flavor (5 minutes)
Divide the batter evenly among three bowls. Keep one bowl plain for the vanilla layer. To the second bowl, add the strawberry puree and the dissolved gelatin (if using). Mix until pink. To the third bowl, add the cocoa powder and hot coffee/water. Mix until smooth and chocolatey. The chocolate batter might look a bit thinner—that’s the hot liquid. That’s okay.
Step 7: Bake (25-30 minutes)
Pour the batter into the prepared pans. Bake for 25-30 minutes. Test for doneness by inserting a toothpick into the center. It should come out clean or with just a few moist crumbs. If it’s wet batter, give it 2-3 more minutes. Rotate the pans halfway through baking for even browning.
Step 8: Cool Completely (1-2 hours)
Let the cakes cool in the pans for 10 minutes, then turn them out onto a wire rack. Peel off the parchment paper. Let them cool completely to room temperature. This is crucial. If they are even slightly warm, your frosting will melt.
Step 9: Make the Strawberry Buttercream (10 minutes)
In a clean bowl, beat the softened butter until creamy. Add the sifted powdered sugar, one cup at a time, on low speed. Once combined, add the cooled strawberry puree, vanilla, and salt. Beat on medium-high for 2-3 minutes until fluffy and smooth. If it’s too thin, add more powdered sugar. If too thick, add a teaspoon of milk.
Step 10: Assemble the Cake (15 minutes)
Place one cake layer on a plate or cake stand. Spread a generous layer of strawberry buttercream on top. Place the second layer (chocolate or vanilla, your choice) on top. Spread more frosting. Add the final layer. Crumb coat the entire cake with a thin layer of frosting and chill for 15 minutes. Then, apply the final layer of frosting. Smooth the sides and top.
Step 11: Decorate and Serve
Decorate with fresh strawberry slices or whole berries. You can also add a few mint leaves for color. Slice and serve. Enjoy!
Expert Tips & Tricks
Here’s everything I’ve learned from making this dozens of times. These tips will save you from my early mistakes.
Room Temperature Ingredients Matter
I can’t stress this enough. Cold butter and eggs don’t emulsify properly. If you forgot to take them out, microwave the butter for 5 seconds and the eggs in warm water for 1 minute. It makes a huge difference in texture.
Don’t Overmix the Batter
Once you add the flour, mix until *just* combined. Overmixing makes the cake dense and chewy instead of tender. It’s okay if there are a few tiny lumps.
Strain Your Strawberry Puree
If you want a smooth pink layer, blend the strawberries and push them through a fine-mesh sieve to remove seeds. If you don’t mind seeds, skip this step. They’re edible!
Cool Completely Before Frosting
I know it’s tempting. But warm cake + buttercream = mess. Let them cool on a rack until they feel cool to the touch. This might take an hour or two, so plan ahead.
Crumb Coat is Your Friend
A thin layer of frosting first traps loose crumbs. Chill it for 15 minutes, then add the final layer. Your cake will look professional and clean.
Use Fresh Strawberries
For the frosting, fresh strawberries taste best. If you only have frozen, thaw them, drain the excess liquid, and reduce it in a pan to concentrate the flavor before using.
Variations & Substitutions
Once you’ve nailed the basic version, here’s how you can mix it up. I’ve tried all of these.
White Cake Only
Skip the strawberry and chocolate layers. Make three vanilla layers. It’s simpler and still delicious. Top with fresh peaches or blueberries.
Chocolate and Strawberry Only
Make two chocolate layers and one strawberry layer. It’s a bit more dramatic and tastes like a strawberry shortcake in cake form.
Gluten-Free
Use a 1-to-1 gluten-free flour blend. The texture might be slightly denser, but it still works. I’ve used Bob’s Red Mill and Cup4Cup with good results.
Dairy-Free
Use dairy-free butter sticks and oat milk or almond milk with lemon juice for the buttermilk substitute. The frosting might be slightly softer, so chill it longer.
Vegan
Use flax eggs (1 tablespoon ground flax + 3 tablespoons water per egg) and dairy-free butter. The texture will be different but still tasty.
Mini Cakes
Divide the batter into 12 muffin tins for cupcakes. Bake for 18-20 minutes. Frost with a piping bag for a cute touch.
Serving & Storage
How to Serve:
I serve this at room temperature. Cold cake doesn’t have the same tender texture. Take it out of the fridge 30 minutes before serving. Pair it with a cup of coffee or a glass of cold milk.
Side Dishes:
This cake is rich, so it doesn’t need much. A simple green salad or some fresh fruit works well if you’re serving it after dinner. Otherwise, it’s perfect as a standalone dessert.
Refrigerator:
Store leftovers in an airtight container in the fridge for up to 4 days. The buttercream will firm up in the fridge, so let it sit out for 15 minutes before eating.
Freezing:
You can freeze the unfrosted cake layers. Wrap them tightly in plastic wrap and then foil. Freeze for up to 2 months. Thaw overnight in the fridge before frosting. Frosted cakes don’t freeze as well because the buttercream can separate.
Meal Prep:
Bake the layers a day ahead. Store them wrapped at room temperature. Make the frosting the day of. This is the best way to manage your time if you’re hosting a party.
Nutrition Information
I’m not a nutritionist, but here’s the breakdown if you’re tracking. Keep in mind this is an estimate.
Per Serving (based on 12 slices):
- Calories: 450
- Protein: 5g
- Carbs: 65g
- Fiber: 1g
- Sugar: 45g
- Fat: 20g
- Saturated Fat: 12g
This is a treat. It’s sweet, rich, and meant to be enjoyed. It’s not a health food, but it’s made with real ingredients like eggs, butter, and fresh strawberries. When I make it, I enjoy a small slice and savor it. It’s worth it.
Final Thoughts
So that’s my Neapolitan Layer Cake with Fresh Strawberry Buttercream! I’ve talked a lot about it, but when you make a recipe this often, you have a lot to say about it. This cake has saved me more times than I can count. It’s my answer to “what dessert should I bring?” when I’m tired but want to impress. It’s reliable. It’s delicious. And it’s genuinely easy.
Make it yours! Try different berries on top. Swap the vanilla for almond extract. Add a drizzle of chocolate ganache. The best recipes are the ones you adapt to your tastes.
If you make this, drop a comment and let me know how it went! I love hearing how recipes turn out in your kitchen. And if something doesn’t work, tell me that too—I’m here to help troubleshoot. Happy baking!
Frequently Asked Questions
Can I use box cake mix instead of scratch?
You can! It’s a great shortcut. Use three boxes of white cake mix. For the pink layer, add strawberry gelatin and a little strawberry puree. For the chocolate layer, use a chocolate cake mix box. The scratch version tastes better, but the box mix version is still delicious and much faster.
Why did my cake sink in the middle?
This usually happens if the oven temperature is too high or if you opened the oven door too early. Don’t open the oven for the first 20 minutes. Also, make sure your baking powder is fresh. If it’s old, it won’t provide enough lift.
Can I make the frosting ahead of time?
Yes! Store the frosting in an airtight container in the fridge for up to 3 days. Let it come to room temperature and beat it again with the mixer before using. It might need a little extra powdered sugar if it separated.
Why is my frosting runny?
Your butter was probably too warm, or your strawberry puree was too watery. Make sure your butter is soft but not melted. And reduce your strawberry puree until it’s thick like jam before adding it to the butter.
Can I use frozen strawberries?
Yes! Thaw them completely, then drain the excess liquid in a sieve. You can also simmer the puree to reduce it before using. Frozen strawberries are fine, but fresh taste brighter.
How do I get clean layers when I slice the cake?
Use a serrated knife. Saw gently back and forth without pressing down. You can also chill the cake for 15 minutes before slicing to firm up the frosting. Wipe the knife clean between cuts.
Pin This Recipe!
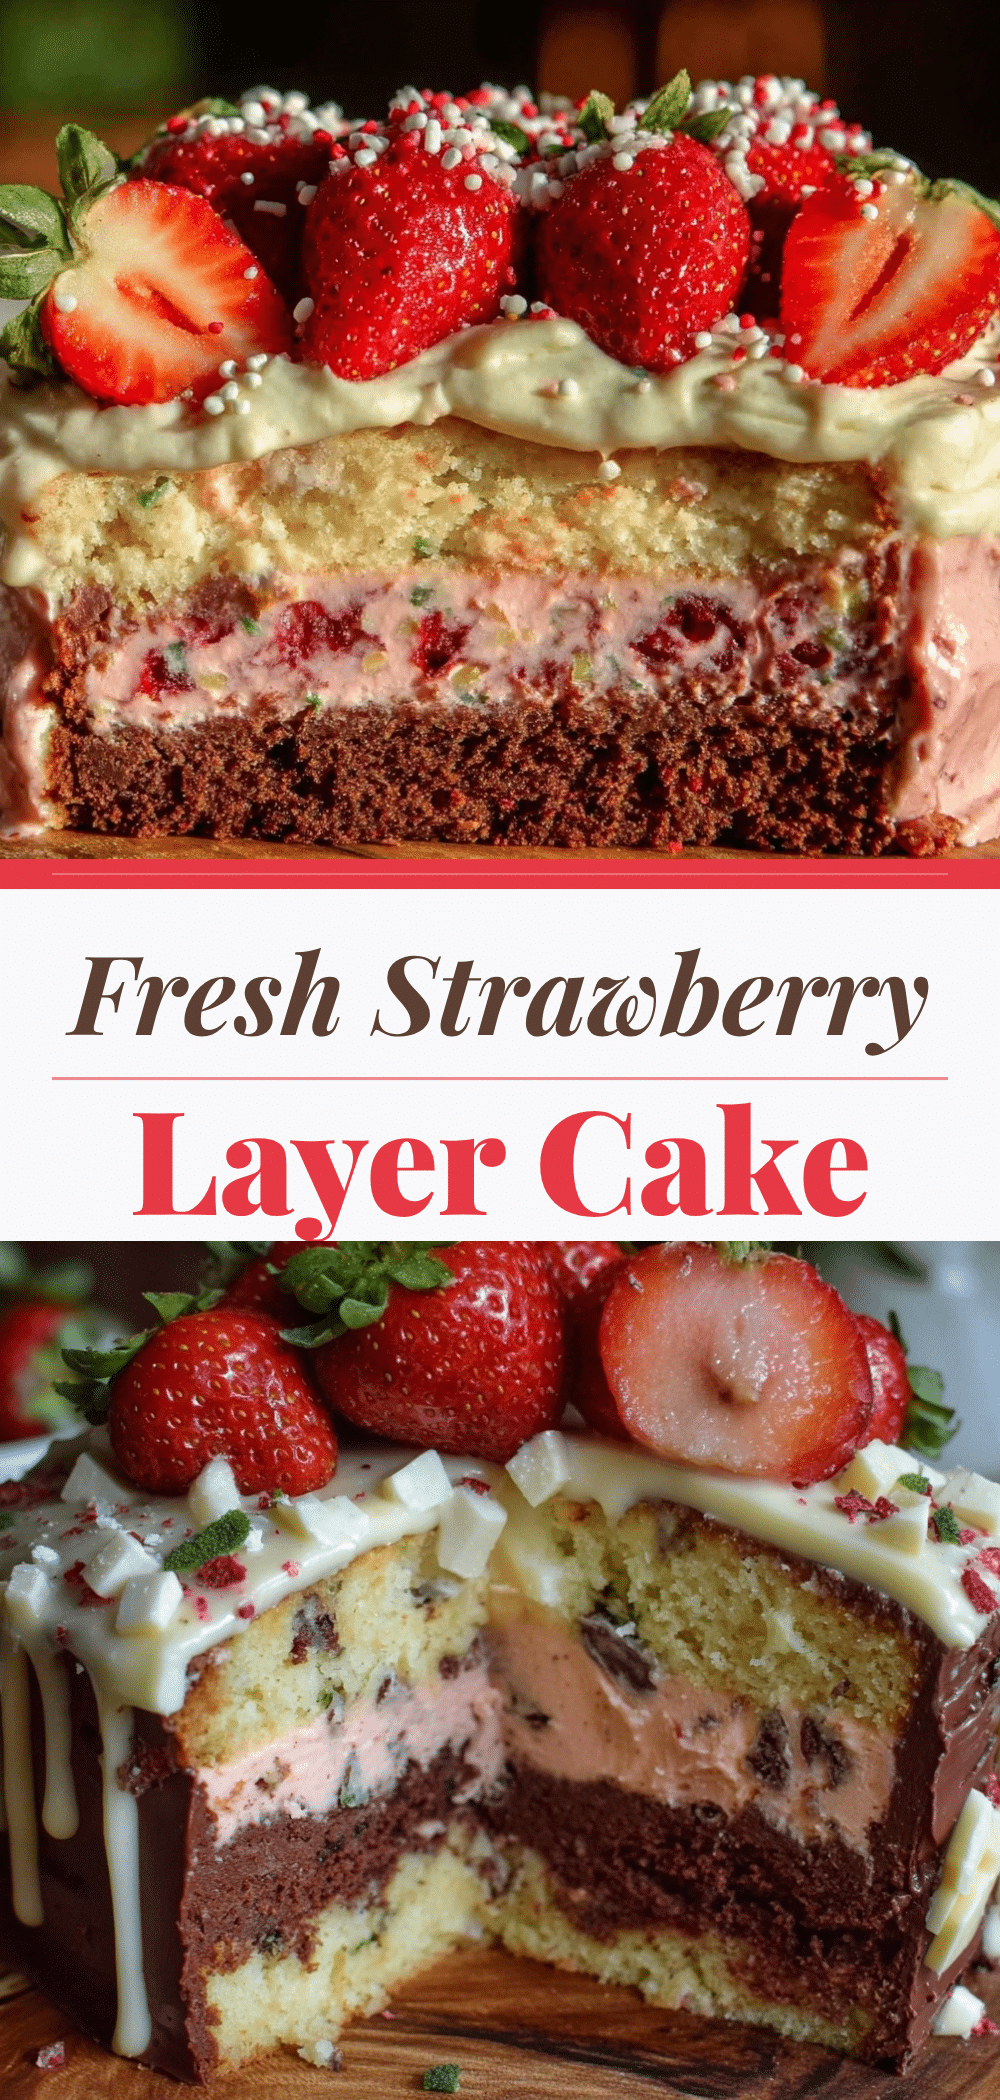
Neapolitan Layer Cake: Foolproof & Beginner-Friendly
- Total Time: 2 hours 15 minutes
- Yield: 12 servings 1x
Description
A beginner-friendly, foolproof Neapolitan layer cake featuring moist vanilla, strawberry, and chocolate layers topped with fresh strawberry buttercream. This nostalgic treat is easy to make and perfect for birthdays or potlucks.
Ingredients
- 2 ½ cups all-purpose flour
- 2 teaspoons baking powder
- 1 teaspoon salt
- 1 cup unsalted butter (softened)
- 1 ½ cups granulated sugar
- 4 large eggs (room temperature)
- 2 teaspoons vanilla extract
- 1 cup buttermilk
- ½ cup strawberry puree
- 1 envelope strawberry gelatin (optional)
- ½ cup unsweetened cocoa powder
- ½ cup hot coffee or hot water
- 1 cup unsalted butter (for frosting, softened)
- 4–5 cups powdered sugar
- ¼ cup strawberry puree (for frosting)
- 1 teaspoon vanilla extract (for frosting)
- ½ teaspoon salt (for frosting)
- Fresh strawberries (for garnish)
Instructions
- Preheat oven to 350°F (175°C). Grease three 9-inch round cake pans and line bottoms with parchment paper. Dust with flour and tap out excess.
- In a medium bowl, whisk together flour, baking powder, and salt.
- In a large bowl, beat softened butter and sugar on medium-high speed for 3 minutes until light and fluffy.
- Add eggs one at a time, beating well after each addition. Scrape down sides. Add vanilla extract.
- Reduce mixer speed to low. Add dry ingredients in three parts, alternating with buttermilk in two parts. Start and end with dry ingredients. Mix just until combined.
- Divide batter evenly among three bowls. Keep one plain for vanilla. Add strawberry puree and dissolved gelatin to the second bowl. Add cocoa powder and hot coffee/water to the third bowl. Mix until smooth.
- Pour batter into prepared pans. Bake for 25-30 minutes or until a toothpick inserted in the center comes out clean. Rotate pans halfway through.
- Let cakes cool in pans for 10 minutes, then turn out onto a wire rack. Peel off parchment. Cool completely to room temperature.
- For frosting, beat softened butter until creamy. Add sifted powdered sugar one cup at a time on low speed. Add cooled strawberry puree, vanilla, and salt. Beat on medium-high for 2-3 minutes until fluffy.
- Assemble cake: Place one layer on stand, spread frosting, add second layer, spread frosting, add final layer. Apply a thin crumb coat and chill for 15 minutes. Apply final layer of frosting.
- Decorate with fresh strawberries and serve.
Notes
Ensure all ingredients are at room temperature for best emulsification. Do not overmix the batter once flour is added to avoid a dense cake. Cool cakes completely before frosting to prevent melting. For a smooth pink layer, strain strawberry puree to remove seeds. Use fresh strawberries for the best flavor in the frosting.
- Prep Time: 45 minutes
- Cook Time: 30 minutes
- Category: Dessert
- Cuisine: American
Nutrition
- Serving Size: 1 slice
- Calories: 450
- Sugar: 45
- Fat: 20
- Saturated Fat: 12
- Carbohydrates: 65
- Fiber: 1
- Protein: 5
Keywords: Neapolitan cake, layer cake, strawberry cake, chocolate cake, vanilla cake, beginner baking, fresh strawberry buttercream, birthday cake, easy cake recipe


