I used to be a creature of habit. For years, my morning routine was a well-oiled machine of instant coffee, a splash of milk, and a desperate scramble to find my keys before the house went silent. It was functional, sure, but it wasn’t enjoyable. Then came the Starbucks run. You know the one: the line snaking out the door, the $7 price tag that made me wince, and the inevitable disappointment when my “perfect” drink was lukewarm and too sweet by the time I got home.
That changed last October. I was half-asleep, staring at a bag of brown sugar and a half-empty bottle of espresso in my pantry, when I decided to stop buying other people’s mornings and start making my own. I remembered seeing that viral video of the shaken iced espresso—the one with the foam rising like a cloud—and thought, How hard can it be?
Turns out, it’s incredibly hard to get right if you don’t know the tricks. I messed up the ratios. I used hot coffee (big mistake). I shook it so hard the lid popped off onto my counter. But after about six iterations, I cracked the code. This Homemade Brown Sugar Shaken Espresso is now my non-negotiable morning ritual. It takes less time than brewing a pot of coffee, tastes like a fancy café treat, and costs pennies compared to the shop version. If you’re tired of the morning caffeine slump or just want to save money, this recipe is your new best friend.
Why You’ll Love This Recipe
There are a dozen reasons I keep coming back to this drink, but let’s be real: it’s not just about the caffeine. It’s about the vibe. This drink feels like a little treat you give yourself before the chaos of the day starts. Here’s why it’s earned a permanent spot in my fridge:
- Stupid Simple — Seriously, if you can boil water and shake a jar, you can make this. I’ve made this while one hand was tying my shoe and the other was holding the baby. It doesn’t require a fancy machine or barista skills.
- Lightning Fast — 5 minutes from start to finish. That’s it. I can have this ready before my toast pops up. It’s the perfect antidote to “I’m running late” panic.
- Cheaper Than Takeout — This costs about $0.50 to make. At $6-$7 a cup, you’re saving enough for a muffin in a month. My bank account loves this as much as my taste buds do.
- Customizable — Want it sweeter? Add more brown sugar. Want it creamier? Swap the milk for oat milk or add a splash of vanilla. I’ve made this for my coffee-hating husband (with extra cream) and my espresso-obsessed friend (with double shots), and we both loved it.
- Energy Without the Jitters — Because I use strong brewed espresso or cold brew concentrate, the caffeine hits steady and clean. No crash by 10 AM. I feel alert, not anxious.
This isn’t just a drink; it’s a morning reset. It’s my answer to “what do I want for breakfast?” when I don’t want food, just fuel. And honestly? It pairs beautifully with my fluffy buttermilk blueberry pancakes on weekends, or stands alone as a quick pick-me-up on weekdays.
Ingredients You’ll Need
Here’s the best part: you probably have most of this already. This isn’t a recipe that requires a trip to three different specialty stores. It’s pantry-friendly, simple, and effective.
For the Espresso Base
Espresso beans or fine-ground coffee (2 tablespoons / 14g) — I use a dark roast for that rich, bitter backbone that cuts through the sugar. If you don’t have an espresso machine, strong brewed coffee or even cold brew concentrate works. Just make sure it’s strong. Weak coffee makes a weak drink.
Water (½ cup / 120ml) — Filtered is best. If your tap water tastes like chlorine, your coffee will too. I use filtered water every time.
Brown sugar (2 tablespoons / 25g) — This is the star. I use light brown sugar for a softer molasses note, but dark brown is great if you like a deeper, toffee-like flavor. Don’t use white sugar; it doesn’t have that depth.
Ice cubes (1 cup / packed) — You need enough ice to chill the drink quickly. I use filtered ice to avoid any weird freezer tastes.
For the Creamy Finish
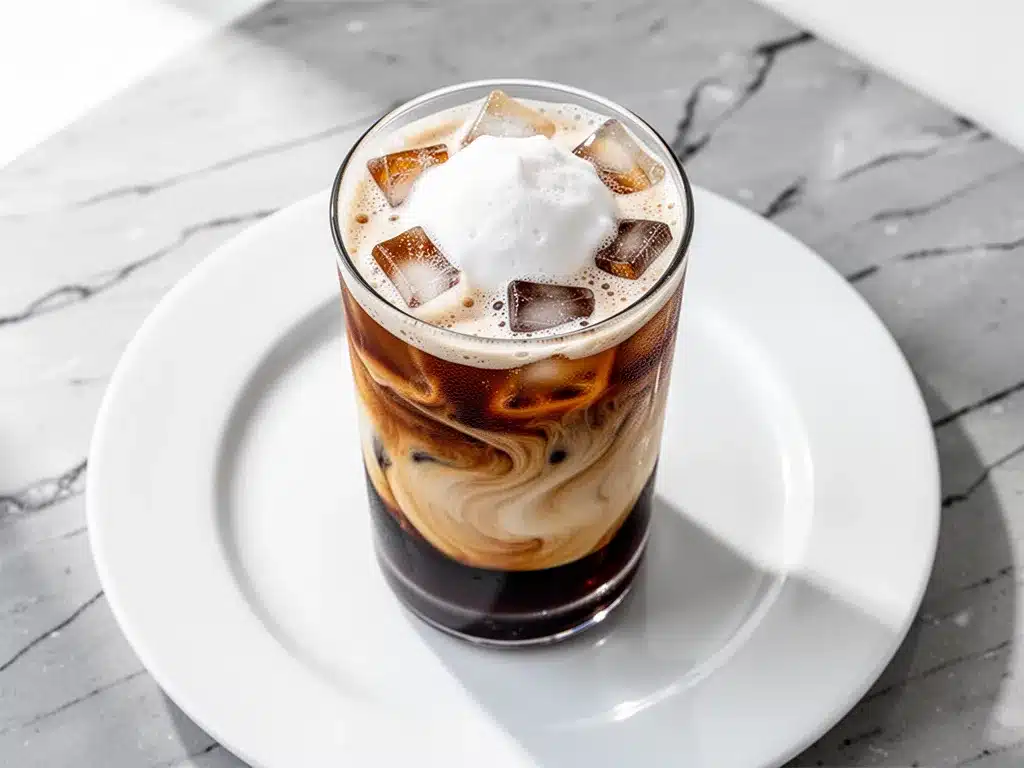
Milk of choice (½ cup / 120ml) — Whole milk gives the richest texture, but I often use oat milk because it froths beautifully and has a natural sweetness. Almond milk works too, but it’s thinner. Avoid skim milk if you want that café-quality mouthfeel.
Vanilla extract (½ teaspoon) — Pure vanilla, not imitation. It adds that warm, bakery-like aroma. A little goes a long way.
Cinnamon (optional) (1 pinch) — Just a tiny pinch on top adds a lovely aroma. I sprinkle it on right before serving.
Substitutions & Tips
No espresso machine? Use ½ cup of strong cold brew concentrate. It’s already chilled and super concentrated, so it works perfectly. If you only have drip coffee, brew it double-strength and let it cool completely.
Sugar-free? You can use a keto-friendly brown sugar alternative like Lakanto or Swerve. I’ve tested this, and it works, but the texture of the foam is slightly less thick. Still delicious, though.
Flavor variations? Try a splash of hazelnut syrup instead of brown sugar for a nutty twist. Or add a teaspoon of cocoa powder for a mocha vibe. I keep it simple most days, but variety is fun.
Equipment Needed
You don’t need fancy gadgets for this. Here’s what I actually use, along with some honest thoughts on what’s necessary.
French Press or Espresso Machine — I use a French Press because it’s easy to clean and makes a rich brew. If you have an espresso machine, go for it. If not, strong coffee works.
Small Jar with Lid — This is your shaker. I use a small mason jar (8oz size). Make sure the lid seals tight! I’ve had leaks before, and cleaning coffee off the ceiling is not fun. A cocktail shaker works too, but a jar is easier to find and store.
Mug or Glass — I prefer a tall glass to show off the foam layers. But a ceramic mug keeps it warmer longer. Choose your weapon.
Measuring Spoons — For the sugar and vanilla. I eyeball it sometimes, but measuring ensures consistency.
Strainer (optional) — If you’re using a French Press, the coffee might have fine grounds. A small mesh strainer helps if you’re picky about texture.
Pro Tip: Keep your shaker jar in the fridge or near your coffee station. If you have to dig it out every morning, you’ll skip the recipe. Out of sight, out of mind.
How to Make It: Step-by-Step
Alright, let’s make this! I’m walking you through exactly how I do it, including the little tricks I’ve picked up to get that perfect foam.
Step 1: Brew Your Espresso (5 minutes)
Start by brewing your coffee. If you’re using an espresso machine, pull two shots. If you’re using a French Press, add 2 tablespoons of fine-ground coffee to ½ cup of hot water (just off the boil). Let it steep for 4 minutes, then press down slowly. The goal is a strong, concentrated coffee base. If you’re using cold brew, just measure out ½ cup. Set it aside to cool slightly—hot coffee melts ice too fast and dilutes the drink.
Step 2: Sweeten the Brew (1 minute)
While the coffee is still warm (not boiling), add the brown sugar. Stir vigorously until the sugar is completely dissolved. This is crucial. If you add brown sugar to cold coffee, it won’t dissolve properly, and you’ll get gritty bits at the bottom. I use a small spoon and stir for about 30 seconds. The mixture should look smooth and slightly syrupy.
Step 3: The Shake (30 seconds)
This is the fun part. Add the sweetened espresso to your small jar. Add a handful of ice cubes (about ½ cup). Secure the lid tightly. Shake it hard for 30 seconds. I know, it’s tiring, but trust me. You’re chilling the coffee and creating that signature frothy foam. You’ll feel the jar getting cold, and you’ll hear the ice crunching. That’s the sound of success.
Step 4: Prepare the Glass (1 minute)
While you’re shaking, get your serving glass ready. Pour in the milk (or oat milk) and add the vanilla extract. If you like it extra creamy, you can add a splash of half-and-half here. Fill the glass with fresh ice cubes. The ice keeps the drink cold and prevents the milk from warming up too quickly.
Step 5: Combine and Pour (1 minute)
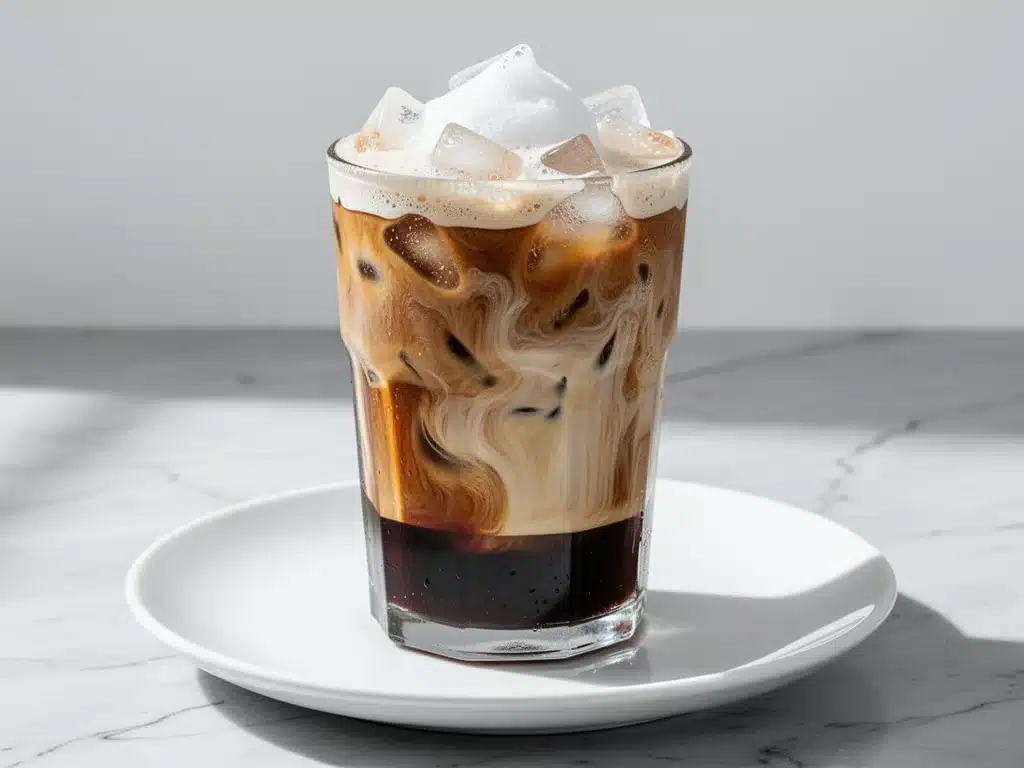
Open the jar carefully (it might be pressurized). Pour the shaken espresso mixture over the ice and milk. Watch the magic happen—the foam will rise to the top, creating a beautiful layered effect. The dark espresso floats on top of the lighter milk, creating those gorgeous streaks.
Step 6: Garnish and Serve
Top with a pinch of cinnamon if you’re feeling fancy. Stir gently before drinking to mix the foam with the milk. Drink immediately while it’s cold and frothy. It tastes best within 10 minutes before the ice melts too much.
Expert Tips & Tricks
Here’s everything I’ve learned from making this dozens of times. These tips will save you from my early mistakes.
- Chill Your Ingredients — If your coffee and milk are already cold, the shake is even more effective. I sometimes put my milk in the fridge overnight. Cold liquids shake up faster and create a thicker foam.
- Don’t Skimp on Sugar — The brown sugar isn’t just for sweetness; it helps stabilize the foam. Too little sugar, and the foam collapses quickly. Stick to the 2-tablespoon ratio for the best texture.
- Shake Until It’s Cold — Don’t rush the shake. If the jar isn’t cold to the touch, keep shaking. That temperature drop is what creates the creamy texture.
- Use Fresh Ice — Old ice can taste stale. Use freshly made ice cubes for the cleanest flavor. Crushed ice works too, but it melts faster and dilutes the drink quicker.
- Layering Technique — For the best visual effect, pour the milk first, then gently pour the shaken espresso over the back of a spoon. This keeps the layers distinct. But if you’re just drinking it, stir it up!
Common Mistake: Using hot coffee. If you pour hot coffee over ice, it melts instantly and becomes watery. Always cool the coffee slightly before shaking.
Pro Trick: Add a splash of heavy cream to the milk for an extra decadent version. It’s like a liquid dessert. I do this on weekends when I’m not rushing.
Variations & Substitutions
Once you’ve nailed the basic version, here’s how you can mix it up. I’ve tried all of these, and they’re all winners.
The Classic Iced Coffee Swap
Skip the brown sugar and use simple syrup instead. Add 1 tablespoon of simple syrup to the shaken espresso. This is closer to the traditional iced coffee taste. Great for those who prefer less molasses flavor.
The Vanilla Bean Version
Add ½ teaspoon of vanilla bean paste instead of extract. It looks gorgeous with little black specks in the foam. I buy vanilla bean paste because it’s worth the extra cost for the flavor.
The Caramel Drizzle
Drizzle caramel sauce on the inside of the glass before adding ice. Then pour in the shaken espresso. It’s sweet, salty, and totally indulgent. I pair this with my overnight vanilla cinnamon chia pudding for a complete breakfast.
The Mocha Twist
Add 1 teaspoon of cocoa powder to the shaken espresso before shaking. It turns it into an iced mocha. The cocoa pairs beautifully with the brown sugar. I use unsweetened cocoa powder.
Dietary Modifications
Keto: Use erythritol or monk fruit sweetener instead of brown sugar. Add heavy cream or coconut cream for fat. It’s rich and satisfying.
Vegan: Use oat milk or almond milk and ensure your brown sugar is vegan (some brown sugar is processed with bone char). I use organic brown sugar to be safe.
Low-Carb: Skip the sugar entirely and use stevia drops. It’s less sweet, but still caffeinated and refreshing.
Serving & Storage
How to Serve: I usually serve this straight away, no garnish needed. But if I have guests, I put out a small bowl of cinnamon and a bottle of vanilla extract for them to customize. It’s interactive and fun.
Side Dishes: This drink pairs well with savory breakfast items. I love it with my cheesy sausage and egg breakfast casserole on weekends. The bitterness of the coffee cuts through the richness of the egg and cheese.
Storage Instructions: You can’t really store the shaken espresso. It loses its foam quickly. However, you can prep the sweetened coffee base ahead of time. Mix the coffee and brown sugar, let it cool, and store in the fridge for up to 3 days. When you want a drink, just shake it with ice and milk. It saves morning time.
Reheating: Don’t reheat this. It’s an iced drink. If you want hot coffee, just brew it normally. This recipe is specifically for the cold, frothy experience.
Nutrition Information
I’m not a nutritionist, but here’s the breakdown if you’re tracking. This is based on one serving with whole milk.
| Nutrient | Amount |
|---|---|
| Calories | 120 |
| Protein | 4g |
| Carbs | 18g |
| Fiber | 0g |
| Sugar | 16g |
| Fat | 4g |
| Saturated Fat | 2.5g |
| Cholesterol | 15mg |
| Sodium | 50mg |
What’s Good: It’s a quick energy boost. The protein from the milk helps keep you full. It’s much lower in calories than most café drinks.
What to Know: The sugar content comes from the brown sugar. You can reduce this by using less sugar or a substitute. The caffeine content is roughly equivalent to 2 cups of coffee, so don’t drink this too late in the day.
My Take: Look, this is a treat. It’s not a health food. But it’s better than the sugary syrups at the coffee shop. I enjoy it as a morning ritual, not a daily staple. Balance is key.
Final Thoughts
So that’s my Homemade Brown Sugar Shaken Espresso! I’ve probably talked your ear off at this point, but when you make a recipe this often, you have a lot to say about it.
This drink has saved my mornings more times than I can count. It’s my answer to “what do I want for breakfast?” when I don’t want food, just fuel. My kids love it too (they call it “fancy coffee”), and I love it because it’s fast, cheap, and delicious.
Make it yours! Try different milks, adjust the sugar, or add your favorite spices. The best recipes are the ones you adapt to your tastes. If you make this, drop a comment and let me know what you think! I love hearing how recipes turn out in your kitchen.
Happy brewing! And I hope your mornings smell half as good as mine do right now.
Frequently Asked Questions
Can I use instant coffee instead of espresso?
You can, but the flavor won’t be as rich. If you use instant coffee, make a very strong concentrate (2 tablespoons of powder in ½ cup of hot water). Let it cool completely before shaking. It’s a budget-friendly option, but you’ll miss some of that espresso depth.
Why is my foam not thick?
This usually happens if the coffee is too hot or if you didn’t shake it long enough. Make sure the coffee is cool or room temperature before shaking. Also, shake for a full 30 seconds. The friction creates the foam. If you’re using low-fat milk, the foam might be thinner. Whole milk or oat milk froths better.
Can I make this ahead of time?
Not the finished drink. The foam collapses quickly. But you can prep the sweetened coffee base. Mix coffee and brown sugar, cool it, and store in the fridge for up to 3 days. When you’re ready, just shake with ice and milk. It saves morning time.
Is this drink too sweet?
The 2 tablespoons of brown sugar is balanced by the bitterness of the espresso and the creaminess of the milk. If you find it too sweet, reduce to 1 tablespoon. Or use a sugar substitute. I prefer it sweet, but taste is subjective.
Can I use almond milk?
Yes, almond milk works, but it’s thinner and doesn’t froth as well. Oat milk or whole milk gives the creamiest texture. If you use almond milk, consider adding a splash of heavy cream for richness.
How much caffeine is in this?
It depends on your coffee strength. Two shots of espresso have about 60-80mg of caffeine. If you use strong brewed coffee, it might be closer to 100mg. It’s roughly equivalent to 2 cups of drip coffee. Be mindful if you’re sensitive to caffeine.
Can I add other flavors?
Absolutely. Try a pinch of nutmeg, a dash of cardamom, or a splash of hazelnut syrup. I’ve even added a teaspoon of cocoa powder for a mocha version. Get creative!
Pin This Recipe!

Homemade Brown Sugar Shaken Espresso: Easy Morning Drink
- Total Time: 7 minutes
- Yield: 1 serving 1x
Description
A quick, 5-minute homemade version of the viral Starbucks shaken espresso. This drink combines strong espresso, brown sugar, and milk shaken with ice for a creamy, frothy, and customizable morning caffeine boost.
Ingredients
- 2 tablespoons (14g) espresso beans or fine-ground coffee
- 1/2 cup (120ml) water
- 2 tablespoons (25g) brown sugar
- 1 cup ice cubes
- 1/2 cup (120ml) milk of choice (whole, oat, or almond)
- 1/2 teaspoon vanilla extract
- 1 pinch cinnamon (optional)
Instructions
- Brew 2 shots of espresso or steep 2 tablespoons of fine-ground coffee in 1/2 cup of hot water for 4 minutes. Let cool slightly.
- While the coffee is still warm, add brown sugar and stir vigorously until completely dissolved.
- Pour the sweetened espresso into a small jar with a tight lid. Add 1/2 cup of ice cubes.
- Secure the lid and shake hard for 30 seconds until the jar is cold to the touch.
- Pour milk and vanilla extract into a serving glass filled with fresh ice.
- Carefully open the jar and pour the shaken espresso mixture over the milk and ice.
- Garnish with a pinch of cinnamon if desired and serve immediately.
Notes
Ensure coffee is cooled slightly before shaking to prevent melting ice too quickly. For best foam, use cold ingredients and shake until the jar is cold. The sweetened coffee base can be stored in the fridge for up to 3 days for quick preparation.
- Prep Time: 2 minutes
- Cook Time: 5 minutes
- Category: Beverage
- Cuisine: American
Nutrition
- Serving Size: 1 tall glass
- Calories: 120
- Sugar: 16
- Sodium: 50
- Fat: 4
- Saturated Fat: 2.5
- Carbohydrates: 18
- Protein: 4
Keywords: shaken espresso, brown sugar espresso, iced coffee, homemade starbucks drink, morning coffee, easy coffee recipe, caffeine boost


