
It was 7 PM on a Friday, and I was staring at my pantry with that specific brand of panic that only happens when you realize you’re hosting friends in three hours. I had promised a “light appetizer” to a group of health-conscious foodies, but my brain was still stuck on the heavy, cheesy lasagna I’d made the night before. I needed something fresh, something that didn’t require an oven, and most importantly, something that didn’t look like I’d just opened a bag of store-bought chips.
That’s when I decided to make herbed cream cheese turkey pinwheels. I know, I know—they’re a classic for a reason. But I’d always thought they were a bit… basic. Until I actually took the time to get them right. I spent the next two hours rolling, slicing, and arranging little spirals of turkey and herb-infused cream cheese on a platter. The smell of fresh dill and garlic in the cream cheese filled the kitchen, and when my friends arrived, the first thing they grabbed wasn’t a drink—it was a pinwheel.
There’s something deeply satisfying about these little bites. They’re elegant enough for a holiday gathering but simple enough for a casual Tuesday night snack. And here’s the best part: they’re ready in under 20 minutes. No baking, no mess, no stress. Just good food that makes you look like you planned ahead for weeks (even if you didn’t). If you’re looking for a quick, crowd-pleasing starter that feels homemade but takes zero effort, this is it. I’ve made these for game days, office parties, and lazy weekend gatherings, and they’ve never failed to disappear before I can grab one myself.
Why You’ll Love These Pinwheels
I’ve been making these herbed cream cheese turkey pinwheels for years, and they’ve become my go-to answer for “what should I bring?” Here’s why they work so well:
- Zero Cooking Required — Seriously. If you can spread cream cheese, you can make these. I’ve made them while half-asleep on the couch, and they still turned out perfect. No oven, no stove, just assembly.
- Make-Ahead Friendly — These are actually better if you make them a few hours ahead. The flavors meld together, and the tortillas soften just enough to be tender but not soggy. I often prep them the morning of the party and refrigerate them until guests arrive.
- Customizable to Any Diet — Want to make them vegetarian? Skip the turkey and add roasted red peppers. Need gluten-free? Use gluten-free tortillas. I’ve made these for everyone from keto friends to picky eaters, and everyone finds something to love.
- Impressive but Simple — They look like you spent hours in the kitchen, but it’s really just rolling and slicing. The visual of those beautiful spirals always gets a “wow” from guests, even if they’re just snacking while watching TV.
- Perfect for Any Occasion — Whether it’s a holiday party, a game day spread, or a casual get-together, these fit right in. They’re light enough not to fill people up before dinner but flavorful enough to keep them coming back for more.
Real talk: these pinwheels are my secret weapon for last-minute hosting. They’re reliable, delicious, and always a hit. Once you try them, you’ll probably start making them for no reason at all. (I know I do.)
Ingredients You’ll Need
Here’s the thing about these pinwheels: you probably have most of the ingredients already. It’s a simple pantry-and-fridge combo, but the quality of the ingredients makes a huge difference. I’m particular about a few things here, so let’s break it down.
For the Filling
Softened Cream Cheese (8 oz / 225g) — This is the base. Make sure it’s softened to room temperature. Cold cream cheese is hard to spread and will tear the tortillas. I usually take it out of the fridge about 30 minutes before I start. If you’re in a rush, microwave it in 10-second bursts until it’s spreadable.
Sour Cream (2 tablespoons / 30ml) — Adds tang and helps thin out the cream cheese so it’s easier to spread. Don’t skip this—it balances the richness and keeps the filling from being too heavy.
Fresh Dill (2 tablespoons, chopped) — This is the star flavor. Fresh dill gives a bright, grassy note that pairs perfectly with the cream cheese. Dried dill works in a pinch, but use only 1 teaspoon. Fresh is worth the extra minute.
Fresh Parsley (1 tablespoon, chopped) — Adds a mild, fresh contrast to the dill. I use flat-leaf parsley because it has a cleaner flavor. If you don’t have parsley, just double the dill.
Garlic (1 clove, minced) — Just one clove. You want a hint of garlic, not a garlic bomb. Fresh only—jarred garlic has a weird metallic taste that really shows up in this kind of simple filling.
Salt and Black Pepper (to taste) — I start with ½ teaspoon of salt and a good crack of black pepper. Taste the filling before you spread it and adjust as needed. It should be well-seasoned because the tortillas and turkey are mild.
Red Pepper Flakes (¼ teaspoon, optional) — A tiny pinch adds a subtle warmth without making it spicy. I always add this because it adds depth.
For the Assembly

Flour Tortillas (8-inch / 20cm, 4 large) — Large flour tortillas are key. They’re pliable and easy to roll. I use Mission brand because they’re soft and don’t tear. If you can’t find large tortillas, you can use two smaller ones per pinwheel, but the rolling is trickier.
Sliced Turkey Breast (12–16 slices / about 8 oz / 225g) — Look for deli-style turkey breast, not the pre-packaged lunch meat that’s already sliced thin. You want slices that are thick enough to hold up but thin enough to roll. I usually buy a block of turkey breast and slice it myself, but deli slices work fine too. Make sure it’s low-sodium if you can find it.
Optional Add-ins — I sometimes add a few slices of provolone cheese or some sun-dried tomatoes for extra flavor. But honestly, the basic version is perfect as is.
For Serving
Chives (for garnish) — A few chopped chives on top add a pop of color and a mild onion flavor. If you don’t have chives, just skip it. The pinwheels look great on their own.
Extra Dill Sprigs — A small sprig of fresh dill on each pinwheel makes them look fancy. I know, I know—it’s just a sprig, but it elevates the whole presentation.
Equipment You’ll Need
You don’t need any fancy tools for this. Here’s what I actually use:
Medium Mixing Bowl — For combining the cream cheese and herbs. Any bowl works as long as it’s big enough to mix comfortably.
Whisk or Fork — To beat the cream cheese until it’s smooth. I use a fork because it’s easier to clean, but a whisk works too.
Butter Knife or Spatula — For spreading the filling. A flexible spatula is best because it gets into the edges of the tortilla.
Sharp Knife — For slicing the pinwheels. A serrated knife works well if your tortillas are a bit thick, but a regular chef’s knife is fine for most.
Platter or Tray — For serving. I like a large rectangular platter because it looks more elegant than a round plate.
Plastic Wrap — To cover the rolled tortillas while they chill. This helps them hold their shape.
Refrigerator — For chilling the pinwheels before slicing. This step is crucial for clean cuts.
How to Make Herbed Cream Cheese Turkey Pinwheels
Alright, let’s make these! I’m walking you through exactly how I do it, including the little tricks I’ve picked up over the years.
Step 1: Prep the Filling (5 minutes)
In a medium mixing bowl, combine the softened cream cheese, sour cream, chopped dill, chopped parsley, minced garlic, salt, pepper, and red pepper flakes. Whisk or mix with a fork until the filling is smooth and well-combined. Taste it and adjust seasoning if needed. It should be creamy, herby, and well-seasoned. Set aside.
Step 2: Lay Out the Tortillas (2 minutes)
Take your flour tortillas and lay them out on a clean work surface. If they’re stacked, separate them carefully. You want them flat and ready to receive the filling. If your tortillas are stiff, you can microwave them for 10–15 seconds to make them more pliable. Just don’t overheat them—they should be warm, not hot.
Step 3: Layer the Turkey (3 minutes)
Take 3–4 slices of turkey breast and lay them on each tortilla, slightly overlapping them to create an even layer. Try to cover the entire surface of the tortilla, leaving about a ½-inch border on the edges. This border helps keep the filling in when you roll. If your turkey slices are very large, you can cut them in half to make them easier to manage.
Step 4: Spread the Filling (3 minutes)
Using a butter knife or spatula, spread a thin, even layer of the cream cheese mixture over the turkey. You want a generous coating, but not so thick that it’s hard to roll. Aim for about ¼-inch thickness. Be careful to spread it all the way to the edges, but leave that ½-inch border. If you get filling on the border, just wipe it off with a damp paper towel.
Step 5: Roll It Up (2 minutes)
Starting from one of the long edges, tightly roll the tortilla up into a log. Use your fingers to tuck in the sides as you roll to keep it tight. Once it’s rolled, use plastic wrap to wrap the log tightly. Twist the ends to seal it. This helps the pinwheel hold its shape when you slice it later.
Step 6: Chill (30 minutes)
Place the wrapped logs in the refrigerator for at least 30 minutes. This step is crucial. Chilling firms up the cream cheese and makes the tortillas less likely to tear when you slice. If you’re short on time, you can freeze them for 15 minutes, but 30 minutes in the fridge is ideal.
Step 7: Slice and Serve (5 minutes)
After chilling, unwrap the logs and use a sharp knife to slice each log into 1-inch pinwheels. For clean cuts, use a gentle sawing motion rather than pressing down hard. If the knife sticks, wipe it clean with a damp paper towel between cuts. Arrange the pinwheels on a platter, garnish with fresh chives and dill sprigs, and serve.
Total Time: About 20 minutes active, plus 30 minutes chilling.
Expert Tips & Tricks
Here’s everything I’ve learned from making these dozens of times. These tips will save you from my mistakes.
- Softened Cream Cheese is Key — Cold cream cheese is a nightmare to spread. I always take it out of the fridge 30 minutes before I start. If I forget, I microwave it in 10-second bursts until it’s spreadable. It should be soft enough to mix easily but not melted.
- Don’t Skip the Chilling Step — I know it’s tempting to slice them right away, but chilling is crucial for clean cuts. If you skip it, your pinwheels will be messy and fall apart. Trust me on this.
- Use a Sharp Knife — A dull knife will crush the pinwheels. I use a serrated knife for cleaner cuts, but a regular chef’s knife works too. Just make sure it’s sharp.
- Wipe the Knife Between Cuts — If the filling sticks to the knife, wipe it clean with a damp paper towel. This keeps each pinwheel looking neat and professional.
- Make Them Ahead — These pinwheels actually taste better the next day. I often make them the morning of the party and refrigerate them until serving. They hold up well for up to 4 hours at room temperature.
Common Mistakes (and how to avoid them)
- Mistake: The tortillas tear when rolling — Fix: Use warm tortillas and roll them tightly but gently. If they’re too stiff, microwave them for 10 seconds first.
- Mistake: The filling leaks out — Fix: Make sure you leave a ½-inch border around the edges. Also, don’t overfill the tortilla. A thin, even layer is better than a thick, messy one.
- Mistake: The pinwheels are messy — Fix: Chill them for at least 30 minutes before slicing. Use a sharp knife and a sawing motion.
Variations & Substitutions
Once you’ve nailed the basic version, here’s how you can mix it up. I’ve tried all of these:
Veggie Pinwheels
Skip the turkey and add roasted red peppers, spinach, or sun-dried tomatoes to the filling. I love adding a layer of provolone cheese for extra richness. This is a great option for vegetarian guests.
Spicy Pinwheels
Add ½ teaspoon of cayenne pepper or a diced jalapeño to the cream cheese filling. Top with sliced jalapeños after slicing for a spicy kick. My friends who like heat always ask for these.
Smoked Salmon Pinwheels
Replace the turkey with smoked salmon and add a bit of capers to the filling. This is a bit more upscale but still just as easy. I serve these at holiday parties and they’re always a hit.
Gluten-Free Pinwheels
Use gluten-free flour tortillas. I’ve tried several brands, and Mission Gluten-Free works well. Just be careful when rolling—they’re a bit more fragile. Chill them longer (45 minutes) to help them hold their shape.
Hummus Pinwheels
Replace the cream cheese with hummus and add sliced cucumber and feta cheese. This is a lighter, Mediterranean-inspired version. I make this when I want something less heavy.
Serving & Storage
How to Serve
I usually serve these straight from the platter at room temperature. They’re best eaten within 4 hours of being sliced. If you’re serving them at a party, arrange them on a large platter with a few sprigs of fresh dill and chives for garnish. They look beautiful and inviting.
Side Dishes
These pinwheels pair well with a variety of sides. I often serve them with a simple green salad, some roasted vegetables, or even a bowl of roasted butternut squash soup for a cozy autumn vibe. They also go great with crispy baked pretzel bites for a game day spread.
Storage Instructions
Refrigerator: Store leftover pinwheels in an airtight container for up to 2 days. They’re best eaten fresh, but they’ll hold up for a day or two. The tortillas may soften slightly over time, but the flavor remains good.
Freezing: I don’t recommend freezing these because the tortillas become soggy when thawed. It’s better to make them fresh.
Reheating: These are best served at room temperature. If you need to warm them, microwave them for 10–15 seconds. But honestly, they’re best cold or room temp.
Nutrition Information
I’m not a nutritionist, but here’s the breakdown if you’re tracking. Per pinwheel (based on 16 pinwheels from 4 tortillas):
- Calories: 120
- Protein: 6g
- Carbs: 10g
- Fat: 6g
- Sodium: 250mg
What’s Good: Decent protein from the turkey, low in carbs if you use small tortillas. Can be made gluten-free or vegetarian.
What to Know: Higher in sodium due to the turkey and cream cheese. Use low-sodium turkey if you’re watching salt.
My Take: Look, these are appetizers. They’re not a meal. But they’re a lighter option compared to fried snacks or heavy dips. When I want to make them healthier, I use low-fat cream cheese and turkey, but honestly, the full-fat version is just so much better. Enjoy them in moderation and don’t stress about the numbers.
Final Thoughts
So that’s my go-to herbed cream cheese turkey pinwheel recipe! I’ve probably talked your ear off at this point, but when you make a recipe this often, you have a lot to say about it. These pinwheels have saved me from last-minute hosting disasters more times than I can count. They’re my answer to “what should I bring?” when I’m tired, don’t want takeout, and still want something that tastes really good. My friends are happy, my guests are happy, and I’m happy because I’m not stressed about cooking.
Make them yours! Try different herbs, swap in your favorite veggies, or add a bit of spice. The best recipes are the ones you adapt to your tastes. If you make these, drop a comment and let me know what you think! I love hearing how recipes turn out in your kitchen. And if something doesn’t work, tell me that too—I’m here to help troubleshoot.
Happy hosting! And I hope your party smells half as good as my kitchen does right now.
Frequently Asked Questions
Q: Can I use cream cheese spread instead of block cream cheese?
A: You can, but block cream cheese has a firmer texture that holds up better in the pinwheels. Cream cheese spread is softer and may make the filling too wet. If you must use spread, reduce the amount of sour cream by half. But honestly, block cream cheese is worth the extra effort.
Q: Can I make these ahead of time?
A: Absolutely! These are actually better if you make them a few hours ahead. Assemble the pinwheels, wrap them tightly in plastic wrap, and refrigerate for up to 4 hours before slicing. This helps them hold their shape and makes the flavors meld together. I often make them the morning of the party and slice them right before guests arrive.
Q: Why did my pinwheels fall apart when I sliced them?
A: This usually happens if you didn’t chill them long enough or if your knife wasn’t sharp enough. Make sure to chill the rolled tortillas for at least 30 minutes before slicing. Also, use a sharp knife and a gentle sawing motion. If the filling is too wet, it can also cause the pinwheels to fall apart. Make sure your cream cheese is softened but not melted.
Q: Can I use gluten-free tortillas?
A: Yes, but they’re a bit more fragile. I recommend using a high-quality gluten-free tortilla like Mission Gluten-Free. Roll them gently and chill them for at least 45 minutes to help them hold their shape. They’ll still taste great, just handle them with a bit more care.
Q: How do I store leftover pinwheels?
A: Store them in an airtight container in the refrigerator for up to 2 days. They’re best eaten fresh, but they’ll hold up for a day or two. The tortillas may soften slightly over time, but the flavor remains good. Don’t freeze them because the tortillas become soggy when thawed.
Q: Can I add other herbs to the filling?
A: Definitely! I love using a mix of dill, parsley, and chives. You can also try adding basil, cilantro, or tarragon. Just make sure the herbs are finely chopped so they distribute evenly. I usually stick to fresh herbs because dried herbs don’t have the same bright flavor.
Pin This Recipe!
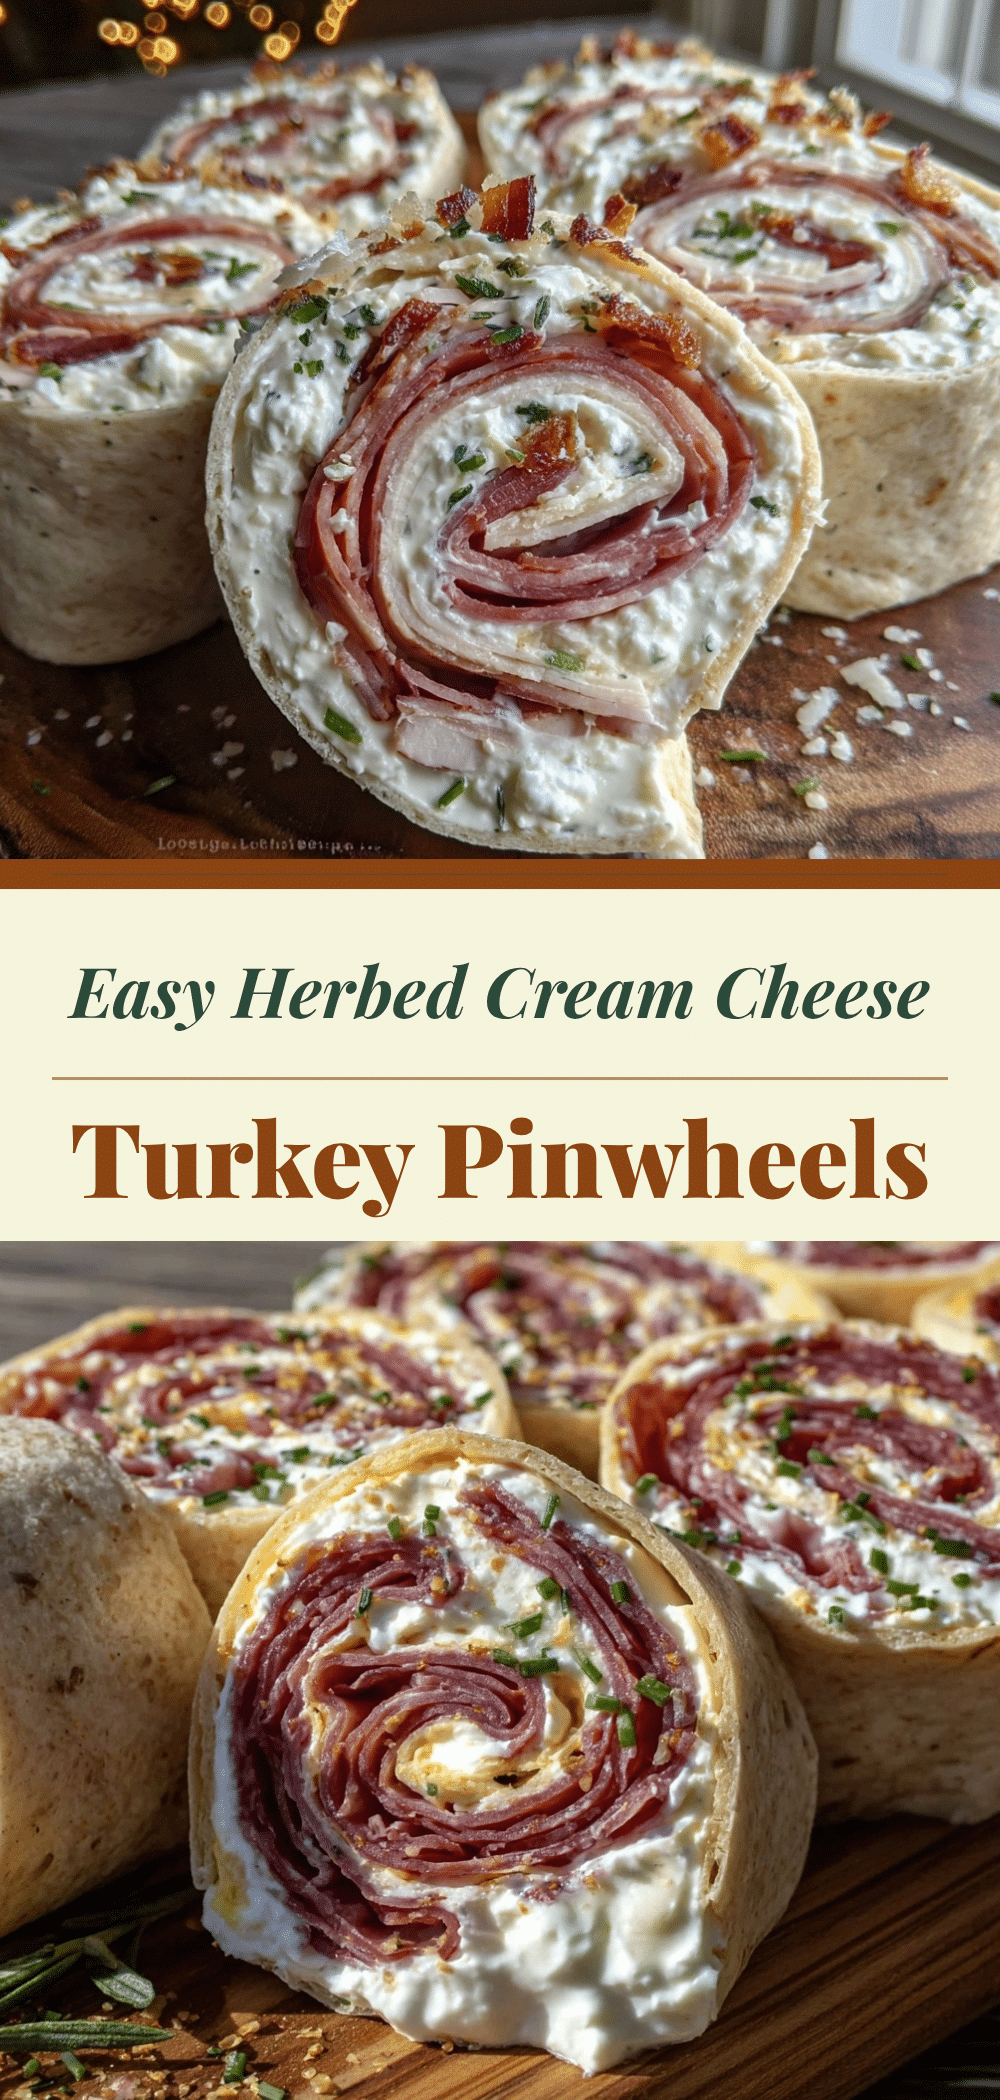

Herbed Cream Cheese Turkey Pinwheels: Easy Party Appetizer
- Total Time: 50 minutes
- Yield: 16 servings 1x
Description
These no-bake herbed cream cheese turkey pinwheels are a quick, elegant, and crowd-pleasing appetizer perfect for parties or casual snacking. Ready in under 20 minutes of active time, they are customizable for various diets and make-ahead friendly.
Ingredients
- 8 oz (225g) softened cream cheese
- 2 tablespoons sour cream
- 2 tablespoons fresh dill, chopped
- 1 tablespoon fresh parsley, chopped
- 1 clove garlic, minced
- 1/2 teaspoon salt
- Black pepper, to taste
- 1/4 teaspoon red pepper flakes (optional)
- 4 large flour tortillas (8-inch / 20cm)
- 12–16 slices turkey breast (about 8 oz / 225g)
- Chives, for garnish
- Fresh dill sprigs, for garnish
Instructions
- In a medium mixing bowl, combine softened cream cheese, sour cream, chopped dill, chopped parsley, minced garlic, salt, pepper, and red pepper flakes. Whisk or mix with a fork until smooth and well-combined. Taste and adjust seasoning if needed. Set aside.
- Lay the flour tortillas flat on a clean work surface. If they are stiff, microwave them for 10–15 seconds to make them pliable, but do not overheat.
- Layer 3–4 slices of turkey breast on each tortilla, slightly overlapping to create an even layer. Leave a 1/2-inch border around the edges.
- Spread a thin, even layer (about 1/4-inch thick) of the cream cheese mixture over the turkey, covering the surface but leaving the 1/2-inch border. Wipe any filling off the border with a damp paper towel.
- Starting from a long edge, tightly roll the tortilla into a log. Tuck in the sides as you roll to keep it tight. Wrap the log tightly in plastic wrap and twist the ends to seal.
- Place the wrapped logs in the refrigerator for at least 30 minutes to firm up the cream cheese and make slicing easier.
- Unwrap the logs and use a sharp knife to slice each log into 1-inch pinwheels using a gentle sawing motion. Wipe the knife clean between cuts if needed.
- Arrange the pinwheels on a platter and garnish with fresh chives and dill sprigs. Serve at room temperature.
Notes
Softened cream cheese is crucial for easy spreading. Do not skip the chilling step, as it ensures clean cuts and prevents the pinwheels from falling apart. These are best served within 4 hours of slicing. They can be made ahead and refrigerated for up to 4 hours before slicing. Do not freeze, as tortillas become soggy when thawed.
- Prep Time: 20 minutes
- Cook Time: 0 minutes
- Category: Appetizer
- Cuisine: American
Nutrition
- Serving Size: 1 pinwheel
- Calories: 120
- Sugar: 1
- Sodium: 250
- Fat: 6
- Saturated Fat: 3
- Carbohydrates: 10
- Protein: 6
Keywords: turkey pinwheels, cream cheese appetizer, party food, no bake appetizer, easy party snacks, herbed cream cheese, make ahead appetizer, gluten free options


