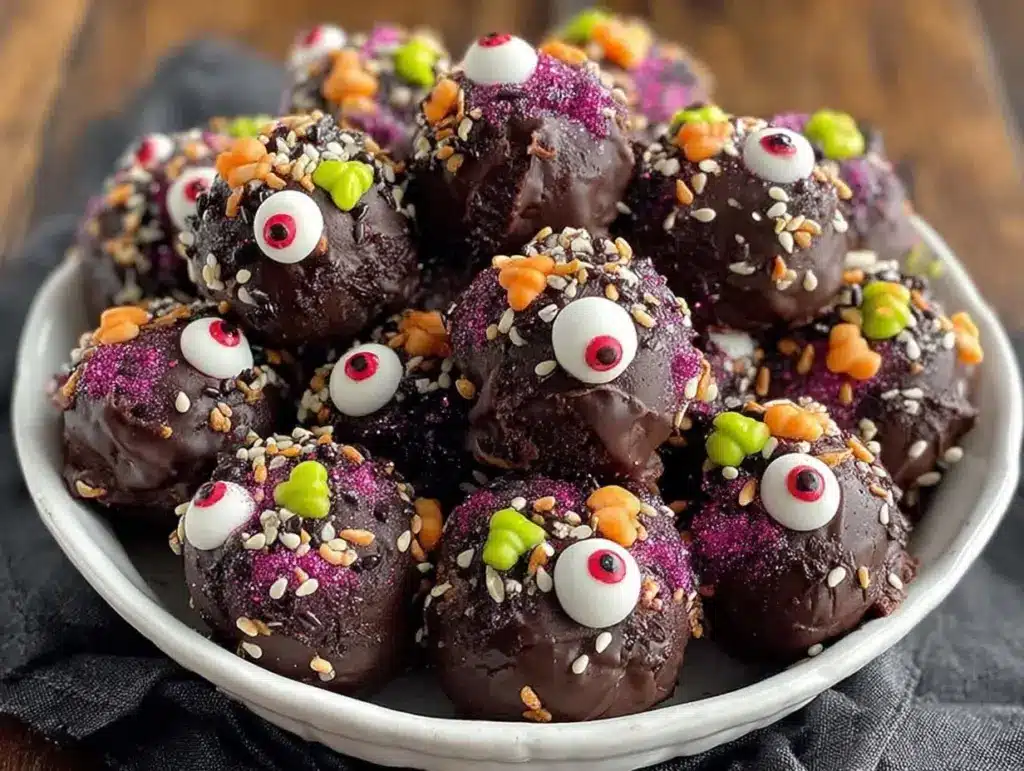
It was 11 PM on a Tuesday, and I was staring at the dollar store aisle like it held the secrets to the universe. I had exactly $5 to my name, a craving for something sweet, and a desperate need to feel like I was participating in Halloween without spending $30 on candy corn and plastic bats. That’s when I saw them: a tiny bag of black licorice twists and a single pack of generic chocolate chips that cost $1.25. I bought them on impulse, mostly because they were cheaper than the gas money I’d need to drive to the grocery store.
I didn’t have a recipe. I had a hunch and a microwave. What I ended up making weren’t just snacks; they were Halloween Monster Eyeball Truffles. And honestly? They were the best $5 I’ve spent in months. These little spooky treats look like they came from a gothic bakery in Tim Burton’s hometown, but they’re made from pantry staples you probably already have (or can get for pennies). They’re perfect for that “spooky budget night” when you want to feel festive but your wallet is screaming for mercy.
I’ve made these for my own midnight snack attacks, for trick-or-treaters who showed up at my door at the last minute, and even as a weirdly sophisticated dessert for a single-serving wine night. The trick is in the ratio. Get it right, and you get a truffle that’s creamy, rich, and undeniably spooky. Get it wrong, and you get a chocolate ball that cracks open like an egg. I’ve tested this enough times to know exactly how to nail it every single time.
Why You’ll Love This Recipe
This isn’t just about being cheap, though that’s a huge bonus. It’s about the fact that these Halloween Monster Eyeball Truffles deliver maximum impact for minimum effort. Here’s why they’ve earned a permanent spot in my spooky snack rotation:
- Stupid Simple — Seriously, if you can melt chocolate and roll a ball, you can make these. There’s no baking, no oven, and no special equipment. I make these in a mug if I don’t want to wash a bowl.
- Lightning Fast — 15 minutes from start to finish, and most of that is waiting for the chocolate to cool slightly. I make these on weeknights when I get home late and want something sweet without the commitment of a full dessert.
- Pantry-Friendly — You probably have 90% of these ingredients already. I keep chocolate chips and heavy cream stocked specifically for nights like this. If you don’t, the grocery run is short and cheap.
- Budget-Smart — Feeds one person (or two if you’re being generous) for under $3. That’s less than a single candy bar at the gas station, but infinitely better.
- Visually Shocking — They look like real eyeballs. Seriously. The white chocolate iris and the licorice pupil are so realistic that my friends actually hesitated before eating them. It’s a fun party trick that costs nothing.
This is my go-to when I need a dessert to just work. No complicated techniques, no weird ingredients, just reliable, delicious, spooky food that makes a boring night feel special.
Ingredients You’ll Need
Here’s the best part: the ingredient list for these Halloween Monster Eyeball Truffles is so short it’s almost insulting. But I’m particular about two things here, and I’ll tell you exactly why. If you cut corners, the texture suffers.
For the Truffle Base
Dark Chocolate Chips (1/2 cup / 90g) — Use semi-sweet or dark chocolate. Milk chocolate is too sweet for the “monster” vibe and melts differently. I use the store brand because the flavor difference is negligible, and I’m trying to save every dollar. Avoid the “baking chips” that are designed to hold their shape in cookies; they have too much wax. You want real chocolate that melts smoothly.
Heavy Cream (2 tablespoons / 30ml) — This is the binder. It turns the chocolate into a ganache. You can’t skip this, or you’ll just have a hard chocolate ball. If you’re out of heavy cream, full-fat coconut milk works, but it changes the flavor profile slightly. I usually have a small carton of cream left over from coffee, which is perfect.
Vanilla Extract (1/4 teaspoon) — Just a hint to round out the chocolate flavor. Don’t use imitation vanilla if you can help it; it tastes chemical and cheap. But for a $3 dessert? I’ve been known to use the cheap stuff in a pinch.
For the “Eyeball” Look
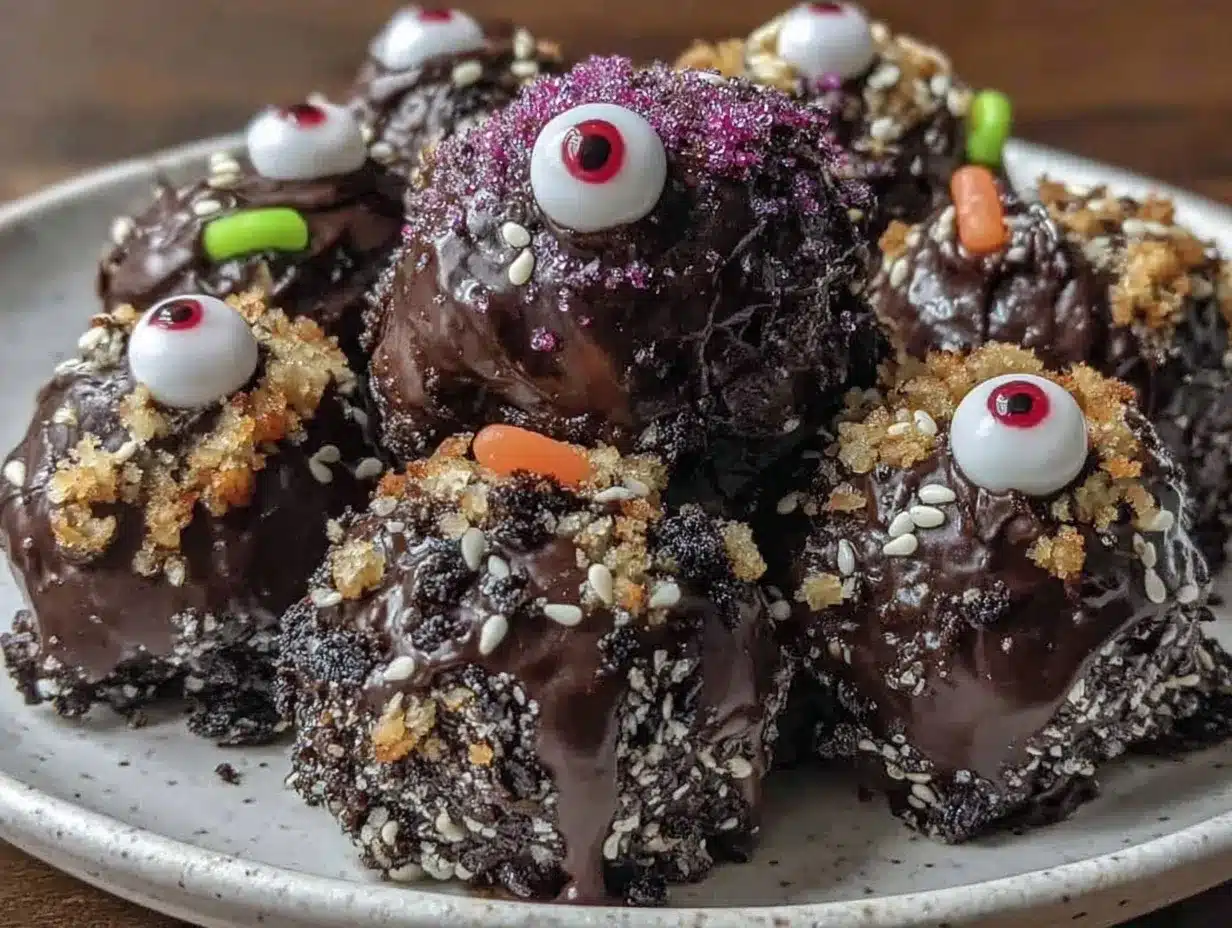
White Chocolate Chips (2 tablespoons / 30g) — This forms the sclera (the white part of the eye). Again, use real white chocolate, not the white coating stuff. It melts cleaner and looks more opaque. I buy a tiny bag of white chips separately because they’re expensive, but you only need a tiny amount.
Black Licorice Twists (1 small piece) — For the pupil. Yes, black licorice. It’s an acquired taste for some, but for this? It’s perfect. It’s dark, it’s chewy, and it’s cheap. If you hate licorice, you can use a tiny dot of black food coloring mixed into a bit of white chocolate, but licorice is the authentic budget hack. I find licorice in the baking aisle, usually near the sprinkles.
Optional: Sprinkles — For extra spookiness. I sometimes add a few red sprinkles to make it look like a bloodshot eye. It’s fun, but not necessary.
Equipment Needed
You don’t need fancy equipment for this. Here’s what I actually use.
Microwave-Safe Bowl — A small mug works too. I use a ceramic bowl because it doesn’t get too hot to touch. Glass works, but it can shatter if it’s cold and you put hot chocolate in it. Ceramic is safer.
Spatula — For stirring the chocolate. Silicone works best because it doesn’t scratch the bowl. A spoon works, but it’s harder to get all the chocolate melted evenly.
Parchment Paper — To line a small plate or tray. This prevents sticking and makes cleanup a breeze. I usually just use a piece of parchment I saved from a previous baking session.
Small Knife — To cut the licorice. A dull knife works fine for licorice; it’s soft.
Refrigerator — Obviously. You need a place to chill the truffles. If your fridge is full, a cool corner of the kitchen works in winter, but summer requires the fridge.
How to Make It: Step-by-Step
Alright, let’s make these Halloween Monster Eyeball Truffles! I’m walking you through exactly how I do it, including the little tricks I’ve picked up so you don’t end up with a mess.
Step 1: Melt the Chocolate (2-3 minutes)
Place the dark chocolate chips in your microwave-safe bowl. Microwave on high for 30 seconds. Remove and stir. If there are still chunks, microwave for another 15 seconds and stir again. Do not overheat! Chocolate burns easily. You want it smooth and glossy. If you’re using a stovetop, use a double boiler, but for one serving? The microwave is faster and uses less energy.
Step 2: Make the Ganache (1 minute)
Once the chocolate is melted, pour in the heavy cream and vanilla extract. Stir vigorously. The mixture will look lumpy at first, but keep stirring. It will come together into a thick, glossy paste. This is your truffle base. If it’s too thin, add a few more chocolate chips. If it’s too thick, add a tiny drop more cream. You want a consistency like playdough.
Step 3: Chill the Base (15 minutes)
Place the bowl in the fridge. This step is crucial. If you try to roll the chocolate while it’s warm, it will stick to your hands and melt into a puddle. I usually set a timer for 15 minutes. If you’re impatient, you can put it in the freezer for 5-7 minutes, but watch it closely. You want it firm but not rock hard.
Step 4: Roll the Truffles (2 minutes)
Take the bowl out. Scoop out about a tablespoon of the chocolate mixture. Roll it between your palms to form a smooth ball. If it sticks, dip your hands in cold water or a little powdered sugar. Place the ball on the parchment-lined plate. You should get two small eyeballs from this amount. Don’t make them too big, or they’ll be hard to eat in one bite.
Step 5: Make the “Iris” (2 minutes)
Melt the white chocolate chips in the microwave for 15-20 seconds. Stir until smooth. If it’s too thick, add a tiny drop of cream. Using a toothpick or a small spoon, place a small dollop of white chocolate on top of each truffle ball. Flatten it slightly so it covers about half the surface. It should look like a white circle on a dark sphere.
Step 6: Add the Pupil (1 minute)
Cut a tiny piece of black licorice twist. Place it in the center of the white chocolate. Press it down gently so it sticks. For a more realistic look, you can cut the licorice into a small oval instead of a circle. If you’re feeling fancy, add a tiny dot of white chocolate on the licorice to create a “reflection” in the eye. It’s a small detail, but it makes the truffle look alive.
Step 7: Chill Again (10 minutes)
Place the plate back in the fridge for 10 minutes to set the white chocolate and licorice. This ensures the details stay in place when you eat them. When you take them out, they should be firm and glossy.
Expert Tips & Tricks
Here’s everything I’ve learned from making these dozens of times. These tips will save you from my mistakes.
Don’t Overheat the Chocolate
This is the #1 mistake. If you burn the chocolate, it seizes up and becomes grainy. You can’t fix it. Heat in short bursts and stir often. If it looks like it’s getting too hot, take it out. It’s better to under-melt and stir than to burn.
Work Quickly with the White Chocolate
White chocolate melts faster than dark chocolate. If you let it sit too long on the toothpick, it will harden and won’t stick to the truffle. Have your truffles ready before you melt the white chocolate.
Use Cold Hands
If the truffle base is sticking to your hands, dip them in ice water. The cold prevents the chocolate from melting. It sounds weird, but it works.
License Substitution
If you can’t find black licorice, use a tiny dot of black food coloring mixed into a teaspoon of white chocolate. Mix it well until it’s jet black. It won’t have the chewy texture, but it will look the same.
Storage Hack
These truffles are best eaten within 2 days. After that, the licorice can start to soften the chocolate. Keep them in an airtight container in the fridge.
Variations & Substitutions
Once you’ve nailed the basic version, here’s how you can mix it up. I’ve tried all of these.
Red Velvet Eyeballs
Add a drop of red food coloring to the white chocolate iris. It looks like a bloodshot eye. Spooky and delicious.
Green Monster Eyeballs
Use green food coloring for the pupil. It looks like an alien eye. My kids love this version.
Gluten-Free
This recipe is naturally gluten-free. Just make sure your chocolate chips and licorice are certified gluten-free. Most are, but check the label.
Vegan
Use vegan chocolate chips and coconut cream instead of heavy cream. Use black licorice that’s vegan (most are, but some contain honey). It works just as well.
Low-Carb
Use sugar-free chocolate chips and sugar-free licorice. The texture might be slightly different, but it’s still a great low-carb treat. I’ve paired these with my low-carb chocolate peanut butter fat bombs for a keto-friendly Halloween spread.
Serving & Storage
How to Serve:
I usually serve these on a small plate with a few scattered “spiderwebs” made from shredded coconut or white chocolate drizzle. They look great next to a glass of red wine or a cold soda.
Storage:
Store in an airtight container in the fridge for up to 3 days. They will firm up in the cold. If you leave them out, the white chocolate will sweat and look cloudy.
Reheating:
Don’t reheat these. They’re meant to be eaten cold. The contrast between the cold truffle and the room-temperature licorice is part of the experience.
Nutrition Information
I’m not a nutritionist, but here’s the breakdown if you’re tracking. Keep in mind, this is for one serving (two small eyeballs).
Per Serving:
– Calories: 220
– Protein: 2g
– Carbs: 24g
– Fiber: 1g
– Sugar: 18g
– Fat: 14g
– Saturated Fat: 9g
– Cholesterol: 15mg
– Sodium: 5mg
What’s Good:
– It’s a small portion, so it fits into most diets if you’re mindful.
– Dark chocolate has antioxidants.
– It’s a single-serving treat, so you don’t have to worry about overeating.
What to Know:
– Higher in sugar due to the chocolate and licorice.
– Contains dairy (unless you use vegan substitutes).
– Moderate in fat.
My Take:
Look, this is a treat. It’s not a health food. But it’s a controlled portion of something delicious, and it’s way better than buying a $5 bag of Halloween candy that you’ll eat in one sitting. When I want to make it lighter, I use more dark chocolate and less white chocolate. But usually? I just enjoy it.
Final Thoughts
So that’s my go-to Halloween Monster Eyeball Truffles! I’ve probably talked your ear off at this point, but when you make a recipe this often, you have a lot to say about it.
This has saved my budget more times than I can count. It’s my answer to “what’s for dessert” when I’m broke, tired, and still want something that feels festive. My friends are impressed, my wallet is happy, and I’m happy because I’m not stressed about cooking.
Make it yours! Try different colors for the pupils, add sprinkles, or pair it with a spooky drink. The best recipes are the ones you adapt to your mood. If you make these, drop a comment and let me know what you think! I love hearing how recipes turn out in your kitchen. And if something doesn’t work, tell me that too—I’m here to help troubleshoot.
Happy cooking! And I hope your kitchen smells half as good as mine does right now.
Frequently Asked Questions
Can I use milk chocolate instead of dark chocolate?
You can, but the truffle will be sweeter and softer. Dark chocolate has a higher cocoa content, which makes the truffle firmer and less likely to melt in your hands. If you use milk chocolate, chill the truffles longer before rolling them. I prefer dark chocolate for the “monster” look because it’s darker and more realistic.
Why did my white chocolate seize up?
Water is the enemy of chocolate. If even a drop of water got into the white chocolate while it was melting, it will seize up and become grainy. Make sure your bowl and spoon are completely dry. If it seizes, you can try adding a tiny bit of warm cream and whisking vigorously to save it, but it’s often easier to start over.
Can I make these ahead of time?
Yes! I usually make these the day before Halloween. They store well in the fridge for up to 3 days. In fact, they taste better after a day because the flavors have time to meld. Just keep them in an airtight container to prevent them from absorbing fridge odors.
What if I don’t have black licorice?
Use a tiny dot of black food coloring mixed into a teaspoon of white chocolate. Mix it well until it’s jet black. It won’t have the chewy texture of licorice, but it will look the same. You can also use a small piece of dark chocolate, but it won’t be as distinct.
How do I reheat leftovers without it getting dry?
Don’t reheat these. They’re meant to be eaten cold. The contrast between the cold truffle and the room-temperature licorice is part of the experience. If you leave them out, the white chocolate will sweat and look cloudy.
Can I double this recipe?
Absolutely! Double everything and use your biggest bowl. The cooking times stay the same. I do this when I’m meal-prepping or feeding a crowd. Just make sure your fridge has space for the plate of truffles.
Pin This Recipe!
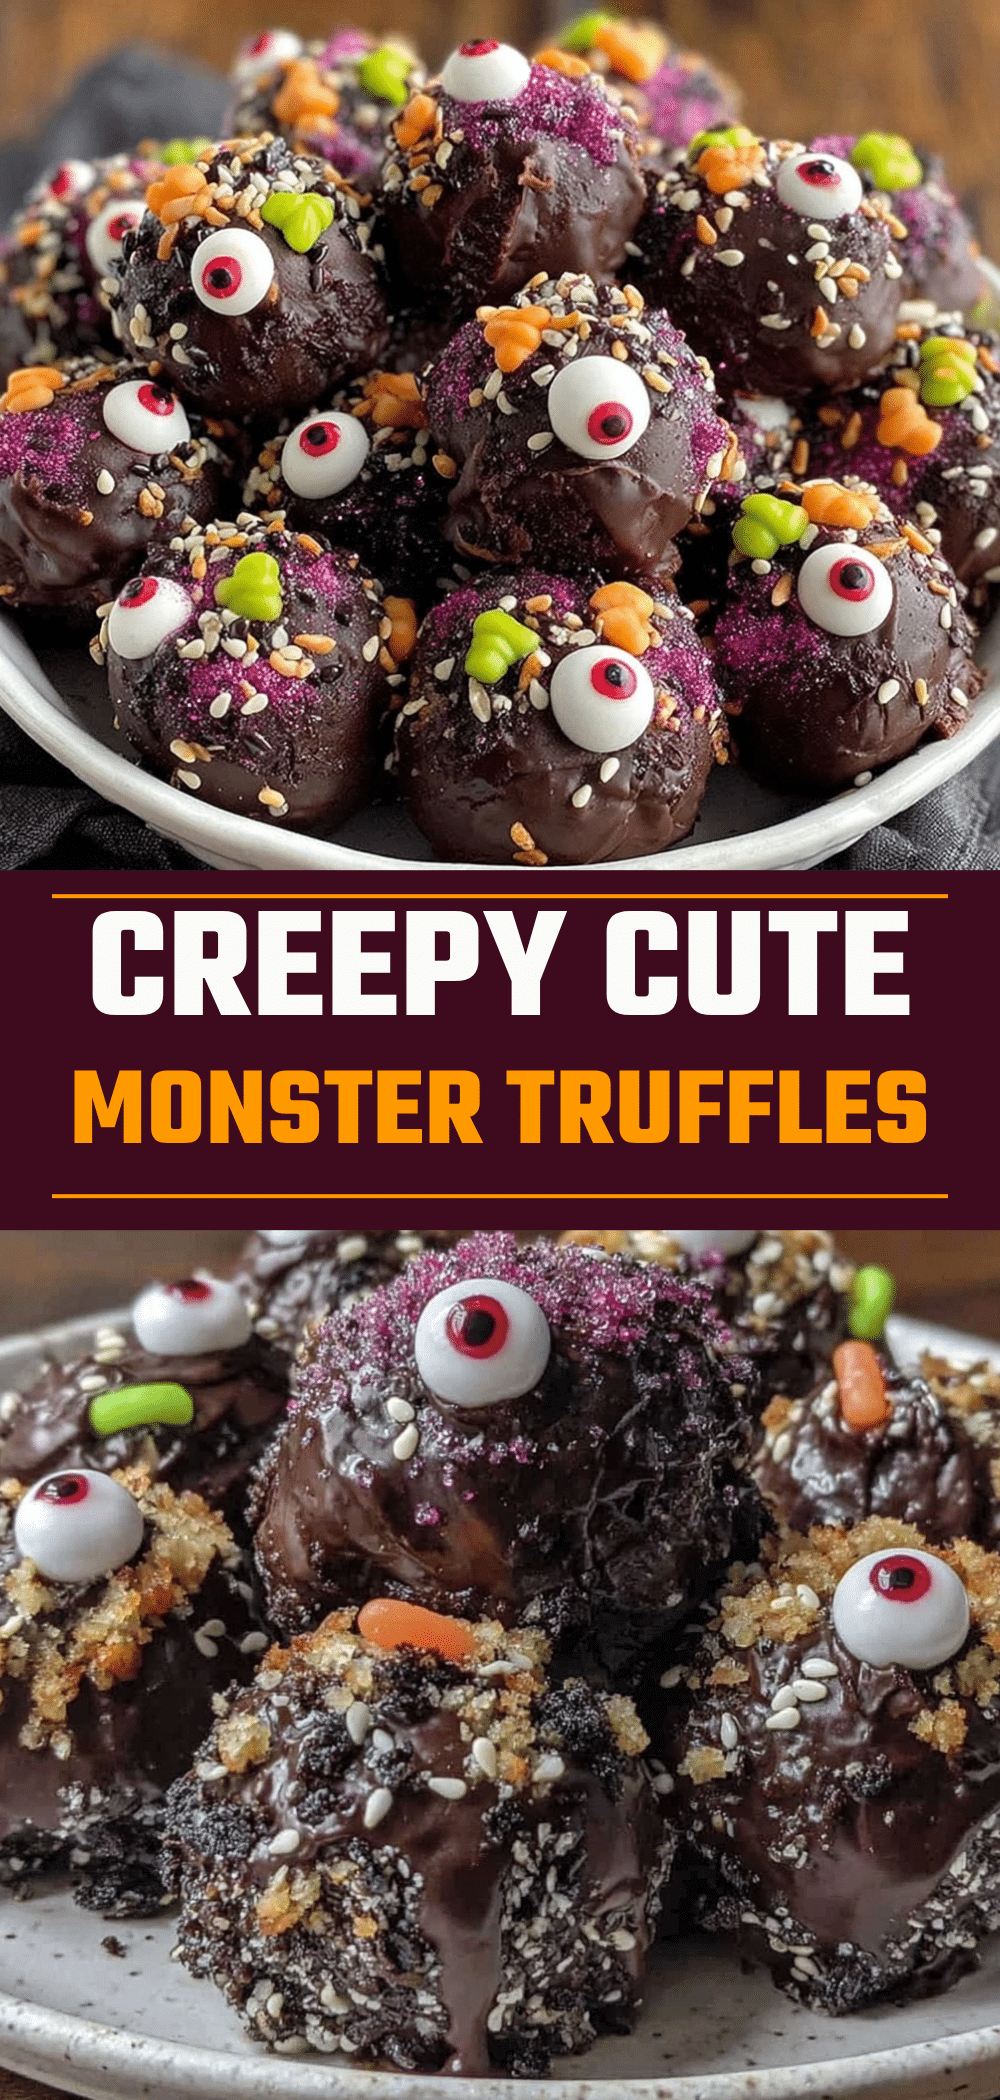

Halloween Monster Eyeball Truffles: 1-Serving Spooky Snack
- Total Time: 15 minutes
- Yield: 1 serving (2 truffles) 1x
Description
A spooky, budget-friendly single-serving dessert that looks like realistic monster eyeballs. Made with pantry staples like dark chocolate, heavy cream, and black licorice, these truffles require no baking and are ready in just 15 minutes.
Ingredients
- 1/2 cup (90g) dark chocolate chips (semi-sweet or dark)
- 2 tablespoons (30ml) heavy cream
- 1/4 teaspoon vanilla extract
- 2 tablespoons (30g) white chocolate chips
- 1 small piece black licorice twists
- Optional: red sprinkles for bloodshot effect
Instructions
- Place dark chocolate chips in a microwave-safe bowl. Microwave on high for 30 seconds, stir, then microwave for another 15 seconds if needed until smooth and glossy. Do not overheat.
- Pour heavy cream and vanilla extract into the melted chocolate. Stir vigorously until the mixture forms a thick, glossy paste with a consistency like playdough.
- Place the bowl in the refrigerator for 15 minutes (or 5-7 minutes in the freezer) until the base is firm but not rock hard.
- Scoop out about a tablespoon of the chocolate mixture and roll it between your palms to form a smooth ball. If it sticks, dip hands in cold water. Place on a parchment-lined plate. Repeat to make a second ball.
- Melt white chocolate chips in the microwave for 15-20 seconds, stirring until smooth. Using a toothpick or small spoon, place a small dollop of white chocolate on top of each truffle ball and flatten slightly to cover about half the surface.
- Cut a tiny piece of black licorice and place it in the center of the white chocolate on each truffle. Press gently to adhere. Optionally, add a tiny dot of white chocolate on the licorice for a reflection effect.
- Refrigerate the truffles for 10 minutes to set the white chocolate and licorice before serving.
Notes
Do not overheat the chocolate as it will seize up. Work quickly with white chocolate as it melts faster. If the truffle base sticks to your hands, dip them in ice water. These are best eaten within 2 days and should be stored in an airtight container in the fridge. Do not reheat; serve cold.
- Prep Time: 5 minutes
- Cook Time: 5 minutes
- Category: Dessert
- Cuisine: American
Nutrition
- Serving Size: 2 small truffles
- Calories: 220
- Sugar: 18
- Sodium: 5
- Fat: 14
- Saturated Fat: 9
- Carbohydrates: 24
- Fiber: 1
- Protein: 2
Keywords: Halloween, spooky snacks, budget dessert, single serving, no bake, chocolate truffles, monster eyeballs, quick treats


