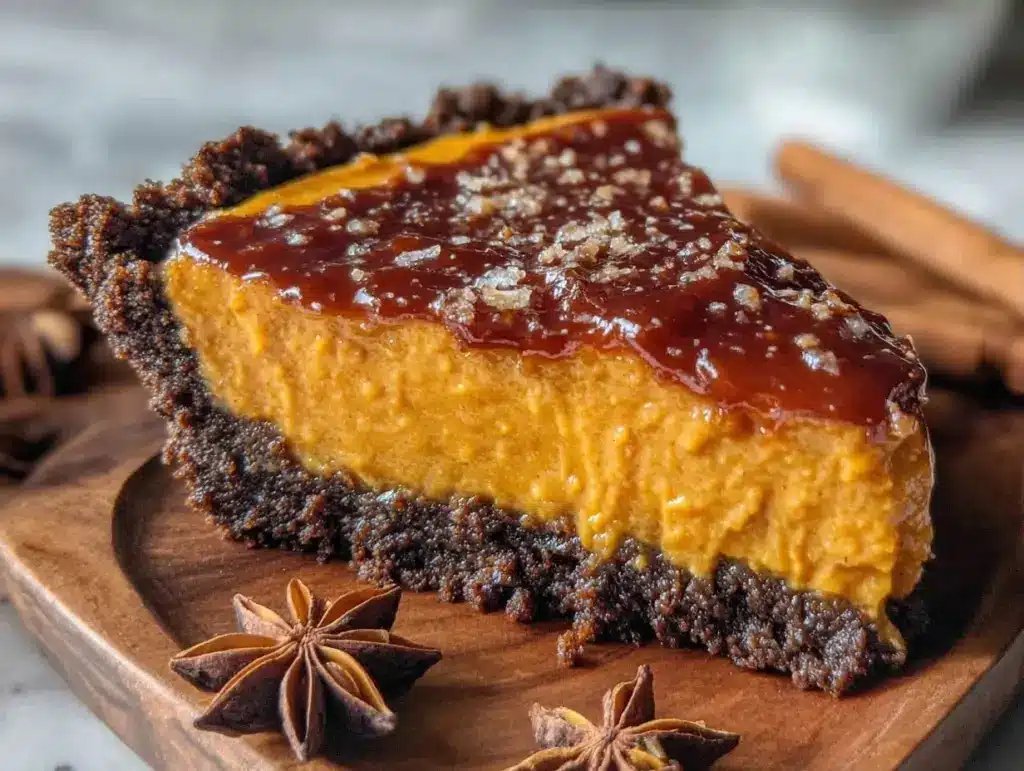
Last Tuesday, I stood in my kitchen looking at a perfectly ripe pumpkin puree I’d bought on a whim at the farmers market, and I had a sudden, terrifying realization: I didn’t want to bake. Not because I was lazy (though, let’s be honest, I was), but because the idea of heating up my oven in mid-October felt like a personal attack. The air was crisp, the leaves were turning that perfect shade of burnt orange, and I just wanted a dessert that felt like fall without turning my house into a sauna.
That’s when I decided to make this fall no-bake pumpkin pie with gingersnap crust. I’d seen recipes for it before, but most of them felt like heavy, sweetened custards that tasted more like canned filling than actual pumpkin. I wanted something that tasted like the season itself—spiced, creamy, and light, with a crust that actually had some crunch and character. So I grabbed five ingredients, skipped the oven entirely, and ended up with the best dessert I’ve made all autumn.
This fall no-bake pumpkin pie with gingersnap crust has become my secret weapon for hosting. It looks incredibly fancy on the table, with its deep orange hue and crumbly, dark brown crust, but the truth is, it takes less than twenty minutes of active work. I’ve made it for Thanksgiving, for casual Tuesday dinners, and even for last-minute guests who show up unannounced (we’ve all been there). Every single time, people ask for the recipe within the first bite. It’s that good.
What I love most about this approach is how it lets the pumpkin shine. Without the heavy batter of a traditional pie, you get this silky, mousse-like texture that melts in your mouth. The gingersnap crust adds this warm, spicy kick that cuts through the sweetness perfectly. It’s not just a pie; it’s a flavor profile that captures everything I love about October. If you’ve been dreading the holiday baking season or just want a quick treat that feels special, you need to try this. It’s my new go-to for “make while it’s at its best” moments.
Why You’ll Love This Fall No-Bake Pumpkin Pie with Gingersnap Crust
There are about ten reasons I keep making this pie, but here are the big ones that have convinced me to stick with it over traditional baked versions.
Zero Oven Required — Seriously, if you can mix a bowl, you can make this. I made this while helping my daughter with her homework, and it didn’t even get my kitchen hot. This is huge for fall when you’re trying to keep the house cozy without cooking up a storm.
Ready in Under 30 Minutes — Okay, technically it needs time to chill in the fridge, but active prep time is maybe 15 minutes. I throw the crust together, whip the filling, assemble it, and put it in the fridge. By the time I’ve washed the dishes, it’s set. It’s perfect for those “I forgot to plan dessert” panic moments.
Crust That Actually Crunches — You know how some no-bake crusts get soggy after a day? Not this one. The gingersnaps stay relatively crisp because the filling isn’t overly wet. I’ve tested this by eating leftovers on day three, and the texture is still satisfying. It’s a game-changer.
Light and Airy — Traditional pumpkin pie can feel like a brick after dinner. This version is whipped with cream, so it’s fluffy and light. You can eat a whole slice and still have room for more. It feels indulgent without being heavy.
Five Ingredients Only — I’m obsessed with simplicity. You don’t need a pantry full of spices or exotic ingredients. Just pumpkin, cream, sugar, gingersnaps, and butter. That’s it. It’s budget-friendly and uses things you probably already have or can grab on the way home.
Seasonal Perfection — This pie celebrates what’s fresh right now. It’s not a year-round dessert; it’s a “pumpkin is in season” dessert. Eating it feels like part of the ritual of fall. I make it as soon as I see the pumpkins at the market, and it disappears by the weekend.
This is my go-to when I need dessert to just work. No complicated techniques, no weird ingredients, just reliable, delicious food that makes everyone happy. It’s the kind of recipe that brings people together because it’s easy to share and impossible not to love.
Ingredients You’ll Need
I’m particular about these ingredients because they’re the entire flavor profile. Since there are only five, quality matters. Here’s what you need to make this fall no-bake pumpkin pie with gingersnap crust shine.
Gingersnap Cookies (about 2 cups crushed / 200g) — I use classic gingersnaps, not ginger snaps with white chocolate chips. The dark, spiced cookies give that deep molasses flavor. I buy the box from the grocery store, but if your local bakery has fresh ones, even better. You’ll crush them finely.
Unsalted Butter (¼ cup / 57g, melted) — This binds the crust. I use unsalted so I can control the saltiness, but you can use salted if that’s all you have (just reduce any added salt in the crust if you add any). Melt it in the microwave or a small saucepan.
Canned Pumpkin Puree (15 oz / 425g) — Listen to me closely: use pure pumpkin puree, not pumpkin pie filling. The puree is just cooked pumpkin; the filling is already sweetened and spiced, which will throw off the balance. I check the label every time. I love the Libby’s brand because it’s consistent, but any plain puree works.
Heavy Whipping Cream (2 cups / 480ml, cold) — This is what makes the filling light. You need cold cream to whip it properly. I keep a carton in the fridge at all times for this. If your cream isn’t cold enough, your filling will be dense and heavy, not fluffy.
Powdered Sugar (½ cup / 60g) — I use powdered sugar because it dissolves instantly. Granulated sugar won’t melt in the cold filling and will leave gritty bits. You can adjust this up or down depending on how sweet you like it, but ½ cup is my sweet spot.
Pumpkin Pie Spice (1 teaspoon) — Most store-bought blends work fine. If you want to make your own, mix cinnamon, ginger, nutmeg, and cloves. But honestly, the spice blend in the cookies plus a little extra in the filling is plenty. I add a pinch of salt here to enhance the flavors.
Vanilla Extract (1 teaspoon) — Pure vanilla, please. It adds warmth and depth. It’s the bridge between the pumpkin and the spices.
Optional Toppings — I usually serve this with a dollop of freshly whipped cream and a sprinkle of extra gingersnap crumbs. It looks beautiful and adds a nice textural contrast. If you’re feeling fancy, a drizzle of caramel sauce is amazing here.
Equipment Needed
You don’t need fancy equipment for this. Here’s what I actually use.
Food Processor or Blender — This is the easiest way to crush the gingersnaps into fine crumbs. If you don’t have one, put the cookies in a zip-top bag and crush them with a rolling pin. It takes a little elbow grease, but it works.
Medium Bowl — For mixing the pumpkin filling. Any size that fits your ingredients will do.
Electric Mixer — Handheld or stand mixer works great for whipping the cream. I prefer a handheld mixer because it’s faster to clean. You need to whip the cream to stiff peaks, so a mixer saves your arm.
9-Inch Pie Dish — Glass or ceramic works best. I use a glass pie plate so I can see the crust. A springform pan works too if you want to remove the sides, but it’s not necessary.
Spatula — For folding the whipped cream into the pumpkin mixture. A silicone spatula is best because it scrapes the bowl clean.
Measuring Cups and Spoons — Standard stuff. Dollar store versions work fine.
Refrigerator — Okay, this is technically equipment. You need space in your fridge for the pie to set. Make sure you have room for at least 4 hours.
How to Make It: Step-by-Step
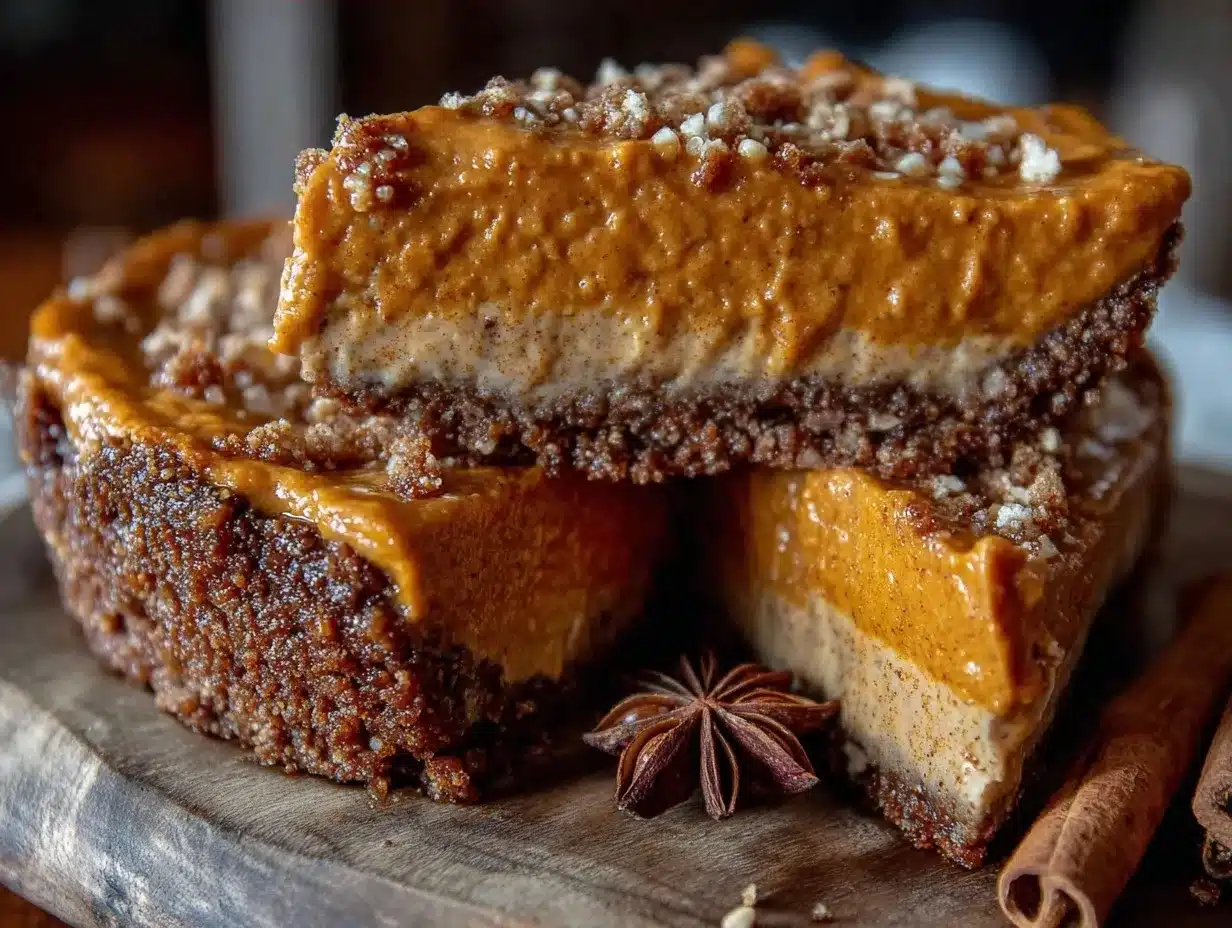
Alright, let’s make this! I’m walking you through exactly how I do it, including the little tricks I’ve picked up.
Step 1: Prepare the Crust (5 minutes)
Crush your gingersnap cookies into fine crumbs. If you’re using a food processor, pulse until you have a sandy texture. Don’t over-process it into a paste; you want crumbs. In a medium bowl, mix the crumbs with the melted butter. It should look like wet sand. If it’s too dry, add a teaspoon more butter. Press this mixture firmly into the bottom and up the sides of your pie dish. Use the bottom of a glass to pack it down tightly. This prevents crumbling later. Set aside.
Step 2: Whip the Cream (3 minutes)
In a large bowl, pour the cold heavy whipping cream. Using your electric mixer, beat on high speed until stiff peaks form. This means when you lift the beaters, the cream stands up straight. Don’t over-whip it into butter, but don’t under-whip it either. Stiff peaks are key for a light filling. Set the whipped cream aside.
Step 3: Mix the Filling (3 minutes)
In a separate medium bowl, combine the pumpkin puree, powdered sugar, pumpkin pie spice, vanilla extract, and a pinch of salt. Whisk this together until it’s completely smooth and no lumps remain. The mixture should be a vibrant orange color. Taste it now. If you want it sweeter, add a little more powdered sugar. If you want more spice, add a pinch more cinnamon or ginger.
Step 4: Fold Together (2 minutes)
Now comes the magic. Gently fold the whipped cream into the pumpkin mixture. Use your spatula to cut down the middle and fold over the top. Do this gently and slowly. You want to keep the air in the cream. If you stir too vigorously, you’ll deflate the filling and it will become dense. Fold until just combined. The color should be a uniform, light orange.
Step 5: Assemble and Chill (4 hours)
Pour the filling into the prepared crust. Smooth the top with your spatula. Cover the pie loosely with plastic wrap or aluminum foil. Place it in the refrigerator for at least 4 hours, or ideally overnight. This gives the crust time to set and the flavors to meld. I usually make it the night before, but if you’re in a rush, 4 hours is the minimum.
Step 6: Serve
Remove the pie from the fridge. If you want, garnish with a dollop of whipped cream and a sprinkle of gingersnap crumbs. Slice with a sharp knife. Serve immediately. It’s best enjoyed cold, right out of the fridge.
Total active time: About 15 minutes. Total chill time: 4+ hours.
Expert Tips & Tricks
Here’s everything I’ve learned from making this dozens of times. These tips will save you from my mistakes.
Cold Cream is Non-Negotiable
If your cream is warm, it won’t whip. I keep my bowl and beaters in the freezer for 15 minutes before whipping. It makes a huge difference. If you forget, put the cream in the freezer for 10 minutes before starting.
Don’t Skip the Taste Test
Before you fold in the cream, taste the pumpkin mixture. This is your chance to adjust sweetness or spice. Once you add the cream, it’s harder to change the flavor. I usually add a tiny bit more cinnamon at this stage because the cold dulls the spices slightly.
Fold, Don’t Stir
I cannot stress this enough. Folding keeps the filling light. If you stir like you’re making pancake batter, you’ll end up with a dense, heavy pie. Be gentle. It takes about 30 seconds of folding, but it’s worth it.
Chill Your Pie Dish
If you want an extra-crisp crust, put your pie dish in the freezer for 10 minutes before adding the crust mixture. It helps the butter solidify instantly, creating a firmer base.
Use Fresh Gingersnaps
Stale cookies won’t crush well and might be too dry. I check the expiration date and buy a fresh box. If your cookies are a little soft, toast them in the oven for 5 minutes before crushing. They’ll be crispier and more flavorful.
Common Mistakes
Mistake: Filling is too runny. Fix: You didn’t whip the cream enough, or you folded too aggressively. Make sure you have stiff peaks.
Mistake: Crust is soggy. Fix: You didn’t press it down firmly enough, or you didn’t let it chill long enough. Give it at least 4 hours.
Mistake: Pie is too sweet. Fix: Reduce powdered sugar to ¼ cup next time. Pumpkin is naturally sweet, so you don’t need much.
Variations & Substitutions
Once you’ve nailed the basic version, here’s how you can mix it up. I’ve tried all of these.
Vegan Version
Use coconut cream instead of heavy whipping cream. Chill the can of coconut cream overnight, scoop out the solid part, and whip it. Use vegan gingersnaps. It’s surprisingly good, though the texture is slightly denser. My lactose-intolerant friend loves this version.
Gluten-Free
Use gluten-free gingersnaps. Most major brands make them now. The rest of the recipe is naturally gluten-free. I’ve used gluten-free cookies and the result is identical.
Lighter Version
Use half-and-half instead of heavy cream, but you’ll need to whip it with a little gelatin to help it hold its shape. Or, use Greek yogurt folded into the pumpkin mixture instead of whipped cream. It’s tangier and lighter, but still delicious.
Flavor Boosts
Add a tablespoon of bourbon or rum to the filling for an adult twist. I love the depth it adds. Or, mix in some chopped pecans or walnuts for crunch. Toasted pecans are my favorite addition.
Different Spices
Instead of pumpkin pie spice, try cardamom and ginger. It gives a Nordic vibe. Or add a pinch of black pepper for a subtle heat. I’ve experimented with all of these, and they all work.
Serving & Storage
How to Serve:
I usually serve this straight from the pie dish at the dinner table—it looks rustic and stays cold. But here are other ways I’ve enjoyed it:
Side Dishes:
– This pie is a dessert, so it pairs well with anything. I often serve it with cranberry ginger mocktail to cut the richness.
– It’s also great with hot chocolate if you want a cozy winter vibe.
Storage Instructions:
Store in an airtight container or covered with plastic wrap in the fridge for up to 5 days. The crust may soften slightly over time, but it’s still edible. I usually eat it all within 3 days because it disappears so fast.
Reheating:
Do not reheat this pie. It’s meant to be served cold. Reheating will melt the filling and make the crust soggy. Just eat it straight from the fridge.
Freezing:
You can freeze this pie, but the texture of the whipped cream may change slightly upon thawing. It’s still safe to eat, but it won’t be as light. If you must freeze it, wrap it tightly in plastic and foil. Thaw in the fridge overnight. I don’t recommend it unless you’re meal-prepping for a large event.
Pro Tip:
If you’re serving it to guests, make it the day before. It tastes better the next day because the flavors have had time to meld. The crust also sets better. It’s the best way to ensure success.
Nutrition Information
I’m not a nutritionist, but here’s the breakdown if you’re tracking. This is a rich dessert, so portion control is key.
Per Serving (based on 8 servings):
– Calories: 280
– Protein: 4g
– Carbs: 22g
– Fiber: 2g
– Sugar: 14g
– Fat: 20g
– Saturated Fat: 12g
– Cholesterol: 50mg
– Sodium: 120mg
What’s Good:
– It’s gluten-free if you use GF cookies.
– It’s vegetarian.
– It’s lower in sugar than traditional pumpkin pie because you control the sweetness.
What to Know:
– Higher in fat from the cream and butter.
– Contains dairy.
– Moderate calories, but dense.
My Take:
Look, this is dessert. It’s not a health food. But it’s made with real ingredients, no artificial flavors, and it’s lighter than a baked pie. When I want to make it lighter, I use the half-and-half version. But usually? I just eat a reasonable slice and enjoy it. Life’s too short to worry about every calorie.
Final Thoughts
So that’s my go-to fall no-bake pumpkin pie with gingersnap crust! I’ve probably talked your ear off at this point, but when you make a recipe this often, you have a lot to say about it.
This has saved dessert time more times than I can count. It’s my answer to “what’s for dessert” when I’m tired, don’t want to bake, and still want something that tastes really good. My family is happy, my guests are impressed, and I’m happy because I’m not stressed about cooking.
Make it yours! Try different add-ins, swap in your favorite spices, or top it with salted caramel ice cream if you’re feeling extra indulgent. The best recipes are the ones you adapt to your tastes.
If you make this, drop a comment and let me know what you think! I love hearing how recipes turn out in your kitchen. And if something doesn’t work, tell me that too—I’m here to help troubleshoot.
Happy cooking! And I hope your kitchen smells half as good as mine does right now.
Frequently Asked Questions
Can I use fresh pumpkin instead of canned?
You can, but it’s a lot of work. You’d need to roast and puree the pumpkin yourself, and it might be too watery for a no-bake pie. Canned pumpkin puree is cooked and concentrated, which gives the right texture. If you use fresh, make sure to drain the excess liquid first. I stick with canned for convenience and consistency.
Why did my filling turn out runny?
This usually happens if the cream wasn’t cold enough or if you didn’t whip it to stiff peaks. Cold cream is essential for structure. Also, if you folded too aggressively, you deflated the air. Next time, chill your bowl and beaters, and fold gently.
Can I make this ahead for a party?
Absolutely! This pie is even better the next day. I recommend making it 24 hours in advance. It’ll keep in the fridge for up to 5 days, so you can make it up to a week before the party. Just add fresh toppings right before serving.
Can I use whipped cream from a can?
I don’t recommend it. Canned whipped cream has stabilizers and doesn’t whip up as light or flavorful. Fresh whipped cream makes a huge difference in texture and taste. It’s worth the extra 3 minutes.
What if I don’t like gingersnaps?
You can use any cookie for the crust! Nilla wafers, chocolate cookies, or even shortbread work well. Just adjust the spice in the filling accordingly. If you use chocolate cookies, skip the pumpkin pie spice and add a little cocoa powder.
How do I slice this pie cleanly?
Use a sharp knife and wipe it clean between cuts. You can also dip the knife in hot water and dry it before each cut. This helps the knife glide through the cold filling without squishing it.
Can I freeze leftovers?
Yes, but the texture may change. The whipped cream might become slightly grainy after thawing. It’s still safe to eat, but it won’t be as light. I usually eat leftovers within 3 days because it’s that good fresh.
Pin This Recipe!
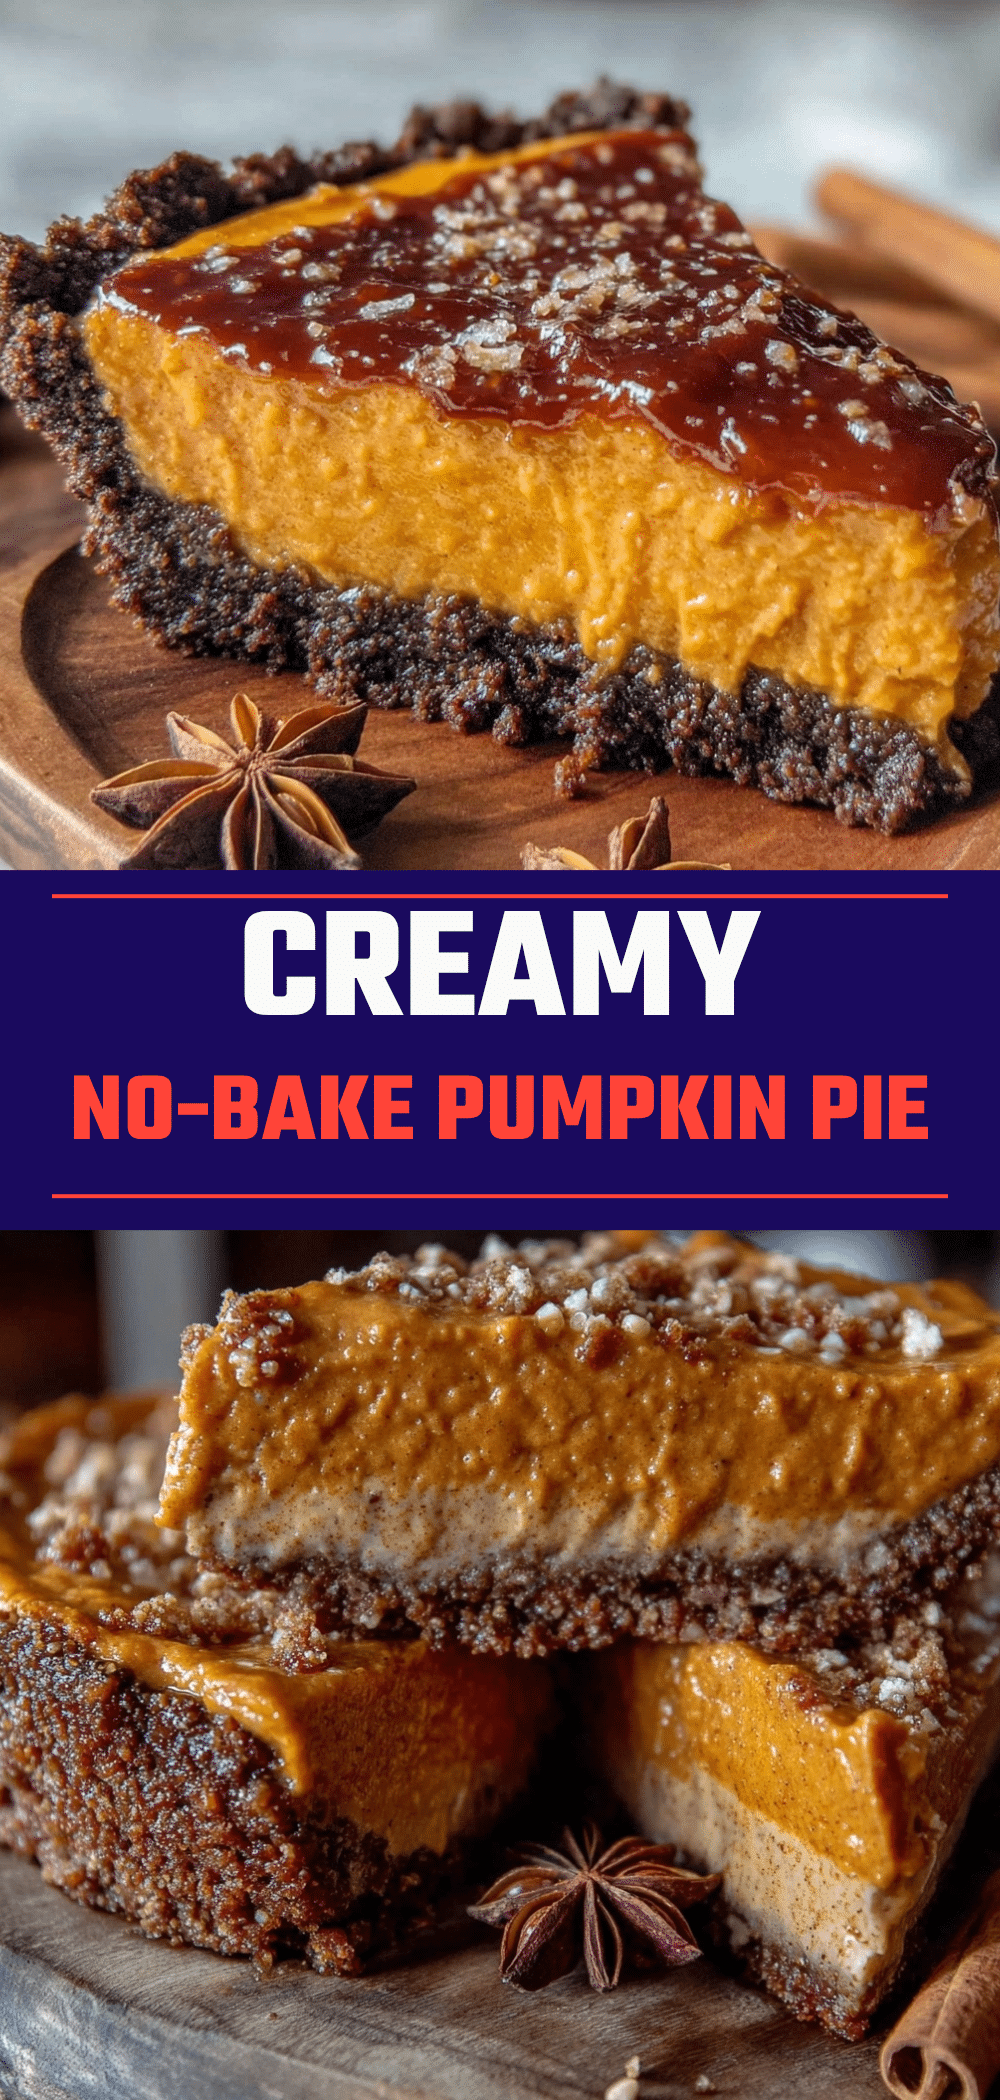
Fall No-Bake Pumpkin Pie with Gingersnap Crust
- Total Time: 4 hours 15 minutes
- Yield: 8 servings 1x
Description
A light, airy, no-bake pumpkin pie featuring a crunchy gingersnap crust and a silky mousse-like filling. This five-ingredient dessert is perfect for fall, requiring zero oven time and just 15 minutes of active prep.
Ingredients
- 2 cups crushed gingersnap cookies (about 200g)
- 1/4 cup unsalted butter, melted
- 15 oz (425g) canned pumpkin puree
- 2 cups heavy whipping cream, cold
- 1/2 cup powdered sugar
- 1 teaspoon pumpkin pie spice
- 1 teaspoon vanilla extract
- Pinch of salt
Instructions
- Crush gingersnap cookies into fine crumbs using a food processor or rolling pin.
- Mix the crumbs with melted butter until the texture resembles wet sand.
- Press the crust mixture firmly into the bottom and up the sides of a 9-inch pie dish. Set aside.
- In a large bowl, whip the cold heavy cream using an electric mixer until stiff peaks form.
- In a separate medium bowl, whisk together pumpkin puree, powdered sugar, pumpkin pie spice, vanilla extract, and a pinch of salt until smooth.
- Gently fold the whipped cream into the pumpkin mixture using a spatula until just combined and uniform in color.
- Pour the filling into the prepared crust and smooth the top.
- Cover loosely with plastic wrap and refrigerate for at least 4 hours, or ideally overnight, until set.
- Serve chilled, optionally topped with extra whipped cream or gingersnap crumbs.
Notes
Ensure the heavy whipping cream is very cold to achieve stiff peaks. Chill the bowl and beaters in the freezer for 15 minutes before whipping for best results. Do not stir vigorously when combining the cream and pumpkin mixture; fold gently to maintain airiness. The pie must chill for at least 4 hours to set properly. Use pure pumpkin puree, not pumpkin pie filling.
- Prep Time: 15 minutes
- Cook Time: 0 minutes
- Category: Dessert
- Cuisine: American
Nutrition
- Serving Size: 1 slice
- Calories: 280
- Sugar: 14
- Sodium: 120
- Fat: 20
- Saturated Fat: 12
- Carbohydrates: 22
- Fiber: 2
- Protein: 4
Keywords: no-bake pumpkin pie, gingersnap crust, fall dessert, easy pumpkin recipe, autumn treats, gluten-free option


