Last Sunday, I was standing in my kitchen at 11:30 AM, staring at a half-eaten bag of chips and feeling absolutely defeated. The big game was in six hours, my friends were arriving at 5 PM sharp, and my “snack game” was currently consisting of pretzels and hope. I knew I needed something sweet, something salty, and something that could survive being left out on a counter for four hours without turning into a science experiment. I didn’t want to bake a whole cake (who has time for that?) or buy something from the store that tasted like cardboard.
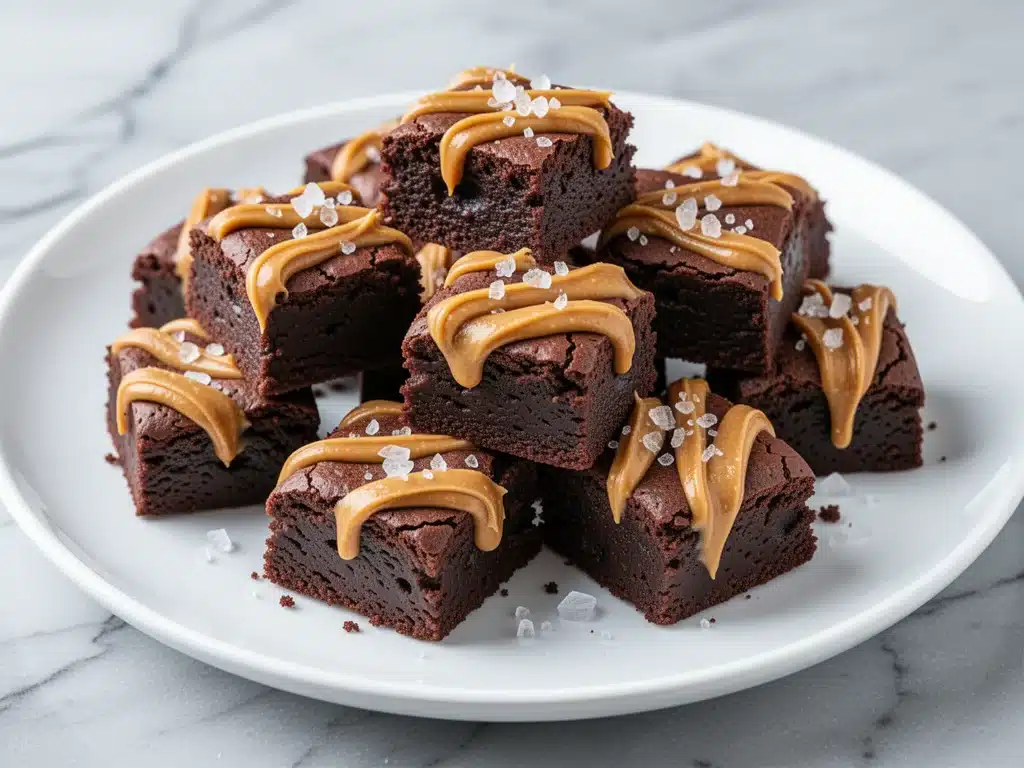
That’s when I decided to make chocolate peanut butter brownie bites for game day snacks. I’d seen the combo before—obviously, it’s a classic for a reason—but I wanted something bite-sized, easy to grab while arguing about the referee, and rich enough to satisfy a serious sweet tooth. I whipped up a batch, expecting them to be just okay. Instead? They disappeared in twenty minutes. My friend Sarah actually asked for the recipe before the first quarter ended.
I’ve made these little squares about a dozen times since then, tweaking the ratios and testing different baking times. I’ve learned exactly how to get that perfect fudgy center with a slightly crisp edge, and how to keep them from getting too messy to eat during a touchdown. This isn’t just a dessert; it’s a strategic advantage for your next gathering. Whether you’re hosting a Super Bowl party, a watch party for the playoffs, or just a lazy Sunday with the family, these brownie bites are the answer. They’re the best game day snacks because they balance convenience with actual flavor. No one wants to fumble with a giant cake slice when they’re trying to catch the ball. These are one-handed, messy-free (mostly), and absolutely delicious.
Why You’ll Love This Recipe
There are a lot of dessert recipes out there, but few hit this specific sweet spot of being impressive yet incredibly low-stress. Here’s why these brownie bites have taken over my kitchen—and why I think they’ll take over yours:
One-Bowl Magic — Seriously, you don’t need a stand mixer or a dozen bowls. I mix everything in one large bowl with a whisk. If you can whisk, you can make this. I’ve made these while the TV was blaring and the dog was barking, and they turned out perfect every single time.
Perfectly Portioned — Game day snacking is about grazing. You don’t want to sit down for a full slice of cake. These bite-sized squares are the ideal portion size. You can eat two without feeling like you need a nap afterward, but they’re rich enough to feel like a treat. Perfect for keeping energy up during overtime.
Make-Ahead Friendly — This is the biggest win. You can make these the night before. In fact, they taste even better the next day because the flavors have had time to meld. I usually bake them on Saturday morning, let them cool, and store them in the fridge. By game day, they’re ready to go. No last-minute panic.
The Flavor Combo Is Unbeatable — Chocolate and peanut butter is a dynamic duo, but in these brownies, it’s balanced. You get the deep, dark richness of the chocolate mixed with the salty, creamy kick of the peanut butter. It’s not too sweet, which is usually the problem with dessert bars. It’s sophisticated but comforting.
Feeds a Crowd — This recipe makes about 24 bites. That’s enough for a small party or a family with hungry teenagers. I’ve made these for my husband’s poker night, and they were gone before the second hand of the clock ticked ten minutes. If you’re feeding a crowd, this is your safest bet.
This recipe has saved me more times than I can count. It’s my go-to when I want to look like I put in effort, but I actually just mixed three ingredients and baked them. It’s reliable, it’s tasty, and it’s exactly what you need when the big game is on.
Ingredients You’ll Need
Here’s the best part: you probably have most of these ingredients already. This isn’t a recipe that requires a trip to three different specialty stores. It’s pantry-friendly, which is crucial when you’re in the middle of game day prep. I’m particular about a few things here, so pay attention to the details.
For the Brownie Base
Unsalted Butter (½ cup / 113g) — I use real butter, not margarine. It adds that rich, creamy flavor that makes brownies taste homemade. Melt it in the microwave or on the stove. Don’t burn it!
Granulated Sugar (1 cup / 200g) — This gives the brownies their slight crispiness on the edges. If you want chewier brownies, you can swap half of this for brown sugar, but the white sugar gives that classic crackly top.
Eggs (2 large) — Room temperature eggs mix better. If you’re in a rush, just drop them in a bowl of warm water for five minutes. Don’t skip this; the eggs are the structure.
All-Purpose Flour (¾ cup / 95g) — I always sift my flour if I have time, but it’s not strictly necessary. Just make sure you’re not packing it down too hard in the measuring cup. Spoon and level is the way to go.
Cocoa Powder (½ cup / 50g) — Use good quality unsweetened cocoa powder. I prefer Dutch-processed because it’s darker and has a deeper flavor. If you only have natural cocoa, it’ll still work, but the color will be lighter.
Salt (½ teaspoon) — Even though we’re using unsalted butter, the salt is crucial. It balances the sweetness and makes the chocolate flavor pop. Don’t skip it.
Vanilla Extract (1 teaspoon) — Real vanilla, not the imitation stuff. It adds that warm, cozy background note.
For the Peanut Butter Swirl
Creamy Peanut Butter (½ cup / 125g) — I use Jif or Skippy for this because they’re stable and easy to swirl. Natural peanut butter that separates can make the swirls too oily. If you must use natural, make sure it’s well-stirred and thick.
Extra Peanut Butter Chips (¼ cup) — Optional, but I love adding a few chips on top for extra texture and peanut butter flavor. It makes them look fancy.
Optional Add-ins
Chopped Peanuts (¼ cup) — For crunch. I sprinkle these on top before baking. It adds a nice texture contrast to the soft brownie.
Mini Chocolate Chips (¼ cup) — If you’re a chocolate freak like me, add these to the batter. It’s extra decadent, but sometimes that’s what you need.
Equipment Needed
You don’t need fancy equipment for this. Here’s what I actually use:
Large Mixing Bowl — I use a 4-quart bowl. It needs to be big enough to whisk the batter without making a mess. I prefer glass because I can see the color change as I mix.
Whisk — A standard balloon whisk works fine. I use it to combine the wet ingredients and then fold in the dry. No need for an electric mixer.
8×8 Inch Baking Pan — This is the standard size for brownies. Line it with parchment paper for easy removal. I also grease it lightly with butter or non-stick spray.
Parchment Paper — This is non-negotiable. It makes cleanup a breeze and ensures the brownies don’t stick. Leave a little overhang on the sides so you can lift them out once they’re cooled.
Small Microwave-Safe Bowl — For melting the butter. If you don’t have one, use a small saucepan on the stove.
Offset Spatula — Not strictly necessary, but it makes swirling the peanut butter much easier. A regular spoon works too, but it’s messier.
Cooling Rack — Let the brownies cool completely before cutting. This helps them set and makes clean cuts possible. I usually let them cool in the pan for 10 minutes, then transfer to the rack.
How to Make It: Step-by-Step
Alright, let’s make this! I’m walking you through exactly how I do it, including the little tricks I’ve picked up to ensure they’re fudgy and delicious.
Step 1: Prep Your Pan and Oven (5 minutes)
Preheat your oven to 350°F (175°C). Line your 8×8 inch baking pan with parchment paper, leaving a slight overhang on the long sides. This is your lifeline for removing the brownies later. Grease the parchment lightly with butter or cooking spray.
Step 2: Melt the Butter (2 minutes)
Melt the butter in a microwave-safe bowl or a small saucepan. Stir it occasionally to ensure it melts evenly. Don’t let it boil or brown; you just want it liquid. Set it aside to cool for a minute.
Step 3: Mix the Wet Ingredients (3 minutes)
In your large mixing bowl, whisk the melted butter and sugar together until well combined. It should look like wet sand. Add the eggs one at a time, whisking vigorously after each addition. This step is important—it incorporates air and ensures the brownies have a nice texture. Stir in the vanilla extract.
Step 4: Add the Dry Ingredients (2 minutes)
Add the cocoa powder, flour, and salt to the wet mixture. Switch to a spatula or wooden spoon and fold gently. Mix just until no dry flour remains. Do not overmix! Overmixing leads to tough brownies. The batter will be thick and glossy.
Step 5: Pour and Swirl (5 minutes)
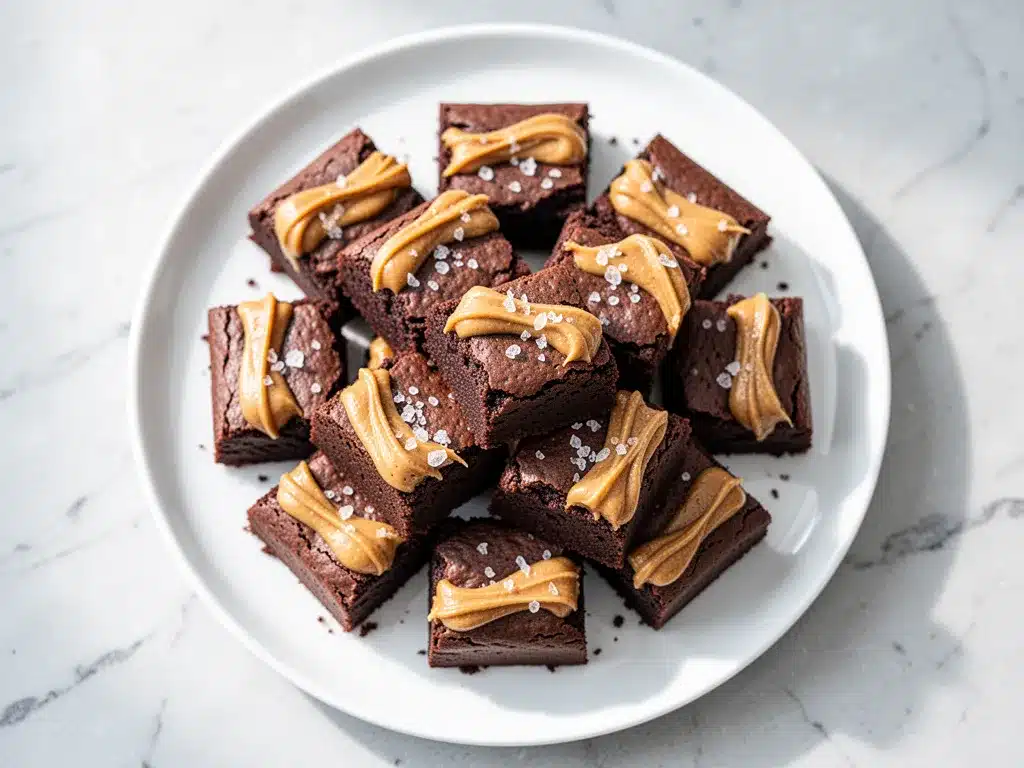
Pour the batter into your prepared pan and spread it evenly with your spatula. Now for the fun part: the peanut butter swirl. Drop spoonfuls of creamy peanut butter over the top of the batter. Use a knife or offset spatula to gently swirl the peanut butter into the brownie batter. Don’t over-swirl; you want distinct ribbons of peanut butter, not a uniform beige color. If you’re using peanut butter chips or chopped peanuts, sprinkle them on top now.
Step 6: Bake (20-25 minutes)
Bake in the preheated oven for 20-25 minutes. The brownies are done when a toothpick inserted into the center comes out with a few moist crumbs attached, but not wet batter. If it comes out clean, they might be overbaked. If it’s wet, give them 2-3 more minutes. The edges should be set, but the center will still be slightly jiggly.
Step 7: Cool and Cut (30 minutes)
Let the brownies cool in the pan for at least 10 minutes. Then, use the parchment paper overhang to lift them out onto a cooling rack. Let them cool completely. This is the hardest part—waiting—but if you cut them while warm, they’ll be mushy. Once cool, use a sharp knife to cut them into 24 bite-sized squares. Or triangles, if you’re feeling fancy.
Total Time: About 45 minutes (15 minutes prep, 25 minutes bake, 30 minutes cool).
Expert Tips & Tricks
Here’s everything I’ve learned from making these dozens of times. These tips will save you from my mistakes.
Don’t Overbake
This is the #1 mistake people make. Brownies continue to cook in the pan after you take them out of the oven. Pull them when the toothpick has moist crumbs, not when it’s clean. You want them fudgy, not cakey.
Room Temperature Eggs
As I mentioned, room temperature eggs mix better. Cold eggs can cause the melted butter to seize up slightly, leading to a lumpy batter. Just a small tip that makes a big difference.
Use Good Peanut Butter
Since peanut butter is a main flavor, don’t skimp on quality. If you use a cheap, oily peanut butter, the swirls might separate in the oven. A stable, creamy brand like Jif or Skippy works best for this application.
Chill Before Cutting
If you’re in a rush, you can cut them warm, but they’ll be messy. For clean, neat bites, chill them in the fridge for 30 minutes before cutting. This is especially helpful if you’re packing them for a party.
Storage is Key
Store in an airtight container at room temperature for up to 3 days. If it’s hot outside, keep them in the fridge. They’ll last up to a week in the fridge, and they actually taste better cold.
Variations & Substitutions
Once you’ve nailed the basic version, here’s how you can mix it up. I’ve tried all of these.
Dark Chocolate Version
Use dark chocolate chips instead of milk chocolate. Or add 2 ounces of chopped dark chocolate to the batter. It makes the brownies less sweet and more sophisticated.
Gluten-Free
Substitute the all-purpose flour with a 1:1 gluten-free flour blend. I’ve used Bob’s Red Mill and it works perfectly. The texture might be slightly denser, but it’s still delicious.
Reduced Sugar
I haven’t tested this extensively, but you can try reducing the sugar by ¼ cup. The brownies will be less sweet and slightly chewier. Add a pinch more salt to balance it.
Almond Butter Swirl
Swap the peanut butter for almond butter. It’s a bit more expensive, but it has a richer, nuttier flavor. Same technique applies.
Stuffed Center
For an extra treat, add a small cube of cream cheese or a piece of chocolate in the center of each square before baking. It creates a surprise center.
Serving & Storage
How to Serve:
I usually serve these straight from the pan at game day parties. They’re easy to grab and eat while standing around. But here are other ways I’ve enjoyed them:
Side Dishes:
– A glass of cold milk (classic)
– A scoop of vanilla ice cream (if you want to go all out)
– A cup of coffee or hot chocolate
Toppings Bar:
If I’m hosting a dinner party, I put out: whipped cream, crushed peanuts, extra chocolate drizzle. Everyone customizes their bite.
Wine Pairing:
Not a wine expert, but a bold Cabernet Sauvignon or a sweet Port works great with chocolate.
Storage Instructions:
Refrigerator:
Store in an airtight container for up to 4 days. They’ll firm up in the fridge, which is nice for clean cuts.
Freezing:
These freeze beautifully! Place them in a single layer on a baking sheet, freeze for an hour, then transfer to a freezer bag. They’ll last up to 3 months. Thaw at room temperature for 15 minutes before eating.
Meal Prep:
Make them on Sunday, store in the fridge. Grab one or two for a quick dessert during the week. They’re perfect for satisfying a sweet tooth without committing to a whole dessert.
Nutrition Information
I’m not a nutritionist, but here’s the breakdown if you’re tracking. Keep in mind, these are bite-sized, so the calories are moderate per piece.
Per Serving (based on 24 bites):
- Calories: 110
- Protein: 2g
- Carbs: 12g
- Fiber: 1g
- Sugar: 9g
- Fat: 6g
- Saturated Fat: 3g
- Cholesterol: 15mg
- Sodium: 45mg
What’s Good:
- Small portion size helps control calories
- Peanut butter adds some protein and healthy fats
- Easy to share and distribute
What to Know:
- Higher in sugar due to the brownie base
- Contains dairy and nuts
- Moderate calories, perfect for a snack
My Take:
Look, these are brownies. They’re not a health food. But they’re a controlled portion of something delicious. When I want to make them lighter, I use less sugar and add more nuts. But usually? I just enjoy a couple and move on with my life.
Final Thoughts
So that’s my go-to chocolate peanut butter brownie bites for game day! I’ve probably talked your ear off at this point, but when you make a recipe this often, you have a lot to say about it.
This has saved weeknight desserts more times than I can count. It’s my answer to “what’s for dessert” when I’m tired, don’t want to bake a whole cake, and still want something that tastes really good. My friends are happy, my husband’s happy, and I’m happy because I’m not stressed about cooking.
Make it yours! Try different add-ins, swap in your favorite nut butter, or adjust the chocolate. The best recipes are the ones you adapt to your family’s tastes.
If you make this, drop a comment and let me know what you think! I love hearing how recipes turn out in your kitchen. And if something doesn’t work, tell me that too—I’m here to help troubleshoot.
Happy cooking! And I hope your kitchen smells half as good as mine does right now.
Frequently Asked Questions
Can I use natural peanut butter?
You can, but be aware that natural peanut butter tends to separate and can make the swirls oily. If you must use it, make sure it’s very thick and well-stirred. I find that stable, creamy peanut butter like Jif or Skippy works best for the swirl effect.
Why did my brownies turn out cakey instead of fudgy?
This usually happens if you overmix the batter or overbake them. For fudgy brownies, mix the dry ingredients just until combined, and pull them from the oven when the toothpick has moist crumbs. Also, using more sugar and less flour helps with fudginess.
Can I make these ahead for a party?
Absolutely! These are perfect for making ahead. Bake them the day before, let them cool, and store them in an airtight container. They actually taste better the next day as the flavors meld. You can even freeze them for up to 3 months.
How do I cut them into neat squares?
Use a sharp knife and wipe it clean between cuts. If they’re too soft, chill them in the fridge for 30 minutes first. This firms up the brownies and makes clean cuts much easier.
Can I double this recipe?
Yes, but you’ll need a 9×13 inch baking pan. The baking time will increase by about 5-10 minutes. Keep an eye on them to avoid overbaking.
What’s the best way to store leftovers?
Store in an airtight container at room temperature for up to 3 days. If it’s hot, keep them in the fridge. They’ll last up to a week in the fridge.
Can I add other mix-ins?
Definitely! Chopped nuts, mini chocolate chips, or even a swirl of caramel sauce work great. Just be careful not to overload the batter, or they might not cook evenly.
Pin This Recipe!
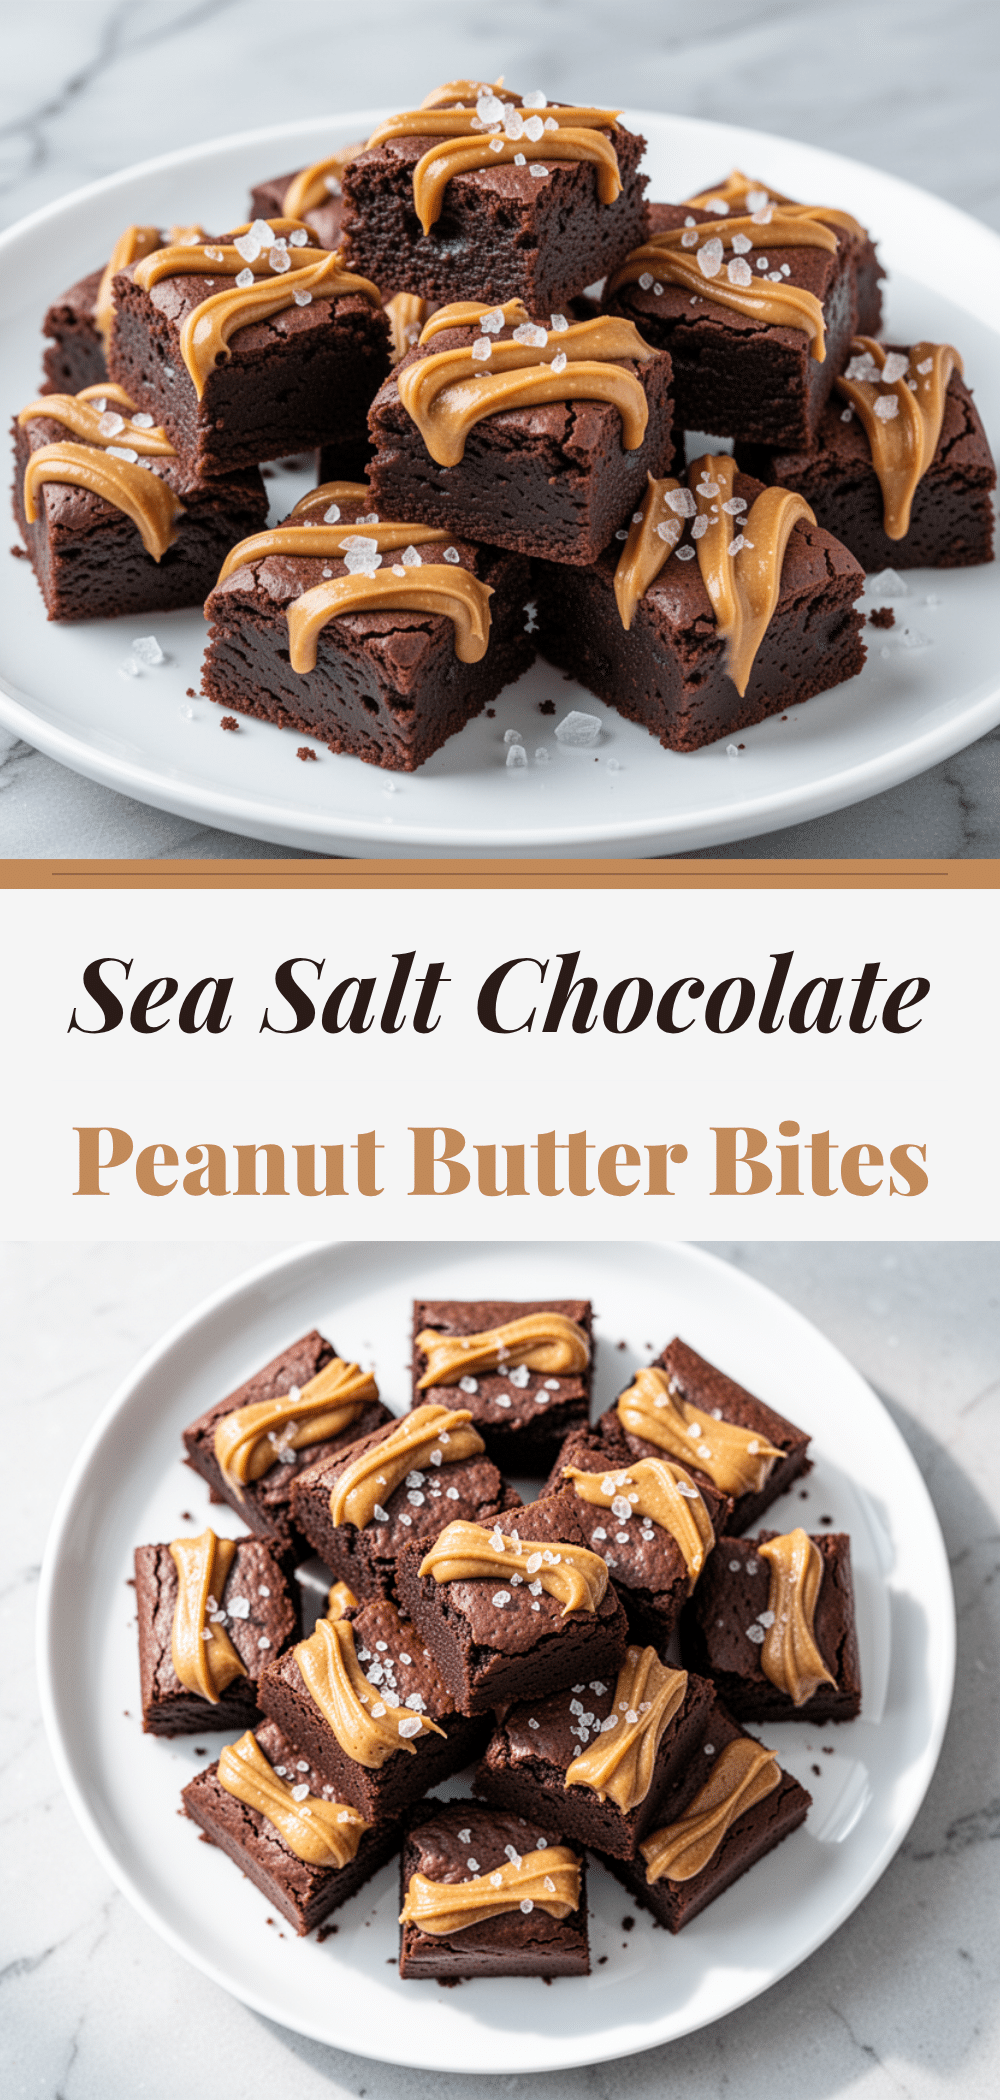
Chocolate Peanut Butter Brownie Bites for Game Day
- Total Time: 45 minutes
- Yield: 24 servings 1x
Description
These bite-sized chocolate peanut butter brownies are the perfect game day snack. They are fudgy, easy to make in one bowl, and can be prepared ahead of time for stress-free entertaining.
Ingredients
- 1/2 cup (113g) unsalted butter
- 1 cup (200g) granulated sugar
- 2 large eggs, room temperature
- 3/4 cup (95g) all-purpose flour
- 1/2 cup (50g) unsweetened cocoa powder
- 1/2 teaspoon salt
- 1 teaspoon vanilla extract
- 1/2 cup (125g) creamy peanut butter
- 1/4 cup peanut butter chips (optional)
- 1/4 cup chopped peanuts (optional)
- 1/4 cup mini chocolate chips (optional)
Instructions
- Preheat oven to 350°F (175°C). Line an 8×8 inch baking pan with parchment paper, leaving an overhang on the long sides, and grease lightly.
- Melt the butter in a microwave-safe bowl or small saucepan. Set aside to cool slightly.
- In a large mixing bowl, whisk the melted butter and sugar together until combined. Add eggs one at a time, whisking vigorously after each addition. Stir in vanilla extract.
- Add cocoa powder, flour, and salt to the wet mixture. Fold gently with a spatula until no dry flour remains. Do not overmix.
- Pour batter into the prepared pan and spread evenly. Drop spoonfuls of creamy peanut butter over the top. Use a knife or offset spatula to swirl the peanut butter into the batter.
- Sprinkle with optional peanut butter chips, chopped peanuts, or mini chocolate chips.
- Bake for 20-25 minutes, or until a toothpick inserted into the center comes out with moist crumbs attached.
- Let brownies cool in the pan for at least 10 minutes, then lift out using the parchment overhang. Cool completely on a wire rack before cutting into 24 squares.
Notes
For fudgy brownies, do not overbake. Pull them when the toothpick has moist crumbs. For clean cuts, chill the brownies in the fridge for 30 minutes before slicing. Store in an airtight container at room temperature for up to 3 days, or in the fridge for up to a week. They can also be frozen for up to 3 months.
- Prep Time: 15 minutes
- Cook Time: 25 minutes
- Category: Dessert
- Cuisine: American
Nutrition
- Serving Size: 1 bite-sized square
- Calories: 110
- Sugar: 9
- Sodium: 45
- Fat: 6
- Saturated Fat: 3
- Carbohydrates: 12
- Fiber: 1
- Protein: 2
Keywords: game day snacks, brownie bites, chocolate peanut butter, make ahead dessert, easy brownies, party snacks