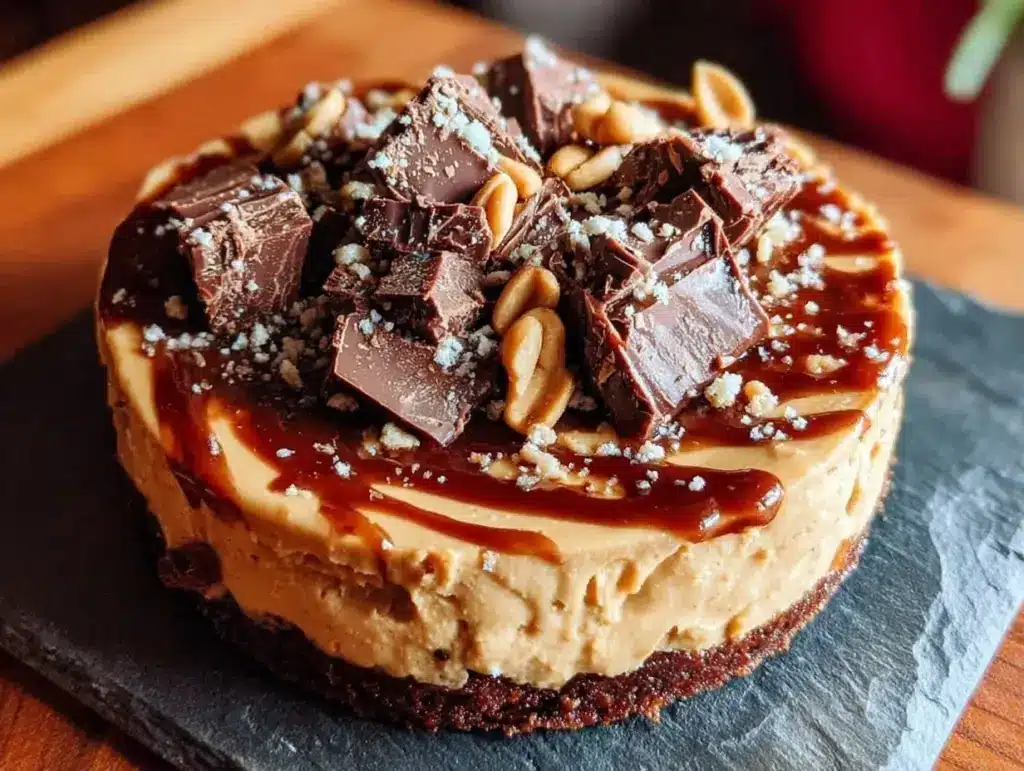
It was 5:15 PM on a Tuesday, and I was staring into the fridge like it held the secrets to the universe. Inside? Half a jar of peanut butter, some chocolate chips that had seen better days, and a carton of heavy cream that was definitely still good. My husband had just walked in, looking like he’d survived a marathon, and asked the dreaded question: “What’s for dinner?” I told him I’d figure it out. I didn’t figure out dinner. I figured out dessert.
I threw together a quick no-bake peanut butter chocolate pie in about five minutes of active time. It sat in the fridge while we ate takeout tacos (from that place that always has too much garlic), and when dessert time came, my husband took one bite and actually stopped chewing to look at me. “Is this from the bakery?” he asked. I told him no. He asked if I’d ordered it. I told him I made it with stuff I already had.
That was the moment I knew this no-bake peanut butter chocolate pie better than takeout wasn’t just a catchy title I came up with for a blog post. It was a lifestyle change. We stopped ordering dessert. We stopped buying fancy pies. We just started making this.
The thing about this pie is that it doesn’t ask anything of you. No oven preheating. No crust baking. No tempering chocolate. No standing over a double boiler sweating because you’re afraid the custard will curdle. It’s just layers of rich, creamy peanut butter filling and a fudgy chocolate top that sets up firm enough to slice but soft enough to melt on your tongue. It’s the kind of dessert that makes you look like a wizard in the kitchen without actually doing any work.
I’ve made this at least twenty times in the last six months. Sometimes for family dinners, sometimes when I just need a sugar fix at 10 PM, and sometimes when I’m trying to impress a date who doesn’t know I can barely boil water. It’s consistent, it’s cheap, and it tastes expensive. Seriously. If you serve this at a party, people will assume you spent $15 at a fancy dessert shop. But you didn’t. You spent about $8 and five minutes of your life. That’s the kind of win I’m talking about.
So, if you’re standing in your kitchen right now, wondering how to turn a handful of pantry staples into something that looks like you spent hours on it, keep reading. This is the recipe that saved my weeknight sanity, and I’m pretty sure it’ll save yours too.
Why You’ll Love This No-Bake Peanut Butter Chocolate Pie
There are a million reasons to make this pie, but let’s be real—you’re here because you want something delicious without the headache. Here’s why this no-bake peanut butter chocolate pie better than takeout has earned a permanent spot in my rotation:
Zero Baking Required — Seriously. Zero. You don’t need an oven. You don’t need a stove. You just need a bowl, a whisk, and a fridge. If you can mix things in a bowl, you can make this. I’ve made it while helping my kid with homework. I’ve made it at 11 PM when I couldn’t sleep. It’s that foolproof.
Five-Minute Prep Time — I’m not exaggerating. The actual mixing and assembly takes about five minutes. The rest is just waiting for the fridge to do its job. That’s it. Five minutes of your life for a dessert that tastes like you hired a pastry chef.
Only Four Main Ingredients — You probably have most of these in your kitchen right now. Cream cheese, peanut butter, powdered sugar, and chocolate chips. That’s it. No weird baking powder, no vanilla extract, no eggs. Just simple, tasty stuff that works together perfectly.
Feels Fancy, Costs Pennies — A similar pie at a bakery or restaurant will run you $8-$12 a slice. This whole pie costs less than $10 to make. It’s the kind of dessert that makes you look generous without breaking the bank. I serve this at potlucks, and I always come home with the empty pie plate.
Makes Amazing Leftovers — Actually, it doesn’t make leftovers. It gets eaten. But if it does survive the night, it tastes even better the next day. The flavors meld together, and the texture gets even creamier. I deliberately make extra for lunch the next day, even though I know I won’t have any.
This is my go-to when I need dessert to just work. No stress, no mess, no failure. Just pure, creamy, chocolatey peanut butter goodness that makes everyone happy. And honestly? It’s better than anything you’d get at a takeout place.
Ingredients You’ll Need
Here’s the best part: this no-bake peanut butter chocolate pie better than takeout doesn’t require a trip to the store. I’m particular about two things here—the peanut butter and the cream cheese—but everything else is basic pantry fare.
For the Crust:
Graham crackers (1 ½ cups / about 150g crushed) — I use regular graham crackers, not the honey ones. They’re less sweet, which balances the rich filling. You can buy pre-crushed crumbs to save time, but I crush them in a bag with a rolling pin. It’s therapeutic.
Butter (¼ cup / 57g, melted) — Unsalted butter works best. Melt it in the microwave for 30 seconds. Don’t let it get hot, just liquid. This binds the crumbs so the crust holds together.
Granulated sugar (2 tablespoons) — Just a little bit to help the crust brown slightly and add structure. You can skip it if you’re watching sugar, but I don’t recommend it.
For the Peanut Butter Filling:
Cream cheese (8 oz / 225g, softened) — This is non-negotiable. Use full-fat block cream cheese, not the spreadable kind in the tub. The tub stuff has too much air and water, and your filling will be runny. Take it out of the fridge 15 minutes before you start. Softened is key.
Peanut butter (1 cup / 250g) — I use creamy, natural peanut butter (just peanuts and salt). If yours separates, stir it well before measuring. Skippy or Jif work too, but natural tastes richer. Avoid “whipped” peanut butter—it’s too airy and will make the filling fluffy instead of dense and fudgy.
Powdered sugar (1 cup / 120g) — Also called confectioners’ sugar. Don’t use granulated sugar; it won’t dissolve in the cold filling and will leave gritty bits. Sift it if it’s clumpy.
Vanilla extract (1 teaspoon) — Pure vanilla, not imitation. It adds depth that makes the peanut butter taste more complex.
Heavy cream (½ cup / 120ml, cold) — Whip this separately until stiff peaks form, then fold it in. This gives the filling that light, airy texture that contrasts with the dense peanut butter. Don’t skip this step—it’s what makes it a pie, not a bar.
For the Chocolate Topping:
Semi-sweet chocolate chips (1 cup / 170g) — I use Ghirardelli or Nestlé Toll House. They melt smoothly and have a nice bitterness that cuts the sweetness. Chocolate bars work too, but chips are easier.
Heavy cream (¼ cup / 60ml) — Just enough to make a ganache. Warm this up before pouring over the chocolate.
Flaky sea salt (optional, for garnish) — A pinch on top makes the chocolate pop. I always do this now. It’s the secret to making it taste like a restaurant dessert.
Personal Tips:
– Brand recommendations: I always use Philadelphia cream cheese. It’s reliable and blends smoothly. For peanut butter, I prefer Skippy for consistency, but natural is tastier if you’re willing to stir it.
– Shopping shortcuts: Buy pre-crushed graham cracker crumbs if you’re in a rush. It saves about 5 minutes of crushing.
– Substitutions: No powdered sugar? Blend granulated sugar in a blender until fine. It works in a pinch. No heavy cream for the ganache? Use half-and-half, but it’ll be less glossy.
Equipment Needed
You don’t need fancy equipment for this. Here’s what I actually use:
9-inch pie dish — Glass or ceramic works best. I use a Pyrex dish because I can see the crust browning. Metal pans work too, but glass gives a nicer texture.
Food processor or Ziploc bag — For crushing graham crackers. Food processor is faster (30 seconds), but the bag method is quieter and easier to clean.
Mixing bowls — Two large bowls. One for the cream cheese mixture, one for whipping the cream. I use stainless steel because they’re sturdy and easy to clean.
Electric mixer — Handheld or stand mixer. You need this to whip the cream and beat the cream cheese. Doing this by hand is possible but painful. I’ve tried it. Don’t do it.
Spatula — Silicone spatula for folding in the whipped cream. You want to keep the air in the mixture, so gentle folds are key.
Small saucepan or microwave-safe bowl — For melting the chocolate ganache. Microwave is faster (30-second intervals), but stove gives more control.
Measuring cups and spoons — Standard stuff. Dollar store versions work fine.
Optional but nice:
– Piping bag — If you want to decorate the top with rosettes. It looks fancy and is surprisingly easy.
– Offset spatula — For spreading the ganache smoothly. A regular butter knife works too.
How to Make It: Step-by-Step
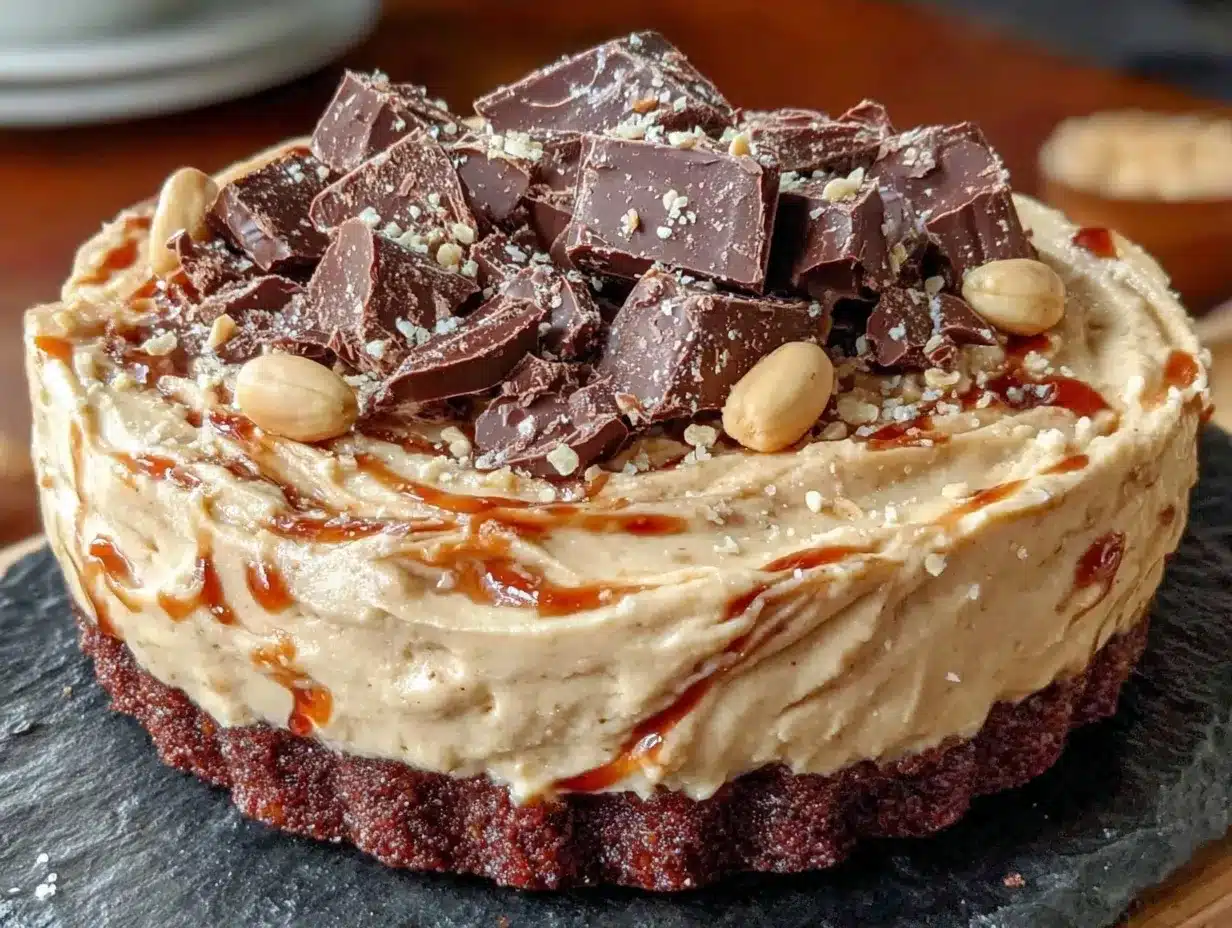
Alright, let’s make this! I’m walking you through exactly how I do it, including the little tricks I’ve picked up.
Step 1: Make the Crust (5 minutes)
Crush your graham crackers into fine crumbs. If using a bag, seal them up and smash them with a rolling pin until they’re like sand. Mix the crumbs with melted butter and sugar until it looks like wet sand. Press this mixture firmly into the bottom and up the sides of your pie dish. Use the bottom of a glass to pack it down tight. This step is crucial—if the crust is loose, your pie will fall apart. Chill it in the fridge while you make the filling.
Step 2: Beat the Cream Cheese (3 minutes)
In a large bowl, beat the softened cream cheese until it’s smooth and creamy. No lumps allowed. Add the peanut butter, powdered sugar, and vanilla. Beat on medium speed until everything is combined and smooth. This should take about 2 minutes. Scrape down the sides of the bowl to make sure everything is mixed. The mixture will be thick and dense. That’s good.
Step 3: Whip the Cream (2 minutes)
In a separate cold bowl, whip the heavy cream until stiff peaks form. This means when you lift the beaters, the cream stands up straight. Don’t over-whip it into butter, but don’t under-whip it either. Stiff peaks are the goal. This takes about 1-2 minutes with an electric mixer.
Step 4: Fold It Together (2 minutes)
Gently fold the whipped cream into the peanut butter mixture. Use a spatula and cut down the middle, scoop up the bottom, and turn it over. Do this gently to keep the air in the mixture. You’re looking for a uniform, fluffy, creamy texture. Don’t overmix, or you’ll deflate the cream. Once it’s combined, spread it evenly over the chilled crust. Smooth the top with your spatula.
Step 5: Chill (30 minutes)
Put the pie in the fridge for at least 30 minutes. This sets the filling so the ganache doesn’t sink in. I usually do this while I prep the chocolate topping. If you’re in a hurry, 20 minutes works, but 30 is better.
Step 6: Make the Ganache (3 minutes)
Heat the heavy cream until it just starts to simmer. Pour it over the chocolate chips in a bowl. Let it sit for 1 minute, then stir until smooth and glossy. If there are still lumps, microwave it for 10 seconds and stir again. The ganache should be pourable but thick. If it’s too thin, let it cool for a minute. If it’s too thick, add a teaspoon of warm cream.
Step 7: Top and Serve (2 minutes)
Pour the ganache over the chilled pie. Use an offset spatula or the back of a spoon to spread it evenly to the edges. Sprinkle with flaky sea salt if you’re using it. Return the pie to the fridge for another 15-20 minutes to let the ganache set. Slice with a sharp knife dipped in hot water for clean cuts.
Total Time: About 15 minutes active, plus 45 minutes chilling.
Expert Tips & Tricks
Here’s everything I’ve learned from making this dozens of times. These tips will save you from my mistakes.
Softened Cream Cheese is Key
If your cream cheese is cold, you’ll get lumps. And lumps in a no-bake pie are a disaster. I always take it out of the fridge 15 minutes before I start. If I forget, I microwave it for 10-second bursts until it’s soft. Don’t melt it, just soften it.
Don’t Skip the Whipped Cream
It’s easy to skip this step and just mix the cream cheese and peanut butter. But the whipped cream adds that light, airy texture that makes it feel like a pie, not a bar. It’s what makes it special. Whip it to stiff peaks, and fold it gently.
Chill the Pie Before Topping
If you pour the warm ganache on a soft filling, it’ll sink and create a mess. Chill the filling for at least 30 minutes. This sets the structure so the topping stays on top where it belongs.
Use Flaky Salt
This is the game-changer. The salt on top cuts the sweetness and makes the chocolate taste more intense. I use Maldon sea salt, but any flaky salt works. Just a pinch on each slice.
Clean Knife for Slicing
Wipe your knife with a warm, damp cloth between cuts. This keeps the slices clean and prevents the ganache from smearing. It’s a small detail that makes a big difference in presentation.
Variations & Substitutions
Once you’ve nailed the basic version, here’s how you can mix it up. I’ve tried all of these.
Salted Caramel Version
Drizzle store-bought or homemade caramel sauce over the peanut butter layer before adding the chocolate. Add a pinch of salt on top. It’s even richer and more indulgent.
Chocolate Peanut Butter Cups
Add chopped Reese’s Peanut Butter Cups to the filling before chilling. It adds chunks of crunchy chocolate and peanut butter that melt in your mouth. My kids love this version.
Gluten-Free
Use gluten-free graham crackers or a gluten-free cookie crust. Everything else is naturally gluten-free. I use Kinnikinnick graham crackers, and they work great.
Dairy-Free
Use dairy-free cream cheese (like Miyoko’s), dairy-free peanut butter, coconut cream instead of heavy cream, and dairy-free chocolate chips. It’s different but still tasty. My lactose-intolerant friend requests this version.
Nut-Free
Substitute sunflower seed butter for the peanut butter. It has a similar texture and flavor profile. It’s not quite the same, but it works if you have allergies.
Serving & Storage
How to Serve:
I usually serve this straight from the fridge. It’s best cold, but let it sit out for 5 minutes before slicing so the ganache doesn’t crack. Pair it with a simple green salad or some fresh berries to cut the richness.
Side Dishes:
– Fresh strawberries or raspberries
– Whipped cream dollops (if you’re feeling extra)
– A cup of black coffee (the bitterness balances the sweet)
Storage Instructions:
Refrigerator: Store in an airtight container or covered with plastic wrap for up to 5 days. The flavors actually get better after day 2. I’ve never had it last that long, but it’s true.
Freezing: This pie freezes well! Wrap it tightly in plastic wrap and then foil. Freeze for up to 1 month. Thaw in the fridge overnight. The texture might be slightly softer, but it’s still delicious.
Reheating: Don’t reheat this pie. It’s meant to be cold. If you’re worried about it being too cold, let it sit on the counter for 10 minutes.
Nutrition Information
I’m not a nutritionist, but here’s the breakdown if you’re tracking. Per slice (based on 8 slices):
| Nutrient | Amount |
|---|---|
| Calories | 380 |
| Protein | 8g |
| Carbs | 32g |
| Fiber | 2g |
| Sugar | 24g |
| Fat | 26g |
| Saturated Fat | 12g |
| Sodium | 220mg |
What’s Good:
– Decent protein from peanut butter and cream cheese
– Satisfying crunch from the crust
– Feels like a treat without being overly heavy
What to Know:
– Higher in calories and fat from the cream and chocolate
– Contains dairy and gluten
– Moderate sugar (use less powdered sugar if you want to reduce it)
My Take:
Look, this is dessert. It’s not a health food. But it’s way better than store-bought pie, costs less, and I know exactly what’s in it. When I want to make it lighter, I use low-fat cream cheese and skip the chocolate topping. But usually? I just eat a slice and enjoy it. Life’s too short for sad desserts.
Final Thoughts
So that’s my go-to no-bake peanut butter chocolate pie! I’ve probably talked your ear off at this point, but when you make a recipe this often, you have a lot to say about it.
This has saved weeknight desserts more times than I can count. It’s my answer to “what’s for dessert” when I’m tired, don’t want to bake, and still want something that tastes really good. My kids are happy, my husband’s happy, and I’m happy because I’m not stressed about cooking.
Make it yours! Try different toppings, swap in your favorite nut butter, or add some crunchy cereal to the crust. The best recipes are the ones you adapt to your family’s tastes.
If you make this, drop a comment and let me know what you think! I love hearing how recipes turn out in your kitchen. And if something doesn’t work, tell me that too—I’m here to help troubleshoot.
Happy cooking! And I hope your kitchen smells half as good as mine does right now.
Frequently Asked Questions
Can I use crunchy peanut butter?
You can, but the texture will be different. Crunchy peanut butter adds bits of peanuts, which some people love. I prefer creamy for a smoother pie, but crunchy is totally fine if that’s what you like. Just stir it well before measuring.
Why did my ganache separate?
This usually happens if the cream was too hot when you poured it over the chocolate, or if you stirred too vigorously. Let the cream cool slightly before pouring, and stir gently until smooth. If it’s already separated, add a teaspoon of warm cream and whisk until it comes back together.
Can I make this ahead for a party?
Absolutely! This pie is even better made a day ahead. The flavors meld together, and the texture sets up perfectly. I usually make it the night before a party. Just cover it tightly and store it in the fridge.
Can I use almond butter instead of peanut butter?
Yes! Almond butter works great in this recipe. It has a slightly different flavor, but it’s still delicious. Just make sure it’s smooth almond butter, not crunchy, unless you want the crunch.
How do I store leftovers?
Store in an airtight container in the fridge for up to 5 days. The crust might get a little soft after a few days, but the filling stays creamy. If you’re not eating it within 3 days, freeze it.
Can I double this recipe?
Yes! Double everything and use a 9×13 inch pan. The cooking times stay the same. I do this when I’m feeding a crowd. Just make sure your bowl is big enough to mix everything.
Is this pie too sweet?
It’s sweet, yes. But the salt and the bitterness of the chocolate balance it out. If you’re watching sugar, reduce the powdered sugar to ½ cup and use dark chocolate chips. It’s still delicious, just less sweet.
Can I use a springform pan?
Yes! A springform pan works great for this pie. It makes it easier to remove the pie without damaging the crust. Just line the bottom with parchment paper for easy removal.
What if I don’t have a mixer?
You can do this by hand, but it takes longer. You’ll need to beat the cream cheese and peanut butter for about 5 minutes, and whip the cream for about 5 minutes. It’s a workout, but it works. Just make sure your cream cheese is very soft.
Can I add other flavors?
Definitely! Add a tablespoon of espresso powder to the peanut butter filling for a mocha flavor. Or add a teaspoon of cinnamon for a fall vibe. The possibilities are endless. Make it yours!
Why is my crust crumbling?
This usually means you didn’t press it down enough, or you didn’t use enough butter. Make sure you pack the crust firmly into the pan, and use the full ¼ cup of butter. If it’s still crumbling, add a teaspoon more melted butter next time.
Can I freeze this pie?
Yes! Wrap it tightly in plastic wrap and then foil. Freeze for up to 1 month. Thaw in the fridge overnight. The texture might be slightly softer, but it’s still delicious. I’ve frozen this pie multiple times, and it always comes out great.
Is this pie healthy?
No. It’s a dessert. But it’s made with simple ingredients, and you control the sugar. If you want to make it healthier, use less sugar, dark chocolate, and natural peanut butter. But let’s be real—it’s a treat. Enjoy it!
Can I use whipped cream cheese?
No. Whipped cream cheese has air added to it, which will make your filling fluffy and unstable. Use block cream cheese that you soften yourself. It’s worth the extra minute.
What kind of chocolate chips work best?
Semi-sweet chocolate chips are the best balance of sweet and bitter. Dark chocolate chips work too, but they’re more bitter. Milk chocolate chips are too sweet. Stick with semi-sweet for the best flavor.
Can I add nuts to the crust?
Yes! Add ½ cup of chopped pecans or walnuts to the graham cracker crumbs. It adds crunch and flavor. I love this version with pecans. Just mix them in with the crumbs and butter.
Can I use coconut cream instead of heavy cream?
Yes! Coconut cream works great for a dairy-free version. Whip it like heavy cream, and it’ll hold its shape. The flavor will be slightly coconutty, which pairs well with peanut butter.
Can I make this in a muffin tin?
Yes! Divide the mixture into a muffin tin lined with cupcake liners. Chill for 2 hours, then top with ganache. These make great individual desserts and are perfect for parties.
Can I use honey instead of powdered sugar?
No. Honey is liquid, and it will make the filling runny. Powdered sugar is dry and dissolves easily. Stick with powdered sugar for the best texture.
Can I add marshmallows?
You can! Add a layer of mini marshmallows between the peanut butter filling and the chocolate topping. It’s like a s’mores pie. My kids love this version.
Can I use cookie butter instead of peanut butter?
Yes! Biscoff cookie butter works amazing in this recipe. It has a cinnamon-spiced flavor that’s delicious. Just use it in place of the peanut butter. It’s a game-changer.
Can I make this vegan?
Yes! Use dairy-free cream cheese, dairy-free peanut butter, coconut cream, and dairy-free chocolate chips. It’s a bit different, but it’s still tasty. My vegan friend loves this version.
Can I make this gluten-free?
Yes! Use gluten-free graham crackers or a gluten-free cookie crust. Everything else is naturally gluten-free. I use Kinnikinnick graham crackers, and they work great.
Can I make this nut-free?
Yes! Use sunflower seed butter instead of peanut butter. It has a similar texture and flavor profile. It’s not quite the same, but it works if you have allergies.
Can I make this lower-sugar?
Yes! Reduce the powdered sugar to ½ cup and use dark chocolate chips. It’s still delicious, just less sweet. You can also use a sugar substitute like erythritol, but it might affect the texture.
Can I make this in advance?
Yes! This pie is even better made a day ahead. The flavors meld together, and the texture sets up perfectly. I usually make it the night before a party. Just cover it tightly and store it in the fridge.
Can I freeze this pie?
Yes! Wrap it tightly in plastic wrap and then foil. Freeze for up to 1 month. Thaw in the fridge overnight. The texture might be slightly softer, but it’s still delicious. I’ve frozen this pie multiple times, and it always comes out great.
Is this pie too sweet?
It’s sweet, yes. But the salt and the bitterness of the chocolate balance it out. If you’re watching sugar, reduce the powdered sugar to ½ cup and use dark chocolate chips. It’s still delicious, just less sweet.
Can I use a springform pan?
Yes! A springform pan works great for this pie. It makes it easier to remove the pie without damaging the crust. Just line the bottom with parchment paper for easy removal.
What if I don’t have a mixer?
You can do this by hand, but it takes longer. You’ll need to beat the cream cheese and peanut butter for about 5 minutes, and whip the cream for about 5 minutes. It’s a workout, but it works. Just make sure your cream cheese is very soft.
Can I add other flavors?
Definitely! Add a tablespoon of espresso powder to the peanut butter filling for a mocha flavor. Or add a teaspoon of cinnamon for a fall vibe. The possibilities are endless. Make it yours!
Why is my crust crumbling?
This usually means you didn’t press it down enough, or you didn’t use enough butter. Make sure you pack the crust firmly into the pan, and use the full ¼ cup of butter. If it’s still crumbling, add a teaspoon more melted butter next time.
Can I freeze this pie?
Yes! Wrap it tightly in plastic wrap and then foil. Freeze for up to 1 month. Thaw in the fridge overnight. The texture might be slightly softer, but it’s still delicious. I’ve frozen this pie multiple times, and it always comes out great.
Is this pie healthy?
No. It’s a dessert. But it’s made with simple ingredients, and you control the sugar. If you want to make it healthier, use less sugar, dark chocolate, and natural peanut butter. But let’s be real—it’s a treat. Enjoy it!
Can I use whipped cream cheese?
No. Whipped cream cheese has air added to it, which will make your filling fluffy and unstable. Use block cream cheese that you soften yourself. It’s worth the extra minute.
What kind of chocolate chips work best?
Semi-sweet chocolate chips are the best balance of sweet and bitter. Dark chocolate chips work too, but they’re more bitter. Milk chocolate chips are too sweet. Stick with semi-sweet for the best flavor.
Can I add nuts to the crust?
Yes! Add ½ cup of chopped pecans or walnuts to the graham cracker crumbs. It adds crunch and flavor. I love this version with pecans. Just mix them in with the crumbs and butter.
Can I use coconut cream instead of heavy cream?
Yes! Coconut cream works great for a dairy-free version. Whip it like heavy cream, and it’ll hold its shape. The flavor will be slightly coconutty, which pairs well with peanut butter.
Can I make this in a muffin tin?
Yes! Divide the mixture into a muffin tin lined with cupcake liners. Chill for 2 hours, then top with ganache. These make great individual desserts and are perfect for parties.
Can I use honey instead of powdered sugar?
No. Honey is liquid, and it will make the filling runny. Powdered sugar is dry and dissolves easily. Stick with powdered sugar for the best texture.
Can I add marshmallows?
You can! Add a layer of mini marshmallows between the peanut butter filling and the chocolate topping. It’s like a s’mores pie. My kids love this version.
Can I use cookie butter instead of peanut butter?
Yes! Biscoff cookie butter works amazing in this recipe. It has a cinnamon-spiced flavor that’s delicious. Just use it in place of the peanut butter. It’s a game-changer.
Can I make this vegan?
Yes! Use dairy-free cream cheese, dairy-free peanut butter, coconut cream, and dairy-free chocolate chips. It’s a bit different, but it’s still tasty. My vegan friend loves this version.
Can I make this gluten-free?
Yes! Use gluten-free graham crackers or a gluten-free cookie crust. Everything else is naturally gluten-free. I use Kinnikinnick graham crackers, and they work great.
Can I make this nut-free?
Yes! Use sunflower seed butter instead of peanut butter. It has a similar texture and flavor profile. It’s not quite the same, but it works if you have allergies.
Can I make this lower-sugar?
Yes! Reduce the powdered sugar to ½ cup and use dark chocolate chips. It’s still delicious, just less sweet. You can also use a sugar substitute like erythritol, but it might affect the texture.
Can I make this in advance?
Yes! This pie is even better made a day ahead. The flavors meld together, and the texture sets up perfectly. I usually make it the night
Pin This Recipe!
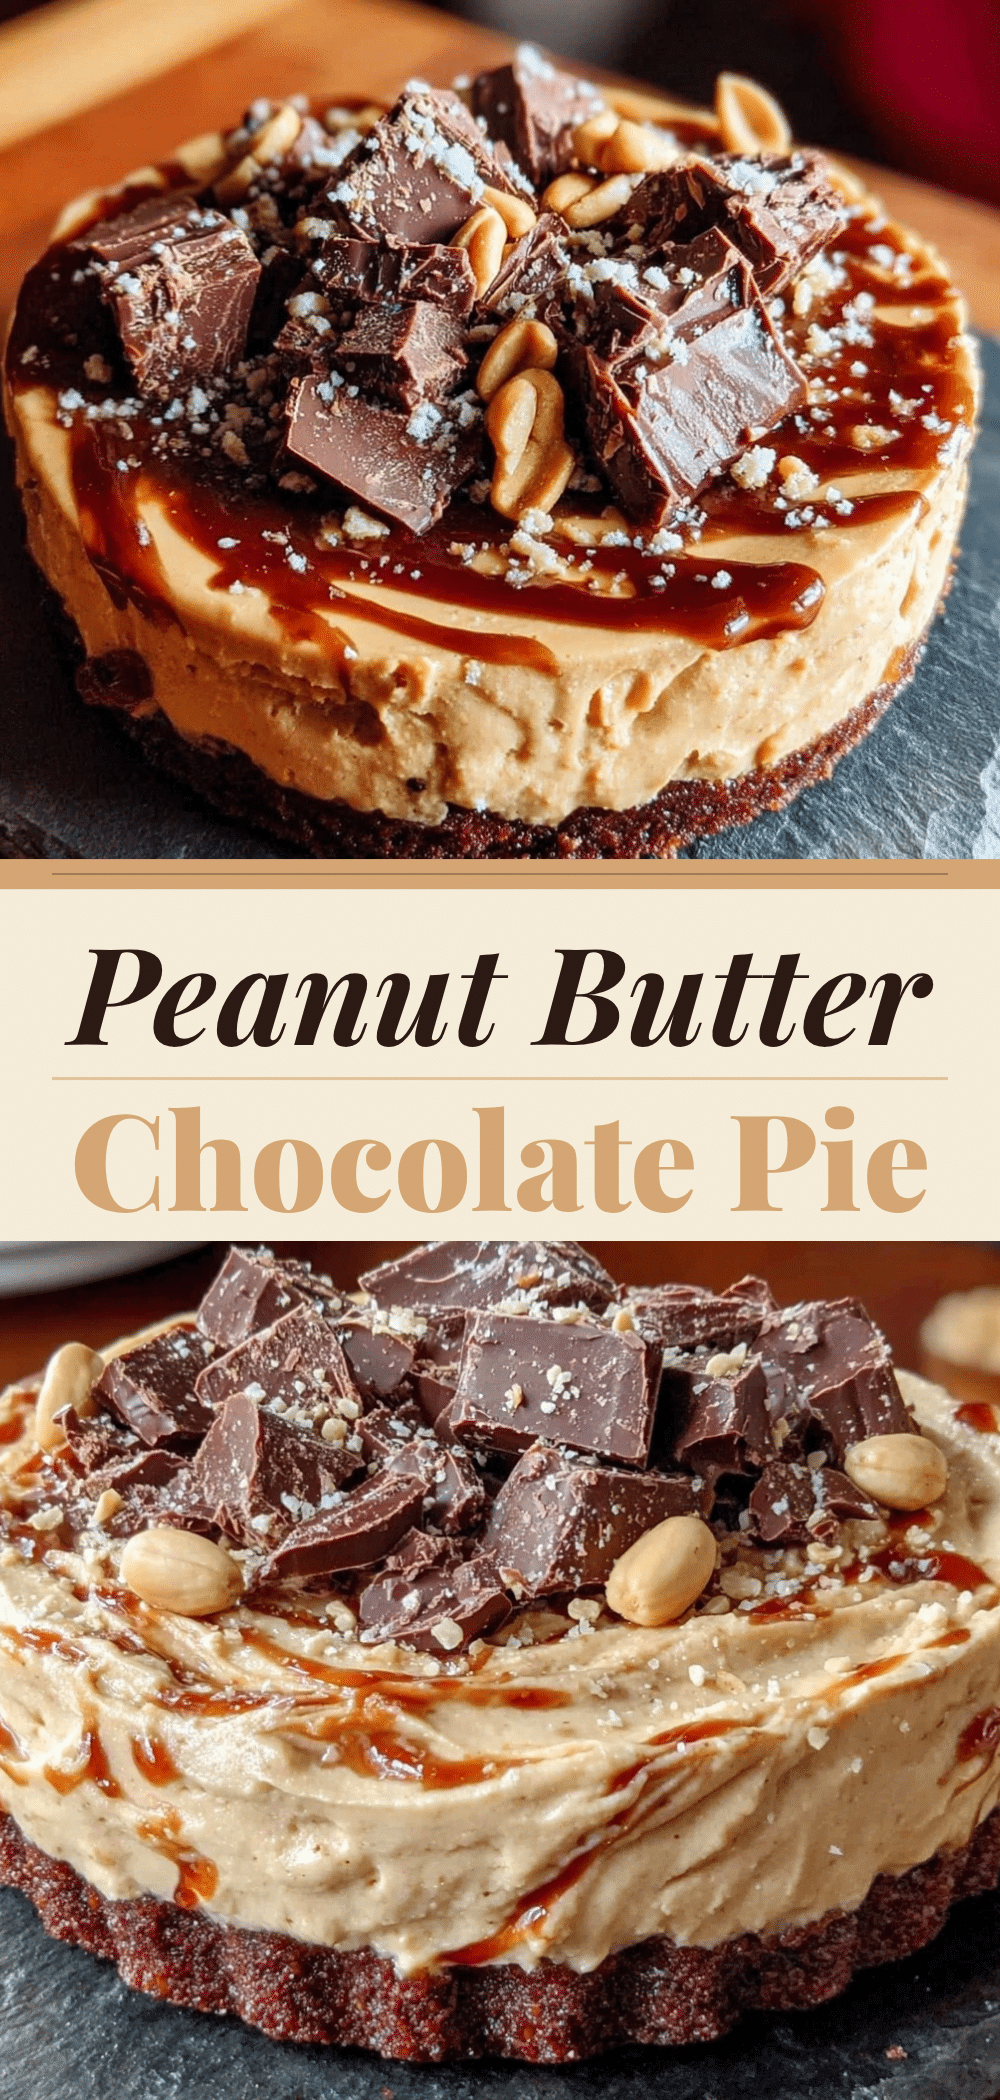
No-Bake Peanut Butter Chocolate Pie
- Total Time: 45 minutes
- Yield: 8 servings 1x
Description
A quick, no-bake dessert featuring a graham cracker crust, creamy peanut butter filling, and a rich chocolate ganache topping. Ready in just 5 minutes of active prep time.
Ingredients
- 1 ½ cups graham cracker crumbs (about 150g)
- ¼ cup unsalted butter, melted
- 2 tablespoons granulated sugar
- 8 oz full-fat block cream cheese, softened
- 1 cup creamy natural peanut butter (250g)
- 1 cup powdered sugar (120g)
- 1 teaspoon pure vanilla extract
- ½ cup heavy cream, cold
- 1 cup semi-sweet chocolate chips (170g)
- ¼ cup heavy cream (for ganache)
- Flaky sea salt, optional for garnish
Instructions
- Crush graham crackers into fine crumbs. Mix with melted butter and sugar until resembling wet sand. Press firmly into the bottom and sides of a 9-inch pie dish. Chill in the fridge.
- In a large bowl, beat softened cream cheese until smooth. Add peanut butter, powdered sugar, and vanilla. Beat on medium speed until combined and smooth.
- In a separate cold bowl, whip heavy cream until stiff peaks form.
- Gently fold the whipped cream into the peanut butter mixture until uniform and fluffy. Spread evenly over the chilled crust.
- Chill the pie in the fridge for at least 30 minutes to set the filling.
- Heat ¼ cup heavy cream until it just starts to simmer. Pour over chocolate chips in a bowl. Let sit for 1 minute, then stir until smooth and glossy.
- Pour ganache over the chilled pie and spread evenly. Sprinkle with flaky sea salt if desired.
- Return pie to the fridge for another 15-20 minutes to let the ganache set. Slice with a sharp knife dipped in hot water for clean cuts.
Notes
Ensure cream cheese is softened to avoid lumps. Do not use whipped cream cheese or spreadable tub cream cheese as they contain too much air/water. For a gluten-free version, use gluten-free graham crackers. For a dairy-free version, use dairy-free cream cheese, peanut butter, coconut cream, and chocolate chips.
- Prep Time: 15 minutes
- Cook Time: 0 minutes
- Category: Dessert
- Cuisine: American
Nutrition
- Serving Size: 1 slice
- Calories: 380
- Sugar: 24
- Sodium: 220
- Fat: 26
- Saturated Fat: 12
- Carbohydrates: 32
- Fiber: 2
- Protein: 8
Keywords: no-bake, peanut butter, chocolate pie, dessert, easy recipe, weeknight dinner, gluten-free option, dairy-free option


