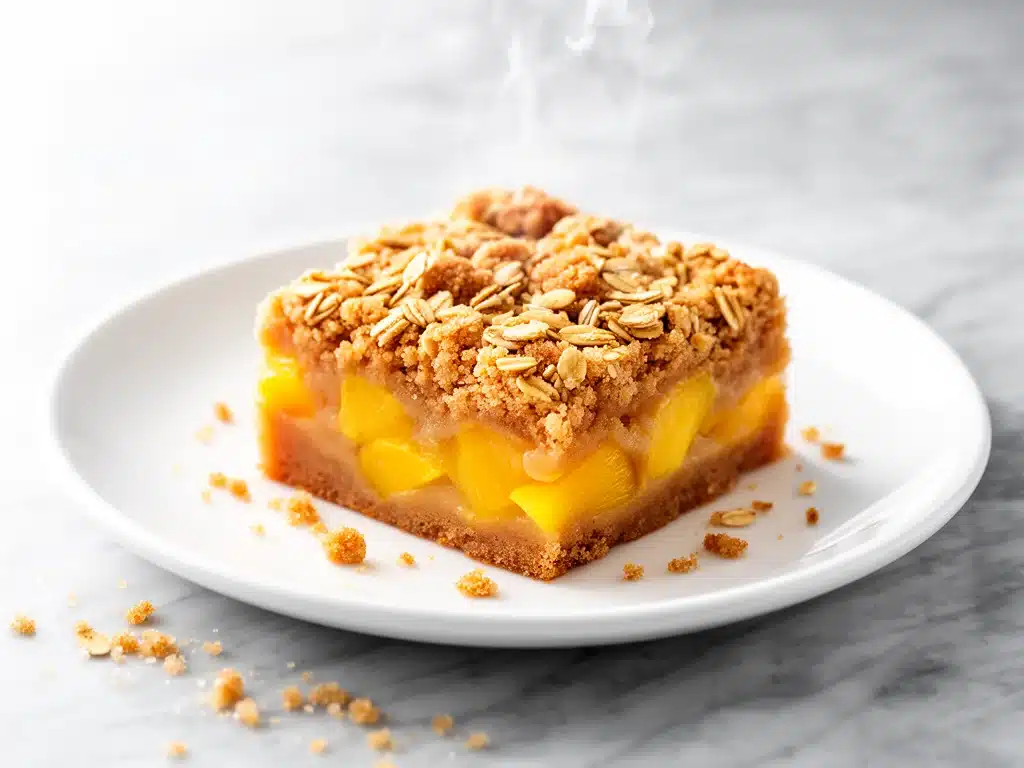
Last July, I was standing in my neighbor’s backyard, sweating through my linen shirt, trying to look casual while holding a plate of store-bought cookies that were already crumbling. The sun was beating down, the iced tea was melting faster than I could drink it, and I knew, with sinking certainty, that I had brought the worst possible dessert to a potluck. My friend Sarah looked at me, then at the sad, dry cookies, and whispered, “You didn’t have to bring those. We have peaches.”
She went inside and came back out with a dish that changed my life. It wasn’t fancy. It wasn’t pretentious. It was just a few squares of golden, crumbly goodness oozing with juicy, warm peaches. I took one bite and nearly dropped my plate. It was sweet, tart, buttery, and textured in all the right ways. I spent the rest of the evening asking her for the recipe, but she just laughed and said, “It’s just brown sugar, butter, flour, and peaches. You can’t mess it up.”
I went home skeptical. How could something so simple taste better than anything from a bakery? I spent the next three weekends testing variations. I tried canned peaches (too watery). I tried fresh peaches from the grocery store (too firm, not sweet enough). I tried adding cinnamon (nice, but distracting). I tried making it in a pie dish (hard to serve, messy edges). But last week, I finally nailed it. These Brown Sugar Peach Crumble Bars are the result of that obsession. They are sticky, tangy, incredibly easy to make, and honestly? They’re better than anything I’ve ever bought.
I’ve made these for every backyard gathering, picnic, and random Tuesday night craving since. My husband says they smell like summer. My kids ask for them by name. And if you’re looking for a dessert that feels special but doesn’t require a degree in pastry arts, this is it. Let me show you why these bars are about to become your new summer obsession.
Why You’ll Love These Peach Crumble Bars
There are about ten reasons I keep making these, but let’s be real: you’re here because you want something delicious that doesn’t require a trip to the specialty grocery store or three hours of prep time. Here’s why these Brown Sugar Peach Crumble Bars deserve a permanent spot in your summer dessert rotation.
- Stupid Simple Ingredients — Seriously, if you can boil water, you can make this. I’m talking five ingredients. Flour, butter, brown sugar, peaches, and a tiny bit of lemon. That’s it. No weird extracts, no gelatin, no fancy nuts you’ll never use again. I keep these staples on hand specifically for days when I need to impress someone with zero effort.
- Lightning Fast Prep — 15 minutes of active time. That’s it. I mix the crumble topping, slice the peaches, dump it in a pan, and put it in the oven. I use that 15 minutes to change clothes, reply to texts, or actually relax. The oven does the heavy lifting while I do nothing. This is my go-to when I’m hosting and want to spend time with guests, not staring at a stove.
- Pantry & Fridge Friendly — You probably have 90% of these ingredients already. The only thing you need to buy is peaches. If they’re not in season, you can use frozen peaches (more on that later). This makes it a lifesaver for unexpected guests. “Oh, you’re coming over? Great, I can throw these together in 20 minutes.”
- Texture Heaven — This is the big one. Most peach desserts are just mush. These bars have a distinct contrast: a tender, cake-like base, a layer of juicy, bursting fruit, and a topping that stays crisp and crumbly even after baking. The brown sugar creates this incredible caramelized crunch that you just can’t get from white sugar. It’s the difference between a snack and a treat.
- Makes Amazing Leftovers — Actually tastes better the next day. The flavors meld together overnight, making the peach filling even more syrupy and the crumble even more fragrant. I deliberately make a double batch because I know I’ll be eating these cold for breakfast or dessert all week. They keep well in the fridge for up to 4 days, and I’ve had them survive a picnic in a cooler for 6 hours without falling apart.
- Feeds a Crowd for Cheap — Feeds 8-12 people for under $10. That’s less than the cost of a single slice of cake at a fancy cafe. This is budget-smart luxury. Perfect for potlucks, bridal showers, or just feeding a hungry family after soccer practice.
This is my go-to when I need dinner—or dessert—to just work. No complicated techniques, no weird ingredients, just reliable, delicious food that makes everyone happy. It’s the kind of recipe that makes you feel like a genius cook without actually having to try hard.
Ingredients You’ll Need
Here’s the best part: you probably have most of this already. This isn’t a recipe that requires you to run to three different stores. It’s straightforward, honest cooking. I’m particular about three ingredients here, and I’ll tell you exactly why. Stick to these, and you’ll get bars that are sticky, golden, and perfectly balanced.
For the Crumble Topping & Base
All-purpose flour (2 cups / 250g) — This is your structure. Don’t substitute almond flour or coconut flour unless you want a completely different texture. I use regular flour because it gives that classic, tender-crumble bite. If you’re gluten-free, use a 1:1 gluten-free baking blend, but it won’t be quite as chewy.
Unsalted butter (1 cup / 2 sticks / 226g, cold and cubed) — This is non-negotiable. Cold butter is the secret to those distinct, crunchy crumbs. If you use melted butter, you’ll get a soggy, cake-like mess. Cube it straight from the fridge. I know it’s annoying, but it makes all the difference. I use Kerrygold or Plugra, but any high-quality unsalted butter works.
Light brown sugar (1 cup / 200g) — This gives the crumble its deep, molasses-like flavor and chewiness. Dark brown sugar works too, but light is sweeter and less intense. Don’t use white sugar; it won’t give you that caramelized edge.
Salt (½ teaspoon) — Just a pinch to balance the sweetness. Don’t skip it. Sweet food without salt tastes flat.
For the Peach Filling
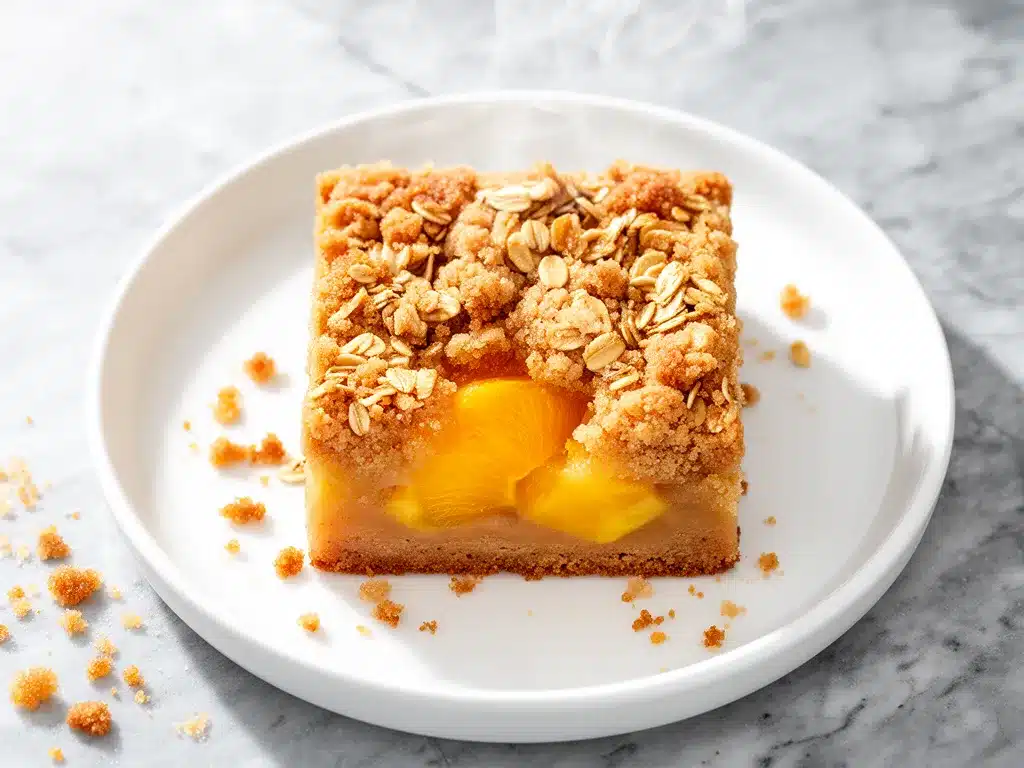
Fresh peaches (3-4 large / about 1.5 lbs / 680g, peeled and sliced) — This is where the magic happens. You want peaches that are ripe but still firm. If they’re too soft, they’ll turn to mush. If they’re too hard, they’ll be sour. Look for peaches that smell fragrant and give slightly when you press them. I prefer yellow peaches for their tartness, but white peaches work if you want sweeter bars.
Granulated sugar (½ cup / 100g) — Peaches vary in sweetness, so this ensures the filling isn’t bland. Taste a slice of your peach first—if it’s super sweet, reduce this to ¼ cup.
Cornstarch (2 tablespoons) — This thickens the peach juices so you don’t end up with a soupy bottom layer. It’s crucial for getting those clean, square cuts. If you don’t have cornstarch, use arrowroot powder.
Lemon juice (1 tablespoon) — Just a splash to brighten the flavor and prevent the peaches from browning. It adds a subtle tang that cuts through the rich butter and sugar.
Cinnamon (½ teaspoon) — Optional, but I think it’s essential. It adds warmth that pairs perfectly with peaches. If you’re not a cinnamon person, skip it, but you’ll miss out on that cozy autumn vibe in summer.
Optional Add-ins
Vanilla extract (1 teaspoon) — Stir this into the peach mixture for extra depth. I add it because it makes the bars taste more “bakery-like.”
Oats (½ cup / 40g) — I sometimes add rolled oats to the crumble topping for extra texture. It makes it heartier and more like a crumble than a bar. If you like a chunkier topping, do it.
Almond extract (½ teaspoon) — Peaches and almonds are best friends. A tiny bit of almond extract in the crumble makes the flavor profile incredibly sophisticated. Just a few drops—don’t overdo it.
Equipment Needed
You don’t need fancy equipment for this. Here’s what I actually use. If you don’t have these exact items, don’t worry—I’ve made this with substitutes and it still works fine.
9×13 inch baking dish — I use a glass Pyrex dish because it conducts heat evenly and I can see the bottom browning. Metal works too, but glass is easier to clean and prevents burning. Make sure it’s not too deep; you want the peaches to be close to the top for maximum caramelization.
Large mixing bowl — For combining the crumble topping. I use a wide bowl so I can get my hands in there. Yes, hands. Fingers work better than a fork for breaking up the butter.
Medium mixing bowl — For tossing the peaches with sugar and cornstarch. I like having two bowls so I can prep everything at once without cross-contaminating.
Pastry cutter or fork — If you don’t want to use your hands, a pastry cutter or a large fork works to cut the butter into the flour. But honestly? My hands are faster and warmer, which helps break up the butter chunks.
Sharp chef’s knife — For slicing the peaches. A dull knife will crush the peaches. I use my 8-inch Wüsthof, but any sharp knife works. Be careful when peeling—if you’re not comfortable peeling them, you can leave the skins on, but they can be a bit chewy.
Peeler or paring knife — To peel the peaches. If you’re feeling fancy, you can blanch them in boiling water for 30 seconds to make peeling easier, but it’s not necessary. I just use a vegetable peeler.
Cooling rack — Essential. You cannot cut these bars hot. They will fall apart. Let them cool completely on a rack so air circulates underneath. I’ve ruined bars by cutting them too soon—learned this the hard way with a sticky, messy disaster.
How to Make It: Step-by-Step
Alright, let’s make this! I’m walking you through exactly how I do it, including the little tricks I’ve picked up over dozens of batches. This is straightforward, but there are a few key moments that determine success.
Step 1: Prep Your Oven and Pan (5 minutes)
Preheat your oven to 350°F (175°C). Grease your 9×13 inch baking dish generously with butter or non-stick spray. I use butter because it adds flavor and ensures the edges get nice and crispy. If you’re worried about sticking, you can also line the pan with parchment paper, leaving an overhang on the sides for easy lifting. I don’t bother with parchment usually, but it’s a good safety net.
Step 2: Make the Crumble Topping (5 minutes)
In your large mixing bowl, combine the flour, brown sugar, and salt. Mix with a fork or your fingers until evenly distributed. Add the cold, cubed butter. Here’s the trick: use your fingers to rub the butter into the flour mixture. Press and pinch until you have a mix of large crumbs and smaller pebbles. You want some bigger chunks for texture, not a fine, sandy meal. It should look like coarse sand with some pea-sized lumps. Set aside about ½ cup of this mixture for the topping later; the rest will be your base.
Step 3: Press the Base (3 minutes)
Take the larger portion of the crumble mixture and press it firmly into the bottom of your prepared baking dish. Use your hands or the bottom of a measuring cup to pack it down tight. You want an even layer. This is your crust. It needs to be compact so it supports the juicy peaches on top. Don’t worry if it’s not perfect; it’s rustic.
Step 4: Prepare the Peaches (5 minutes)
While you’re prepping the base, slice your peaches. Remove the pits and slice them into ¼-inch thick wedges. If your peaches are very juicy, you might want to pat them dry with a paper towel to remove excess liquid. In your medium bowl, toss the peach slices with the granulated sugar, cornstarch, lemon juice, cinnamon, and vanilla (if using). Make sure every slice is coated. The cornstarch will turn into a syrup as it bakes, binding the juices.
Step 5: Assemble and Bake (45-50 minutes)
Pour the peach mixture over the pressed base. Spread it out evenly. Take the reserved ½ cup of crumble mixture and sprinkle it evenly over the top of the peaches. Don’t press it down; just let it sit loosely. This is what makes it a crumble, not a cobbler.
Place the dish in the preheated oven and bake for 45-50 minutes. You’ll know it’s done when the topping is golden brown and the peaches are bubbling vigorously around the edges. The sauce should be thick and syrupy, not watery. If the topping is browning too quickly, you can loosely tent a piece of aluminum foil over the top for the last 10 minutes.
Step 6: Cool Completely (At least 1 hour)
This is the hardest part. Remove the dish from the oven and place it on a cooling rack. You need to let these cool completely. I know the smell is intoxicating, and you want to dive in, but if you cut them warm, they will be a mess. The crumble needs to set, and the peach filling needs to thicken. Let them cool for at least 1 hour, preferably 2. Once cool, lift them out of the pan using the parchment paper (if you used it) or cut them directly in the dish. Slice into squares or rectangles.
Expert Tips & Tricks
Here’s everything I’ve learned from making these dozens of times. These tips will save you from my mistakes and ensure your bars are perfect every time.
Keep the Butter Cold
This is the #1 tip. Cold butter creates steam pockets as it melts, which creates those flaky, crunchy crumbs. If your butter is soft or melted, you’ll get a dense, cake-like bottom instead of a crumble. Cube it straight from the fridge, and work quickly so it doesn’t warm up. If your kitchen is hot, put the bowl in the fridge for 10 minutes before pressing the base.
Don’t Skip the Cornstarch
Peaches release a lot of liquid. Without cornstarch, you’ll end up with a puddle of syrup at the bottom of the pan. The cornstarch absorbs that liquid and turns it into a glossy, thick glaze that clings to the fruit. If you’re using very firm, dry peaches, you might get away with less, but I always use 2 tablespoons to be safe.
Choose the Right Peaches
Look for peaches that are fragrant and give slightly to pressure. Avoid rock-hard peaches; they won’t soften enough in the baking time. Avoid peaches that are already mushy; they’ll turn to sauce. Yellow peaches are my preference because they have a tartness that balances the sweet crumble. White peaches are sweeter and milder, which works if you like dessert-style sweetness.
Be Patient with Cooling
I cannot stress this enough. Cutting warm peach bars is a recipe for disaster. The layers separate, the crumble turns to mush, and you end up with a sticky mess on your knife. Let them cool for at least 1 hour. If you can wait 2 hours, even better. The flavors meld and the texture sets perfectly.
Storage is Simple
These bars keep well at room temperature for up to 2 days in an airtight container. After that, store them in the fridge for up to 4 days. The cold will firm up the butter, making them easier to cut. Let them come to room temperature before serving for the best texture. They don’t freeze well because the peach filling can get watery when thawed. Make them fresh.
Variations & Substitutions
Once you’ve nailed the basic version, here’s how you can mix it up. I’ve tried all of these, and they’re all winners.
Blueberry Crumble Bars
Swap the peaches for fresh or frozen blueberries. Use the same amount of sugar and cornstarch. Add 1 teaspoon of lemon zest to the blueberry mixture for brightness. This is a huge hit in spring and summer.
Strawberry Rhubarb
Combine 2 cups sliced strawberries with 1 cup chopped rhubarb. Increase the sugar to ¾ cup because rhubarb is tart. Add 1 teaspoon of ginger to the crumble topping for a spicy kick. This is a classic fall flavor that works in late spring.
Apple Cinnamon
Use 4 large, peeled and sliced apples (Granny Smith or Honeycrisp). Toss with ½ cup sugar, 1 tablespoon cornstarch, and 1 teaspoon cinnamon. Bake for 50-55 minutes as apples take longer to soften. Add a pinch of nutmeg to the crumble.
Gluten-Free Version
Use a 1:1 gluten-free flour blend in the crumble. The texture will be slightly more tender and less chewy, but it still works. Make sure your cornstarch is certified gluten-free if you’re cross-contaminated.
Dairy-Free Option
Replace the butter with a high-quality vegan butter stick (like Miyoko’s or Earth Balance). Keep it cold and work it in the same way. The crumble will be slightly less rich but still delicious. Use maple syrup instead of brown sugar if you want to avoid refined sugar.
Extra Crunch
Add ½ cup of chopped pecans or walnuts to the crumble topping. Toast them first for extra flavor. This adds a nice nutty contrast to the sweet fruit.
Serving & Storage
How to Serve:
I usually serve these straight from the pan, cut into squares. They look rustic and inviting. But here are other ways I’ve enjoyed them:
- With Ice Cream — A scoop of vanilla bean ice cream or whipped cream is classic. The cold cream contrasts beautifully with the warm, sticky bars.
- With Coffee or Tea — These are perfect with a morning cup of coffee or an afternoon tea. They’re not too sweet, so they pair well with bitter drinks.
- With Yogurt — For a lighter breakfast, top a square with Greek yogurt and a drizzle of honey. It’s like a deconstructed cobbler.
Storage Instructions:
Store in an airtight container at room temperature for up to 2 days. If your kitchen is hot or humid, store them in the fridge. In the fridge, they keep for up to 4 days. Let them come to room temperature before serving for the best texture. They do not freeze well due to the high moisture content of the peaches.
Nutrition Information
I’m not a nutritionist, but here’s the breakdown if you’re tracking. Keep in mind that these are indulgent bars, so portions matter.
Per Serving (based on 12 bars):
- Calories: 280
- Protein: 3g
- Carbs: 42g
- Fiber: 2g
- Sugar: 28g
- Fat: 12g
- Saturated Fat: 7g
What’s Good:
– Real fruit in every bite
– Simple ingredients you can pronounce
– No artificial preservatives
What to Know:
– High in sugar from the brown sugar and peaches
– Contains gluten and dairy
– Moderate in calories due to butter and sugar
My Take:
Look, this is a dessert. It’s sweet, buttery, and delicious. It’s not a health food. But it’s way better than store-bought pastries, costs less, and I know exactly what’s in it. When I want to make it lighter, I reduce the sugar in the crumble by ¼ cup and use less butter. But usually? I just enjoy a square and call it a day.
Final Thoughts
So that’s my go-to Brown Sugar Peach Crumble Bars! I’ve probably talked your ear off at this point, but when you make a recipe this often, you have a lot to say about it. These bars have saved my summer gatherings more times than I can count. They’re my answer to “what’s for dessert” when I’m tired, don’t want takeout, and still want something that tastes really good. My guests are happy, my family is happy, and I’m happy because I’m not stressed about cooking.
Make it yours! Try different fruits, swap in your favorite nuts, adjust the sugar to your taste. The best recipes are the ones you adapt to your family’s tastes. If you make this, drop a comment and let me know what you think! I love hearing how recipes turn out in your kitchen. And if something doesn’t work, tell me that too—I’m here to help troubleshoot.
Happy baking! And I hope your kitchen smells half as good as mine does right now.
Frequently Asked Questions
Can I use frozen peaches instead of fresh?
Yes, you can! Use about 3 cups of frozen peaches (no need to thaw). They will release more water, so increase the cornstarch to 3 tablespoons. Also, bake for an extra 5-10 minutes to ensure the juices thicken. The flavor is slightly less bright, but the texture is still great.
Why did my crumble topping turn into a cake?
This usually happens if the butter was too soft or if you pressed the topping down too hard. Make sure your butter is cold and cubed, and only press down the bottom layer. The top layer should stay loose and crumbly. Also, don’t overmix the flour and butter; you want distinct crumbs.
Can I make these ahead of time?
Absolutely. You can assemble the bars up to 24 hours ahead. Cover them tightly and refrigerate. When you’re ready to bake, let them sit at room temperature for 20 minutes, then bake as directed. You might need to add 5 minutes to the baking time since the dish will be cold.
How do I store leftover bars?
Store them in an airtight container at room temperature for up to 2 days. If your kitchen is hot, store them in the fridge for up to 4 days. Let them come to room temperature before serving for the best texture. They don’t freeze well because the peach filling can get watery when thawed.
Can I use canned peaches?
You can, but they’re very watery. Drain them thoroughly and pat them dry with paper towels. You’ll need to increase the cornstarch to 3 tablespoons to thicken the excess liquid. The flavor will be sweeter and less complex than fresh peaches, but it still works in a pinch.
What kind of peaches are best?
Yellow peaches are my favorite because they have a tartness that balances the sweet crumble. White peaches are sweeter and milder. Look for peaches that are fragrant and give slightly to pressure. Avoid rock-hard or mushy peaches.
Can I add nuts to the crumble?
Yes! Chopped pecans or walnuts add a great crunch and nutty flavor. Toast them first for extra flavor. Add them to the crumble mixture along with the flour and butter. Just be aware that this changes the texture slightly, making it heartier.
Pin This Recipe!
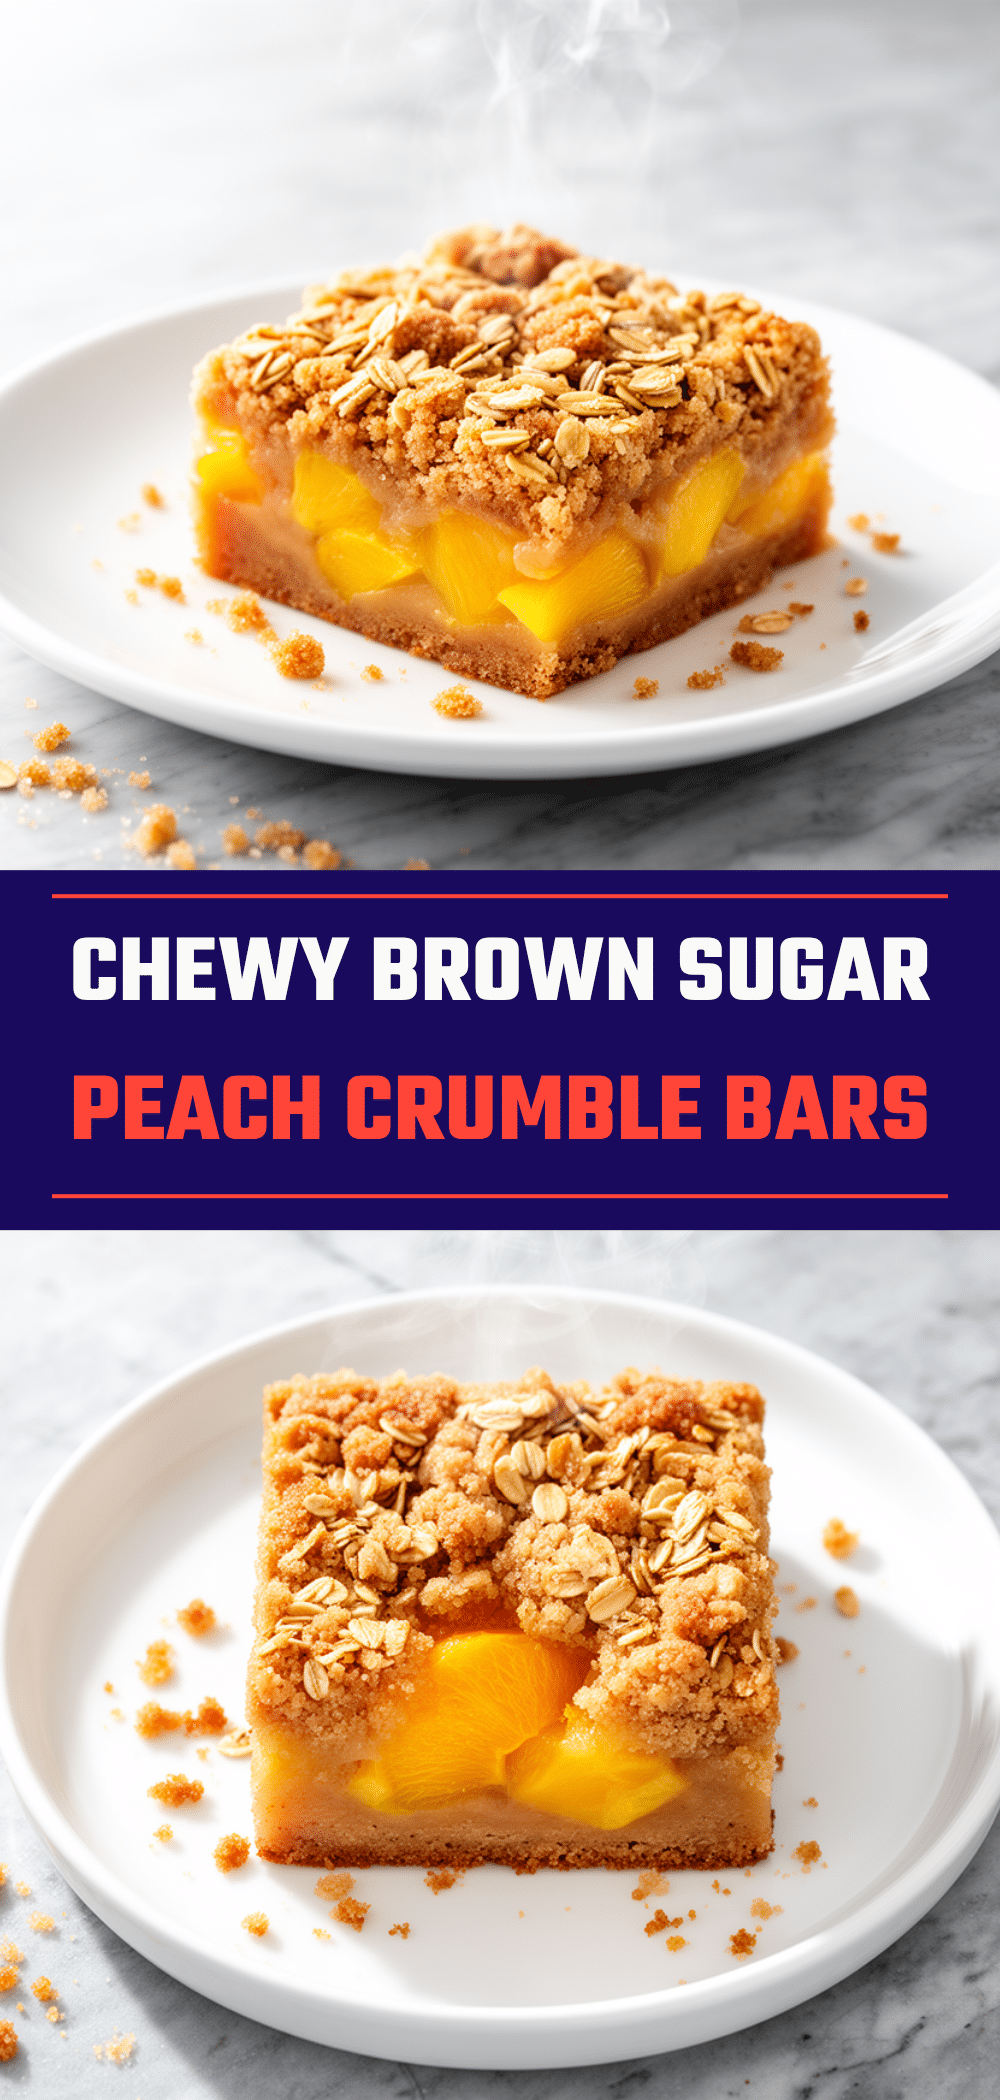
Brown Sugar Peach Crumble Bars: Easy 5-Ingredient Summer Dessert
- Total Time: 1 hour 15 minutes
- Yield: 12 servings 1x
Description
Sticky, tangy, and incredibly easy to make, these Brown Sugar Peach Crumble Bars feature a tender base, juicy peach filling, and a caramelized brown sugar crumble topping. They are perfect for summer gatherings and taste even better the next day.
Ingredients
- 2 cups (250g) all-purpose flour
- 1 cup (226g) unsalted butter, cold and cubed
- 1 cup (200g) light brown sugar
- 1/2 teaspoon salt
- 3–4 large peaches (about 1.5 lbs / 680g), peeled and sliced
- 1/2 cup (100g) granulated sugar
- 2 tablespoons cornstarch
- 1 tablespoon lemon juice
- 1/2 teaspoon cinnamon
- 1 teaspoon vanilla extract (optional)
- 1/2 cup rolled oats (optional, for topping)
Instructions
- Preheat oven to 350°F (175°C). Grease a 9×13 inch baking dish with butter or non-stick spray.
- In a large mixing bowl, combine flour, brown sugar, and salt. Add cold cubed butter and rub it into the flour mixture with your fingers until it resembles coarse sand with pea-sized lumps.
- Remove 1/2 cup of the crumble mixture and set aside for the topping. Press the remaining mixture firmly into the bottom of the prepared baking dish to form the base.
- In a medium bowl, toss sliced peaches with granulated sugar, cornstarch, lemon juice, cinnamon, and vanilla (if using) until evenly coated.
- Pour the peach mixture over the pressed base and spread evenly. Sprinkle the reserved 1/2 cup crumble mixture loosely over the top.
- Bake for 45-50 minutes, or until the topping is golden brown and the peaches are bubbling vigorously. Tent with foil if browning too quickly.
- Cool completely on a wire rack for at least 1 hour (preferably 2) before cutting into squares to allow the filling to set.
Notes
Keep butter cold for a crunchy crumble. Do not skip cornstarch as peaches release significant liquid. Bars must cool completely before cutting to prevent falling apart. Store in an airtight container at room temperature for 2 days or in the fridge for 4 days. They do not freeze well.
- Prep Time: 15 minutes
- Cook Time: 45-50 minutes
- Category: Dessert
- Cuisine: American
Nutrition
- Serving Size: 1 bar
- Calories: 280
- Sugar: 28
- Fat: 12
- Saturated Fat: 7
- Carbohydrates: 42
- Fiber: 2
- Protein: 3
Keywords: peach crumble bars, summer dessert, easy dessert, brown sugar crumble, fresh peaches, 5 ingredient dessert, potluck dessert


