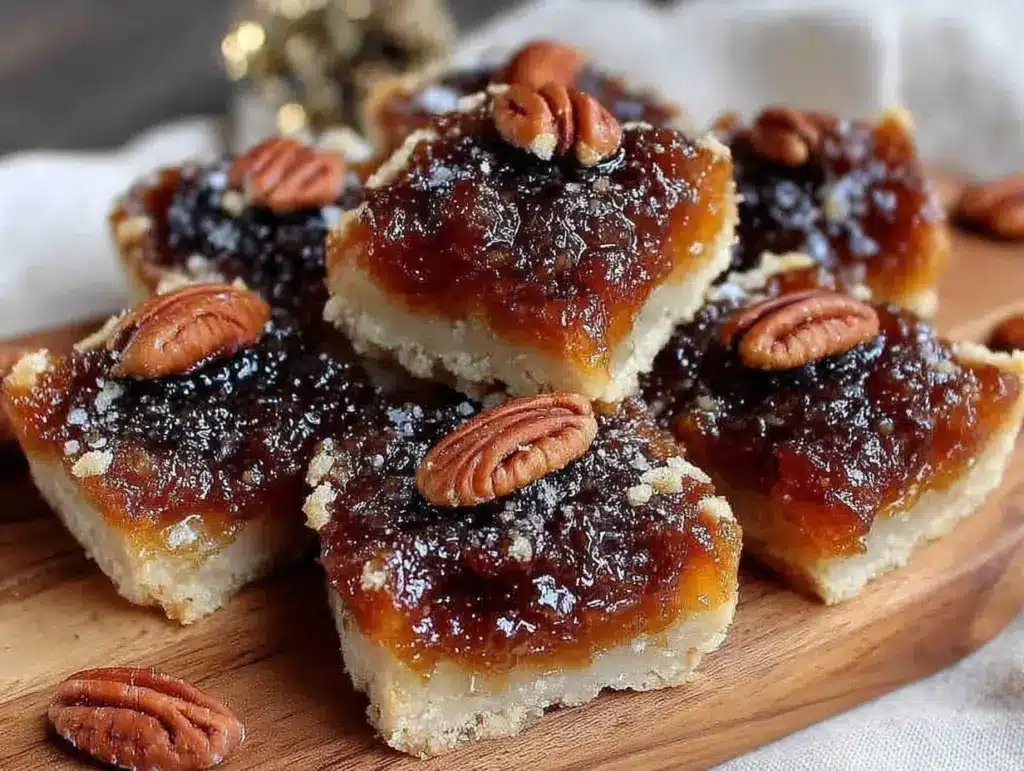
There is a specific kind of guilt that comes with making traditional Canadian butter tarts for a small household. You know the feeling. You’ve spent an hour rolling out dough, mixing up that gloriously sweet, gooey filling, and baking them until your kitchen smells like caramelized sugar. Then you sit down to eat one, and realize you’ve made twelve. Twelve. For two people. And now you’re stuck with a Tupperware container of rock-hard, sticky-sweet pastry sitting in your fridge for the next five days, slowly hardening into something resembling a brick.
I’ve been there. I’ve eaten cold butter tart for breakfast three days in a row just to “use them up.” It’s not fun. It’s not festive. And it definitely isn’t the cozy, comforting dessert I was hoping for during Canadian Thanksgiving.
That’s why I spent the last six months tweaking my approach. I wanted the authentic, molasses-heavy, pecan-studded flavor of a classic butter tart, but in a format that makes sense for just me and my partner. Enter the Canadian Thanksgiving Butter Tart Squares. By baking the filling in a small, right-sized pan—specifically a 6-inch square pan or a small 8×8 pan cut in half—you get exactly six perfect, gooey squares. That’s it. That’s the whole batch. No waste. No freezer burn. Just pure, sweet, buttery comfort when you actually want it.
This recipe is my new go-to for small-batch baking. It’s easier than individual tarts because you don’t have to worry about fitting six tiny ramekins into your oven or dealing with soggy bottoms in miniature crusts. It’s one pan, one mix, and immediate satisfaction. If you’re tired of making desserts for an army when you’re just cooking for two, this is the solution you’ve been waiting for.
Why You’ll Love This Small-Batch Butter Tart Recipe
There are about ten reasons I keep making these butter tart squares, but here are the big ones that changed my mind about small-batch baking.
Stupid Simple Assembly — Seriously, if you can melt butter and whisk eggs, you can make this. I’ve made this while watching TV, with one hand holding a spoon. No fancy pastry wheel, no intricate crimping. Just press the dough in, pour the filling, and bake.
Perfectly Portioned — This is the main event. Six squares. That’s two meals for two people, or four slices for a weekend treat. It stops the “what do I do with the rest?” panic in its tracks. I never have to wonder if I should freeze half the batch (I always do, and I always forget until it’s rock hard).
Lightning Fast Cleanup — Because it’s one pan, cleanup is a dream. Just a quick wash of the square pan and a bowl. Compared to washing six individual tart shells or a large 9×13 pan full of unused batter, this is a win.
Guaranteed Gooey Center — Small batches bake more evenly. In a large pan, the edges get dry while the center stays raw. In a small 6-inch or cut-down 8×8 pan, the heat penetrates perfectly. You get that perfect set—firm enough to hold its shape, but soft enough to melt in your mouth.
Freezer-Friendly (But Smart) — Since you only make six, you can freeze three and eat three. Or freeze the whole batch for a later date. Because the portion is small, it freezes and thaws faster and more evenly than a giant tray of tarts. I keep these in my freezer for when I need a quick dessert fix without the commitment.
This is my go-to when I want something sweet but don’t want the stress of a big holiday bake. No complicated techniques, no weird ingredients, just reliable, delicious food that feels special without the waste.
Ingredients You’ll Need
Here’s the best part: you probably have most of this already. The beauty of butter tarts is that they rely on pantry staples, not exotic ingredients. I’m particular about two things here: the brown sugar and the butter, and I’ll tell you exactly why.
For the Shortcrust Pastry:
**All-purpose flour** (1 cup / 125g) — I use regular all-purpose. Cake flour makes it too tender and it falls apart; bread flour makes it too tough. All-purpose is the sweet spot. If you’re looking for a different texture, you might enjoy the flaky layers in my super soft cinnamon rolls for comparison, but here we want a sturdy, crisp base.
**Unsalted butter** (½ cup / 115g, cold and cubed) — This is non-negotiable. Cold butter creates those flaky layers. If your butter is soft, your crust will be greasy and dense. I keep my butter in the fridge until the minute I use it.
**Granulated sugar** (2 tablespoons / 25g) — Just a touch to balance the salt and help browning.
**Salt** (¼ teaspoon) — Essential to cut through the sweetness of the filling.
**Ice water** (2-3 tablespoons / 30-45ml) — Use ice-cold water. This keeps the butter cold. If the water is warm, the butter melts into the flour, and you lose the flakiness.
For the Filling:
**Brown sugar** (1 cup / 200g, packed) — I use dark brown sugar for deeper molasses flavor, which is classic for Canadian butter tarts. Light brown works too, but it’s less complex. This is the main flavor driver.
**Unsalted butter** (¼ cup / 55g, melted) — Yes, melted. This blends with the sugar to create that signature gooey texture. Don’t use margarine; it won’t set right.
**Eggs** (2 large) — Room temperature is best, but cold eggs straight from the fridge work fine if you whisk them well. They provide structure so the filling doesn’t run off the crust.
**Maple syrup** (2 tablespoons / 30ml) — This is the secret Canadian touch. Real maple syrup (Grade A or B) adds that distinct earthy sweetness that distinguishes a butter tart from a generic caramel square.
**Vanilla extract** (1 teaspoon) — Pure vanilla only. I’ve tried imitation, and it tastes chemical in this delicate filling.
**Salt** (¼ teaspoon) — Again, salt is your friend. It makes the sweet taste sweeter.
**Optional Add-ins:
**Chopped pecans** (½ cup / 60g) — Classic choice. Toast them first for extra flavor. I love the crunch against the soft filling.
**Chopped walnuts** (½ cup / 60g) — A bit more bitter, which balances the sugar well.
Personal Tips:
– **Pan Size**: I strongly recommend a 6-inch square baking pan. If you don’t have one, use a standard 8×8 inch pan but cut the recipe in half (use ½ cup flour, ¼ cup brown sugar, etc.) OR just make this full recipe in an 8×8 pan and eat the whole thing in two sittings (which, let’s be honest, might happen).
– **Pecan Prep**: If you’re using nuts, toast them in a dry skillet for 3 minutes before adding. It releases the oils and makes them taste like they came from a fancy bakery.
Equipment Needed
You don’t need fancy equipment for this. Here’s what I actually use.
**6-inch Square Baking Pan** — This is ideal. It gives you six perfect squares. If you don’t have one, a small 8×8 pan works, but you’ll get more squares (and more temptation).
**Medium Saucepan** — For melting the butter for the filling. Or just use a microwave-safe bowl. I use a small saucepan because I like to watch the butter melt slowly.
**Whisk** — For the filling. You need to emulsify the melted butter and eggs thoroughly. A fork works, but a whisk is faster and ensures no lumps.
**Fork or Pastry Blender** — For mixing the crust. I use a fork because it’s less messy than a blender, and I don’t mind a rustic texture.
**Parchment Paper** — Lining your pan makes cleanup instant. Just lift the squares out when they’re cool.
**Cooling Rack** — Let the squares cool completely. If you cut them warm, they’ll fall apart. Patience pays off.
How to Make It: Step-by-Step
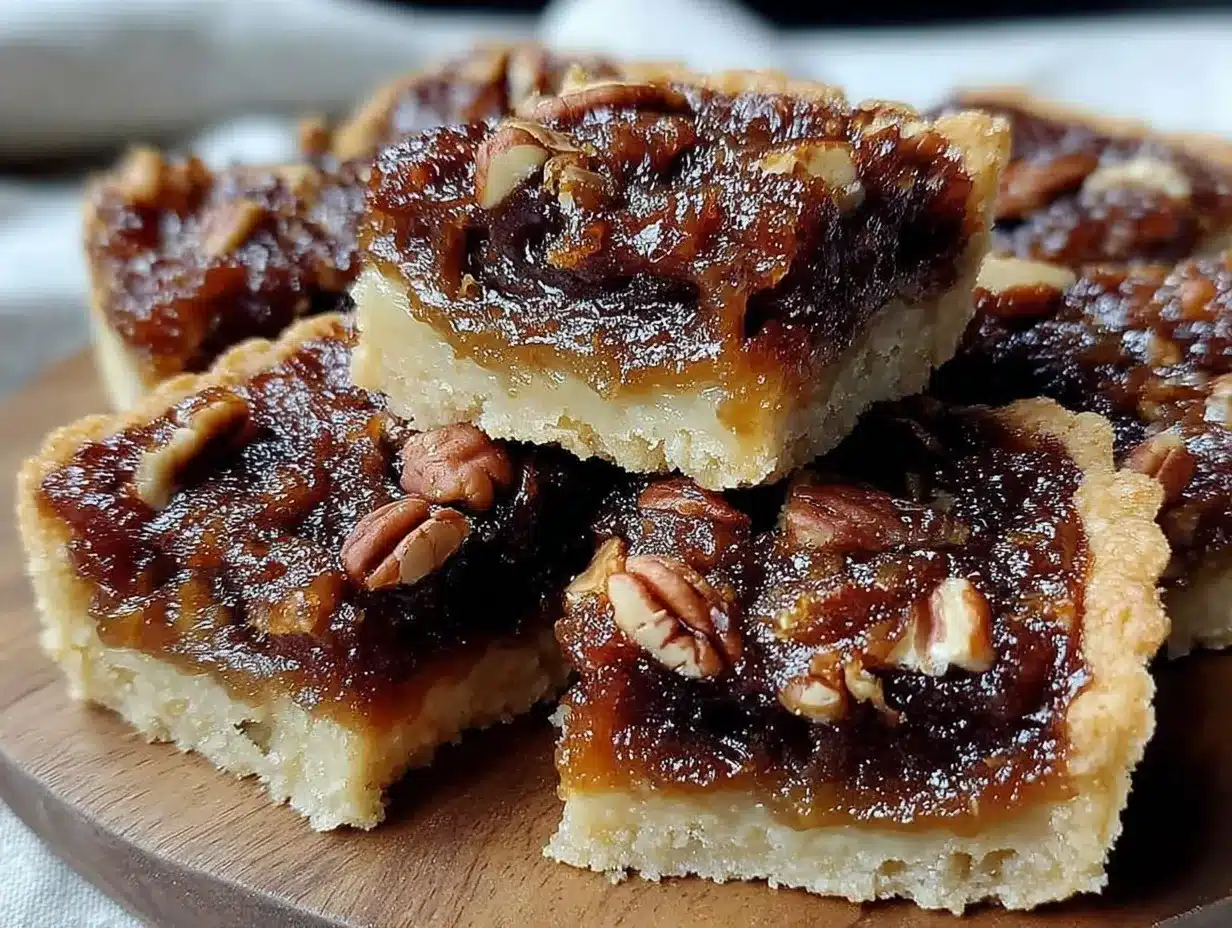
Alright, let’s make this! I’m walking you through exactly how I do it, including the little tricks I’ve picked up.
Step 1: Prep Your Pan and Oven (5 minutes)
Preheat your oven to 350°F (175°C). Line your 6-inch square pan with parchment paper, leaving an overhang on the sides. This is crucial for lifting the squares out later. Grease the parchment lightly with butter or cooking spray.
Step 2: Make the Crust (5 minutes)
In a medium bowl, whisk together the flour, granulated sugar, and salt. Add the cold, cubed butter. Using a fork, cut the butter into the flour until the mixture looks like coarse crumbs with some pea-sized pieces of butter remaining. Don’t overmix! Those little butter chunks create flakiness. Drizzle in the ice water, one tablespoon at a time, mixing gently with the fork until the dough just starts to come together. It should hold together when pinched but not be sticky.
Step 3: Press the Crust (5 minutes)
Transfer the dough to your prepared pan. Press it firmly and evenly into the bottom and up the sides. Use your fingers or the bottom of a measuring cup. Don’t worry about it being perfect; rustic edges add character. If the dough cracks, just press it back together. Prick the bottom all over with a fork to prevent bubbling.
Step 4: Make the Filling (5 minutes)
In a medium bowl, whisk the two eggs until smooth. Add the melted butter, maple syrup, vanilla extract, and salt. Whisk vigorously until the mixture is glossy and well combined. Stir in the brown sugar until no dry pockets remain. If you’re adding nuts, fold them in now.
Step 5: Assemble and Bake (25-30 minutes)
Pour the filling over the crust. It will be quite liquidy—that’s normal. Bake for 25-30 minutes. The edges should be golden brown, and the center should be set but still have a slight jiggle. It will firm up as it cools. If you see the filling bubbling over the sides, that’s good! It means it’s getting caramelized.
Step 6: Cool Completely (1 hour)
This is the hardest part. Let the squares cool in the pan on a wire rack for at least one hour. If you cut them warm, the filling will ooze out. Patience is key. Once cool, lift them out using the parchment overhang and slice into six squares.
Total Time: About 45 minutes (15 active, 30 baking, plus cooling)
Expert Tips & Tricks
Here’s everything I’ve learned from making this dozens of times. These tips will save you from my mistakes.
Don’t Overbake the Center
The center should look slightly soft when you take it out. It continues to cook from residual heat. If you bake it until the center is completely firm, it will become hard and crunchy after cooling, like a candy bar. We want gooey, not brittle.
Room Temperature Eggs Help
While cold butter is good for the crust, room temperature eggs help the filling emulsify better. If you forget to take them out, just place the eggs in a bowl of warm water for 5 minutes. It prevents the filling from looking curdled.
Toast Your Nuts
If you’re using pecans or walnuts, toast them in a dry skillet over medium heat for 3-4 minutes. Shake the pan frequently. This brings out the oils and adds a smoky depth that contrasts beautifully with the sweet filling.
Use Real Maple Syrup
Don’t skip the maple syrup or use pancake syrup. Real maple syrup has a complex flavor that enhances the butter and brown sugar. It’s a small amount, so it doesn’t add many calories, but it makes a huge difference in taste.
Common Mistakes (and how to avoid them):
**Mistake: Soggy Bottom**
Fix: Make sure your crust is pressed firmly and evenly. Also, don’t skip the par-baking step if your filling is very wet. For this small batch, par-baking isn’t usually necessary, but if your kitchen is humid, bake the crust for 10 minutes before adding the filling.
**Mistake: Filling Runs Over**
Fix: This happens if the pan is too small or the filling is too liquid. Use a 6-inch pan for this specific recipe. If you use an 8×8, you might need to reduce the filling slightly or watch it closely.
**Mistake: Crust is Too Tough**
Fix: You likely overworked the dough. Handle it as little as possible. Mix until just combined.
Variations & Substitutions
Once you’ve nailed the basic version, here’s how you can mix it up. I’ve tried all of these.
Chocolate Chip Butter Tart Squares
Add ½ cup of semi-sweet chocolate chips to the filling. The chocolate melts into pockets of goo. This is my personal favorite variation.
Maple Walnut Squares
Skip the pecans and use walnuts. Double the maple syrup to 3 tablespoons. This is very Canadian.
Gluten-Free Version
Use a 1:1 gluten-free flour blend. The texture will be slightly more tender and less flaky, but still delicious. I’ve used Bob’s Red Mill 1-to-1 and it works great. Check out my gluten-free almond flour raspberry thumbprint cookies if you’re looking for other GF dessert ideas.
Dairy-Free Version
Replace the butter with high-quality vegan butter (like Miyoko’s or Earth Balance) and use coconut sugar instead of brown sugar. The texture will be slightly different but still tasty. For a richer dairy-free option, you might enjoy my dairy-free coconut mango panna cotta for a lighter alternative.
Lower Sugar Version
Reduce the brown sugar to ¾ cup and add 1 tablespoon of erythritol or monk fruit sweetener. The texture won’t be as gooey, but it’s still sweet and satisfying. I use this when I’m watching my intake.
Serving & Storage
How to Serve:
I usually serve these at room temperature. They’re best eaten with a cup of tea or black coffee. But here are other ways I’ve enjoyed them:
Side Dishes:
– A dollop of whipped cream (classic)
– A scoop of vanilla ice cream (warm tart, cold ice cream = heaven)
– A slice of sharp cheddar cheese (the saltiness cuts the sweetness)
Toppings Bar:
When I have guests, I put out: flaky sea salt, extra pecans, and a drizzle of warm maple syrup. Everyone customizes their square.
Storage Instructions:
Refrigerator:
Store in an airtight container for up to 5 days. The filling will firm up in the fridge. Let it sit at room temperature for 15 minutes before eating to soften it up.
Freezer:
These freeze beautifully! Wrap each square individually in plastic wrap, then place them in a freezer bag. They’ll last for 3 months. Thaw at room temperature for an hour. No need to reheat, though warming them in the microwave for 10 seconds makes them extra gooey.
Reheating:
Microwave for 10-15 seconds to warm through. Or bake at 350°F for 5 minutes. Don’t overheat or the butter will separate.
Nutrition Information
I’m not a nutritionist, but here’s the breakdown if you’re tracking. This is a rich dessert, so portion control is key.
Per Square (based on 6 servings):
| Nutrient | Amount |
|---|---|
| Calories | 280 |
| Protein | 3g |
| Carbs | 38g |
| Fiber | 1g |
| Sugar | 28g |
| Fat | 14g |
| Saturated Fat | 8g |
| Sodium | 120mg |
What’s Good:
– Decent amount of butter for satiety
– Can add nuts for healthy fats and protein
– Smaller portion size helps manage intake
What to Know:
– High in sugar from brown sugar and maple syrup
– Contains gluten and dairy
– Moderate calories, but very dense
My Take:
Look, this is butter tart. It’s sugar and butter. It’s not a health food. But it’s way better than store-bought, costs less, and I know exactly what’s in it. When I want to make it lighter, I reduce the sugar and add more nuts. But usually? I just eat one square and enjoy it. It’s a treat, not a meal.
Final Thoughts
So that’s my go-to Canadian Thanksgiving butter tart squares! I’ve probably talked your ear off at this point, but when you make a recipe this often, you have a lot to say about it.
This has saved my dessert game more times than I can count. It’s my answer to “what’s for dessert” when I’m tired, don’t want takeout, and still want something that tastes really good. My partner is happy, I’m happy because I’m not stressed about cooking, and we’re happy because we’re not stuck with a week of leftovers.
Make it yours! Try different nuts, add chocolate chips, or skip the nuts entirely. The best recipes are the ones you adapt to your tastes. And if you’re feeling adventurous, try these alongside my ultra-fudgy one-bowl brownies for a serious chocolate fix, or my creamy banana pudding for something lighter.
If you make this, drop a comment and let me know what you think! I love hearing how recipes turn out in your kitchen. And if something doesn’t work, tell me that too—I’m here to help troubleshoot.
Happy baking! And I hope your kitchen smells half as good as mine does right now.
Frequently Asked Questions
Can I use a round pan instead of a square pan?
You can, but the baking time will change. A 6-inch round pan will hold the same amount of batter, but the shape is different. Bake for 20-25 minutes and check for doneness. The edges will brown faster in a round pan, so watch them closely.
My filling came out runny—what happened?
Usually, this means it wasn’t baked long enough. The filling needs to set. Let it bake for the full 30 minutes. If it’s still runny after cooling, the next time, increase the bake time by 5 minutes. Also, make sure you’re using the correct amount of brown sugar; too much liquid (maple syrup) relative to sugar can prevent setting.
Can I make these ahead for a dinner party?
Absolutely! Make them 2 days ahead. Store them in the fridge. Bring them to room temperature before serving. They actually taste better the next day as the flavors meld. I do this all the time for small gatherings.
Why did my crust crack?
Cracking is normal for shortcrust pastry. It shrinks slightly as it bakes. Just press it back together before adding the filling. If it’s too dry, add a teaspoon more ice water. If it’s too sticky, add a tablespoon more flour.
Can I use light brown sugar instead of dark?
Yes, but the flavor will be milder. Dark brown sugar has more molasses, which gives that classic butter tart depth. If you only have light brown, it will still taste good, just less complex.
How do I reheat leftovers without them getting dry?
Microwave for 10-15 seconds. This warms the butter and softens the filling. Don’t overheat or the butter will separate. If you’re serving them warm, pair with a scoop of ice cream to balance the temperature.
Can I double this recipe?
If you double it, you’ll need a larger pan (like a 9×9 or 9×13). The baking time will increase to 35-40 minutes. Keep an eye on the edges. I usually just make one batch because it’s perfect for two people, but doubling is fine if you’re feeding a crowd.
Pin This Recipe!
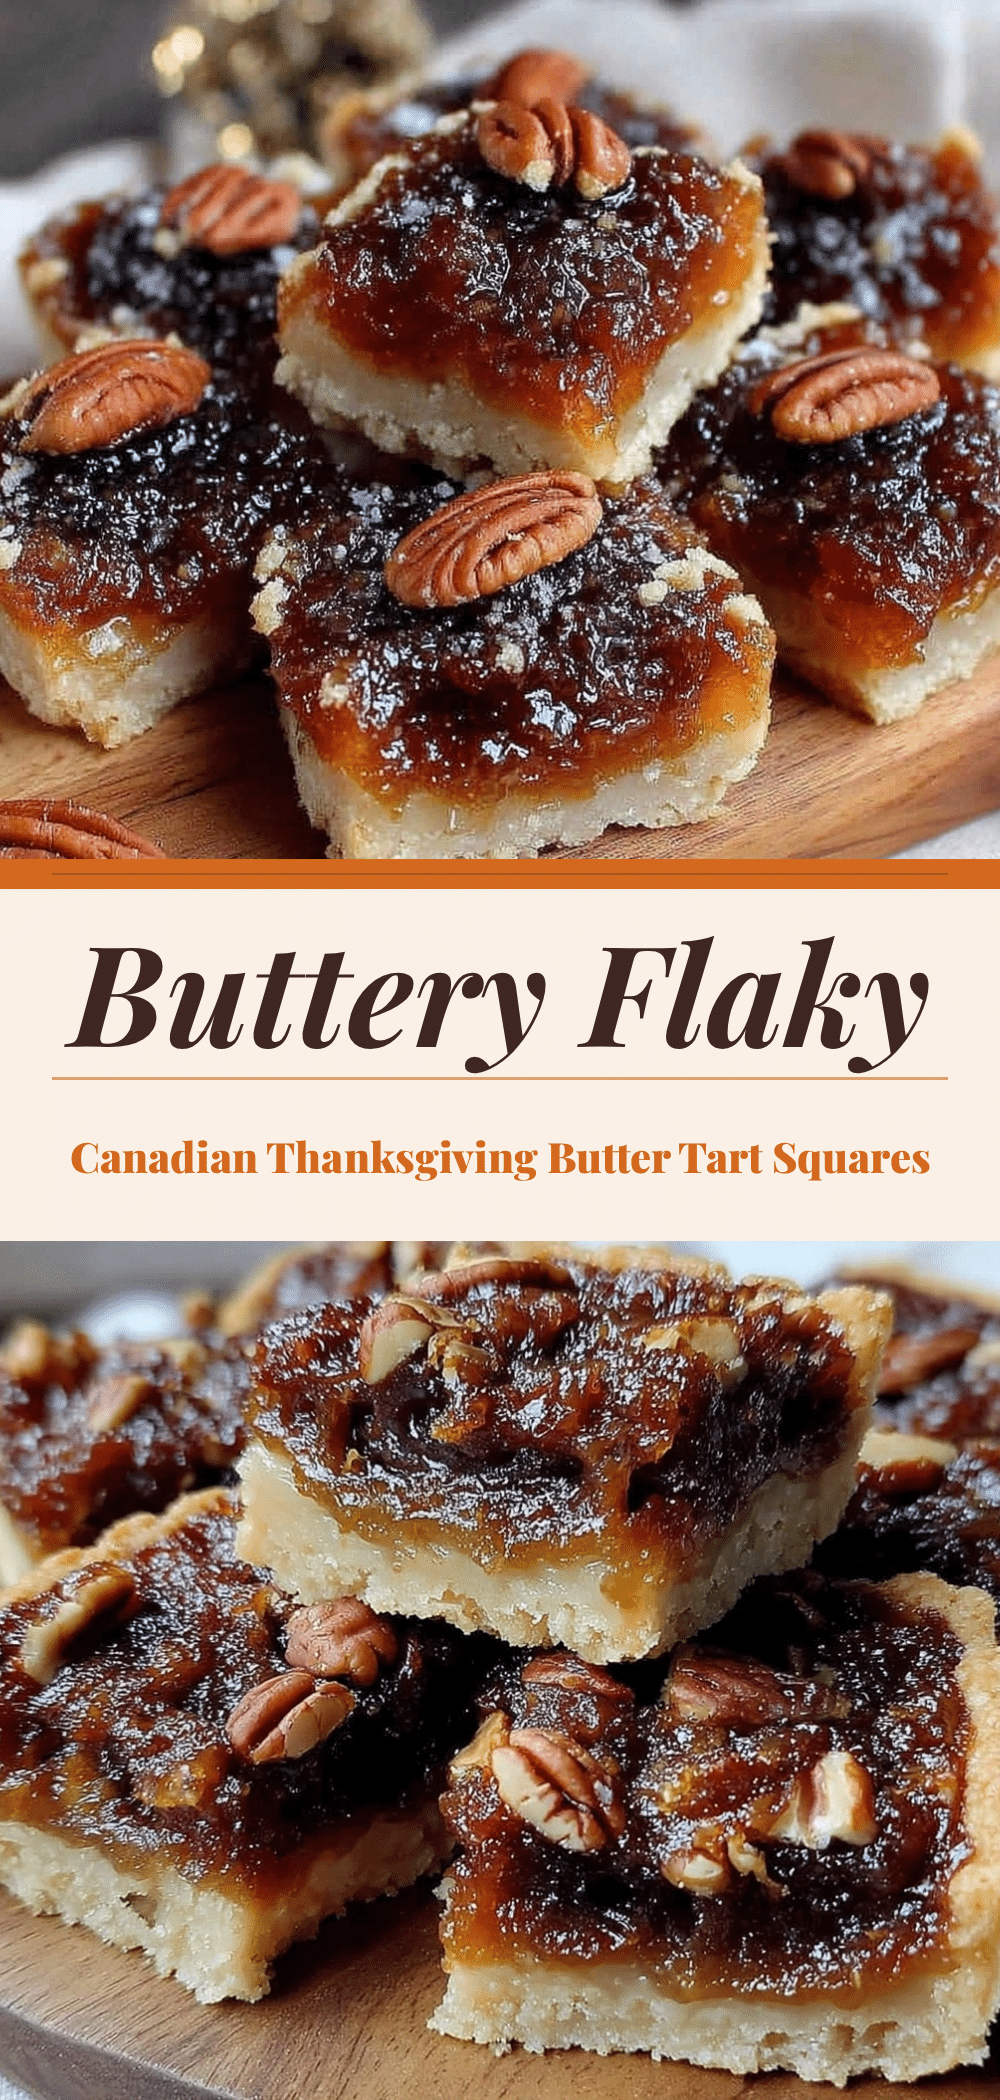
Canadian Thanksgiving Butter Tart Squares: Small Batch, No Waste
- Total Time: 45 minutes
- Yield: 6 servings 1x
Description
A small-batch recipe for classic Canadian butter tart squares that yields exactly six perfect, gooey servings, eliminating waste and making it ideal for couples or small households.
Ingredients
- 1 cup (125g) all-purpose flour
- ½ cup (115g) unsalted butter, cold and cubed
- 2 tablespoons (25g) granulated sugar
- ¼ teaspoon salt
- 2–3 tablespoons (30-45ml) ice water
- 1 cup (200g) dark brown sugar, packed
- ¼ cup (55g) unsalted butter, melted
- 2 large eggs
- 2 tablespoons (30ml) real maple syrup
- 1 teaspoon vanilla extract
- ¼ teaspoon salt
- Optional: ½ cup (60g) chopped pecans or walnuts
Instructions
- Preheat oven to 350°F (175°C). Line a 6-inch square baking pan with parchment paper, leaving an overhang on the sides, and grease lightly.
- In a medium bowl, whisk together flour, granulated sugar, and salt. Add cold cubed butter and cut in with a fork until the mixture resembles coarse crumbs with pea-sized butter pieces.
- Drizzle in ice water one tablespoon at a time, mixing gently until the dough just comes together. Do not overmix.
- Press the dough firmly and evenly into the bottom and up the sides of the prepared pan. Prick the bottom all over with a fork.
- In a separate bowl, whisk eggs until smooth. Add melted butter, maple syrup, vanilla extract, and salt, whisking vigorously until glossy.
- Stir in the brown sugar until no dry pockets remain. Fold in toasted nuts if using.
- Pour the filling over the crust. Bake for 25-30 minutes until edges are golden brown and the center is set but still has a slight jiggle.
- Cool completely in the pan on a wire rack for at least one hour before lifting out and slicing into six squares.
Notes
Ensure butter is cold for the crust to maintain flakiness. Room temperature eggs help the filling emulsify better. Toast nuts in a dry skillet for 3 minutes before adding for enhanced flavor. Do not overbake the center; it should still jiggle slightly as it firms up while cooling. For a gluten-free version, use a 1:1 gluten-free flour blend. For dairy-free, use vegan butter and coconut sugar.
- Prep Time: 15 minutes
- Cook Time: 30 minutes
- Category: Dessert
- Cuisine: Canadian
Nutrition
- Serving Size: 1 square
- Calories: 280
- Sugar: 28
- Sodium: 120
- Fat: 14
- Saturated Fat: 8
- Carbohydrates: 38
- Fiber: 1
- Protein: 3
Keywords: Canadian Thanksgiving, butter tart squares, small batch baking, no waste dessert, pecan butter tarts, maple syrup dessert, easy dessert for two


