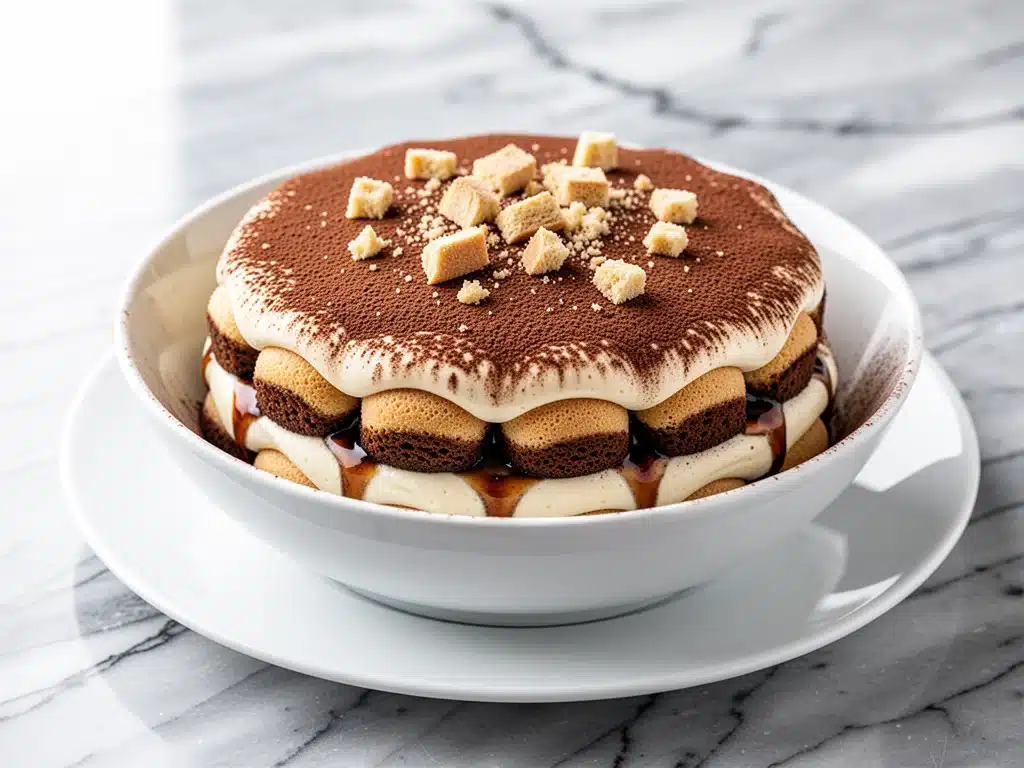
I used to think tiramisu was one of those desserts that looked easy but was actually a trap. You know the kind. The one where the ladyfingers turn into soggy cardboard, the mascarpone gets grainy, and you end up with a dessert that tastes like sweetened coffee grounds. I spent my early twenties making “authentic” tiramisu the hard way—raw eggs, folding in egg whites until my arms ached, and worrying about food safety every time I took a bite.
Then, about three years ago, I made a batch for a dinner party that was supposed to be my “signature dessert.” I was nervous. I wanted something elegant, something that said, “I put thought into this,” without spending six hours in the kitchen. I messed up the coffee soak. I over-whipped the cream. It was… edible. But it wasn’t the creamy, dreamy masterpiece I’d imagined.
So I stopped trying to replicate the restaurant versions. I stopped worrying about tradition for a second and started thinking about what I actually loved about the flavor. I wanted that intense espresso kick. I wanted the tangy richness of mascarpone. I wanted the texture to be light, not heavy. And I wanted a recipe that didn’t require a thermometer or a degree in food science.
That experiment led to this ultra-creamy tiramisu recipe. It’s simpler than you think. It uses just five main ingredients (okay, maybe six if you count the cocoa powder for dusting, but we’re keeping it real here). It’s the kind of dessert that comes together while you’re watching a movie, and the result is so good that people ask for the recipe before they’ve even finished their second slice.
I’ve made this ultra-creamy tiramisu at least a dozen times since that first disaster. It’s become my go-to when I need to impress guests but don’t have time to stress. It’s better than the classic New York cheesecake for people who want something lighter but just as rich. And unlike my old attempts, this version never fails. The ladyfingers stay tender but firm, the cream is silky smooth, and the coffee flavor hits you in the best way possible.
Why You’ll Love This Ultra-Creamy Tiramisu
There are a million tiramisu recipes out there, but this one sticks around for a reason. It’s not just about convenience (though, let’s be honest, who doesn’t love a dessert that’s mostly hands-off?). It’s about the texture and the balance of flavors.
It’s Actually Creamy — Most recipes use whipped cream that deflates or mascarpone that’s too dense. This method strikes the perfect balance. The mascarpone is whipped just enough to be light, but stable enough to hold its shape. The result is a filling that melts in your mouth, not one that sits heavy in your stomach.
Five Ingredients (Seriously) — I’m not exaggerating. Mascarpone, heavy cream, sugar, espresso, and ladyfingers. That’s it. No raw eggs, no gelatin, no weird stabilizers. If you can open a can and whip cream, you can make this. It’s my answer to fall caramel apple crumble bars when I need a dessert that feels fancy but takes zero effort.
Make-Ahead Friendly — This is the ultimate party hack. You assemble it the night before, pop it in the fridge, and it gets better as it sits. The flavors meld, the coffee soaks in perfectly, and you walk into the party with a finished dessert. No last-minute panic. No stress.
Customizable Strength — Want strong coffee? Soak the ladyfingers longer. Want it milder? Dip them quickly. Want to add a little liqueur? Go for it. This recipe is a blank canvas for your coffee preferences.
It Impresses Without Trying — When you serve this, people assume you spent hours on it. They see the layers, the dusting of cocoa, the elegant presentation. They don’t know you put it together in 20 minutes. It’s my secret weapon for dinner parties, holiday gatherings, or just treating myself on a Tuesday.
This is the dessert I make when I want to feel like a pro chef without actually being a pro chef. It’s reliable, it’s delicious, and it’s always a crowd-pleaser.
Ingredients You’ll Need
Here’s the best part: you probably have most of these ingredients already, or you can grab them on your way home from the grocery store. This isn’t a recipe that requires a special trip to a specialty shop. Just five simple, high-quality ingredients.
Mascarpone Cheese (16 oz / 450g) — This is the star. Don’t buy the pre-whipped stuff. Buy the block of mascarpone in the dairy section. It should be cold when you start. If it’s too warm, it won’t whip properly. I like the brand La Tourangelle, but any good quality mascarpone works.
Heavy Cream (1 cup / 240ml) — You need full-fat heavy cream here. Half-and-half won’t hold the peaks. Cold cream whips better, so take it out of the fridge 15 minutes before you start. If you’re using a hand mixer, this is a good time to chill the beaters for a few minutes too.
Granulated Sugar (1/3 cup / 70g) — You don’t need a lot of sugar because the mascarpone and ladyfingers are already sweet. I prefer granulated because it dissolves easily into the cream. Powdered sugar can make it too sweet and grainy, so stick with granulated.
Espresso (1 cup / 240ml, cooled) — Strong, hot espresso is key. You can use a single-serve machine, a French press, or even instant espresso powder dissolved in hot water (use about 2 tablespoons of powder per cup of water). Let it cool completely before dipping the ladyfingers. Hot coffee will melt the cheese and make a mess.
Ladyfingers (1 package / about 24-30 pieces) — Look for the Italian-style ladyfingers, not the cake-like ones. They’re denser and hold up better to the coffee. Don’t buy the ones that are already dusted with sugar if you can help it—plain ones work best. If you can’t find Italian-style, regular ladyfingers will work, but they’ll get softer faster.
Cocoa Powder (For dusting) — Unsweetened cocoa powder. I use regular Hershey’s or Ghirardelli. It’s for garnish, so quality matters less here, but good cocoa tastes better. Sift it through a fine-mesh sieve for a pretty, cloud-like finish.
Optional Add-ins:
- Amaretto or Marsala Wine (2 tablespoons) — If you want that classic Italian kick, add this to the cooled espresso. It’s traditional, but not required.
- Vanilla Extract (1 teaspoon) — A little vanilla adds depth to the cream. I always add this because it balances the bitterness of the coffee.
Equipment Needed
You don’t need fancy tools for this. Here’s what I actually use.
Large Mixing Bowl — Glass or stainless steel works best. It needs to be big enough to hold the mascarpone, sugar, and cream without splattering. I use a 4-quart bowl.
Electric Hand Mixer or Stand Mixer — You need to whip the cream and mascarpone to soft peaks. A hand mixer is perfect for this. If you have a stand mixer with a paddle attachment, that works too. Don’t try to do this by hand unless you want to do arm day.
Shallow Dish — A pie plate or a large, shallow bowl for the espresso. You need enough surface area to dip the ladyfingers quickly. A deep bowl makes the dipping messy.
9×13 Inch Baking Dish — This is the standard size for tiramisu. It holds the layers nicely and is easy to cover with plastic wrap. You can use a smaller dish if you want individual portions, but the 9×13 is easiest for serving.
Pastry Brush or Spoon — Some people brush the coffee onto the ladyfingers, but I just dip them quickly. If you’re worried about soaking too much, a spoon gives you more control.
Fine-Mesh Sieve — For dusting the cocoa powder. It prevents clumps and makes the top look professional.
How to Make It: Step-by-Step
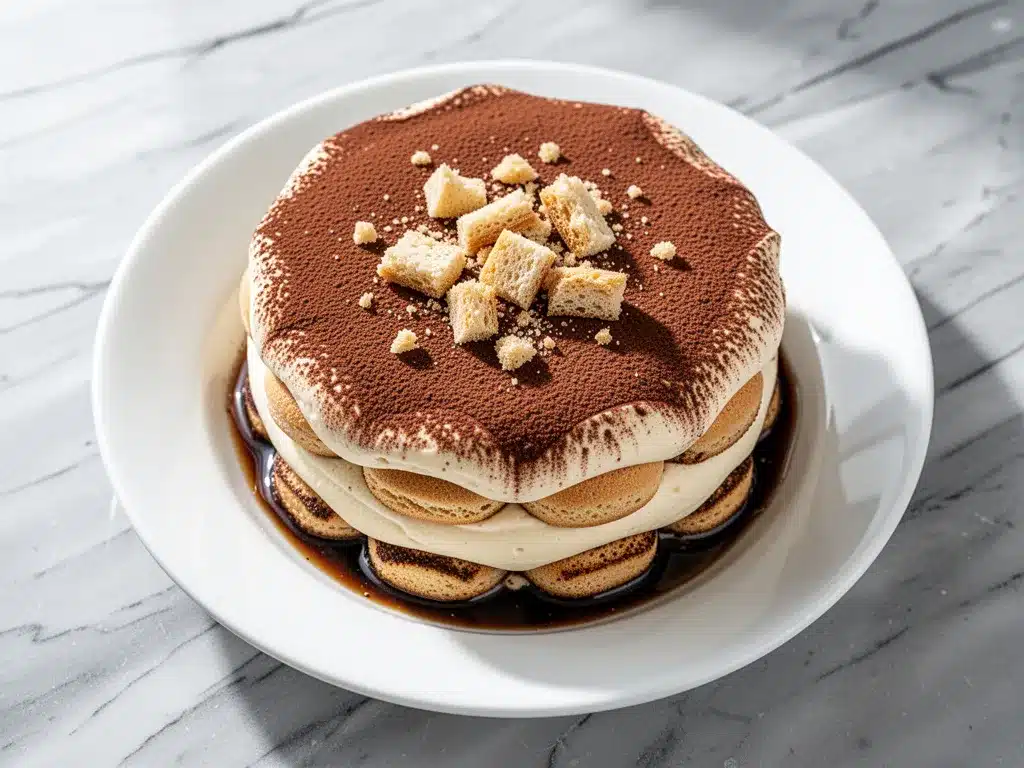
Alright, let’s make this! I’m walking you through exactly how I do it, including the little tricks I’ve picked up over the years.
Step 1: Brew and Cool the Espresso
Brew your espresso while you’re prepping the other ingredients. You need 1 cup of strong, hot coffee. Let it cool to room temperature. This is crucial. If the coffee is hot, it will melt the mascarpone when you dip the ladyfingers. I usually brew it an hour ahead so it has time to cool. If you’re in a rush, you can put it in the fridge for 15 minutes, but don’t skip the cooling step.
Step 2: Whip the Mascarpone
In your large mixing bowl, add the cold mascarpone and the sugar. Beat on medium speed until smooth and creamy, about 2-3 minutes. Scrape down the sides of the bowl with a spatula to make sure everything is incorporated. The mixture should be thick and smooth. Don’t overbeat it here, or it might start to separate.
Step 3: Whip the Heavy Cream
In a separate clean, cold bowl, pour the heavy cream. Beat on high speed until you see soft peaks forming. This means when you lift the beaters, the cream forms a gentle curve that droops slightly. Don’t overwhip it into stiff peaks yet, or it will be hard to fold into the mascarpone. This takes about 2-3 minutes.
Step 4: Fold the Cream into Mascarpone
Here’s the important part. Add one-third of the whipped cream to the mascarpone mixture. Fold it in gently with a spatula until combined. Then, add the rest of the cream and fold until just combined. You want to keep as much air in the mixture as possible. Overmixing here will deflate the cream and make the tiramisu dense. Stop as soon as there are no streaks of white cream left.
Step 5: Dip the Ladyfingers
Quickly dip each ladyfinger into the cooled espresso. I mean quick—1-2 seconds per side. You want them soaked, not swimming. If you leave them in too long, they’ll fall apart when you try to layer them. Arrange the dipped ladyfingers in a single layer in the bottom of your 9×13 dish. They should fit snugly, but don’t force them.
Step 6: Layer the Cream
Spread half of the mascarpone cream mixture over the first layer of ladyfingers. Use a spatula to smooth it out, reaching the edges. This is your first main layer.
Step 7: Repeat the Layers
Add another layer of dipped ladyfingers on top of the cream. Then, spread the remaining cream over this second layer. Smooth it out until it’s even. You should now have a nice, tall dessert with distinct layers.
Step 8: Chill
Cover the dish tightly with plastic wrap. Refrigerate for at least 4 hours, but ideally overnight. This is where the magic happens. The ladyfingers absorb the coffee and become cake-like, and the flavors meld together. If you’re impatient, wait at least 4 hours, but I always say overnight is best.
Step 9: Dust and Serve
Just before serving, sift a generous layer of cocoa powder over the top. Use a fine-mesh sieve and tap it gently to create an even, cloud-like dusting. Slice with a sharp knife and serve cold. It’s that simple.
Expert Tips & Tricks
Here’s everything I’ve learned from making this dozens of times. These tips will save you from my mistakes.
Keep Everything Cold
Your mascarpone and cream should be cold before you start. If your kitchen is hot, put the bowl in the fridge for 10 minutes before whipping. Cold ingredients whip better and hold their shape longer.
Don’t Over-Dip the Ladyfingers
This is the most common mistake. Ladyfingers are like sponges. If you soak them, they turn to mush. Dip them for 1 second per side max. They should feel wet but still hold their shape.
Fold, Don’t Stir
When combining the cream and mascarpone, use a folding motion. Cut down through the middle, scrape the bottom, and fold over the top. This keeps the air in the mixture, which makes the tiramisu light and fluffy instead of dense and heavy.
Use Strong Coffee
If your coffee is weak, your tiramisu will taste bland. Use a dark roast espresso or strong brewed coffee. The coffee flavor needs to stand up to the richness of the cheese.
Chill Your Knife
For clean slices, dip your knife in hot water and wipe it dry before each cut. This helps the knife glide through the cold cream without squishing the layers.
Variations & Substitutions
Once you’ve nailed the basic version, here’s how you can mix it up. I’ve tried all of these.
Add Liqueur
Traditional tiramisu uses Marsala wine or Amaretto. Add 2 tablespoons to the cooled espresso for a boozy kick. It’s delicious, but optional if you’re serving kids.
Chocolate Chip Tiramisu
Sprinkle mini chocolate chips between the layers. It’s like a tiramisu cookie. My kids love this version.
Peanut Butter Tiramisu
Swirl 2 tablespoons of peanut butter into the mascarpone mixture. It’s unexpected but amazing. It tastes like a Reese’s Cup meets tiramisu.
Gluten-Free
Use gluten-free ladyfingers. They’re widely available now. Just be extra careful not to over-soak them, as GF ladyfingers can break more easily.
Dairy-Free
This is harder because mascarpone is dairy. You can use a dairy-free cream cheese alternative and coconut cream, but the texture will be different. It’s not the same, but it works if you need to avoid dairy.
Serving & Storage
How to Serve
Serve this chilled, straight from the fridge. It’s best with a cup of black coffee or an iced latte. I also like it with a dollop of whipped cream on the side if I’m feeling fancy.
Storage
Store covered in the fridge for up to 5 days. It actually gets better on day 2 and 3 as the flavors meld. Don’t freeze it—the texture of the cream changes when thawed. It becomes grainy and watery.
Reheating
Don’t reheat this. It’s a cold dessert. Eat it cold.
Nutrition Information
I’m not a nutritionist, but here’s the breakdown if you’re tracking. This is a rich dessert, so a little goes a long way.
Per Serving (based on 12 slices):
- Calories: 320
- Protein: 5g
- Carbs: 28g
- Fat: 20g
- Sugar: 18g
It’s higher in fat and sugar because of the mascarpone and cream, but it’s also satisfying. One slice is usually enough to satisfy a sweet tooth.
Final Thoughts
So that’s my ultra-creamy tiramisu! It’s simple, it’s delicious, and it’s the kind of dessert that makes you look like a pro. I’ve made this for holidays, dinner parties, and quiet nights in, and it never fails to impress.
If you make this, drop a comment and let me know what you think! I love hearing how recipes turn out in your kitchen. And if something doesn’t work, tell me that too—I’m here to help troubleshoot.
Happy cooking! And I hope your kitchen smells half as good as mine does right now.
Frequently Asked Questions
Can I use instant coffee instead of espresso?
Yes! Dissolve 2 tablespoons of instant espresso powder in 1 cup of hot water. Let it cool completely. It works just as well as fresh espresso for dipping the ladyfingers.
Why is my tiramisu watery?
This usually happens if you over-soaked the ladyfingers or if the mascarpone wasn’t cold enough. Make sure to dip the ladyfingers quickly (1-2 seconds) and keep your dairy cold until the last minute.
Can I make this ahead of time?
Absolutely. This is best made 1-2 days ahead. The flavors improve as it sits. Just cover it tightly with plastic wrap to prevent it from absorbing fridge odors.
What if I don’t have a hand mixer?
You can use a whisk, but it will take more effort. You’ll need to whip the cream by hand until it forms soft peaks, then fold it into the mascarpone. It’s doable, just not as easy.
Can I use cake-like ladyfingers?
You can, but they’ll get soggy faster. Italian-style ladyfingers are denser and hold up better to the coffee. If you only have cake-like ones, dip them even faster than usual.
Is this recipe safe for pregnant women?
Yes! This recipe uses no raw eggs, so it’s safe. The mascarpone is pasteurized, and the cream is cooked (if you’re worried, you can pasteurize the cream by heating it gently before whipping, but it’s not necessary).
Can I add alcohol?
Yes, 2 tablespoons of Amaretto, Marsala, or rum added to the espresso is traditional and delicious. It’s optional but recommended for that authentic Italian flavor.
Pin This Recipe!
Ultra-Creamy Tiramisu: Easy 5-Ingredient Dessert
- Total Time: 4 hours 20 minutes
- Yield: 12 servings 1x
Description
A simple, no-bake tiramisu recipe that uses just five main ingredients. This version avoids raw eggs and complex techniques, resulting in a light, creamy, and coffee-rich dessert that is perfect for make-ahead entertaining.
Ingredients
- 16 oz (450g) Mascarpone Cheese, cold
- 1 cup (240ml) Heavy Cream, cold
- 1/3 cup (70g) Granulated Sugar
- 1 cup (240ml) Strong Espresso, cooled completely
- 1 package (24-30 pieces) Italian-style Ladyfingers
- Unsweetened Cocoa Powder, for dusting
- Optional: 2 tablespoons Amaretto or Marsala Wine
- Optional: 1 teaspoon Vanilla Extract
Instructions
- Brew 1 cup of strong espresso and let it cool completely to room temperature.
- In a large mixing bowl, beat the cold mascarpone and sugar on medium speed until smooth and creamy (2-3 minutes). Scrape down the sides.
- In a separate clean, cold bowl, whip the heavy cream on high speed until soft peaks form (2-3 minutes).
- Add one-third of the whipped cream to the mascarpone mixture and fold gently with a spatula until combined.
- Add the remaining whipped cream and fold until just combined, being careful not to deflate the mixture.
- Quickly dip each ladyfinger into the cooled espresso for 1-2 seconds per side. Do not soak them.
- Arrange a single layer of dipped ladyfingers in the bottom of a 9×13 inch baking dish.
- Spread half of the mascarpone cream mixture over the first layer of ladyfingers.
- Add a second layer of dipped ladyfingers on top of the cream.
- Spread the remaining cream mixture over the second layer of ladyfingers.
- Cover the dish tightly with plastic wrap and refrigerate for at least 4 hours, ideally overnight.
- Just before serving, sift a generous layer of cocoa powder over the top.
- Slice with a sharp knife and serve cold.
Notes
Keep all dairy ingredients cold to ensure proper whipping and stability. Do not over-dip the ladyfingers or they will become mushy. Fold the cream gently to maintain airiness. This dessert improves in flavor after sitting overnight. Do not freeze, as the texture will become grainy.
- Prep Time: 20 minutes
- Cook Time: 0 minutes
- Category: Dessert
- Cuisine: Italian
Nutrition
- Serving Size: 1 slice
- Calories: 320
- Sugar: 18
- Sodium: 45
- Fat: 20
- Saturated Fat: 12
- Carbohydrates: 28
- Fiber: 1
- Protein: 5
Keywords: tiramisu, no-bake dessert, easy tiramisu, mascarpone, coffee dessert, make-ahead dessert, 5 ingredient dessert, gluten-free option


