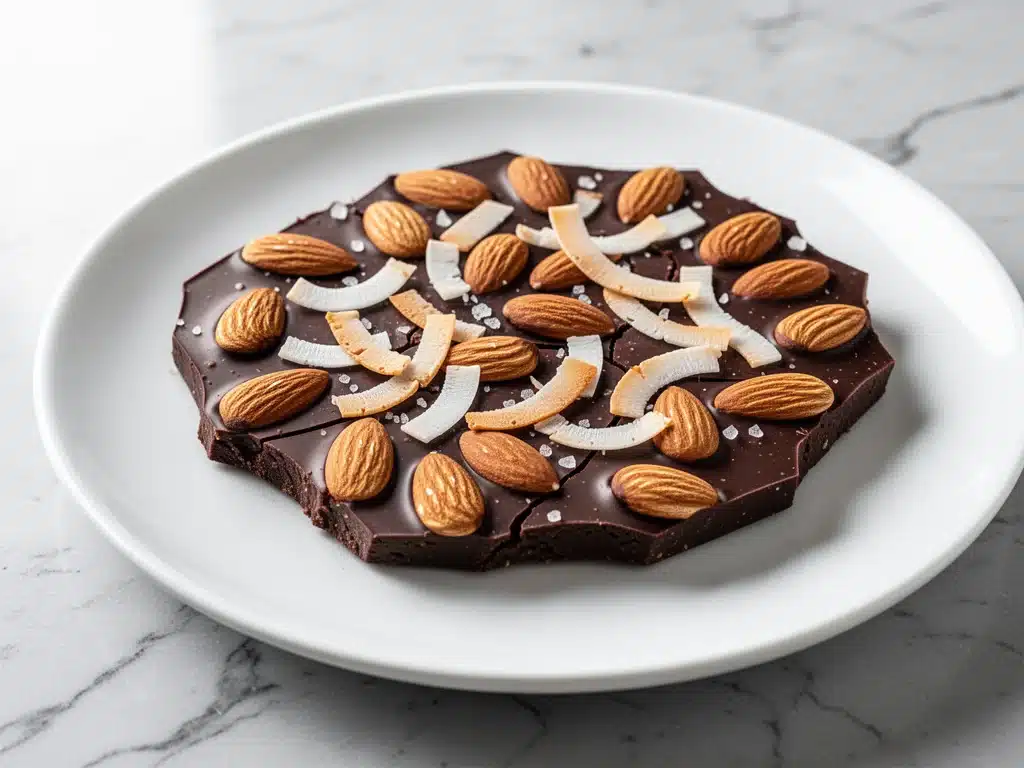
Last winter, I hit that specific wall where my sweet tooth became a full-time job. You know the feeling. It’s 9 PM, the house is quiet, and suddenly you need something sweet, but you also want to feel like you made a good choice. Usually, this leads to a frantic search through the pantry for something “healthy” that tastes like cardboard, or a surrender to a full-sized candy bar that leaves you feeling sluggish and guilty by morning.
That’s when I started messing around with this sugar-free dark chocolate almond bark. I’ll be honest: I didn’t expect much. I figured it would be a one-time experiment, a quick fix for a craving. But three weeks later, it’s sitting on my counter more often than anything else. It’s become my go-to afternoon pick-me-up, my post-dinner treat, and honestly, the only reason I don’t feel like I’m depriving myself while sticking to my low-carb goals.
There’s something incredibly satisfying about making your own candy. It’s fast, it’s visual, and the smell of melting chocolate and toasting coconut fills the kitchen in a way that feels luxurious but takes about 20 minutes of actual work. This sugar-free dark chocolate almond bark with toasted coconut flakes isn’t just a snack; it’s a mood booster. It’s crunchy, rich, and deeply chocolatey without the sugar crash. I’ve made this for friends who are keto, friends who are diabetic, and friends who just want to eat less junk. Everyone loves it. And let’s be real, homemade treats always taste better because you know exactly what’s in them.
Why You’ll Love This Sugar-Free Dark Chocolate Almond Bark
I’ve tested probably a dozen different versions of this bark over the last few months, tweaking the chocolate type, the nut-to-coconut ratio, and the sweetener. This final version is the one that works every single time. Here’s why it’s earned a permanent spot in my routine:
- It’s Ready in 20 Minutes — Seriously. The only active time is melting the chocolate and sprinkling the toppings. The rest is just waiting for it to set in the fridge. I make this after dinner while I’m cleaning up. By the time I’m done, it’s ready to eat. It’s faster than ordering takeout.
- Zero Sugar Crash — Because it’s sweetened with erythritol or stevia (depending on your preference) and packed with healthy fats from the almonds and coconut, this bark keeps my blood sugar stable. I can eat a square at 3 PM and still be good for dinner. No jittery energy spike followed by a crash.
- Texture Perfection — Most keto candies suffer from being too soft or too hard. This one hits the sweet spot. The dark chocolate snaps when you break it, the almonds add a hearty crunch, and the toasted coconut adds this light, airy crispness that contrasts perfectly. It’s not just sweet; it’s a sensory experience.
- Pantry Staples — You don’t need to order specialty ingredients from overseas. I use standard 70% dark chocolate bars (chopped up), raw almonds, and shredded coconut. If you have these in your cupboard, you can make this tonight. It’s the ultimate “I didn’t plan this but I’m still eating well” recipe.
- Gift-Worthy — I packaged this in small cellophane bags with a ribbon for my coworkers during the holidays, and people asked for the recipe. It looks fancy, tastes indulgent, and fits into almost any diet. It’s a huge win for anyone who wants to share sweets without sharing the sugar.
This bark has saved me from vending machine runs and late-night ice cream spoons. It’s my proof that you don’t need sugar to feel satisfied. Once you try it, you’ll likely find yourself making it on repeat.
Ingredients You’ll Need
Before we get into the steps, let’s talk about what goes into this. It’s a short list, but the quality of ingredients matters more here than in most recipes. Since there are no other strong flavors masking the base, you need good stuff.
For the Chocolate Base
Dark Chocolate (70% cocoa or higher) (12 ounces / 340g) — This is your foundation. I recommend using high-quality baking bars rather than chips. Chips have stabilizers that make them melt unevenly. I like Lindt or Ghirardelli 70% bars. If you need to keep it strictly sugar-free, look for brands sweetened with erythritol or monk fruit. If you’re just cutting back on sugar, regular dark chocolate works too, but you’ll add less sweetener. Chop it roughly before melting—it helps it melt faster and more evenly.
Coconut Oil (1 tablespoon / 15ml) — Optional, but I highly recommend it. Adding a tablespoon of coconut oil to the melting chocolate makes it thinner and glossier. It also helps the bark snap cleanly rather than breaking in a crumbly mess. If you’re sensitive to coconut flavor, you can skip it, but it improves the texture significantly.
For the Toppings
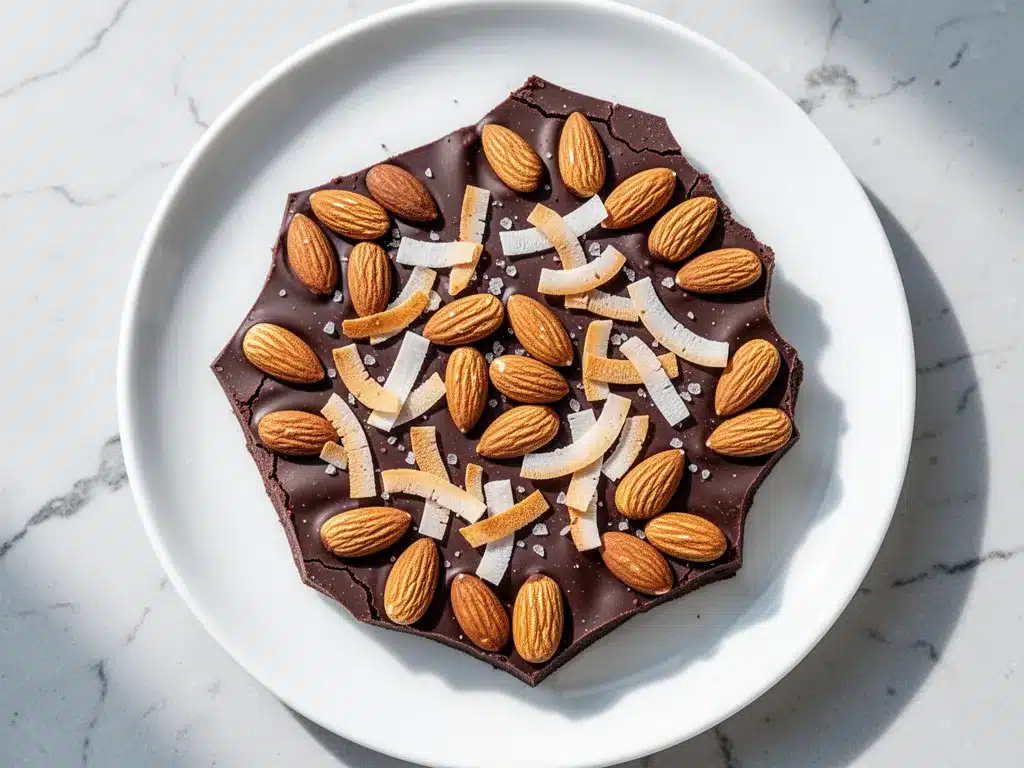
Raw Almonds (1 cup / 115g) — I use whole raw almonds. You can chop them roughly if you prefer smaller pieces, but I like the rustic look of whole nuts. Make sure they’re raw and unsalted so you can control the saltiness. If you have a nut allergy, you can swap these for pecans or macadamia nuts, though almonds provide that classic bark crunch.
Shredded Coconut (½ cup / 40g) — Use unsweetened shredded coconut. Sweetened coconut will make the bark cloyingly sweet and stick to everything. I toast my coconut separately (more on that below) because raw coconut is soft and chewy. Toasted coconut adds this incredible nutty aroma and a light, crispy texture that balances the dense chocolate.
Sea Salt Flakes (1 teaspoon) — This is non-negotiable. The salt amplifies the chocolate flavor and cuts through the richness. Use Maldon or any flaky sea salt. Regular table salt won’t give you that nice crunch or visual appeal.
Zero-Calorie Sweetener (2-3 tablespoons / 25-40g) — Depending on how sweet you like it. I use granular erythritol or a monk fruit blend. If your chocolate is already sweetened, you might not need any. Taste your chocolate mixture after melting—it should taste slightly sweeter than you want the final product to be, because the toppings will dilute the sweetness.
Vanilla Extract (1 teaspoon) — Just a splash to round out the flavors. It makes the chocolate taste more like a confection and less like plain melted cocoa.
Equipment Needed
You don’t need any fancy gadgets for this. Here’s what I actually use:
Large Microwave-Safe Bowl — I use a 4-quart glass bowl. It needs to be big enough to hold the chocolate as it melts and expands. If you’re using a microwave, glass or ceramic works best. Avoid plastic if you can, as it can warp or retain odors.
Baking Sheet — Any standard 13×9 or half-sheet pan works. I prefer a rimmed baking sheet so I can easily move the bark around without spilling.
Parchment Paper — Essential. Do not skip this. The chocolate will stick to anything else. Line your baking sheet generously. I usually use two sheets if my pan is small, just to have enough room to spread the chocolate without it touching the edges.
Small Skillet — For toasting the coconut. A 10-inch non-stick skillet is perfect. It allows you to watch the coconut closely so it doesn’t burn.
Spatula — A silicone spatula is best for scraping the chocolate bowl and spreading the bark. You want something flexible to get all the chocolate out of the bowl.
Chef’s Knife — For chopping the chocolate and almonds. A sharp knife makes quick work of the chocolate bars.
How to Make It: Step-by-Step
Alright, let’s make this! It’s simple, but there are a few tricks to get that professional snap and glossy finish. I’m walking you through exactly how I do it.
Step 1: Prep Your Workspace (5 minutes)
Before you melt any chocolate, get everything ready. Chop your almonds if you’re using them chopped. Measure out your shredded coconut and sweetener. Line your baking sheet with parchment paper and set it aside. Once the chocolate is melted, things move fast, and you don’t want to be searching for the parchment paper while you’re trying to spread chocolate.
Step 2: Toast the Coconut (3-5 minutes)
This is the step most people skip, but it makes a huge difference. Heat your skillet over medium heat. Add the shredded coconut in a single layer. Toast it for 2-3 minutes, stirring frequently. You’ll know it’s done when the coconut turns golden brown in spots and smells nutty. Be careful—it goes from perfect to burnt very quickly. Remove it from the pan immediately and spread it on a plate to cool. If you leave it in the hot pan, it’ll keep cooking and burn.
Step 3: Melt the Chocolate (2-4 minutes)
Chop your dark chocolate into rough chunks. Place them in your microwave-safe bowl. If you’re adding coconut oil and vanilla, add them now. Microwave on high for 30 seconds. Remove and stir. If it’s not fully melted, microwave for another 15-20 seconds. Stir again. Repeat until the chocolate is smooth and glossy. Do not overheat! Chocolate scorches easily. If it gets too hot, it becomes grainy and won’t set properly. If you’re using a stovetop method, use a double boiler and melt over low heat, stirring constantly.
Step 4: Mix and Sweeten
Once the chocolate is smooth, stir in your sweetener and vanilla extract. Taste it. It should be sweet enough for your preference. If you’re using unsweetened chocolate, you might need more sweetener here. If your chocolate is already sweetened, start with less. Stir well to distribute the sweetener evenly.
Step 5: Spread the Base
Pour the chocolate mixture onto your prepared baking sheet. Use your spatula to spread it out into an even layer. Aim for about ¼ inch thickness. If it’s too thick, it’ll be hard to break and chew. If it’s too thin, it’ll be brittle and shatter into dust. You want substantial chunks. Spread it out to the edges of the parchment paper for maximum yield.
Step 6: Add the Toppings
While the chocolate is still wet, sprinkle the toasted coconut and almonds evenly over the top. Don’t be shy with the toppings—I like a generous amount. Press them down gently with the back of your spoon or spatula so they stick into the chocolate. If you don’t press them, they’ll fall off when you break the bark later. Sprinkle the sea salt flakes over the top for that final touch.
Step 7: Set the Bark
Place the baking sheet in the refrigerator. Let it chill for at least 30 minutes, or until the chocolate is completely firm. You can speed this up by putting it in the freezer for 15 minutes, but the fridge is safer to avoid condensation. Once it’s set, remove the parchment paper with the bark on it and place it on a cutting board.
Step 8: Break and Serve
Use a large knife or your hands to break the bark into irregular chunks. Try to make them about 2×2 inches. It doesn’t need to be perfect—rustic looks better. Store in an airtight container in the fridge or freezer.
Expert Tips & Tricks
Here’s everything I’ve learned from making this dozens of times. These tips will save you from my mistakes.
Don’t Overheat the Chocolate
This is the #1 mistake. If your chocolate gets too hot, it seizes up and becomes grainy. Always melt in short bursts and stir frequently. If it looks dry or clumpy, it’s too hot. Let it cool for a minute before stirring again.
Toast the Coconut Properly
Raw coconut is soft. Toasted coconut is crunchy. If you skip toasting, your bark will have a chewy texture that doesn’t match the crisp chocolate. Watch it closely—it burns faster than you think.
Use High-Quality Chocolate
Since there are only a few ingredients, the chocolate flavor shines through. Cheap chocolate with vegetable oil instead of cocoa butter will feel waxy and leave a coating on your teeth. Spend the extra money on good dark chocolate. It’s worth it.
Control the Thickness
I’ve made this too thick before, and it was like eating a chocolate bar with nuts on top. I’ve made it too thin, and it shattered into tiny pieces. Aim for that ¼ inch mark. It’s the perfect balance of crunch and chew.
Salt is Your Friend
Don’t skip the salt. The contrast between sweet chocolate, salty almonds, and flaky sea salt is what makes this addictive. I usually add a little extra salt if I’m using very sweet chocolate.
Common Mistakes (and how to avoid them)
Mistake: Chocolate won’t set
Fix: You likely overheard it, or there was too much moisture in the bowl. Make sure your bowl is completely dry. If it’s still soft after 30 minutes in the fridge, put it in the freezer for 10 minutes.
Mistake: Toppings are falling off
Fix: You didn’t press them in enough, or the chocolate was too thick. Make sure the chocolate is spread thin and press the nuts down gently.
Mistake: Bark is too hard to break
Fix: It’s too thick. Next time, spread it thinner. Or, let it come to room temperature for 5 minutes before breaking.
Variations & Substitutions
Once you’ve nailed the basic version, here’s how you can mix it up. I’ve tried all of these.
White Chocolate Version
Swap the dark chocolate for sugar-free white chocolate chips. Add crushed pistachios and dried cranberries (check for no sugar added) for a festive look. It’s sweeter but equally delicious.
Sea Salt Caramel
Add a drizzle of sugar-free caramel sauce on top of the chocolate before adding toppings. Sprinkle with sea salt. It’s rich and indulgent.
Peanut Butter Cup Style
Swirl a tablespoon of sugar-free peanut butter into the melted chocolate before spreading. Top with crushed peanuts. It tastes like a homemade Skipper bar.
Matcha Green Tea
Whisk 1 tablespoon of matcha powder into the melted chocolate. Top with white chocolate chips and macadamia nuts. Earthy and sweet.
Dietary Modifications:
Whole Food/No Sugar
Use 100% unsweetened dark chocolate and no added sweetener. The almonds and coconut provide enough natural sweetness. It’s less sweet but very clean.
Nut-Free
Skip the almonds and use toasted pumpkin seeds (pepitas) or sunflower seeds. The texture is similar, and it’s safe for school lunches or nut-free environments.
Vegan
Ensure your dark chocolate is dairy-free (most 70% bars are) and use coconut oil instead of any butter. This recipe is naturally vegan if you choose the right chocolate.
Serving & Storage
How to serve this stuff is easy—it’s finger food. But here are some ideas:
How to Serve:
I usually just grab a piece straight from the container. But for parties, I break it into smaller pieces and arrange it on a platter with some fresh berries. The acidity of the berries cuts through the richness. It’s also great crumbled over yogurt or ice cream (if you’re having a cheat day).
Side Dishes:
This pairs perfectly with black coffee or unsweetened almond milk. I have it with my morning coffee sometimes instead of a pastry. It satisfies the craving without the carbs.
Storage Instructions:
Refrigerator:
Store in an airtight container for up to 2 weeks. The chocolate stays firm and the nuts stay crunchy. I keep a small container on my desk at work for afternoon snacks.
Freezer:
This freezes beautifully. Store in a freezer-safe bag or container for up to 3 months. Thaw at room temperature for 10 minutes before eating. It tastes just as good fresh from the freezer.
Pro Tip:
If you live in a hot climate, always keep this in the fridge. Even with the coconut oil, it can get soft if it’s above 75°F. I label my containers with the date so I know when I made them.
Nutrition Information
I’m not a nutritionist, but here’s the breakdown if you’re tracking. Please note that this varies based on the specific brand of chocolate and sweetener you use.
Per Serving (based on 12 pieces, 20g each):
- Calories: 150
- Protein: 3g
- Carbs: 4g
- Fiber: 2g
- Net Carbs: 2g
- Sugar: 1g (natural from coconut)
- Fat: 14g
- Sodium: 50mg
What’s Good:
High in healthy fats from almonds and coconut. Low net carbs make it keto-friendly. Good source of magnesium from dark chocolate.
What to Know:
Calorie-dense due to nuts and chocolate. Portion control is key. It’s easy to eat more than one piece because it’s so tasty.
My Take:
Look, this is still chocolate and nuts. It’s not a salad. But it’s a far better choice than a candy bar. I enjoy it as a treat, not a meal replacement. When I want to make it lighter, I use more almonds and less chocolate. But usually? I just enjoy the rich, crunchy goodness.
Final Thoughts
So that’s my sugar-free dark chocolate almond bark with toasted coconut flakes. I’ve probably talked your ear off at this point, but when you make a recipe this often, you have a lot to say about it.
This has saved my sweet tooth from going rogue. It’s my answer to “what’s for dessert” when I want something quick, healthy, and delicious. My family is happy, my cravings are satisfied, and I’m happy because I’m not stressing about sugar intake.
Make it yours! Try different nuts, swap the coconut for cacao nibs, or add a pinch of chili powder for a spicy kick. The best recipes are the ones you adapt to your tastes.
If you make this, drop a comment and let me know what you think! I love hearing how recipes turn out in your kitchen. And if something doesn’t work, tell me that too—I’m here to help troubleshoot.
Happy cooking! And I hope your kitchen smells half as good as mine does right now.
Frequently Asked Questions
Q: Can I use chocolate chips instead of bars?
A: You can, but bars melt more evenly. Chips have stabilizers that can make the texture grainy. If you must use chips, melt them slowly and stir often. I prefer bars for the smoothest finish.
Q: Why did my chocolate seize up?
A: Usually, this happens if water gets into the chocolate. Even a drop of water can cause it to clump. Make sure your bowl and utensils are completely dry. If it seizes, add a teaspoon of warm water and stir vigorously—it might save it, but it changes the texture.
Q: Can I make this ahead for a party?
A: Absolutely. I make this 2 days ahead and store it in the fridge. It actually tastes better after a day because the flavors meld together. Just keep it in an airtight container to prevent it from absorbing fridge odors.
Q: Is this recipe gluten-free?
A: Yes, naturally. Just make sure your chocolate and sweetener are certified gluten-free, as some brands process them in facilities with wheat.
Q: Can I use honey or maple syrup instead of erythritol?
A: No, because liquid sweeteners will make the chocolate seize and become sticky. Stick to granular sweeteners like erythritol, monk fruit, or allulose.
Q: How do I reheat leftovers without melting them?
A: You don’t need to reheat this. It’s best eaten cold or at room temperature. If it’s too hard from the fridge, let it sit on the counter for 5 minutes.
Q: Can I double this recipe?
A: Yes! Just use a larger baking sheet or two sheets. The melting and spreading process stays the same. I often double it when I’m feeling extra indulgent.
Pin This Recipe!
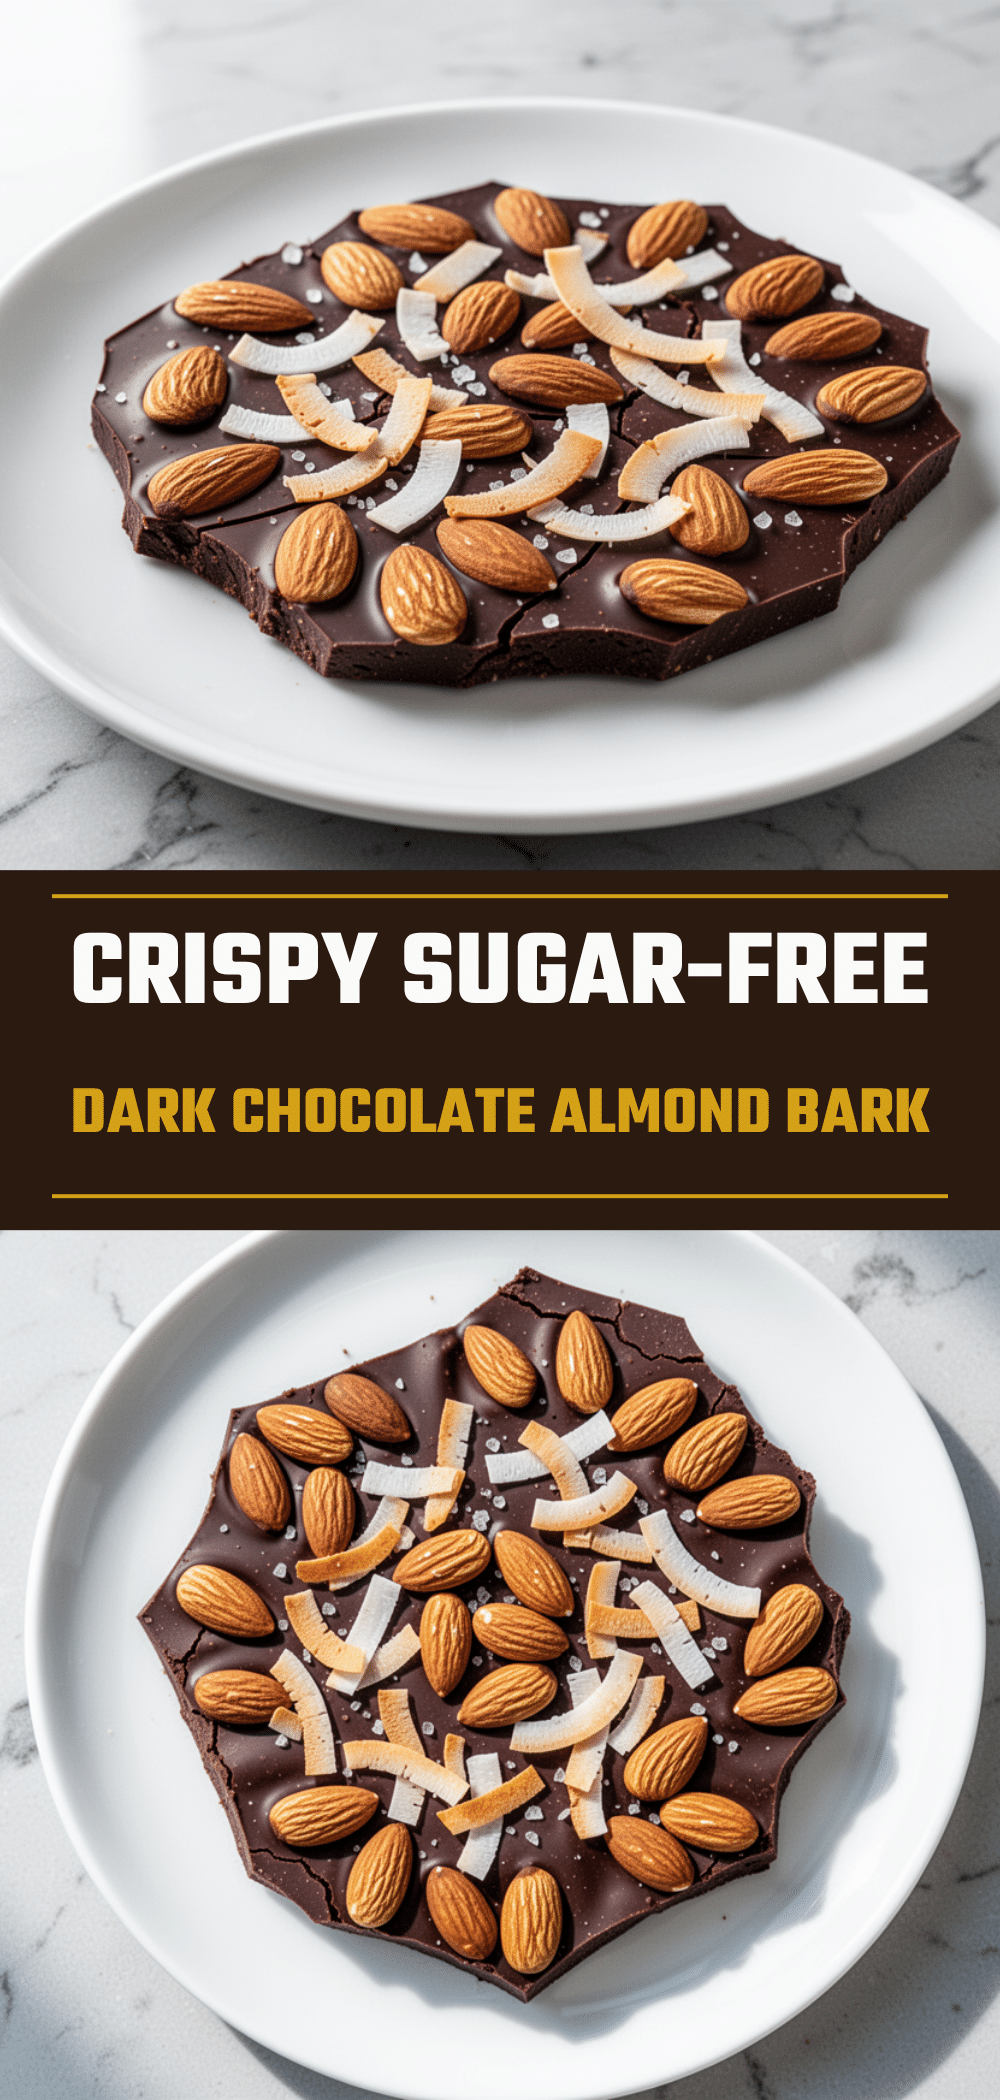
Sugar-Free Dark Chocolate Almond Bark: Easy Keto Recipe
- Total Time: 20 minutes
- Yield: 12 servings 1x
Description
A quick, crunchy, and rich sugar-free dark chocolate almond bark with toasted coconut flakes. This keto-friendly treat is ready in 20 minutes, uses pantry staples, and provides a satisfying sweet fix without the sugar crash.
Ingredients
- 12 ounces (340g) high-quality dark chocolate (70% cocoa or higher), chopped
- 1 tablespoon coconut oil (optional, for gloss and snap)
- 1 cup raw almonds
- ½ cup (40g) unsweetened shredded coconut
- 1 teaspoon sea salt flakes
- 2–3 tablespoons (25-40g) zero-calorie sweetener (erythritol or monk fruit blend)
- 1 teaspoon vanilla extract
Instructions
- Prep workspace: Chop almonds if desired, measure coconut and sweetener, and line a baking sheet with parchment paper.
- Toast coconut: Heat a skillet over medium heat and toast shredded coconut for 2-3 minutes until golden brown and nutty. Remove immediately to cool.
- Melt chocolate: Place chopped chocolate in a microwave-safe bowl with coconut oil and vanilla. Microwave in 30-second bursts, stirring between each, until smooth and glossy. Do not overheat.
- Mix and sweeten: Stir in the sweetener and vanilla extract. Taste and adjust sweetness if needed.
- Spread base: Pour chocolate onto the prepared baking sheet and spread into an even layer about ¼ inch thick.
- Add toppings: While chocolate is wet, sprinkle toasted coconut, almonds, and sea salt flakes evenly over the top. Press gently to adhere.
- Set bark: Refrigerate for at least 30 minutes until firm.
- Break and serve: Break into irregular chunks and store in an airtight container.
Notes
Ensure your bowl is completely dry to prevent chocolate from seizing. Toasting the coconut is crucial for texture. If using sweetened chocolate, reduce or omit added sweetener. Store in the fridge or freezer to maintain firmness.
- Prep Time: 5 minutes
- Cook Time: 15 minutes
- Category: Dessert
- Cuisine: American
Nutrition
- Serving Size: 1 piece (approx. 20g
- Calories: 150
- Sugar: 1
- Sodium: 50
- Fat: 14
- Saturated Fat: 7
- Carbohydrates: 4
- Fiber: 2
- Protein: 3
Keywords: keto, sugar-free, dark chocolate, almond bark, low carb, gluten-free, vegan, healthy snack, coconut, erythritol


