Last Tuesday, I was staring at my kitchen counter at 8:30 PM, feeling that specific kind of exhaustion that comes from a long workday. I wanted dessert. Not a protein bar, not a handful of almonds, but something sweet, something indulgent, something that felt like a hug. I opened my fridge and saw a few eggs, some cream cheese, and a bag of flour. I thought, “Why not?” I didn’t have time for a complicated project. I just wanted to eat.
So I threw together what I thought would be a mediocre cheesecake. I was in a rush. I didn’t sift the flour. I didn’t temper the eggs perfectly. I just mixed it up, poured it into a pan, and shoved it in the oven while I tried to figure out what to do with the leftovers in my Tupperware. Thirty minutes later, the smell hit me. It wasn’t the heavy, dense scent of a traditional New York cheesecake. It smelled like vanilla, butter, and… clouds?
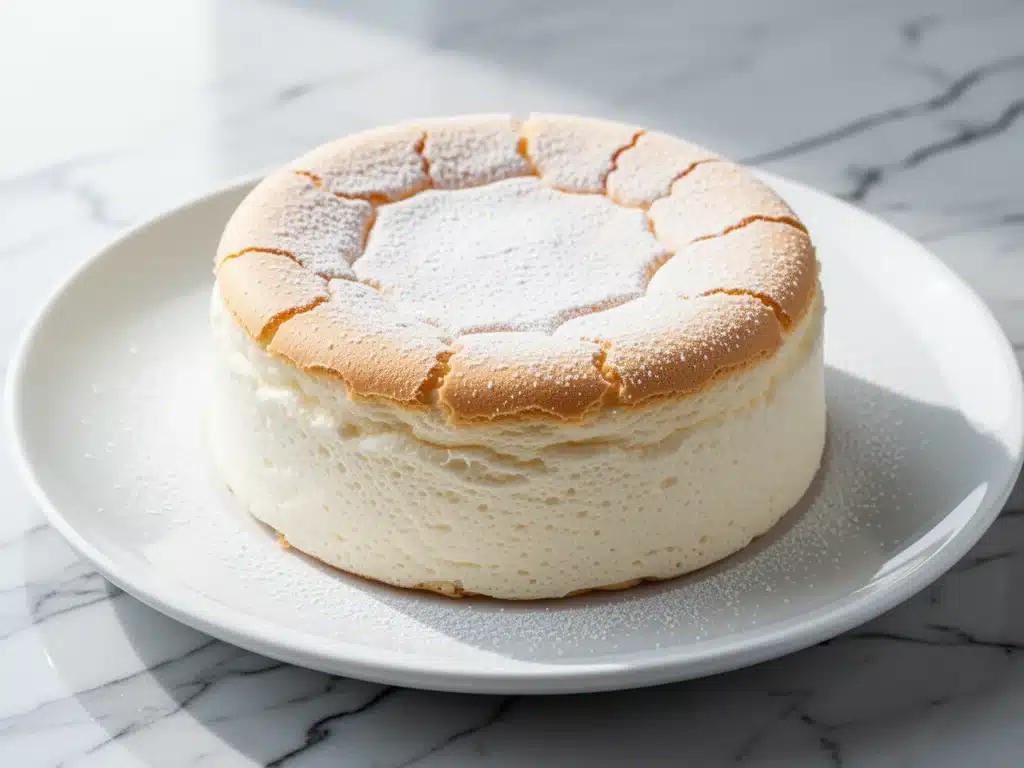
I pulled it out, expecting a flat, dense puck. Instead, this thing had risen like a soufflé and then settled into this incredibly jiggly, trembling masterpiece. I cut a slice. It didn’t crumble. It didn’t feel heavy on my stomach. It literally melted on my tongue. My husband walked in, saw me staring at the pan, and asked, “Is that store-bought?” When I told him I made it in 20 minutes of active time (plus baking), he didn’t believe me until he took a bite.
That was the moment I discovered Ultra-Fluffy Japanese Cotton Cheesecake. And I’m not being dramatic when I say it changed my dessert game. It’s perfect for those busy weeknights when you want to treat yourself but don’t have hours to spare. Unlike my ultra-moist fall apple cider donut cake, which requires a bit more prep, this cotton cheesecake is surprisingly forgiving. It’s light, airy, and tastes like a high-end Japanese café dessert, but it’s made with ingredients you probably already have.
I’ve made this recipe at least a dozen times since that Tuesday. I’ve tested it with different oven temperatures, different pan sizes, and even different types of cream cheese. Every time, the result is the same: a dessert so light it feels like eating air. If you’re tired of heavy, dense sweets and want something that feels special without the stress, you need to try this.
Why You’ll Love This Ultra-Fluffy Japanese Cotton Cheesecake
There are about ten reasons I keep coming back to this recipe, but let’s be real—you don’t need a reason to love something that tastes this good. Still, here’s why this Ultra-Fluffy Japanese Cotton Cheesecake has earned a permanent spot in my weekly rotation, especially on those chaotic weeknights.
- It’s Actually Light — Seriously, this isn’t dense. Traditional cheesecakes can leave you feeling stuffed and sluggish. This cotton cheesecake is airy and delicate. I’ve served it to friends who are “too full” for dessert, and they always ask for a second slice because it’s so easy to eat.
- Weeknight Friendly — I know what you’re thinking. “Japanese cheesecake takes forever to bake.” Yes, the total time is long, but the *active* time is about 20 minutes. I can prep this while my kids are doing homework or while I’m on a work call. The oven does the hard work. It’s my fluffy buttermilk blueberry pancakes energy but for dessert.
- No Special Equipment Needed — You don’t need a springform pan if you don’t want one. A regular 8-inch round pan works fine. You don’t need a food processor. Just a few bowls and a whisk. It’s accessible cooking.
- Perfect Texture Every Time — The “cotton” texture is the holy grail. It’s jiggly on the outside but soft and custardy on the inside. Once you get the hang of the water bath method (more on that below), you’ll nail it every single time.
- Make-Ahead Magic — This tastes even better the next day. The flavors meld, and the texture firms up slightly, making it easier to slice. I often make it on Sunday night for a mid-week treat. It keeps well in the fridge for up to 3 days.
- Gluten-Free Friendly (Sort Of) — While this recipe uses a small amount of flour, it’s incredibly light. If you swap in a gluten-free flour blend, it still works beautifully. It’s a great option for friends with sensitivities who still want a decadent treat.
Bottom line? This is my go-to when I need a win. It’s impressive enough for guests but simple enough for a Tuesday night. No complicated techniques, no weird ingredients, just reliable, delicious food that makes everyone happy.
Ingredients You’ll Need
Here’s the best part: you probably have most of these already. This isn’t a recipe that requires a trip to three different specialty stores. It’s pantry-friendly with just a few key dairy items.
For the Cheesecake Base
Cream cheese (8 oz / 225g) — This is the star. Use full-fat, block-style cream cheese. The soft spreadable kind in the tubs has too much air and water, and it will ruin the texture. Let it come to room temperature before you start. Cold cream cheese is the enemy of smoothness.
Unsalted butter (2 tablespoons / 30g) — Adds richness and helps bind the eggs. Again, room temperature is key so it melts easily into the cream cheese.
Granulated sugar (½ cup / 100g) — Standard white sugar works best here. It dissolves cleanly and doesn’t add moisture like brown sugar would. Don’t reduce the sugar too much; it helps with the browning and texture.
Egg yolks (4 large yolks) — We’re using just the yolks for that rich, custardy yellow color and creamy texture. Save the whites for overnight vanilla cinnamon chia pudding or meringues!
Heavy cream (2 tablespoons / 30ml) — This adds liquid and fat, ensuring the cake stays moist and doesn’t dry out in the oven. Whole milk can work in a pinch, but heavy cream is better.
Cake flour (2 tablespoons / 15g) — Cake flour has less protein than all-purpose flour, which means less gluten development and a more tender, cake-like crumb. If you don’t have it, you can make a substitute: take 1 tablespoon of all-purpose flour and replace it with 1 tablespoon of cornstarch.
For the Meringue (The Fluff Factor)
Egg whites (4 large whites) — These are what create the “cotton” texture. They need to be whipped to stiff peaks. Make sure your bowl is completely clean and grease-free. Even a tiny bit of yolk or oil will stop the whites from whipping up.
Cream of tartar (¼ teaspoon) — This stabilizes the egg whites, helping them hold their shape and volume. It’s cheap and lasts forever. Don’t skip it if you want that reliable rise.
Vanilla extract (1 teaspoon) — Pure vanilla, please. I use Nielsen-Massey or McCormick. It adds that classic cheesecake aroma.
For the Water Bath
Hot water (about 4 cups) — You’ll need this for the roasting pan. Boil a kettle or heat water on the stove. This creates steam, which is crucial for the gentle cooking process.
Aluminum foil — You’ll need to wrap the bottom of your cake pan tightly to keep the water out. Heavy-duty foil works best.
Equipment Needed
You don’t need fancy equipment for this. Here’s what I actually use.
8-inch Round Cake Pan — I use a standard metal cake pan. If you have a springform pan, use it—it makes removal easier—but line the bottom with parchment paper just in case. A glass pan works too, but keep an eye on the baking time as it may take slightly longer.
Large Roasting Pan or Deep Baking Dish — This acts as the water bath. A large roasting pan (like the kind that comes with a turkey) is perfect. It needs to be deep enough to hold the cake pan and have at least 1 inch of water around it.
Hand Mixer or Stand Mixer — You need this for whipping the egg whites. A hand mixer works fine, but a stand mixer is less tiring. I use my KitchenAid, but any reliable mixer will do.
Whisk and Spatula — A silicone spatula is essential for folding the meringue into the cream cheese mixture without deflating it. Be gentle.
Sieve or Sifter — For sifting the cake flour. This prevents lumps and ensures a smooth batter.
Parchment Paper — Line the bottom of your cake pan. It makes cleanup a breeze and helps the cake slide out later.
How to Make It: Step-by-Step
Alright, let’s make this! I’m walking you through exactly how I do it, including the little tricks I’ve picked up over time. This method is designed to be foolproof for busy weeknights.
Step 1: Prep Your Oven and Pan (5 minutes)
Preheat your oven to 325°F (160°C). This is a low temperature, which is crucial for gentle cooking. Line the bottom of your 8-inch cake pan with parchment paper. Do not grease the sides—the cake needs to climb up the sides to rise properly. Wrap the bottom and sides of the pan tightly with two layers of heavy-duty aluminum foil. You want to make sure no water can seep in.
Step 2: Melt the Cream Cheese Mixture (5 minutes)
In a microwave-safe bowl, combine the cream cheese and butter. Microwave in 30-second intervals, stirring in between, until completely smooth and melted. It should look like a thick, glossy paste. If you have lumps, you can strain it through a sieve, but usually, vigorous stirring is enough. Stir in the sugar until fully combined. Then, add the egg yolks one at a time, mixing well after each addition. Finally, stir in the heavy cream and vanilla extract. The mixture should be smooth and liquidy.
Step 3: Sift in the Flour (2 minutes)
Sift the cake flour (and cornstarch substitute if using) over the cream cheese mixture. Use a whisk to gently fold it in until just combined. Be careful not to overmix. You want a smooth, thick batter. Set this aside.
Step 4: Whip the Egg Whites (5-7 minutes)
This is the most important step for the “cotton” texture. In a clean, grease-free bowl, whip the egg whites with the cream of tartar on medium-high speed. Once they become foamy, gradually add the remaining sugar (if you reserved some, otherwise add it now) and continue whipping. Beat until you have stiff, glossy peaks. The whites should stand up straight when you lift the beater. Do not under-whip; this gives the cake its lift.
Step 5: Fold the Batter Together (3 minutes)
Add about one-third of the egg whites to the cream cheese mixture and whisk gently to lighten it. Then, add the rest of the egg whites. Use a silicone spatula to *fold* the mixture. Cut down through the center, scrape the bottom, and fold over the top. Rotate the bowl and repeat. Stop when you see just a few streaks of white left. You want to keep as much air in the batter as possible.
Step 6: Bake in a Water Bath (50-60 minutes)
Pour the batter into the prepared cake pan. Place the pan inside the large roasting pan. Carefully pour hot water into the roasting pan until it reaches about halfway up the sides of the cake pan. This is your water bath (bain-marie). It creates a humid environment that prevents the cake from cracking and keeps it moist.
Place the roasting pan in the oven. Bake at 325°F (160°C) for 50-60 minutes. The cake is done when the edges are set but the center still jiggles slightly like Jell-O. It should be pale golden on top. Do not open the oven door for the first 40 minutes!
Step 7: The Cool Down (Crucial!)
Turn off the oven and crack the door open slightly (use a wooden spoon to hold it open). Let the cake cool in the oven for another hour. This gradual cooling prevents the sudden temperature change that causes cracking. After an hour, remove the cake from the water bath and let it cool completely on a wire rack. Then, refrigerate for at least 4 hours, preferably overnight. This is when the texture sets into that perfect cotton-like consistency.
Expert Tips & Tricks
Here’s everything I’ve learned from making this dozens of times. These tips will save you from my mistakes.
Room Temperature is Non-Negotiable
If your cream cheese or eggs are cold, your batter will be lumpy, and your meringue won’t whip properly. Take your cream cheese and eggs out of the fridge at least an hour before you start. It’s worth the wait.
Clean Bowls for Meringue
Even a tiny drop of yolk or oil in your egg white bowl will prevent them from whipping. Wipe your bowl with a little vinegar or lemon juice before starting. Trust me, it matters.
Don’t Overmix the Fold
When combining the meringue and cream cheese, you’re trying to keep the air bubbles intact. If you stir too vigorously, you’ll deflate the whites, and you’ll end up with a dense, rubbery cake instead of a fluffy cotton one. Be gentle and patient.
The Jiggle Test
When you take the cake out, the center should wobble like gelatin. If it’s firm, you’ve overbaked it. If it’s liquid, it needs more time. A slight jiggle is perfect—it will set as it cools.
Patience with the Cool Down
I know you want to eat it now. But if you take it out of the oven immediately, the drastic temperature change will cause it to collapse or crack. Let it cool in the turned-off oven. It’s the secret to a smooth top.
Variations & Substitutions
Once you’ve nailed the basic version, here’s how you can mix it up. I’ve tried all of these.
Berry Swirl
Before baking, dollop a tablespoon of strawberry or raspberry jam on top of the batter and swirl it gently with a knife. It creates a beautiful marbled effect and adds a tart contrast to the sweet cheese.
Matcha Green Tea
Replace the cake flour with 1 tablespoon of high-quality matcha powder. It adds a subtle earthy flavor and a gorgeous green color. It’s incredibly refreshing.
Lemon Zest
Add the zest of one lemon to the cream cheese mixture. It brightens the flavor and makes it taste like a spring day. Pairs beautifully with a drizzle of lemon curd.
Gluten-Free Version
Use a 1:1 gluten-free flour blend instead of cake flour. The texture might be slightly less tender, but it’s still delicious. I’ve used Bob’s Red Mill, and it works well.
Dairy-Free Option
This is trickier because cream cheese is the base. Use a high-quality vegan cream cheese (like Kite Hill) and coconut milk instead of heavy cream. The texture will be different—more like a mousse—but still tasty.
Serving & Storage
How to Serve:
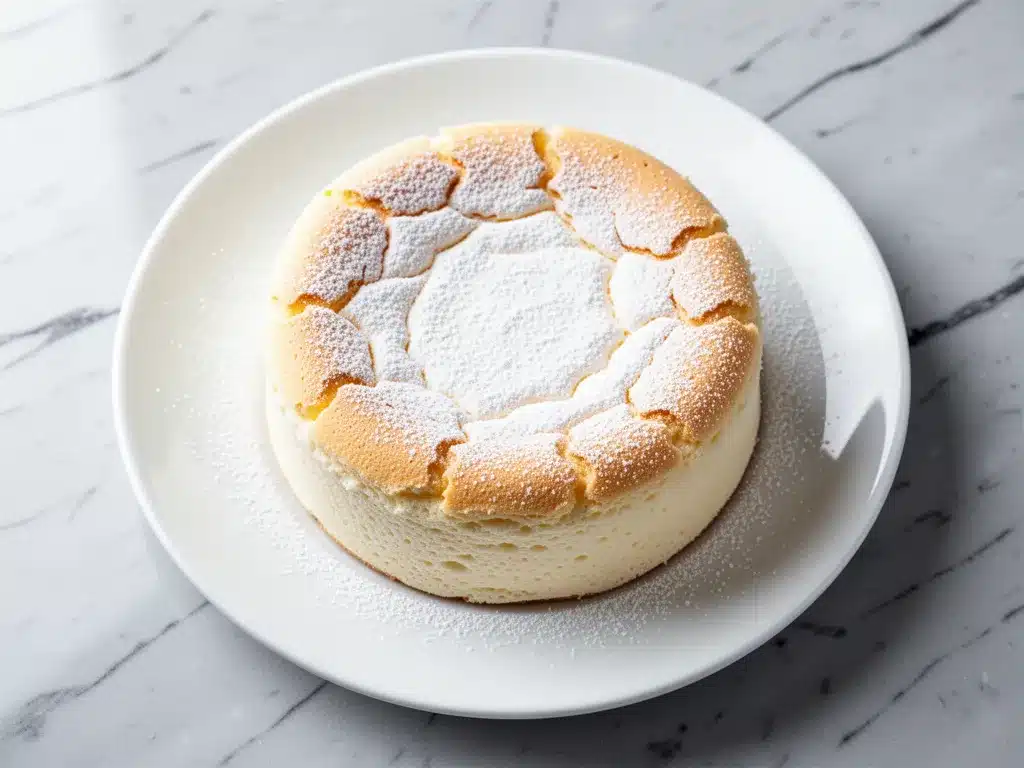
I usually serve this straight from the fridge. It’s best chilled. Slice it with a sharp knife dipped in hot water for clean cuts. It’s perfect with a dusting of powdered sugar or a few fresh berries. It pairs wonderfully with a cup of iced matcha latte for a complete afternoon tea experience.
Storage:
Store leftovers in an airtight container in the refrigerator for up to 3 days. It actually tastes better on day two as the flavors meld. Do not freeze it; the texture will become watery and grainy upon thawing.
Reheating:
Don’t reheat this cake. It’s meant to be eaten cold or room temperature. Heating it will melt the delicate structure.
Nutrition Information
I’m not a nutritionist, but here’s the breakdown if you’re tracking. Keep in mind that this is a dessert, so it’s higher in calories and fat, but it’s also lower in sugar than many traditional cakes.
Per Serving (based on 8 slices):
- Calories: 220
- Protein: 5g
- Carbs: 18g
- Fiber: 0g
- Sugar: 14g
- Fat: 14g
- Saturated Fat: 8g
Look, this is a rich dessert. But compared to a slice of classic New York cheesecake, it’s significantly lighter in calories and fat because of the meringue. It’s a guilt-free indulgence if you stick to one slice.
Final Thoughts
So that’s my go-to Ultra-Fluffy Japanese Cotton Cheesecake! I’ve probably talked your ear off at this point, but when you make a recipe this often, you have a lot to say about it.
This has saved my weeknight dessert routine more times than I can count. It’s my answer to “what’s for dessert” when I want something fancy but don’t have the energy to bake a complicated cake. My family loves it, my friends are obsessed, and I love that I can make it with minimal effort.
Make it yours! Try different toppings, swap in your favorite fruits, or add a swirl of jam. The best recipes are the ones you adapt to your tastes. If you make this, drop a comment and let me know what you think! I love hearing how recipes turn out in your kitchen. And if something doesn’t work, tell me that too—I’m here to help troubleshoot.
Happy baking! And I hope your kitchen smells half as good as mine does right now.
Frequently Asked Questions
Why did my cheesecake crack?
Cracking usually happens for one of three reasons: overbaking, sudden temperature changes, or overmixing the batter. Make sure you take it out when the center still jiggles. Also, always let it cool slowly in the turned-off oven. If you overmix the egg whites when folding, you lose the air, which can cause uneven rising and cracking.
Can I use a springform pan?
Yes! A springform pan is actually easier for removal. Just make sure to wrap the bottom and sides tightly with foil to prevent water leakage. If you’re worried about leaks, place the springform pan inside a larger, deeper pan and wrap that in foil too.
Can I make this ahead of time?
Absolutely. This cake tastes even better the next day. You can make it up to 3 days in advance. Store it covered in the fridge. If you need to transport it, keep it chilled until serving time.
Why is my cheesecake dense instead of fluffy?
This usually means you deflated the egg whites too much during the folding process. Be very gentle when combining the meringue with the cream cheese. Also, ensure your egg whites are whipped to stiff, glossy peaks. If they’re soft or bubbly, they won’t provide enough lift.
Can I use all-purpose flour instead of cake flour?
You can, but the texture won’t be quite as tender. To substitute, use 2 tablespoons of all-purpose flour minus 1 teaspoon, and add 1 teaspoon of cornstarch. This mimics the lower protein content of cake flour.
How do I know when it’s done?
The edges should be set and lightly golden, but the center should still jiggle like Jell-O when you gently shake the pan. It will continue to cook from residual heat as it cools. If the center is firm, it’s overbaked.
Can I double this recipe?
I don’t recommend doubling this in the same pan, as it may not bake evenly. If you want to make two, use two 8-inch pans and place them side-by-side in the roasting pan. Adjust baking time slightly, but keep a close eye on them. The water bath is essential for both.
Pin This Recipe!
Ultra-Fluffy Japanese Cotton Cheesecake
- Total Time: 4 hours 70 minutes
- Yield: 8 servings 1x
Description
An incredibly light, airy, and jiggly Japanese-style cheesecake that is surprisingly easy to make for weeknights. It features a custardy center and a cotton-like texture, baked in a water bath for perfect results.
Ingredients
- 8 oz (225g) full-fat block-style cream cheese, room temperature
- 2 tablespoons (30g) unsalted butter, room temperature
- 1/2 cup (100g) granulated sugar, divided
- 4 large egg yolks
- 2 tablespoons (30ml) heavy cream
- 1 teaspoon vanilla extract
- 2 tablespoons (15g) cake flour
- 4 large egg whites
- 1/4 teaspoon cream of tartar
- Aluminum foil (heavy-duty)
- Hot water (about 4 cups)
Instructions
- Preheat oven to 325°F (160°C). Line the bottom of an 8-inch round cake pan with parchment paper. Do not grease the sides. Wrap the bottom and sides of the pan tightly with two layers of heavy-duty aluminum foil to prevent water leakage.
- In a microwave-safe bowl, combine cream cheese and butter. Microwave in 30-second intervals, stirring until smooth and melted. Stir in 1/2 cup sugar until combined.
- Add egg yolks one at a time, mixing well after each addition. Stir in heavy cream and vanilla extract until the mixture is smooth and liquidy.
- Sift cake flour over the cream cheese mixture. Gently fold in with a whisk until just combined. Set aside.
- In a clean, grease-free bowl, whip egg whites with cream of tartar on medium-high speed until foamy. Gradually add remaining sugar (if reserved) and whip until stiff, glossy peaks form.
- Add about one-third of the egg whites to the cream cheese mixture and whisk gently to lighten. Fold in the rest of the egg whites using a silicone spatula, cutting down through the center and folding over, until just combined with a few streaks left.
- Pour batter into the prepared pan. Place the pan inside a large roasting pan. Pour hot water into the roasting pan until it reaches halfway up the sides of the cake pan.
- Bake at 325°F (160°C) for 50-60 minutes. The edges should be set but the center should jiggle slightly like Jell-O. Do not open the oven door for the first 40 minutes.
- Turn off the oven and crack the door open slightly (use a wooden spoon to hold it). Let the cake cool in the oven for 1 hour.
- Remove from water bath and cool completely on a wire rack. Refrigerate for at least 4 hours, preferably overnight, before serving.
Notes
Ensure all dairy ingredients are at room temperature. The bowl for egg whites must be completely clean and grease-free. Do not overmix when folding the meringue into the batter to maintain airiness. The cake must be refrigerated for at least 4 hours to set properly. Do not freeze as the texture will become watery.
- Prep Time: 20 minutes
- Cook Time: 50-60 minutes
- Category: Dessert
- Cuisine: Japanese
Nutrition
- Serving Size: 1 slice (1/8 of cake
- Calories: 220
- Sugar: 14
- Fat: 14
- Saturated Fat: 8
- Carbohydrates: 18
- Protein: 5
Keywords: Japanese cheesecake, cotton cheesecake, fluffy dessert, weeknight dessert, easy cheesecake, gluten-free option


