I still remember the panic. It was 6:30 PM on Thanksgiving, and my mother-in-law was due to arrive in twenty minutes. The turkey was resting. The gravy was simmering. The mashed potatoes were hot. But the table felt… empty. Cold. There was nothing warm, nothing soft, nothing that screamed “comfort” sitting in the center of the spread. I had forgotten to buy bread. I had forgotten to buy rolls. I had completely, utterly blanked on the one thing that makes a holiday meal feel like a holiday meal.
So I did the only thing I could do. I grabbed a can of biscuits. Yes. I heated up a can of Pillsbury Grands! and slapped them on a plate. My mother-in-law took one look at them, smiled politely, and took a tiny bite. I saw the look in her eyes. It wasn’t anger. It was disappointment. And it broke my heart. Because I knew, deep down, she was thinking, “This is nice, but it’s not from scratch. It’s not made with love.”
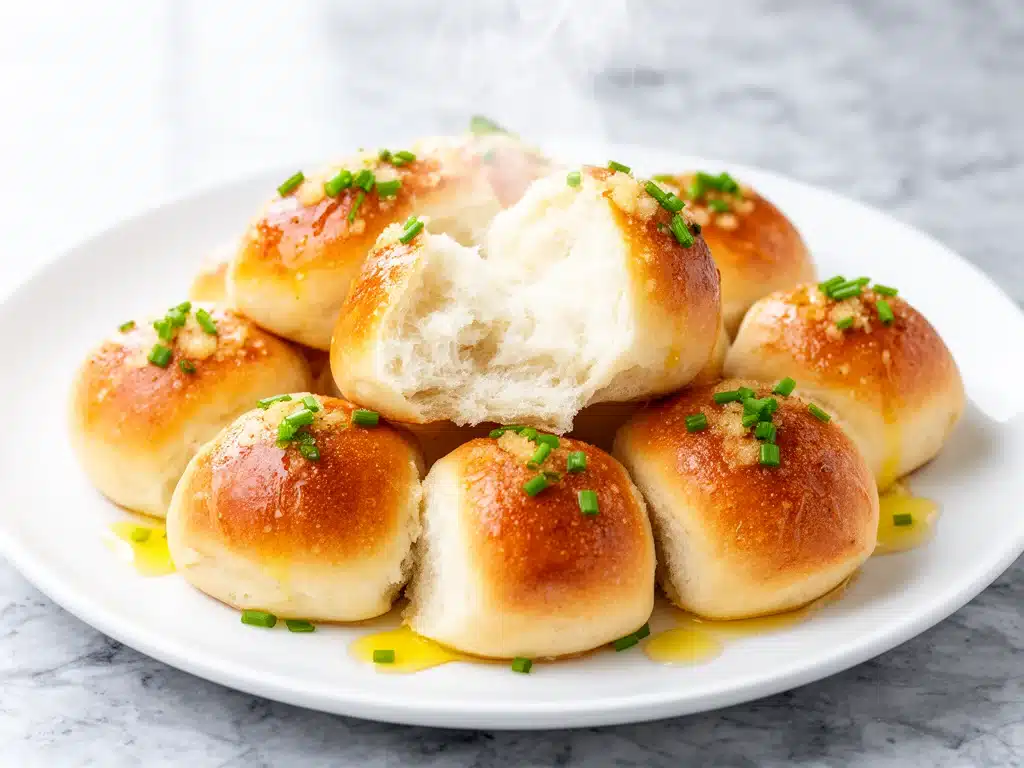
I spent the next three years determined to never serve store-bought dough again. I tested yeast recipes that were too dense. I tried no-knead methods that were too sticky. I made rolls that tasted like bricks. But then, I found the sweet spot. A recipe that was forgiving enough for a nervous beginner but sophisticated enough to win over the harshest critics. These Soft Garlic Butter Dinner Rolls are that recipe. They are pillowy soft, infused with roasted garlic, and smothered in a butter glaze that makes you want to lick your fingers clean.
Last week, I made a double batch just to have leftovers for lunch. I told my kids they couldn’t have more than three per day. By 4 PM, all six were gone. My husband walked in, saw the empty basket, and sighed. “Again?” he asked. “Yes,” I said. “Again.”
If you’ve been intimidated by baking with yeast, this is your moment. I’m going to walk you through exactly how to make these soft garlic butter dinner rolls your whole family will crave, with the kind of tips that actually work in a real kitchen, not just a perfect one.
Why You’ll Love This Recipe
There are a hundred bread recipes out there. So why this one? Why these soft garlic butter dinner rolls?
Because they solve the biggest problem with homemade bread: the fear of failure. These rolls are incredibly forgiving. If you over-proof them slightly, they’re still soft. If you under-proof them, they’re still edible. If you forget to brush them with butter immediately, they’re still delicious. But when you get it right? They are transcendent.
- Stupid Simple Dough — You don’t need a stand mixer. I make this by hand in a large bowl. If you can stir, you can make these rolls. I’ve made them while holding my toddler, which is the ultimate test of simplicity.
- Roasted Garlic Magic — Raw garlic in dough can be overpowering and sharp. Roasting it first transforms it into something sweet, nutty, and mellow. It’s the secret ingredient that makes these rolls taste like they came from a high-end bakery.
- Lightning Fast Rising — Thanks to a warm proofing spot (just your oven with the light on), these rolls rise in about an hour. That means you can have fresh, hot bread on the table in under two hours. No overnight prep needed.
- Butter Glaze Glory — The topping isn’t just butter. It’s a mixture of melted butter, roasted garlic, and a pinch of parsley. When you brush this hot glaze onto the hot rolls right out of the oven, it creates a sticky, savory crust that is absolutely addictive.
- Freezer Friendly — These freeze beautifully. I often make a batch, freeze them unbaked, and bake them fresh when guests arrive. They taste just as good as day-old, which is a lifesaver for last-minute hosting.
These rolls are my go-to when I want to impress without stress. They pair perfectly with everything from hearty stews to simple roasted chicken. They are the edible hug your dinner table needs.
Ingredients You’ll Need
Here’s the thing about bread: the quality of your ingredients matters. You don’t need fancy imports, but you do need good basics. For these soft garlic butter dinner rolls, you’ll need:
For the Dough
Warm Milk (1 cup / 240ml) — This needs to be between 105°F and 115°F (40-46°C). Too hot, and you’ll kill the yeast. Too cold, and it won’t activate. If you don’t have a thermometer, aim for “tepid”—it should feel like a warm bath, not a hot tub. I usually microwave milk for 45 seconds and let it sit for 2 minutes.
Active Dry Yeast (2 ¼ teaspoons / 1 packet) — This is the standard packet size. Make sure it’s not expired! I keep a fresh packet in the fridge to be safe. If your yeast is old, your rolls will be flat. A quick test: stir it into the warm milk with a pinch of sugar and wait 10 minutes. If it doesn’t foam up, toss it and buy new yeast.
Sugar (2 tablespoons) — This feeds the yeast and helps with browning. I use white granulated sugar, but brown sugar works too if you want a slightly deeper, caramel-like flavor in the crumb.
Unsalted Butter (4 tablespoons / 56g, melted) — This goes right into the dough. It adds richness and tenderness. Use real butter, not margarine. The flavor difference is huge.
Egg (1 large) — This adds structure and richness. Room temperature eggs incorporate better into the dough. If you forget, just drop the egg in a bowl of warm water for 5 minutes.
All-Purpose Flour (3 to 3 ½ cups / 375-440g) — This is where it gets tricky. Don’t add all 3 ½ cups at once. Start with 3 cups. You might not need all of it, or you might need a little more depending on your humidity. The dough should be soft and slightly tacky, but not sticky to the touch. If it sticks to your hands, add flour one tablespoon at a time.
Salt (1 ½ teaspoons) — Salt controls the yeast and enhances flavor. Don’t skip it. Use fine sea salt or table salt.
For the Roasted Garlic Butter Glaze
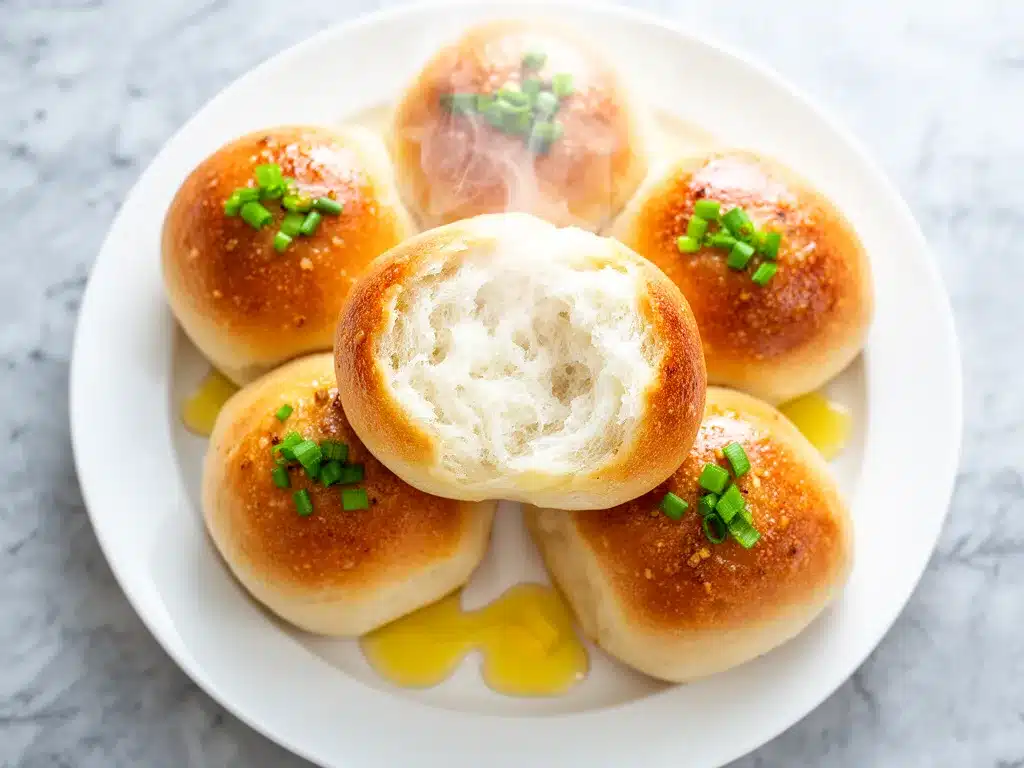
Whole Garlic Head (1 large) — This is the star. Roasting a whole head of garlic makes it sweet and spreadable. Cut the top off, drizzle with olive oil, wrap in foil, and roast at 400°F (200°C) for 40 minutes. The cloves should be soft enough to squeeze out like paste.
Melted Butter (½ cup / 113g) — This is for the glaze. Use unsalted butter so you can control the saltiness.
Roasted Garlic Cloves (from 1 head) — Squeeze the roasted cloves out of their skins and mash them into the melted butter.
Dried Parsley (1 teaspoon) — Adds a pop of color and a fresh, herbal note that cuts through the richness of the butter.
Optional: Parmesan Cheese (¼ cup, grated) — If you want a savory twist, sprinkle this on top before baking. It creates a delicious, crispy crust.
Equipment Needed
You don’t need fancy gear for these soft garlic butter dinner rolls. Here’s what I actually use:
Large Mixing Bowl — A glass or ceramic bowl is best. It holds the dough well and is easy to clean. I use a 6-quart bowl.
Measuring Cups and Spoons — For dry ingredients, use the scoop-and-level method. For liquids, use a liquid measuring cup. Accuracy matters in baking.
Pastry Brush — Essential for applying the butter glaze evenly. Silicone brushes are easier to clean than bristle ones.
Baking Sheet — A standard 18×13 inch sheet pan. Line it with parchment paper for easy cleanup, though it’s not strictly necessary since the butter glaze prevents sticking.
Oven Thermometer — (Optional but recommended) Oven dials are often inaccurate. An inexpensive thermometer hanging inside your oven ensures you’re baking at the right temperature. I learned this the hard way when my rolls were burning on the bottom.
Clean Kitchen Towel — To cover the dough while it rises. A damp towel works best to prevent a crust from forming.
How to Make It: Step-by-Step
Alright, let’s make these soft garlic butter dinner rolls! I’m walking you through exactly how I do it, including the little tricks I’ve picked up over the years.
Step 1: Roast the Garlic (30 minutes ahead)
Preheat your oven to 400°F (200°C). Cut the top off a head of garlic to expose the cloves. Place it on a piece of foil, drizzle with a little olive oil, wrap it up, and roast for 40 minutes. Let it cool, then squeeze the soft, caramelized cloves out of their skins. Mash them into a paste. This takes the sharp bite out of raw garlic and leaves you with something sweet and aromatic.
Step 2: Activate the Yeast (5 minutes)
In a large bowl, combine the warm milk, sugar, and yeast. Stir gently and let it sit for 5-10 minutes. You’re looking for a foamy, creamy layer on top. If it doesn’t foam, your yeast is dead. Start over. This step is crucial—it’s the engine of your bread.
Step 3: Mix the Dough (10 minutes)
Add the melted butter and egg to the yeast mixture. Whisk until combined. Now, add the salt and 3 cups of flour. Stir with a wooden spoon or your hands until a shaggy dough forms. The dough will be sticky. This is normal. Don’t add more flour yet!
Step 4: Knead the Dough (10 minutes)
Turn the dough out onto a lightly floured surface. Knead it for 8-10 minutes. Push the dough away from you with the heel of your hand, fold it over, and turn it. Add more flour only if it’s sticking badly. The dough is ready when it’s smooth, elastic, and springs back when you poke it. If you’re using a stand mixer, use the dough hook on medium-low speed for 6-7 minutes.
Step 5: First Rise (1 hour)
Lightly grease a clean bowl with oil. Place the dough inside, turning it once to coat. Cover with a damp towel or plastic wrap. Place it in a warm, draft-free spot. I turn my oven on to 200°F for 2 minutes, then turn it off. The residual heat creates the perfect proofing environment. Let the dough rise until it has doubled in size. This takes about 1 hour.
Step 6: Shape the Rolls (15 minutes)
Punch down the dough to release air bubbles. Divide it into 12 equal pieces. You can weigh them for consistency, but eyeballing it works too. Roll each piece into a smooth ball by tucking the edges underneath. Place them seam-side down in a greased 9×13 inch baking pan, or on a parchment-lined baking sheet. Leave a little space between them if you want individual rolls, or push them together if you want pull-apart rolls.
Step 7: Second Rise (30 minutes)
Cover the pan again and let the rolls rise for another 30 minutes. They should look puffy and jiggly. Preheat your oven to 375°F (190°C) during the last 15 minutes of rising.
Step 8: Bake (15-18 minutes)
Bake the rolls for 15-18 minutes, or until they are golden brown. If they start browning too quickly, tent them with foil. The internal temperature should reach 190°F (88°C) if you have a thermometer.
Step 9: The Garlic Butter Glaze (5 minutes)
While the rolls bake, melt the ½ cup of butter. Stir in the mashed roasted garlic and parsley. As soon as the rolls come out of the oven, brush the glaze generously over the top. The heat will melt the butter into the crust, creating that irresistible aroma.
Expert Tips & Tricks
Here’s everything I’ve learned from making these soft garlic butter dinner rolls dozens of times. These tips will save you from my mistakes.
Don’t Kill the Yeast — This is the #1 mistake. If your milk is too hot (above 120°F), it will kill the yeast. If you’re unsure, use a thermometer. Tepid is key.
Flour is Humid — The amount of flour you need depends on your kitchen’s humidity. If you’re in a humid climate, you might need more flour. If you’re in a dry climate, you might need less. Trust the texture, not the cup measurements. The dough should be soft and slightly tacky, like a Post-it note.
Roast, Don’t Raw — I cannot stress this enough. Raw garlic in dough can taste bitter and pungent. Roasting it first makes it sweet, nutty, and mellow. It’s a game-changer.
Brush Immediately — Apply the garlic butter glaze while the rolls are still hot. If you wait for them to cool, the butter won’t penetrate the crust. It’ll just sit on top.
Freeze Unbaked — After the second rise, you can freeze the pan of rolls. Once frozen solid, transfer them to a bag. When you’re ready, let them thaw and rise for an extra hour, then bake as usual. This is perfect for meal prep.
Variations & Substitutions
Once you’ve nailed the basic version, here’s how you can mix it up. I’ve tried all of these.
Herb Infused — Add 1 teaspoon of dried rosemary or thyme to the garlic butter glaze. It pairs beautifully with the garlic.
Cheese Roll — Sprinkle ¼ cup of shredded cheddar or parmesan cheese over the rolls before baking. The cheese will melt and create a crispy, savory crust.
Whole Wheat — Substitute half of the all-purpose flour with whole wheat flour. This adds a nuttier flavor and more fiber. The rolls will be slightly denser, but still soft.
Gluten-Free — Use a 1:1 gluten-free flour blend with xanthan gum. The dough will be stickier, so handle it gently. These rolls won’t rise quite as high, but they’ll still taste great.
Spicy Kick — Add a pinch of red pepper flakes to the garlic butter glaze. It adds a nice heat that balances the sweetness of the roasted garlic.
Serving & Storage
These soft garlic butter dinner rolls are best served warm. I usually serve them straight from the pan, with a small plate for extra butter on the side.
Storage — Store leftovers in an airtight container at room temperature for up to 2 days. They will stay soft if kept in the container. If they start to dry out, microwave them for 10 seconds to soften them up.
Reheating — To reheat, wrap the rolls in foil and warm them in a 350°F (175°C) oven for 10 minutes. This restores their freshness better than the microwave.
Freezing — These freeze well for up to 3 months. Thaw at room temperature and reheat as above. Or, freeze them unbaked and bake them fresh when needed.
Nutrition Information
I’m not a nutritionist, but here’s the breakdown if you’re tracking. This is based on 12 rolls.
- Calories: 220
- Protein: 5g
- Carbs: 32g
- Fiber: 1g
- Sugar: 3g
- Fat: 8g
- Saturated Fat: 5g
- Sodium: 250mg
Look, these are rich, buttery rolls. They’re not diet food. But they’re way better than store-bought, and you know exactly what’s in them. Enjoy them in moderation, or make a double batch and share the love.
Final Thoughts
So that’s my soft garlic butter dinner rolls recipe! I’ve probably talked your ear off at this point, but when you make a recipe this often, you have a lot to say about it. These rolls have saved my dinners, impressed my in-laws, and made my kids happy. They are my answer to “what’s for bread?” when I want something special but don’t want to stress.
Make them yours! Try different herbs, add cheese, or make them spicy. The best recipes are the ones you adapt to your family’s tastes. If you make these, drop a comment and let me know what you think! I love hearing how recipes turn out in your kitchen. And if something doesn’t work, tell me that too—I’m here to help troubleshoot.
Happy baking! And I hope your kitchen smells half as good as mine does right now.
Frequently Asked Questions
Q: Can I use instant yeast instead of active dry yeast?
A: Yes! You can use instant yeast directly in the dough without activating it in milk first. Use the same amount (2 ¼ teaspoons). The results will be very similar, though active dry yeast often gives a slightly better rise.
Q: Why are my rolls dense and hard?
A: This usually happens if you add too much flour during kneading, or if the yeast was dead. Make sure your milk was warm but not hot, and don’t over-flour the dough. The dough should be soft and tacky, not stiff.
Q: Can I make these ahead of time?
A: Yes! After shaping the rolls and letting them rise for the second time, you can cover the pan tightly with plastic wrap and refrigerate overnight. In the morning, let them come to room temperature and rise for another hour before baking.
Q: How do I get the rolls to be extra soft?
A: Brush them with the garlic butter glaze immediately after baking. Also, make sure you’re not over-baking them. Pull them out as soon as they are golden brown. Over-baking dries them out.
Q: Can I use salted butter for the dough?
A: You can, but reduce the added salt in the recipe by half. I prefer unsalted butter so I can control the saltiness, but salted butter works in a pinch.
Q: What if I don’t have an oven thermometer?
A: Watch your rolls closely. If they’re browning too fast on top but raw in the middle, your oven might be too hot. Tent them with foil. If they’re taking forever to bake, your oven might be too low. Increase the temperature by 25°F.
Pin This Recipe!
Soft Garlic Butter Dinner Rolls
- Total Time: 2 hours 10 minutes
- Yield: 12 servings 1x
Description
Pillowy soft homemade dinner rolls infused with sweet, roasted garlic and smothered in a savory butter glaze. Forgiving for beginners and perfect for any meal.
Ingredients
- 1 cup warm milk (105°F-115°F)
- 2 ¼ teaspoons active dry yeast (1 packet)
- 2 tablespoons sugar
- 4 tablespoons unsalted butter, melted
- 1 large egg, room temperature
- 3 to 3 ½ cups all-purpose flour
- 1 ½ teaspoons salt
- 1 large head of garlic (for roasting)
- Olive oil (for roasting garlic)
- ½ cup unsalted butter (for glaze)
- 1 teaspoon dried parsley
- ¼ cup grated Parmesan cheese (optional)
Instructions
- Preheat oven to 400°F. Cut the top off the garlic head, drizzle with olive oil, wrap in foil, and roast for 40 minutes. Cool, squeeze out cloves, and mash into a paste.
- In a large bowl, combine warm milk, sugar, and yeast. Let sit for 5-10 minutes until foamy.
- Whisk in melted butter and egg. Add salt and 3 cups of flour. Stir until a shaggy dough forms.
- Knead dough on a floured surface for 8-10 minutes until smooth and elastic. Add more flour only if necessary.
- Place dough in a greased bowl, cover, and let rise in a warm spot for 1 hour until doubled.
- Punch down dough and divide into 12 equal pieces. Shape into balls and place in a greased 9×13 inch pan or on a baking sheet.
- Cover and let rise for another 30 minutes. Preheat oven to 375°F during the last 15 minutes.
- Bake for 15-18 minutes until golden brown.
- While baking, melt ½ cup butter and mix with roasted garlic paste and parsley.
- Immediately brush the hot rolls with the garlic butter glaze upon removing from the oven.
Notes
Ensure milk is tepid (not hot) to avoid killing the yeast. Roasting the garlic transforms its flavor from sharp to sweet and nutty. The dough should be soft and slightly tacky, not sticky. Rolls can be frozen unbaked after the second rise.
- Prep Time: 45 minutes
- Cook Time: 55 minutes
- Category: Side Dish
- Cuisine: American
Nutrition
- Serving Size: 1 roll
- Calories: 220
- Sugar: 3
- Sodium: 250
- Fat: 8
- Saturated Fat: 5
- Carbohydrates: 32
- Fiber: 1
- Protein: 5
Keywords: garlic bread, dinner rolls, homemade rolls, yeast rolls, garlic butter, holiday sides, Thanksgiving bread, soft rolls


