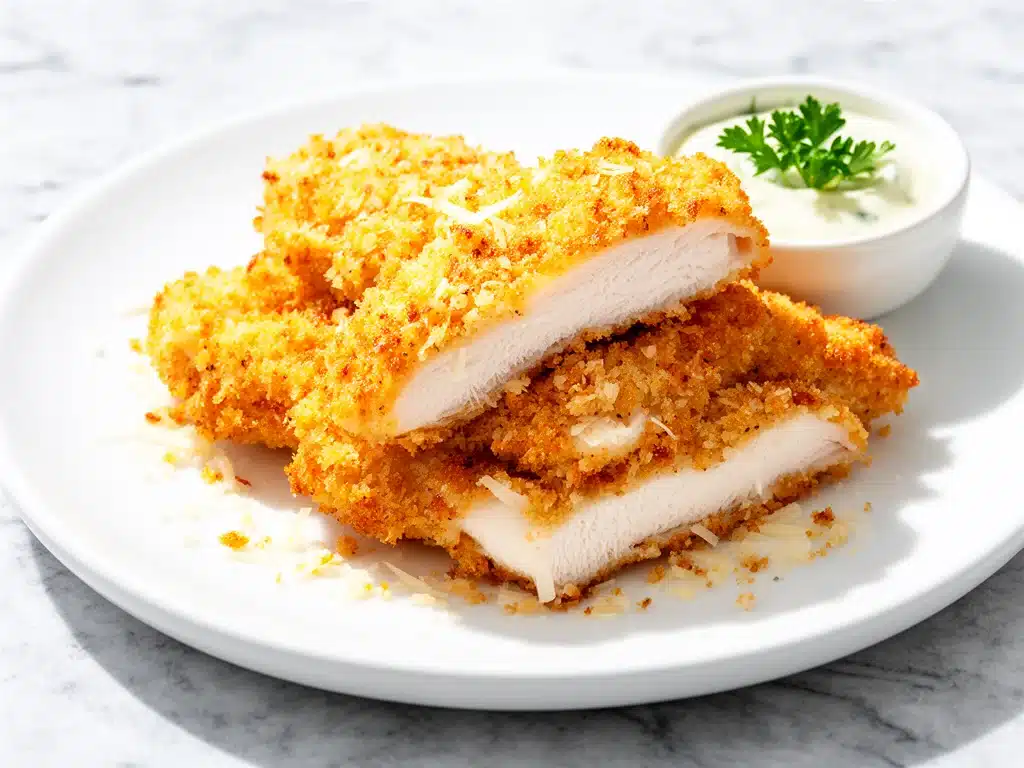
Last Tuesday, I was standing in my kitchen at 6:45 PM, staring into the fridge with that specific kind of desperation that only happens when you’re tired, hungry, and refusing to order takeout. My kids had been asking for “chicken nuggets” since 4:30 PM. Not nuggets—tenders. The long, fancy kind. And I knew that if I pulled out the frozen box from the back of the freezer, they’d eat it, but they’d also complain it wasn’t “real” chicken. If I went to the drive-thru, I’d spend $20 and wait 15 minutes. So I did what I always do when I’m out of options: I raided the pantry.
I had chicken breasts. I had panko breadcrumbs. I had a half-used wedge of Parmesan cheese that was starting to get weird in the crisper drawer. And I had a tiny bottle of garlic powder. No flour. No egg wash. No complicated breading stations that leave a mess on your counter for an hour.
I threw them together, expecting a mediocre dinner at best. What I got was crispy, golden, cheesy chicken tenders that my kids actually asked to pack in their lunchboxes the next day. That’s when I knew I had struck gold. This crispy baked parmesan crusted chicken tenders recipe is now a permanent fixture in our weekly rotation, and I’m convinced it’s the best way to eat chicken without deep-frying it.
The best part? It’s genuinely simple. You don’t need a degree in culinary arts or a pantry full of obscure spices. You just need three main ingredients and a willingness to bake. I’ve tested this method about ten times now—sometimes with chicken thighs, sometimes with different cheeses—and this specific combination of panko and Parmesan is the winner. It’s crunchy on the outside, juicy on the inside, and ready in under 30 minutes. Let’s get into how to make it.
Why You’ll Love This Recipe
I know what you’re thinking. “Chicken tenders? Really?” But hear me out. This isn’t just another chicken recipe. This is the one that replaces the freezer aisle. Here’s why this crispy baked parmesan crusted chicken tenders recipe has taken over my house:
- Stupidly Simple — Seriously, if you can mix a bowl and put a baking sheet in the oven, you can make this. I’ve walked my teenage son through it over FaceTime while I was at work. No egg wash to dip into, no flour dredging. Just toss and bake.
- Lightning Fast — 30 minutes from start to finish. 10 minutes of prep, 20 minutes of baking. I make this on weeknights when I get home at 7pm and the kids are already complaining about hunger. It’s fast enough for a panic dinner.
- Actually Crispy — Baked chicken usually turns out dry or soggy. Not this. The panko-Parmesan mix creates a shatteringly crisp crust that stays crunchy even after sitting for a few minutes. I’ve tried air fryers and ovens, and the oven gives the most even browning.
- Pantry-Friendly — You probably have 80% of these ingredients already. Panko, Parmesan, chicken. That’s it. I keep these stocked just so I can make this on a whim when we need a quick win.
- Kid-Approved — My picky eater (who usually only eats white bread and cheese) loves these. The Parmesan flavor is savory but not overpowering, and the crunch makes them fun to eat. I’ve served these to dinner parties too, and adults love them just as much.
- Budget-Smart — Feeds 4 people for under $12. That’s less than one meal at a fast-food place. Plus, you control the quality of the chicken and the cheese.
This is my go-to when I need dinner to just work. No complicated techniques, no weird ingredients, just reliable, delicious food that makes everyone happy. It’s comfort food that doesn’t feel like a cheat day.
Ingredients You’ll Need
Here’s the best part: you probably have most of this already. I’m particular about three ingredients here, and I’ll tell you exactly why. Don’t skip the details, because they make the difference between “okay” and “wow.”
The Star
Chicken breasts (1.5 pounds / 680g) — I use boneless, skinless chicken breasts. Look for ones that are relatively uniform in size so they cook evenly. If they’re huge, pound them down to about ½-inch thickness. This ensures they cook through before the outside burns. Chicken thighs work too, but they’re juicier and might need a few extra minutes in the oven.
The Crunch
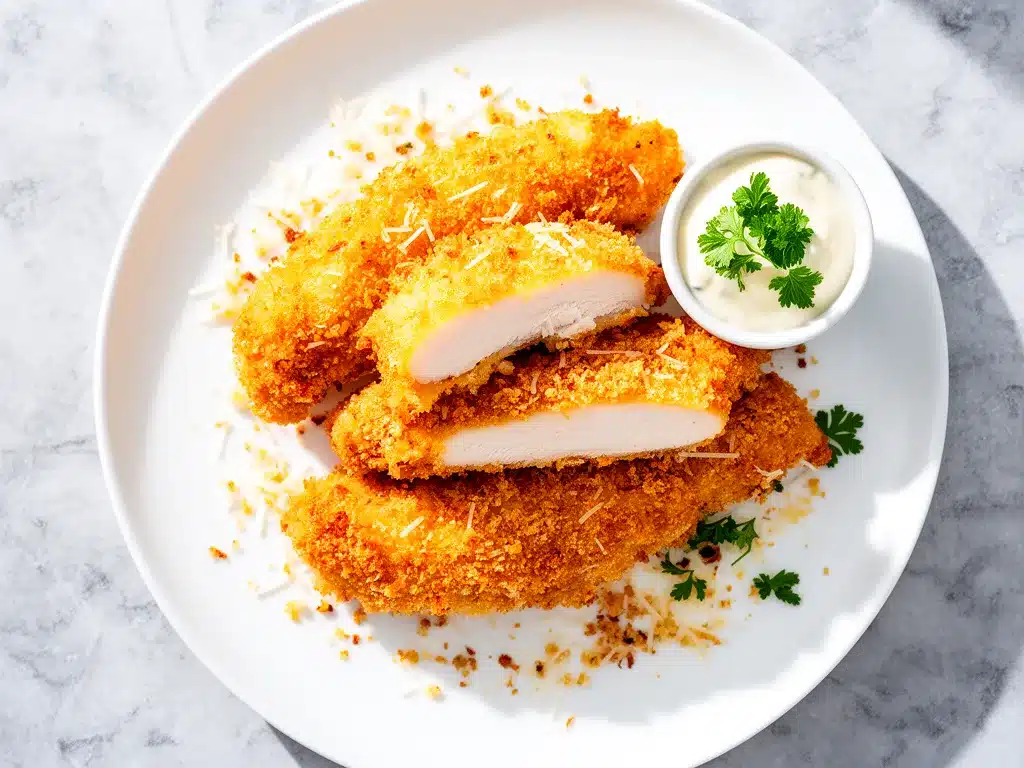
Panko breadcrumbs (1 cup / 80g) — This is non-negotiable. Regular breadcrumbs are too fine and dense; they’ll turn into a paste. Panko is flaky and airy, creating that shatteringly crisp texture. I always buy the Japanese-style panko (like the brand Panko or store brand) because it holds up better to baking. Don’t use seasoned panko unless you want to adjust your salt.
Parmesan cheese (½ cup / 50g, freshly grated) — Buy the block. Seriously. Pre-grated Parmesan is coated in cellulose (wood pulp) to prevent clumping, and it doesn’t melt or crisp up the same way. You want that nutty, salty flavor to bind with the panko. Grate it yourself on the fine side of a box grater. It takes 2 minutes and makes a huge difference.
The Flavor Boosters
Garlic powder (1 teaspoon) — Not fresh garlic (which can burn in the oven), but garlic powder. It distributes evenly and adds that savory backbone. If you don’t have it, onion powder works, but garlic is classic.
Italian seasoning (1 teaspoon) — Adds a hint of herbs without being overwhelming. If you don’t have Italian seasoning, use a mix of dried oregano and basil. Skip it if you prefer a plain, cheesy crunch.
Salt and black pepper (to taste) — Don’t forget to season the chicken itself, not just the coating. I use about ½ teaspoon of kosher salt for the chicken and a good crack of black pepper.
Butter or oil (2 tablespoons, melted) — This helps the breadcrumbs brown. I use melted butter for richer flavor, but olive oil works if you want to keep it dairy-free (though the Parmesan isn’t dairy-free, so that’s a bit ironic). Melt it in the microwave for 30 seconds.
Optional Add-ins
Smoked paprika (½ teaspoon) — If you like a little smokiness, add this. It gives a BBQ vibe without the sauce.
Red pepper flakes (¼ teaspoon) — For a little kick. I add this when I want to spice things up for my husband.
Egg wash (alternative) — Some recipes call for an egg wash to help the crumbs stick. I’ve found that if you toss the chicken in the butter first, then the panko mix, it sticks just fine. But if your chicken is very lean or dry, a light dip in beaten egg can help. I usually skip it to keep it simple.
Equipment Needed
You don’t need fancy equipment for this. Here’s what I actually use.
Baking sheet — I use a standard 18×13 inch sheet pan. A rimmed sheet pan is best to catch any drips. I line it with parchment paper or a silicone baking mat for easy cleanup. Aluminum foil works too, but it can stick if you don’t grease it.
Two shallow bowls or plates — One for the dry mix (panko, Parmesan, spices), one for the wet (melted butter). I use pie dishes because they’re shallow and wide, making it easy to coat the chicken.
Whisk or fork — To mix the dry ingredients thoroughly. You want the spices distributed evenly so every bite is flavorful.
Tongs — For flipping the chicken. Forks can poke holes in the chicken, letting juices escape. Tongs keep the chicken intact.
Cooking spray or brush — Optional, but I lightly spray the tops of the tenders with oil before baking to ensure even browning. It helps them turn golden instead of pale.
Instant-read thermometer — This is my favorite tool. Chicken is done at 165°F (74°C). No more guessing. If you don’t have one, cut into the thickest part to check—it should be white, not pink, and juices should run clear.
Sharp knife and cutting board — For slicing the chicken breasts into strips. A sharp knife makes clean cuts; a dull one tears the meat.
How to Make It: Step-by-Step
Alright, let’s make this! I’m walking you through exactly how I do it, including the little tricks I’ve picked up. This process takes about 10 minutes of active time.
Step 1: Prep Your Chicken (5 minutes)
Start by trimming any excess fat or silver skin from the chicken breasts. Slice each breast horizontally into strips about 1 inch wide and ½ inch thick. If the breasts are very thick, pound them gently with a meat mallet or the bottom of a heavy pan to even them out. Uniform thickness is key for even cooking. Pat the strips dry with paper towels—this sounds boring, but removing surface moisture helps the coating stick better.
Step 2: Make the Dry Mix (2 minutes)
In a shallow bowl or plate, combine the panko breadcrumbs, freshly grated Parmesan cheese, garlic powder, Italian seasoning, salt, and pepper. Whisk it all together with a fork. You want the spices to be evenly distributed throughout the breadcrumbs. Taste a tiny pinch (don’t eat the whole thing, it’s dry!) to check seasoning. If it tastes bland, add a little more salt or garlic powder.
Step 3: Melt the Butter (1 minute)
In another shallow bowl, melt the butter. If you’re using olive oil, just pour it in. Let it cool slightly so it’s warm, not hot, so you don’t cook the chicken when you dip it.
Step 4: Coat the Chicken (3 minutes)
This is the fun part. Take a chicken strip and dip it into the melted butter, turning to coat all sides. Let any excess drip off. Then, press it firmly into the panko-Parmesan mixture. Use your hands to press the crumbs onto the chicken—don’t just roll it. You want a thick, even layer. Place the coated tender on a clean plate or directly on the baking sheet if you’re in a rush. Repeat with all chicken strips. Don’t overcrowd the bowl; do it in batches if needed.
Step 5: Bake (20 minutes)
Preheat your oven to 400°F (200°C). Line a baking sheet with parchment paper or silicone mat. Arrange the coated chicken tenders on the sheet, leaving a little space between them so air can circulate. If they’re touching, they’ll steam instead of crisp. Lightly spray the tops with cooking spray or brush with a little more butter/oil. This helps them brown.
Bake for 10 minutes. Then, carefully flip each tender using tongs. Bake for another 8-10 minutes, or until the chicken reaches an internal temperature of 165°F (74°C) and the coating is golden brown and crispy. Oven temperatures vary, so check at 18 minutes to avoid burning.
Step 6: Rest and Serve (2 minutes)
Remove the tenders from the oven and let them rest for 2-3 minutes. This allows the juices to redistribute, keeping them moist. Serve immediately while hot and crispy. They lose their crunch if they sit too long in a covered container.
Total Time: About 30 minutes (10 minutes active, 20 minutes baking)
Troubleshooting: If the breadcrumbs are burning before the chicken is cooked, lower the oven temperature to 375°F (190°C) and bake for a few minutes longer. If they’re not browning, you can broil for the last 1-2 minutes, but watch them like a hawk—they go from golden to black in seconds.
Expert Tips & Tricks
Here’s everything I’ve learned from making this dozens of times. These tips will save you from my mistakes.
Don’t Skip the Drying
I know it’s tedious, but patting the chicken dry with paper towels is crucial. Wet chicken = soggy coating. If the surface is damp, the panko won’t stick properly, and it’ll slide off in the oven.
Press, Don’t Roll
When coating, use your fingers to press the panko mixture onto the chicken. Rolling it in the bowl often results in sparse coverage. You want a thick, even crust. Think of it like making a sandwich—press the ingredients together.
Space Matters
Don’t crowd the baking sheet. If the tenders are touching, they’ll steam each other. Give them room to breathe. If you’re making a large batch, use two sheets or bake in batches.
Use a Thermometer
Overcooked chicken is dry chicken. Pull them out at 165°F. If you don’t have a thermometer, cut one open to check. The meat should be opaque white, not translucent or pink.
Keep Them Warm
If you’re serving a crowd, keep the baked tenders warm in a 200°F oven on a wire rack. This prevents the bottoms from getting soggy from steam. Wire racks are better than flat sheets because air circulates underneath.
Pro Trick: The Broil Finish
For extra crunch, broil the tenders for the last 1-2 minutes. Keep a close eye on them—butter burns fast. This gives them that restaurant-style golden top.
Variations & Substitutions
Once you’ve nailed the basic version, here’s how you can mix it up. I’ve tried all of these.
Spicy Parmesan
Add ½ teaspoon of cayenne pepper or red pepper flakes to the dry mix. Or use spicy panko if you can find it. This is great for those who like a kick.
Herb Garden
Skip the Italian seasoning and add fresh chopped parsley, chives, or dill to the panko mix after baking. Fresh herbs lose flavor if baked, so add them at the end.
Gluten-Free
Use gluten-free panko breadcrumbs. They’re widely available now and work just as well. Just check the label to ensure they’re certified GF.
Dairy-Free
Substitute the Parmesan with nutritional yeast (2 tablespoons) for a cheesy flavor, or use a dairy-free Parmesan alternative. Use olive oil instead of butter. Note: The texture won’t be quite the same, but it’s still tasty.
Dip It Up
These are great with various dips. Classic ranch, honey mustard, BBQ sauce, or even a simple marinara. I like to serve them with a side of dipping sauce on the plate.
Make-Ahead Breakfast Muffin Cups — If you’re meal prepping, these tenders can be frozen raw. Coat them, place on a tray, freeze solid, then transfer to a bag. Bake from frozen, adding 5 minutes to the cook time.
Serving & Storage
How to Serve:
I usually serve these straight from the baking sheet at the dinner table—it looks rustic and stays warm. But here are other ways I’ve enjoyed them:
Side Dishes:
- No-Bake Peanut Butter Banana Energy Bites — For a sweet snack on the side, these bites are a hit with kids and adults alike.
- Steamed broccoli or green beans
- Simple green salad with lemon vinaigrette
- Mashed potatoes or roasted sweet potatoes
- Crusty bread or dinner rolls to soak up any leftover butter
Toppings Bar:
When I have guests, I put out: extra Parmesan, ranch dressing, honey mustard, hot sauce, and lemon wedges. Everyone customizes their bowl.
Storage Instructions:
Refrigerator: Store in an airtight container for up to 3 days. The coating will soften over time, which is normal. To restore crispness, reheat in an air fryer or oven at 375°F for 5-7 minutes. Microwaving will make them soggy.
Freezing: You can freeze cooked tenders for up to 3 months. Cool completely, then store in a freezer-safe bag. Reheat in the oven or air fryer to regain crispness. Do not freeze raw coated tenders for more than a week as the moisture in the butter can make the panko soggy before baking.
Reheating: Best method: Oven or air fryer. 375°F for 5-7 minutes. Worst method: Microwave. It turns them rubbery. If you must microwave, do it in 30-second bursts and let them sit to cool slightly.
Nutrition Information
I’m not a nutritionist, but here’s the breakdown if you’re tracking. This is per serving (based on 4 servings).
– Calories: 380
– Protein: 35g
– Carbs: 18g
– Fiber: 1g
– Sugar: 1g
– Fat: 18g
– Saturated Fat: 7g
– Cholesterol: 95mg
– Sodium: 450mg
What’s Good:
- High in protein from the chicken and Parmesan
- Lower carb than fried tenders (no flour)
- Good source of calcium from the cheese
What to Know:
- Higher in sodium due to Parmesan and salt
- Contains dairy and gluten
- Calories come from the panko and butter
My Take:
Look, this is a comfort food dish. It’s not a diet recipe. But it’s way better than takeout, costs less, and I know exactly what’s in it. When I want to make it lighter, I use less butter and more chicken. But usually? I just eat a reasonable portion and enjoy it.
Final Thoughts
So that’s my go-to crispy baked parmesan crusted chicken tenders! I’ve probably talked your ear off at this point, but when you make a recipe this often, you have a lot to say about it.
This has saved weeknight dinners more times than I can count. It’s my answer to “what’s for dinner” when I’m tired, don’t want takeout, and still want something that tastes really good. My kids are happy, my husband’s happy, and I’m happy because I’m not stressed about cooking.
Make it yours! Try different spices, swap in your favorite herbs, adjust the garlic. The best recipes are the ones you adapt to your family’s tastes. If you make this, drop a comment and let me know what you think! I love hearing how recipes turn out in your kitchen. And if something doesn’t work, tell me that too—I’m here to help troubleshoot.
Happy cooking! And I hope your kitchen smells half as good as mine does right now.
Frequently Asked Questions
Can I use chicken thighs instead of breasts?
Yes! Chicken thighs are juicier and more forgiving if you overcook them slightly. Just note that they may take 2-3 minutes longer to cook. Make sure they reach 165°F internally. The coating will stick just as well.
Why did my breadcrumbs fall off?
Usually, this happens because the chicken was too wet or you didn’t press the crumbs on firmly enough. Pat the chicken dry, dip in butter, then press the panko mixture onto the chicken with your fingers. Don’t just roll it. Also, make sure the butter is melted but not hot.
Can I make these in an air fryer?
Absolutely. Air fryers are great for this. Cook at 375°F for 8-10 minutes, flipping halfway through. They come out incredibly crispy. Just don’t overcrowd the basket.
How do I reheat leftovers without them getting soggy?
Avoid the microwave! Use an oven or air fryer at 375°F for 5-7 minutes. This restores the crispiness. If you must use the microwave, place a paper towel under the tender and heat in 30-second intervals, but expect some texture loss.
Can I freeze the raw coated tenders?
You can, but it’s better to bake them first, then freeze. If freezing raw, place them on a baking sheet and freeze solid before bagging. Bake from frozen, adding 5 minutes to the cook time. The butter in the coating can sometimes make the panko soggy if frozen raw for too long.
What if I don’t have panko?
You can use regular breadcrumbs, but the texture will be denser and less crispy. You might need to bake them a minute or two longer. For a similar texture, you can crush cornflakes or rice cereal, but panko is best.
Can I double this recipe?
Yes! Double all ingredients and use two baking sheets. Bake in batches if your oven doesn’t fit two sheets, or rotate the sheets halfway through cooking for even browning.
Pin This Recipe!
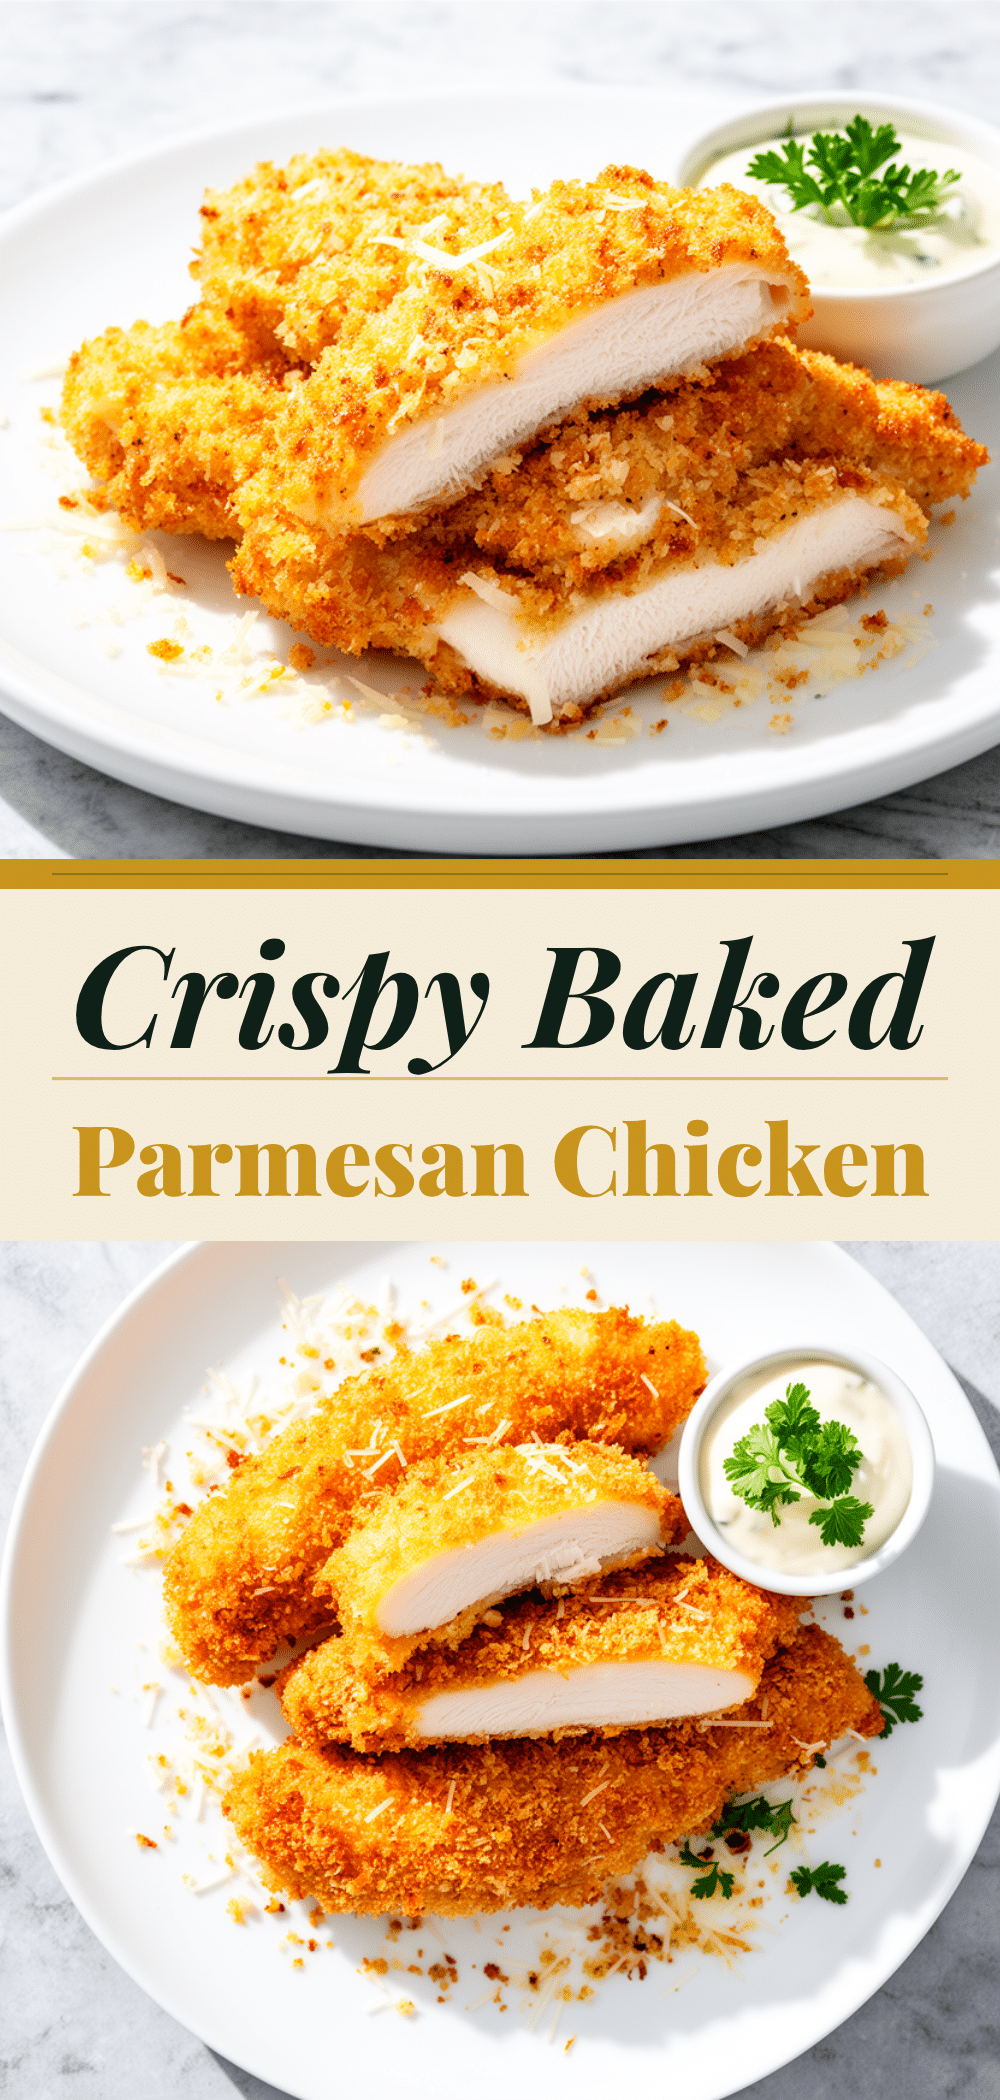
Crispy Baked Parmesan Crusted Chicken Tenders: 3-Ingredient
- Total Time: 30 minutes
- Yield: 4 servings 1x
Description
A simple, kid-approved baked chicken tender recipe using just panko, Parmesan, and chicken. Crispy on the outside, juicy on the inside, and ready in under 30 minutes without deep frying.
Ingredients
- 1.5 pounds boneless, skinless chicken breasts
- 1 cup panko breadcrumbs
- 1/2 cup freshly grated Parmesan cheese
- 1 teaspoon garlic powder
- 1 teaspoon Italian seasoning
- 1/2 teaspoon kosher salt
- Black pepper to taste
- 2 tablespoons melted butter or olive oil
- 1/2 teaspoon smoked paprika (optional)
- 1/4 teaspoon red pepper flakes (optional)
Instructions
- Preheat oven to 400°F (200°C). Line a baking sheet with parchment paper or a silicone mat.
- Trim excess fat from chicken breasts and slice horizontally into strips about 1 inch wide and 1/2 inch thick. Pat dry with paper towels.
- In a shallow bowl, whisk together panko, Parmesan, garlic powder, Italian seasoning, salt, and pepper.
- In another shallow bowl, melt the butter or oil.
- Dip each chicken strip into the melted butter, letting excess drip off, then press firmly into the panko mixture to coat evenly.
- Arrange coated tenders on the baking sheet, ensuring they are not touching.
- Lightly spray tops with cooking spray or brush with more butter/oil.
- Bake for 10 minutes, then flip tenders using tongs.
- Bake for another 8-10 minutes until internal temperature reaches 165°F (74°C) and coating is golden brown.
- Let rest for 2-3 minutes before serving.
Notes
Patting the chicken dry is crucial for the coating to stick. Press the panko mixture onto the chicken rather than rolling it. Do not overcrowd the baking sheet to ensure crispiness. For extra crunch, broil for the last 1-2 minutes. Reheat in an oven or air fryer to maintain crispness; avoid microwaving.
- Prep Time: 10 minutes
- Cook Time: 20 minutes
- Category: Main Course
- Cuisine: American
Nutrition
- Serving Size: 1 serving (approx. 4
- Calories: 380
- Sugar: 1
- Sodium: 450
- Fat: 18
- Saturated Fat: 7
- Carbohydrates: 18
- Fiber: 1
- Protein: 35
Keywords: chicken tenders, baked chicken, parmesan chicken, panko chicken, easy dinner, kid-friendly meals, healthy chicken recipe, 30 minute meals


