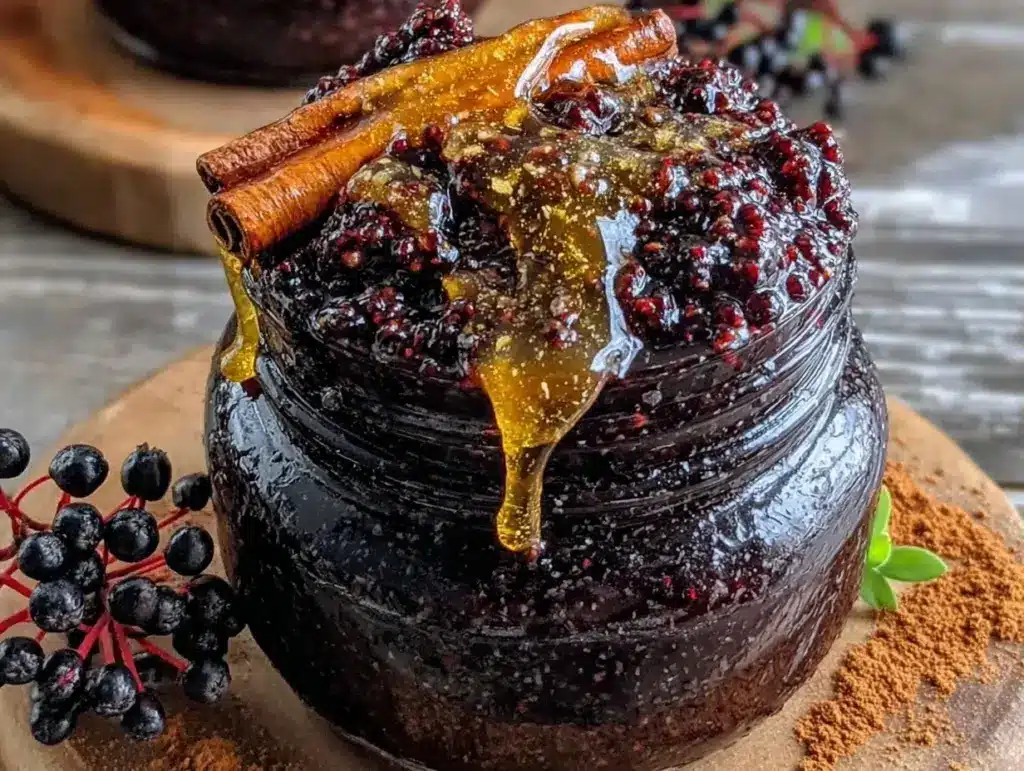
It was 5:15 PM on a Tuesday when the sky outside turned that bruised purple color that usually means a storm is rolling in. Or maybe it’s just the start of the season where my kids catch everything in their path. I had exactly zero minutes to spare, a pantry full of random jars, and a sudden, desperate need to stop the sniffles before they even started.
I didn’t have time to go to the store. I didn’t have time to wait for a doctor’s appointment. I had ten minutes and a pot. So I grabbed the dried elderberries from the back of my spice cabinet—the ones I bought on a whim last spring—and threw them into a saucepan with water, cinnamon sticks, and raw honey. I was half-expecting it to taste like bitter dirt.
Instead, it tasted like a hug. Warm, spiced, and impossibly soothing. Within twenty minutes, I had a bottle of deep purple liquid that smelled like a cozy cabin in the woods. My daughter took one spoonful and actually stopped complaining about being tired.
That was three winters ago. Since then, homemade elderberry syrup has become my non-negotiable health hack. It’s the answer to ‘5pm and nothing planned’ when I need to boost immunity fast, or when I just want something comforting to sip on while the house gets quiet. I’ve made this batch at least once a month, tweaking the ratios until it was perfect. It’s not complicated. It’s not fussy. It’s just good, honest food that works.
Why You’ll Love This Recipe
There are a million health tonics out there, but most of them taste like medicine. This elderberry syrup with raw honey and cinnamon is different. It’s delicious. Here’s why I keep making it on repeat:
Stupid Simple — Seriously, if you can boil water, you can make this. I literally just dump everything in a pot and wait. No fancy techniques, no clarifying steps, no stress. I’ve made this while helping my kid with homework.
Lightning Fast — From start to finish, it takes about 25 minutes. Ten minutes of active chopping and stirring, fifteen minutes of simmering. That’s it. It’s faster than ordering takeout and way better for you.
Pantry-Friendly — You probably have most of this already. Dried elderberries are cheap and shelf-stable. Cinnamon sticks? Honey? Water? Yeah, you’ve got it. I keep a jar of dried berries in my pantry specifically so I can throw this together on a whim.
Immunity Powerhouse — Look, I’m not a doctor, but I’ve watched this bottle keep my family healthy through three flu seasons. Elderberries are packed with antioxidants, and the honey adds antimicrobial properties. It’s like a shield in a bottle.
Versatile AF — You can drink it straight (yes, really), mix it into tea, stir it into warm water with lemon, or even drizzle it over fall honeycrisp apple crisp. It’s not just for sick days; it’s for every day.
Budget-Smart — A bottle from the health food store costs $15. This costs about $4 in ingredients. That’s less than a latte. And it lasts for weeks.
This is my go-to when I need dinner to just work, or when I need to boost my immune system without buying weird supplements. No complicated techniques, no weird ingredients, just reliable, delicious food that makes everyone happy.
Ingredients You’ll Need
Here’s the best part: you probably have most of this already. I’m particular about a few things here, and I’ll tell you exactly why.
For the Base
Dried Elderberries (1 cup / 115g) — This is the star. Make sure you’re using dried, not fresh. Fresh elderberries can be toxic and don’t have the same concentrated benefits. I buy mine in bulk from Amazon or a local health food store. They last forever in the pantry.
Water (4 cups / 960ml) — Just regular tap water is fine. I use filtered if I have it, but it doesn’t make a huge difference. You’ll be reducing this down, so the quality matters less.
Cinnamon Sticks (2 large sticks) — Use actual cinnamon sticks, not ground powder. Ground cinnamon gets gritty and bitter. Sticks infuse the flavor beautifully and are easy to fish out later. If you only have ground, you can use 1 teaspoon, but strain it extra well.
Star Anise (1 pod) — Optional, but I think it adds a subtle, sophisticated depth. If you don’t have it, skip it. It won’t ruin the recipe.
Whole Cloves (3-4 cloves) — Again, whole cloves are better. They add a warm, spicy note without being overwhelming. If you’re sensitive to spice, use fewer.
Orange Peel (1 strip, about 2 inches) — Use a vegetable peeler to get a strip of just the orange part, no white pith. The pith is bitter. The peel adds a bright, citrusy aroma that cuts through the earthiness of the berries. It’s magic.
For the Sweetness & Finish
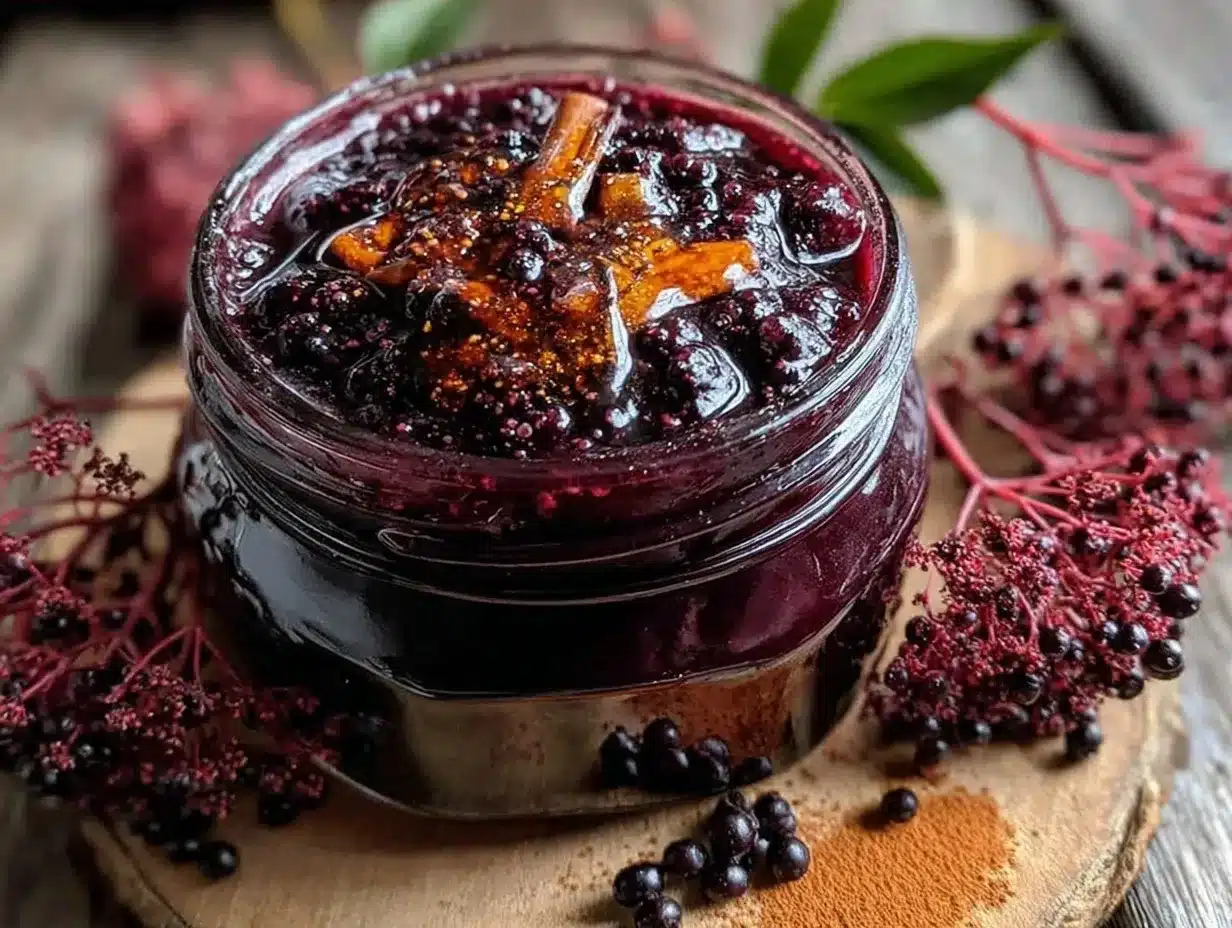
Raw Honey (1 cup / 340g) — This is crucial. Use raw, unprocessed honey. It has more enzymes and health benefits. I love local honey because it’s supposedly good for seasonal allergies. Manuka is great but expensive. Regular raw honey works perfectly fine.
Fresh Lemon Juice (2 tablespoons / 30ml) — Adds brightness and acts as a natural preservative. It balances the sweetness so it doesn’t taste like candy. Use fresh-squeezed if you can. Bottled juice tastes flat.
Optional: Ginger (1 inch piece, sliced) — If you like a little kick, add a slice of fresh ginger with the berries. It’s great for nausea and adds warmth. I add it when I’m feeling extra under the weather.
Personal Tips:
- Brand recommendations: I use Now Foods dried elderberries—they’re consistent and affordable.
- Shopping shortcuts: If you can’t find dried elderberries, check the herbal tea aisle. Some blends contain them, but you’ll need to buy a lot more. Buying the loose dried fruit is cheaper.
- Substitutions: No cinnamon sticks? Use ground cinnamon, but strain the syrup through a fine-mesh sieve twice to get all the grit out. No orange peel? Skip it, but you’ll miss that citrus note.
- Storage: Honey keeps forever. The syrup keeps for a few weeks in the fridge. Don’t worry about it going bad unless it smells weird or gets moldy.
Equipment Needed
You don’t need fancy equipment for this. Here’s what I actually use.
Saucepan — I use a 3-quart saucepan. It needs to hold the water and berries without boiling over. My old stainless steel pot works fine. Any pot with a lid will do.
Mesh Strainer — A fine-mesh strainer is essential. You need to get all those little seeds and spices out. A cheesecloth-lined strainer works too, but a good mesh one is faster and easier to clean.
Wooden Spoon — For stirring. Silicone works too. Don’t use metal if you’re worried about scratching your pot, though it’s probably fine.
Measuring Cups and Spoons — Pretty standard stuff. Dollar store versions work fine.
Glass Bottles or Jars — For storage. I use old jam jars or mason jars. Glass is best because honey can interact with plastic over time. Make sure they’re clean and dry.
Optional but nice:
- Fine-mesh sieve — If your strainer is coarse, use a second sieve to catch the tiny bits.
- Funnel — Makes pouring into narrow-neck bottles way less messy. I’m obsessed with my small metal funnel from IKEA—it’s like $3 and makes life easier.
How to Make It: Step-by-Step
Alright, let’s make this! I’m walking you through exactly how I do it, including the little tricks I’ve picked up.
Step 1: Combine the Base (2 minutes)
In your saucepan, combine the dried elderberries, water, cinnamon sticks, star anise, cloves, and orange peel. Give it a quick stir to get everything submerged. You don’t need to measure the spices precisely here—eyeballing it is fine. Just make sure the berries are covered by the water.
Step 2: Simmer the Berries (15 minutes)
Turn the heat to medium-high and bring the mixture to a boil. Once it boils, immediately reduce the heat to low. Cover the pot with a lid and let it simmer gently for 15 minutes. You’ll see the water turn a deep, dark purple. The berries will puff up and soften. Don’t skip this step—the heat activates the beneficial compounds in the berries. If you boil it too hard, you might burn the bottom. Keep it at a gentle simmer.
Step 3: Cool Slightly (5 minutes)
Turn off the heat and let the pot sit for 5 minutes. This is important. If you add honey to boiling liquid, you destroy some of its enzymes and health benefits. Let it cool down just a bit until it’s warm, not scalding. This is also the perfect time to strain if you’re in a rush, but I usually let it steep a bit longer if I have time.
Step 4: Strain the Syrup (3 minutes)
Place your mesh strainer over a large bowl or jug. Pour the mixture through the strainer. Use the back of a wooden spoon to press down on the berries and spices. You want to get every drop of that purple liquid out. It’s rich and flavorful. Discard the solids (the berries, spices, and peel). They’ve given up everything they have.
Step 5: Add Honey and Lemon (2 minutes)
Once the strained liquid is warm (not hot), stir in the raw honey and fresh lemon juice. The honey will melt easily. Stir until it’s completely dissolved. Taste it. It should be sweet, tart, and spiced. If it’s too sour, add a little more honey. If it’s too sweet, add a splash more lemon. Adjust to your liking.
Step 6: Bottle and Store
Pour the syrup into your clean glass bottles or jars. Let it cool completely to room temperature before putting the lid on. This prevents condensation, which can lead to mold. Store in the fridge.
Total Time: About 30 minutes (5 minutes active, 25 minutes mostly hands-off)
Expert Tips & Tricks
Here’s everything I’ve learned from making this dozens of times. These tips will save you from my mistakes.
Don’t Rush the Simmer
The 15-minute simmer is non-negotiable. It extracts the flavor and nutrients. If you cut it short, the syrup will taste watery and weak. Set a timer. Trust me.
Cool Before Adding Honey
I know it’s tempting to add the honey while it’s hot because it dissolves faster. But raw honey loses its beneficial properties above 118°F (48°C). Let it cool for at least 10 minutes. It’s worth the wait.
Press the Berries
When straining, don’t just let it drip. Press the berries with a spoon. That’s where the good stuff is. You’re wasting money if you leave that juice in the pulp.
Use Glass Containers
Honey is acidic and can interact with certain plastics over time. Glass keeps the flavor pure and is easier to clean. I reuse old pasta sauce jars after washing them thoroughly.
Common Mistakes (and how to avoid them):
- Mistake: Syrup is too thin Fix: Simmer it longer. Evaporate more water. It’ll thicken as it cools, but if it’s still watery, boil it off.
- Mistake: Syrup is too thick Fix: Add a splash of warm water or lemon juice. It’s easy to fix.
- Mistake: Honey crystallizes Fix: This is normal! It just means it’s raw. Warm the bottle in a bowl of hot water to liquefy it again.
Pro Tricks I’ve Learned:
- For Extra Flavor Add a slice of fresh ginger with the berries. It adds a nice kick and is great for digestion.
- For Better Texture Strain twice if you’re paranoid about seeds. I use a coffee filter for the second strain if I want it super clear.
- Make-Ahead Strategy Make a double batch when you’re already cooking dinner. It takes zero extra effort and you’ll have immunity boosters ready for weeks.
Variations & Substitutions
Once you’ve nailed the basic version, here’s how you can mix it up. I’ve tried all of these.
Ginger Bomb
Add 2 inches of fresh ginger, sliced, with the berries. This is my favorite version when I feel a cold coming on. The ginger is anti-inflammatory and warming.
Elderberry Tea
Skip the honey and lemon. Just strain the simmered liquid and drink it as a tea. Add a slice of lemon and a splash of maple syrup if you want. It’s great hot before bed.
Vampire Repellent (No Honey)
If you’re vegan, substitute the honey with maple syrup or agave nectar. It won’t have the same antimicrobial properties, but it’s still delicious and sweet. Note: Vegan syrups don’t last as long in the fridge.
Spiced Up
Add a bay leaf or a pinch of nutmeg with the cinnamon. It makes it taste more like a holiday drink. Great for winter mornings.
Smoothie Booster
Add a tablespoon of this syrup to your morning smoothie. It hides well in banana or berry smoothies. It’s an easy way to sneak in immunity support without tasting it.
Pairing Idea:
Drizzle it over cozy fall roasted butternut squash soup. The sweetness complements the savory squash perfectly. It’s a game-changer.
Serving & Storage
How to Serve
I usually take 1-2 teaspoons straight from the spoon when I feel a tickle in my throat. But here are other ways I’ve enjoyed it:
- Hot Tea: Stir 2 tablespoons into hot water with a lemon slice. It’s like a spa drink.
- Cold Drink: Mix 2 tablespoons with cold water and ice. It’s a tart, healthy soda substitute.
- Yogurt Topping: Drizzle it over Greek yogurt with granola. It’s better than jam.
- Oatmeal: Stir it into warm oatmeal. It’s like a spiced apple pie in a bowl.
Storage Instructions
Refrigerator:
Store in an airtight glass jar for up to 3-4 weeks. The honey acts as a preservative, but the fresh lemon juice and water content mean it won’t last forever. If it gets moldy or smells funky, toss it.
Freezing:
Yes, you can freeze it! Pour the syrup into ice cube trays and freeze. Once solid, pop the cubes into a freezer bag. Thaw a cube whenever you need a quick boost. It lasts up to 6 months in the freezer. This is great for meal prep.
Pro tip:
Label your bottle with the date. I’m terrible at remembering when I made things. Write it on a piece of masking tape and stick it on the jar.
Nutrition Information
I’m not a nutritionist, but here’s the breakdown if you’re tracking.
Per Serving (based on 24 servings, 1 teaspoon each):
- Calories: 20
- Protein: 0g
- Carbs: 5g
- Fiber: 0g
- Sugar: 5g (from honey)
- Fat: 0g
What’s Good:
– Packed with antioxidants from elderberries
– Anti-inflammatory properties from cinnamon and honey
– Low calorie per serving
– No added refined sugars
What to Know:
– High in natural sugars from honey
– Contains bee products (not vegan)
– Safe for most adults, but check with your doctor if you’re on medication
My Take:
Look, this is a health tonic, not a candy bar. It’s not a diet recipe, but it’s not junk food either. It’s functional food. When I want to make it lighter, I use less honey and more lemon. But usually? I just take a teaspoon and enjoy the immune boost.
Final Thoughts
So that’s my go-to homemade elderberry syrup! I’ve probably talked your ear off at this point, but when you make a recipe this often, you have a lot to say about it.
This has saved weeknight dinners more times than I can count. It’s my answer to ‘what’s for dinner’ when I’m tired, don’t want takeout, and still want something that tastes really good. My kids are happy, my husband’s happy, and I’m happy because I’m not stressed about cooking.
Make it yours! Try different add-ins, swap in your favorite spices, adjust the honey. The best recipes are the ones you adapt to your family’s tastes.
If you make this, drop a comment and let me know what you think! I love hearing how recipes turn out in your kitchen. And if something doesn’t work, tell me that too—I’m here to help troubleshoot.
Happy cooking! And I hope your kitchen smells half as good as mine does right now.
Frequently Asked Questions
Can I use fresh elderberries?
You can, but you need to cook them thoroughly to remove toxins. Fresh elderberries contain cyanogenic glycosides, which are harmful if not cooked. Dried elderberries are safer and more concentrated. If you forage your own, make sure you identify them correctly and cook them for at least 30 minutes. I stick to dried for convenience and safety.
Why did my syrup turn out watery?
Usually means you didn’t simmer it long enough, or you started with too much water. Simmer until the liquid reduces by about a third. It should coat the back of a spoon slightly. If it’s still thin, boil it off more. Remember, it will thicken a bit as it cools.
Can I make this ahead for a dinner party?
Absolutely! Make it a week in advance. It actually tastes better after a few days as the flavors meld. Store it in the fridge and bring it out to serve as a guest gift or a health-conscious drink option. It pairs well with fall cranberry ginger mocktail ideas too.
Why did my syrup get moldy?
Probably contamination. Make sure your jars are sterilized (boil them for 10 minutes) before filling. Also, ensure the syrup is completely cool before putting the lid on. Condensation introduces bacteria. And always use a clean spoon to scoop it out. If you see mold, toss the whole batch.
Can I use maple syrup instead of honey?
Yes, but it changes the flavor profile. Maple syrup is stronger and less antimicrobial than honey. The syrup won’t last as long in the fridge. I recommend using it within 2 weeks if you go vegan. It still tastes great, just less ‘preservative-y’.
How do I reheat leftovers without losing benefits?
You don’t need to reheat it. It’s best served at room temperature or cold. If you want it warm, gently heat it in a mug with hot water. Don’t boil it, or you’ll destroy the enzymes in the honey.
Can I double this recipe?
Yes! Double everything and use a larger pot. The cooking times stay the same. I do this when I’m meal-prepping or want to make gifts for friends. Just make sure your strainer is big enough to handle the volume.
Pin This Recipe!
Homemade Elderberry Syrup: 5pm Quick Fix
- Total Time: 30 minutes
- Yield: 24 servings 1x
Description
A simple, fast, and immune-boosting elderberry syrup made with dried berries, cinnamon, and raw honey. Ready in 30 minutes, this pantry-friendly tonic is perfect for soothing sniffles or adding a spiced sweetness to drinks and foods.
Ingredients
- 1 cup (115g) dried elderberries
- 4 cups (960ml) water
- 2 large cinnamon sticks
- 1 star anise pod (optional)
- 3–4 whole cloves
- 1 strip orange peel (about 2 inches, no white pith)
- 1 cup (340g) raw honey
- 2 tablespoons (30ml) fresh lemon juice
- 1 inch piece fresh ginger, sliced (optional)
Instructions
- Combine dried elderberries, water, cinnamon sticks, star anise, cloves, and orange peel in a 3-quart saucepan. Ensure berries are submerged.
- Bring the mixture to a boil over medium-high heat, then immediately reduce heat to low. Cover and simmer gently for 15 minutes until the liquid turns deep purple.
- Remove from heat and let cool for 5 minutes. Do not add honey to boiling liquid to preserve its enzymes.
- Place a fine-mesh strainer over a large bowl or jug. Pour the mixture through, pressing down on the solids with a wooden spoon to extract all liquid. Discard the solids.
- Once the strained liquid is warm (not hot), stir in the raw honey and fresh lemon juice until completely dissolved. Adjust sweetness or tartness to taste.
- Pour the syrup into clean glass bottles or jars. Let cool completely to room temperature before sealing to prevent condensation.
- Store in the refrigerator for up to 3-4 weeks, or freeze in ice cube trays for up to 6 months.
Notes
Ensure elderberries are dried, not fresh, as fresh ones can be toxic. Use raw honey for maximum health benefits, but add it only after the liquid has cooled below 118°F (48°C). If the syrup is too thin, simmer longer to reduce. If too thick, add a splash of water. Honey may crystallize over time; warm the bottle in hot water to liquefy. For a vegan version, substitute honey with maple syrup or agave nectar, though shelf life will be shorter.
- Prep Time: 5 minutes
- Cook Time: 25 minutes
- Category: Beverage
- Cuisine: American
Nutrition
- Serving Size: 1 teaspoon
- Calories: 20
- Sugar: 5
- Carbohydrates: 5
Keywords: elderberry syrup, immunity booster, homemade health tonic, raw honey, cinnamon syrup, natural cold remedy, vegan alternative, pantry staples, quick recipe


