I remember the exact Tuesday this recipe saved me. It was late October, the kind of evening where the wind howls against the windows and the house feels cold no matter how many layers I’m wearing. I had come home from work completely drained—mentally and physically—and the idea of chopping vegetables or managing a complex meal felt impossible. I didn’t want takeout, though. I wanted something warm, something that smelled like a hug, and something that would let my hands do some gentle, repetitive work while my mind finally quieted down.
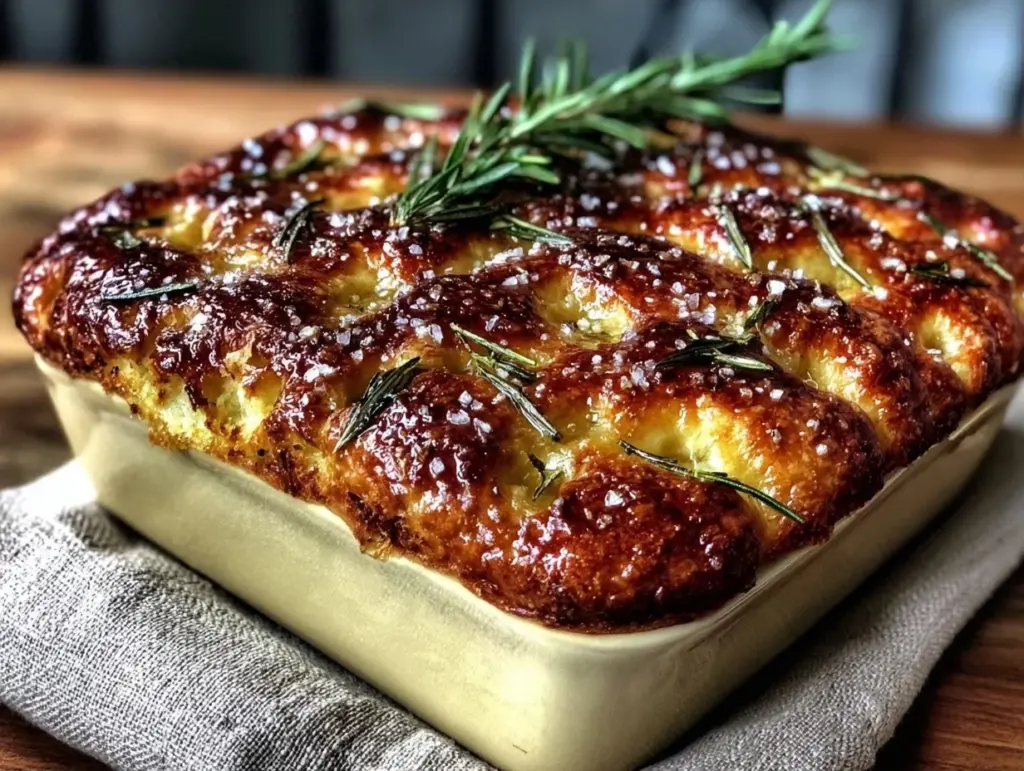
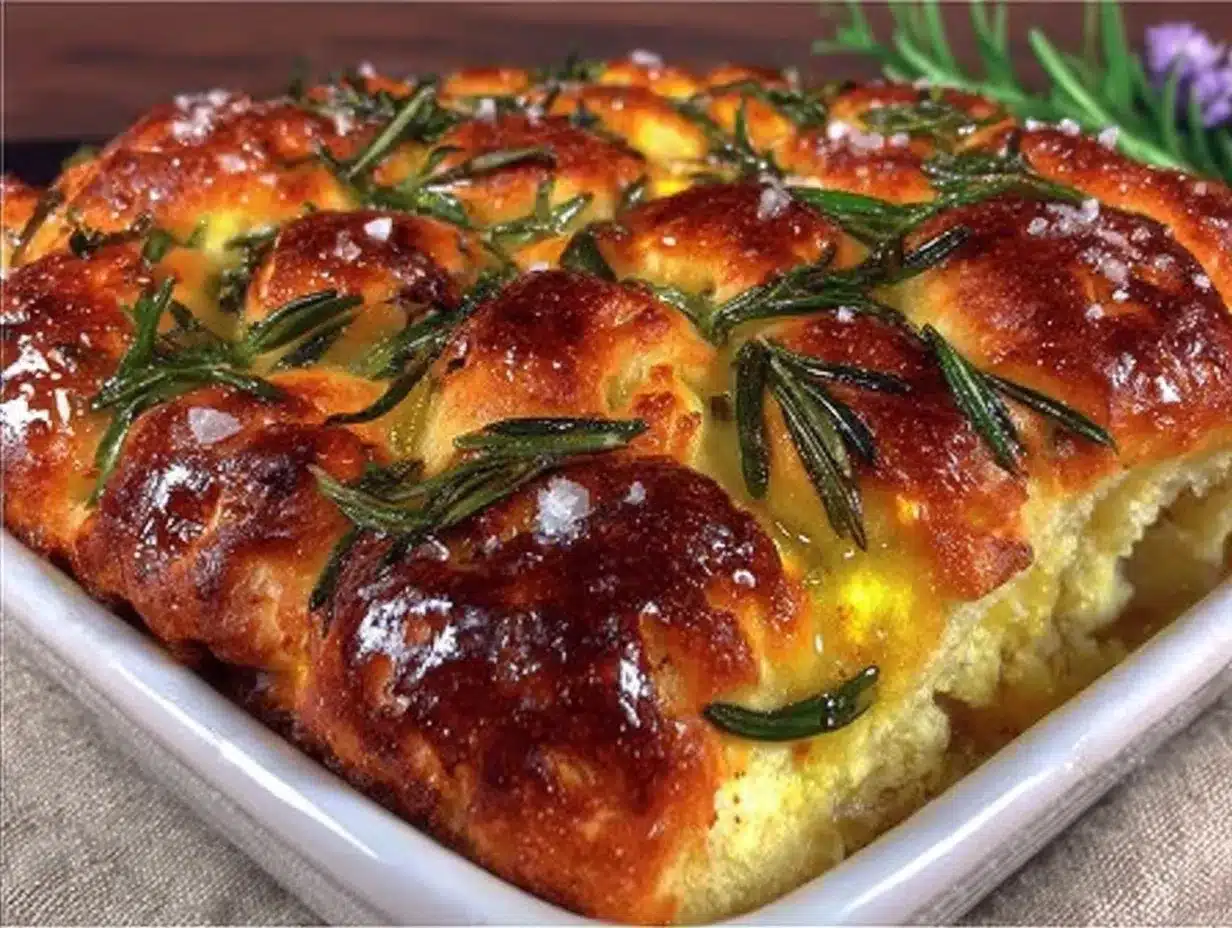
I pulled out my jar of sourdough starter. It was active, bubbly, and begging to be used. I didn’t have a plan, but I had flour, water, salt, and olive oil. I mixed it up, poured it into a pan, and walked away. I let it rest while I took a shower. I let it rise while I read a few pages of a book. When I finally put it in the oven, the kitchen filled with that yeasty, comforting scent that instantly lowered my shoulders. When I pulled out that golden, dimpled, fragrant beginner-friendly sourdough focaccia perfect for busy weeknights, I didn’t just get dinner. I got five minutes of peace.
There is something deeply grounding about making bread when you’re tired. It doesn’t ask for precision or perfection. It asks for patience and a little bit of care. This isn’t about rushing to the table; it’s about the ritual of feeding yourself properly, even on the hardest days. I’ve made this sourdough focaccia dozens of times since that night, usually on days when I feel like I have nothing left to give. It’s forgiving, it’s incredibly easy, and it tastes like a bakery window, but it’s made in your own kitchen, at your own pace. It’s the one to make when you need to take care of yourself.
Why You’ll Love This Gentle Weeknight Recipe
Let’s be honest: most sourdough recipes feel like a part-time job. They demand early mornings, complex folds, and hours of watching the dough like a hawk. This version? It’s different. It’s designed for real life, for tired evenings, and for beginners who think they can’t bake. Here’s why this beginner-friendly sourdough focaccia perfect for busy weeknights has become my nightly sanctuary:
- Zero Kneading Required — Seriously, if you can stir, you can make this. I don’t knead. I don’t fold. I mix, I pour, and I wait. The long, slow rise does all the hard work for you. It’s gentle on your arms and gentle on your brain.
- Uses Your Active Starter — If you keep a sourdough starter, you know it needs feeding. This recipe uses your discard or your active starter, turning what might feel like a chore into something delicious. It’s a waste-free way to get a treat without starting a new batch from scratch.
- Hands-Off Timing — Most of the time is just waiting. You can mix it up after work, let it rise while you relax, and pop it in the oven when you’re ready to eat. It fits into a tired evening without demanding your attention.
- Incredibly Forgiving — Focaccia is basically a pancake that gets baked. You can’t mess it up. The dimples hide all sins. The olive oil ensures it’s never dry. If it looks a bit uneven? That’s rustic charm. If it’s a bit dense? It’s hearty. It’s impossible to fail.
- Sensory Self-Care — The act of pressing dimples into the dough is oddly satisfying. It’s tactile. It’s slow. It forces you to pause. And the smell that fills your house? It’s better than any candle. It’s the scent of warmth and safety.
This isn’t just bread. It’s a way to wind down. It’s a reminder that you can create something beautiful and nourishing even when you’re running on empty. And the best part? It pairs perfectly with a simple soup or just a slice of cheese. It’s my go-to when I need dinner to just work, quietly and beautifully.
Ingredients You’ll Need
The beauty of this beginner-friendly sourdough focaccia perfect for busy weeknights is that it uses pantry staples. You likely have everything you need right now. I keep it simple because, on busy weeknights, I don’t want to run to the store. I want to cook with what I have.
For the Dough
Bread flour (2 cups / 240g) — I use bread flour because it has more protein, which gives the focaccia that chewy, airy interior. All-purpose flour works too, but it’ll be a bit more cake-like. Don’t use self-rising flour; it will change the texture entirely.
Water (1 ½ cups / 360ml) — Lukewarm, not hot. Think bathwater temperature. Too hot will kill your yeast; too cold will slow the rise. If your kitchen is chilly, warm the water slightly.
Active Sourdough Starter (½ cup / 120g) — This is the heart of the recipe. It needs to be active and bubbly. If you’ve been feeding it, use it right at its peak. If you’re using discard, it will still work, but the rise might be slower. I prefer active for that nice tang.
Salt (1 ½ teaspoons) — Fine sea salt or kosher salt. Salt is crucial for flavor and for controlling the yeast. Don’t skip it, or the bread will taste flat.
Instant Yeast (¼ teaspoon) — Just a tiny pinch. This isn’t about making it rise fast; it’s about giving your sourdough a little boost to ensure it’s fully risen by dinner time. It keeps the fermentation gentle and predictable.
For the Toppings
Extra Virgin Olive Oil (½ cup / 120ml) — This is non-negotiable. You need enough oil to coat the pan and create that crispy, golden crust. Use a good quality oil here; it’s the primary flavor. Don’t skimp.
Flaky Sea Salt (for sprinkling) — Maldon salt is my favorite for finishing. It adds those beautiful, crunchy bursts of saltiness that contrast with the soft dough.
Optional Herbs — Fresh rosemary, thyme, or just cracked black pepper. I often keep it simple with just salt and pepper, but herbs add a lovely fragrance.
Shopping Tips
I buy my flour in bulk to save money. Olive oil can be pricey, but a good bottle lasts for months and is worth the investment for recipes like this. If you’re new to sourdough, make sure your starter is fed 4-6 hours before you start. You want it to be at its peak height and bubbly. If it’s sinking, it’s past its prime.
Equipment Needed
You don’t need fancy tools for this. In fact, keeping it simple is part of the self-care aspect. Here’s what I actually use:
- 9×13 inch Baking Pan — A metal or glass pan works best. I use a rimmed baking sheet because it’s easy to handle. Avoid dark non-stick pans if possible, as they can burn the bottom before the top is done. If you use one, lower the oven temperature by 25 degrees.
- Large Mixing Bowl — Something big enough to hold the dough as it doubles or triples in size. Glass or ceramic is nice because you can see the rise.
- Spatula — A sturdy rubber spatula for mixing. You don’t need a mixer. Hand mixing is therapeutic and gives you a feel for the dough.
- Pastry Brush — For adding that final layer of olive oil on top. A silicone brush works well.
- Cling Wrap or a Damp Towel — To cover the bowl during the rise. I use a damp kitchen towel because it’s reusable and breathable.
I don’t use a scale for this recipe because it’s meant to be forgiving, but if you want precision, a scale is helpful. For most weeknight bakers, measuring cups are totally fine. Just fluff your flour before scooping so you don’t pack it down too tightly.
How to Make It: Step-by-Step
Alright, let’s make this. I’m walking you through exactly how I do it, including the little tricks I’ve picked up over years of baking this beginner-friendly sourdough focaccia perfect for busy weeknights. It’s simple, but there’s a rhythm to it.
Step 1: Mix the Dough (5 minutes)
In your large bowl, combine the lukewarm water, active sourdough starter, instant yeast, and salt. Whisk them together until the starter is dissolved. It will look a bit frothy and strange, but that’s normal.
Next, add the flour. Use a spatula or your hands to mix it in. Don’t worry about it being smooth. It will look shaggy and sticky. That’s exactly what you want. Mix until there are no dry pockets of flour. If your hands are clean, you can knead it gently in the bowl for a minute to bring it together. It’s okay if it’s sticky; we’re not kneading it into a smooth ball.
Step 2: The First Rise (2-4 hours)
Cover the bowl with cling wrap or a damp towel. Let it sit at room temperature for 2-4 hours. I usually do this while I’m unwinding after work. You’re looking for the dough to rise by about 50-75%. It doesn’t need to double, but it should look puffier and have some bubbles on the surface.
Pro tip: If your kitchen is cold, this might take longer. If it’s warm, it might be faster. Use your eyes, not the clock. The dough should look alive.
Step 3: Prep the Pan (2 minutes)
While the dough is rising, pour about ¼ cup of olive oil into your 9×13 pan. Tilt the pan to coat the bottom and sides evenly. You want a good layer of oil. This is what creates the crispy crust. Set the pan aside.
Step 4: Transfer and Stretch (5 minutes)
Once the dough has risen, gently pour it into the oiled pan. It will be sticky. Don’t try to pull it or stretch it aggressively. Just let it fall into the pan. Use oiled hands to gently press the dough into the corners. If it resists, let it rest for 10 minutes, then try again. The gluten will relax, and it will spread easier.
This is a gentle process. If it springs back, that’s okay. Just keep pressing. You want it to cover the entire pan. It doesn’t need to be perfect.
Step 5: The Dimples (2 minutes)
This is my favorite part. Dip your fingertips in olive oil (to prevent sticking) and press deep dimples into the dough. Go all the way to the bottom. Space them about an inch apart. It’s rhythmic and satisfying. As you dimple, the dough will push up into the oil, creating those beautiful pockets.
Step 6: The Second Rise (1-2 hours)
Let the shaped dough rest in the pan for 1-2 hours. It should look puffy and jiggly. The dimples should still be visible. If the dough looks flat, it needs more time. If it looks like a cloud, it’s ready.
Preheat your oven to 425°F (220°C) during the last 30 minutes of this rise. You want the oven hot and ready.
Step 7: Bake (20-25 minutes)
Drizzle the remaining olive oil over the top of the dough. Sprinkle with flaky sea salt and any herbs you’re using. Slide the pan into the oven.
Bake for 20-25 minutes. You’re looking for a deep golden brown color, especially around the edges and in the dimples. The crust should look crisp. If it’s browning too fast, cover it loosely with foil.
Step 8: Cool and Serve
Let the focaccia cool in the pan for 5 minutes, then transfer it to a wire rack. It’s best eaten warm, fresh from the oven. Tear it into pieces with your hands—it’s the most satisfying way to eat bread.
Expert Tips & Tricks
Here’s everything I’ve learned from making this dozens of times. These tips will save you from my mistakes.
Know Your Starter
The quality of your beginner-friendly sourdough focaccia perfect for busy weeknights depends on your starter. If it’s sluggish, the bread will be dense. If it’s over-ripe and smells like vinegar, the bread will taste sour. Feed it 4-6 hours before baking. It should be at its peak, rising and ready to go.
Don’t Fear the Stick
Focaccia dough is wetter than sandwich bread dough. It will stick to your hands. That’s normal. Oil your hands instead of adding more flour. Adding flour changes the hydration and can make the bread tough. Trust the process.
The Dimple Deeply
Don’t just poke the surface. Press all the way to the pan. This creates the signature pockets of olive oil that make each bite juicy and flavorful. It also helps the dough bake evenly.
Listen to the Crust
When you take it out of the oven, the crust should sound hollow when you tap the bottom. If it sounds dull, it needs more time. If it sounds like a drum, it’s done.
Variations & Substitutions
Once you’ve nailed the basic version, here’s how you can mix it up. I’ve tried all of these.
- Simple Salt & Pepper — The classic. Just flaky salt and cracked black pepper. Let the olive oil shine.
- Rosemary & Garlic — Add fresh rosemary leaves and thinly sliced garlic cloves before baking. The garlic will crisp up in the oil.
- Cherry Tomato — Press halved cherry tomatoes into the dimples before the second rise. They roast into sweet, jammy jewels.
- Black Olive & Feta — Add sliced black olives and crumbled feta after baking, while the bread is still hot. The cheese melts slightly.
- Gluten-Free — Use a 1:1 gluten-free flour blend with xanthan gum. The texture will be more cake-like, but it’s still delicious.
Serving & Storage
I usually serve this straight from the pan, tearing off pieces as we gather. It’s communal and cozy. But here are other ways I’ve enjoyed it:
How to Serve
This beginner-friendly sourdough focaccia perfect for busy weeknights pairs beautifully with cozy fall roasted butternut squash soup with crispy sage or a simple green salad with balsamic vinaigrette. It’s also amazing with a slice of sharp cheddar or a charcuterie board.
Storage Instructions
Room Temperature: Store in an airtight container or wrapped in foil for up to 2 days. It stays soft and moist.
Refrigerator: I don’t recommend refrigerating bread, as it stales faster. But if you must, wrap it tightly and use within 3 days.
Reheating: The best way to reheat is in a toaster oven or a skillet with a little olive oil. It brings back the crispness. Microwave it, and it will become chewy and tough.
Freezing: You can freeze focaccia! Wrap it tightly in plastic and foil. Freeze for up to 3 months. Thaw at room temperature and reheat in the oven.
Nutrition Information
I’m not a nutritionist, but here’s the breakdown if you’re tracking. Keep in mind that nutrition varies based on exact measurements and toppings.
Per Slice (based on 12 slices):
- Calories: 280
- Protein: 6g
- Carbs: 38g
- Fat: 12g
- Fiber: 2g
This bread is a source of carbohydrates and energy, with healthy fats from the olive oil. It’s not a diet food, but it’s made with whole ingredients and fermented, which can aid digestion. Enjoy it as part of a balanced meal.
Final Thoughts
So that’s my go-to beginner-friendly sourdough focaccia perfect for busy weeknights. I’ve probably talked your ear off at this point, but when you make a recipe this often, you have a lot to say about it. This has saved my weeknights more times than I can count. It’s my answer to “what’s for dinner” when I’m tired, don’t want takeout, and still want something that tastes really good. My kitchen smells amazing, my stress levels drop, and I feel nourished.
Make it yours! Try different toppings, adjust the salt, or just enjoy the simplicity. The best recipes are the ones you adapt to your life. If you make this, drop a comment and let me know how it went! I love hearing how recipes turn out in your kitchen. And if something doesn’t work, tell me that too—I’m here to help troubleshoot.
Happy baking! And I hope your kitchen smells half as good as mine does right now.
Frequently Asked Questions
Can I use discard instead of active starter?
Yes, you can. However, discard is less active, so the rise might be slower. You may need to let it rise for a longer period, up to 6-8 hours, or use the tiny pinch of instant yeast to help it along. The flavor will be slightly milder, but still delicious.
Why did my focaccia turn out flat?
Usually, this means the dough didn’t rise enough before baking. Check your starter’s activity. If it’s old or cold, it won’t produce enough gas. Also, make sure you’re using enough yeast if you’re relying on the sourdough alone. The second rise in the pan is crucial—don’t skip it.
Can I make this ahead for a dinner party?
Sort of. You can mix the dough the night before and let it rise slowly in the fridge (cold fermentation). In the morning, take it out, let it come to room temperature, shape it, and bake. It will have a deeper flavor. But for a busy weeknight, the same-day method is easier.
Why did my focaccia stick to the pan?
Not enough oil! Make sure you’re using a generous amount of olive oil in the pan. If you’re using a non-stick pan, you still need oil. If it sticks, let it sit for a minute after baking; the crust often releases on its own.
Can I use all-purpose flour?
Yes, but the texture will be softer and more cake-like. Bread flour gives that chewy, airy crumb that focaccia is known for. If you only have all-purpose, it will still taste good, just different.
How do I know when it’s done baking?
Look for a deep golden brown color, especially in the dimples. The crust should look crisp. Tap the bottom; it should sound hollow. If it’s pale, it needs more time.
Can I add cheese to the dough?
Yes! Grated Parmesan or Pecorino Romano mixed into the dough works well. Just be aware that cheese can burn if it’s too close to the heating element. Add it after the first rise, before dimpling, for best results.
Pin This Recipe!

Sourdough Focaccia: Gentle Weeknight Self-Care
- Total Time: 4 hours 40 minutes
- Yield: 12 servings 1x
Description
A beginner-friendly, no-knead sourdough focaccia designed for busy weeknights. This forgiving recipe uses pantry staples and requires minimal active time, offering a therapeutic baking experience with a crispy, golden crust.
Ingredients
- 2 cups (240g) bread flour
- 1 ½ cups (360ml) lukewarm water
- ½ cup (120g) active sourdough starter
- 1 ½ teaspoons fine sea salt or kosher salt
- ¼ teaspoon instant yeast
- ½ cup (120ml) extra virgin olive oil (divided)
- Flaky sea salt (for sprinkling)
- Optional: Fresh rosemary, thyme, or cracked black pepper
Instructions
- In a large bowl, whisk together lukewarm water, active sourdough starter, instant yeast, and salt until the starter is dissolved.
- Add the flour and mix with a spatula or hands until no dry pockets remain. The dough will be shaggy and sticky; do not worry about smoothness.
- Cover the bowl with cling wrap or a damp towel and let it rise at room temperature for 2-4 hours, until it has risen by 50-75% and looks puffy.
- Pour about ¼ cup of olive oil into a 9×13 inch baking pan, tilting to coat the bottom and sides evenly.
- Gently pour the risen dough into the oiled pan. Use oiled hands to press the dough into the corners. If it resists, let it rest for 10 minutes before continuing.
- Dip fingertips in olive oil and press deep dimples into the dough, spacing them about an inch apart, going all the way to the bottom.
- Let the dough rest in the pan for 1-2 hours until puffy and jiggly. Preheat oven to 425°F (220°C) during the last 30 minutes of this rise.
- Drizzle remaining olive oil over the top, sprinkle with flaky sea salt and optional herbs.
- Bake for 20-25 minutes until deep golden brown and crisp. If browning too fast, cover loosely with foil.
- Cool in the pan for 5 minutes, then transfer to a wire rack. Serve warm.
Notes
If your kitchen is cold, the rise may take longer. If using discard instead of active starter, the rise may be slower. Do not add extra flour if the dough is sticky; oil your hands instead. For gluten-free version, use a 1:1 gluten-free flour blend with xanthan gum.
- Prep Time: 15 minutes
- Cook Time: 25 minutes
- Category: Side Dish
- Cuisine: Italian
Nutrition
- Serving Size: 1 slice
- Calories: 280
- Sugar: 1
- Sodium: 450
- Fat: 12
- Saturated Fat: 2
- Carbohydrates: 38
- Fiber: 2
- Protein: 6
Keywords: sourdough focaccia, beginner bread recipe, weeknight dinner, no knead bread, sourdough discard, easy baking, self-care recipes


