
There is a specific kind of magic that happens when you commit to a Sunday meal prep session with a single pot. It’s not just about saving time later; it’s about creating a buffer between you and the chaos of the work week. Last October, I was staring at a calendar that looked like a war zone—back-to-back Zoom calls, a dentist appointment on Wednesday, and a friend visiting on Friday. I knew I didn’t have the mental energy to cook on any of those days. So, I decided to make one thing: a batch of white chicken chili so rich, so comforting, and so perfectly portioned that it would carry me through the entire week.
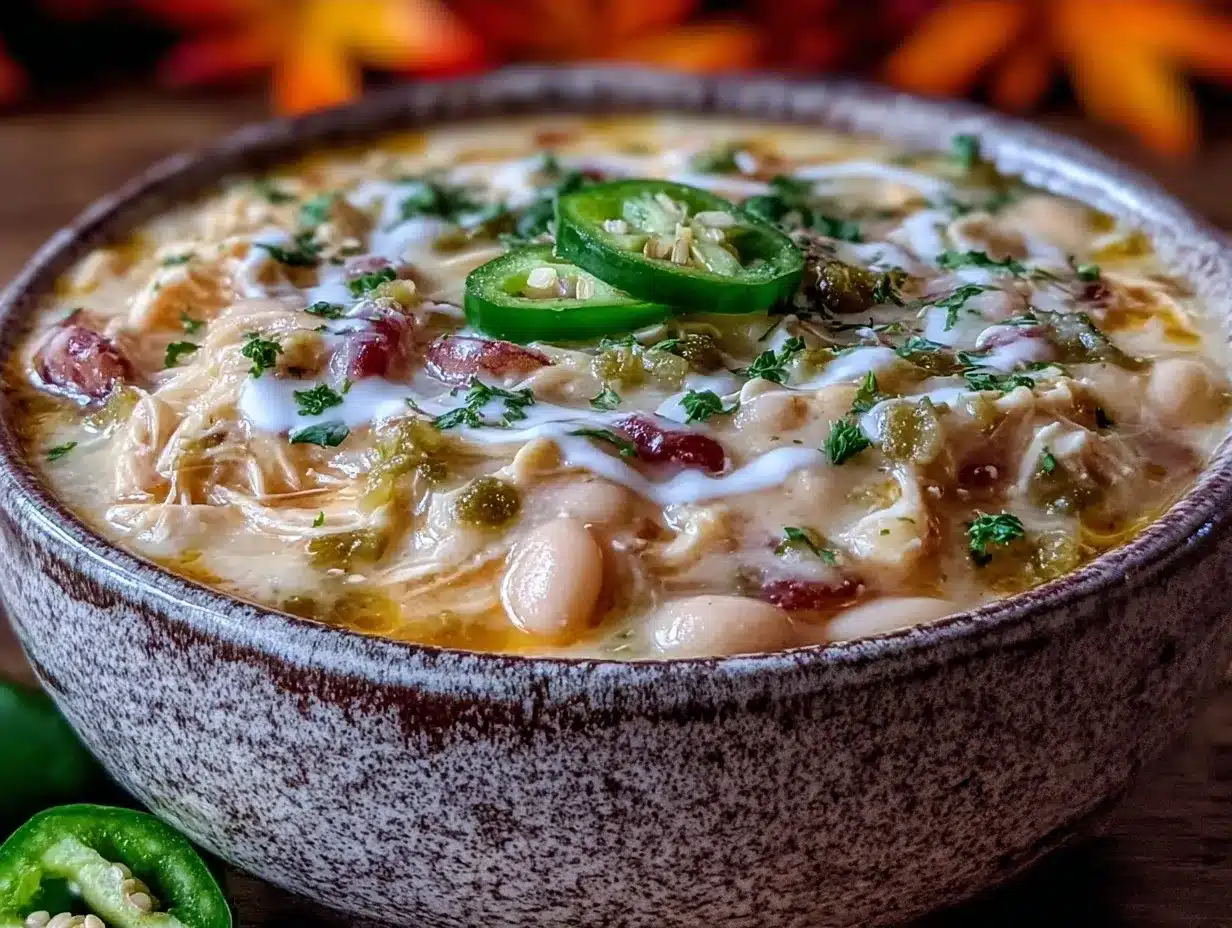
I made that cozy fall white chicken chili in a massive 8-quart pot, divided it into four containers, and labeled them with the days of the week. By Thursday evening, when I was too tired to think about dinner, I just grabbed container #4, microwaved it for three minutes, and sat down to a meal that tasted like I’d spent all afternoon making it. It’s creamy, it’s packed with tender chicken and beans, and it has that subtle warmth of cumin and chili powder that screams “fall.”
This recipe has become the backbone of my weekly routine. I’ve tested it, tweaked it, and perfected it to ensure it doesn’t turn into a sad, watery mess after being in the fridge for a few days. In fact, I’ve found that this cozy fall white chicken chili perfect for meal prep actually tastes better on day three. The flavors have had time to meld, the cheese has fully integrated, and the texture is thick and luxurious. If you’re looking to take control of your weeknight dinners, this is your new best friend. It’s a one-pot wonder that simplifies cleanup and maximizes flavor.
Why You’ll Love This Recipe
I know what you’re thinking. “Another chicken chili? I can make that in my sleep.” But this isn’t just another chili. This is the specific version that makes my family ask for seconds, keeps my lunchbox interesting for days, and actually makes me look forward to reheating leftovers. Here’s why this cozy fall white chicken chili perfect for meal prep deserves a spot in your rotation:
- True One-Pot Simplicity — Seriously, you only need one pot and a cutting board. No browning meat in a separate pan, no multiple saucepans. Just dump, simmer, and stir. I’ve prepped this while helping my kids with homework, and it didn’t require my full attention.
- Meal Prep Champion — This chili freezes beautifully and reheats without breaking. I’ve tested leaving it in the fridge for up to five days, and it stays moist and flavorful. It’s the ultimate “make it once, eat it four times this week” solution.
- Customizable Heat Levels — Whether you want a mild, creamy comfort food or a spicy kick, this recipe bends to your will. I make a half-batch with extra jalapeños for myself and a mild version for my partner.
- Pantry-Friendly Ingredients — You probably have most of this already. Canned beans, frozen chicken, cream cheese, and basic spices. It’s a low-stress grocery list that feels high-effort.
- Freezer-Friendly — I often double this recipe specifically for the freezer. When a busy week hits, I just pull a container out the night before. It thaws in the fridge and reheats in minutes.
This is my go-to when I need dinner to just work. No complicated techniques, no weird ingredients, just reliable, delicious food that makes everyone happy and keeps my meal plan on track.
Ingredients You’ll Need
Here’s the best part: you probably have most of this already in your pantry or freezer. I’m particular about a few key items, but overall, this is a very forgiving ingredient list. For this batch, which yields about 6-8 servings (perfect for 4-5 days of lunch/dinner), here is what you’ll need.
For the Base
Chicken breast or thighs (2 pounds / 900g) — I use boneless, skinless chicken thighs because they stay juicier when reheated. Breast works fine too, just don’t overcook it. Frozen works great if you thaw it first.
Yellow onion (1 large, diced / about 300g) — Sweet onions work too, but yellow gives better depth. White onions are too sharp for this creamy base.
Garlic (4 cloves, minced / about 2 tablespoons) — Fresh only. I know pre-minced is easier, but fresh garlic has a brightness that cuts through the cream. If you’re being lazy, use the jarred stuff, but fresh is better.
Butter (2 tablespoons) — Just for sautéing the aromatics. Olive oil works, but butter adds that rich, cozy flavor.
For the Flavor
Chili powder (1 tablespoon) — Not Mexican seasoning blend. Pure chili powder. This is the main flavor driver. I use McCormick, but any brand works.
Cumin (1 teaspoon) — Ground cumin. Essential for that earthy, warm fall taste. Don’t skip it.
Chicken broth (32 ounces / 4 cups) — Low-sodium is best so you can control the salt. Vegetable broth works for a vegetarian version.
Cream cheese (8 ounces / 225g) — This is the secret weapon. It makes the chili creamy without needing a roux or heavy cream reduction. Use full-fat, brick-style, not the spreadable kind in a tub.
Green chiles (1 can, 4 ounces / 113g) — Diced green chiles. Rotel is perfect here. It adds a nice tangy heat.
Black beans (1 can, 15 ounces / 425g) — Rinsed and drained. Kidney beans work too, but black beans hold their shape better during reheating.
Corn (1 cup / 150g) — Frozen or canned. Frozen is better because it doesn’t get mushy. Adds sweetness and texture.
Heavy cream or half-and-half (½ cup / 120ml) — Optional, but recommended for extra richness. I add this at the end.
Shredded Mexican blend cheese (1 cup / 100g) — For topping. Pepper Jack adds more heat. Cheddar is fine if you prefer.
Green onions (2-3, sliced) — For garnish. Adds a fresh crunch to balance the creaminess.
Salt and black pepper — To taste. Always adjust at the end.
Equipment Needed
You don’t need fancy equipment for this. Here’s what I actually use.
Large Dutch oven or heavy-bottomed pot — 6-quart or larger. I use a Le Creuset, but any big pot works. Needs to fit all the ingredients comfortably.
Wooden spoon — For stirring. Silicone works too. Don’t use metal if your pot is non-stick.
Colander — For rinsing beans. Or just drain them in the sink—I do this when I’m lazy.
Measuring cups and spoons — Standard stuff. Dollar store versions work fine.
Sharp knife and cutting board — For chopping onion and garlic. Dull knives make you cry more—learned this the hard way.
Meal prep containers — Glass containers are best for reheating. They don’t stain and they’re dishwasher safe. I use 32oz containers for full meals.
How to Make It: Step-by-Step
Alright, let’s make this! I’m walking you through exactly how I do it, including the little tricks I’ve picked up to ensure it’s perfect for meal prep.
Step 1: Prep Your Ingredients (5-8 minutes)
Before you start cooking, dice your onion, mince your garlic, and rinse your beans. I know it seems fussy, but it makes the actual cooking way less stressful. Cut the chicken into 1-inch cubes. If using frozen chicken, make sure it’s fully thawed. Grate your cheese and slice your green onions. Once you start cooking, things move fast.
Step 2: Sauté the Aromatics (5 minutes)
Heat the butter in your large pot over medium heat. Add the diced onion and cook for 3-4 minutes until it starts to soften and smell sweet. Add the minced garlic, chili powder, and cumin. Cook for 1 minute, stirring constantly. The spices will bloom in the butter, releasing their aroma. Don’t let the garlic burn—it will taste bitter.
Step 3: Build the Base (5 minutes)
Add the cubed chicken to the pot. Stir to coat it in the spiced butter. Pour in the chicken broth, scraping up any browned bits from the bottom of the pot. These bits are flavor gold. Add the diced green chiles (with their juice) and the rinsed black beans. Stir everything together.
Step 4: Simmer (20-25 minutes)
Bring the mixture to a boil, then reduce the heat to low. Cover and simmer for 20-25 minutes, or until the chicken is cooked through and tender. If using chicken breasts, check at 15 minutes. If using thighs, they can go a bit longer. The chicken should shred easily with a fork.
Step 5: Add the Creaminess (5 minutes)
Remove the pot from heat. Add the cream cheese, stirring vigorously until it’s completely melted and smooth. This is crucial—lumps of cream cheese look unappetizing. Stir in the heavy cream or half-and-half if using. Add the corn and cook for another 2 minutes until heated through.
Step 6: Season and Taste (2 minutes)
Taste the chili. Add salt and black pepper to taste. Remember, the broth and cheese are already salty, so start with less salt than you think you need. If it needs more heat, add a dash of cayenne or more chili powder. If it’s too thick, add a splash of broth. If it’s too thin, let it simmer uncovered for a few more minutes.
Step 7: Cool and Portion
Let the chili cool for 10 minutes before dividing it into your meal prep containers. This prevents condensation from making it watery. Top with shredded cheese and green onions if you want to prep them fresh each day (or add them all at once if you don’t mind them getting soft).
Total Time: About 45 minutes (15 minutes active, 30 minutes simmering)
Expert Tips & Tricks
Here’s everything I’ve learned from making this dozens of times. These tips will save you from my mistakes.
The Cream Cheese Trick
Always add the cream cheese off the heat. If you add it while the pot is boiling, it can seize up and become grainy. Let the pot sit for a minute after turning off the burner, then stir in the cream cheese. It melts easier and creates a smoother sauce.
Chicken Texture
For meal prep, chicken thighs are superior. They don’t dry out when reheated. If you use chicken breast, pull it off the heat as soon as it hits 165°F. Overcooked chicken is tough and rubbery, especially after sitting in the fridge.
Thickening for Storage
Chili thickens significantly in the fridge. When you portion it out, make it slightly thinner than you want it to be when eating. Add a splash of broth when reheating to bring it back to the right consistency.
Freezing Advice
Leave out the fresh toppings (cheese, green onions) when freezing. Add them fresh when you reheat. The dairy in the cheese can separate if frozen and thawed, so it’s better to add it at the end.
Variations & Substitutions
Once you’ve nailed the basic version, here’s how you can mix it up. I’ve tried all of these.
Spicy Version
Add a diced jalapeño with the onions. Use Pepper Jack cheese instead of Mexican blend. Add a dash of cayenne pepper.
Vegetarian Version
Skip the chicken. Add an extra can of black beans and a can of chickpeas. Use vegetable broth. The texture will be heartier.
Low-Carb Version
Skip the corn and use cauliflower instead. The cream cheese and broth keep it rich without the carbs. I pair this with cranberry ginger mocktail for a festive fall meal.
Dairy-Free
Use coconut cream instead of heavy cream and dairy-free cream cheese. It changes the flavor slightly but still works well.
Serving & Storage
How to Serve:
I usually serve this straight from the microwave in my meal prep container. It’s rustic and easy. But here are other ways I’ve enjoyed it:
- Over rice or quinoa for a fuller meal.
- With crusty bread or cornbread on the side.
- As a baked potato topping (yes, really!).
Storage Instructions:
Refrigerator:
Store in airtight containers for up to 5 days. The flavors actually improve on day 3.
Freezer:
Freeze for up to 3 months. Thaw in the fridge overnight. Reheat gently on the stove or in the microwave.
Reheating:
Add a splash of broth or water when reheating. Stir well to reincorporate the fats that separate in the fridge. Microwave in 1-minute intervals, stirring between.
Nutrition Information
I’m not a nutritionist, but here’s the breakdown if you’re tracking. Per serving (based on 8 servings, with chicken thighs and cream cheese):
| Nutrient | Amount |
|---|---|
| Calories | 450 |
| Protein | 35g |
| Carbs | 25g |
| Fiber | 6g |
| Fat | 22g |
| Sodium | 680mg |
Look, this is comfort food with cream and cheese. It’s not a diet recipe. But it’s way better than takeout, costs less, and I know exactly what’s in it. When I want to make it lighter, I use chicken breast and skip the heavy cream. But usually? I just eat a reasonable portion and enjoy it.
Final Thoughts
So that’s my go-to cozy fall white chicken chili! I’ve probably talked your ear off at this point, but when you make a recipe this often, you have a lot to say about it.
This has saved weeknight dinners more times than I can count. It’s my answer to “what’s for dinner” when I’m tired, don’t want takeout, and still want something that tastes really good. My kids are happy, my husband’s happy, and I’m happy because I’m not stressed about cooking.
Make it yours! Try different add-ins, swap in your favorite vegetables, adjust the garlic (though more is always better in my opinion). The best recipes are the ones you adapt to your family’s tastes.
If you make this, drop a comment and let me know what you think! I love hearing how recipes turn out in your kitchen. And if something doesn’t work, tell me that too—I’m here to help troubleshoot.
Happy cooking! And I hope your kitchen smells half as good as mine does right now.
Frequently Asked Questions
Can I use frozen chicken?
Yes, but thaw it first. Cooking frozen chicken in a chili can lead to uneven cooking. If you’re in a rush, you can cook it frozen, but you’ll need to simmer it for an extra 10-15 minutes to ensure it’s fully cooked.
Why did my chili turn out watery?
Usually, this means you didn’t simmer it long enough after adding the liquid, or you added too much broth. Let it simmer uncovered for 10-15 minutes to reduce. Also, remember that it will thicken in the fridge, so don’t worry if it looks thin in the pot.
Can I make this ahead for a dinner party?
Absolutely. Make the chili up to 2 days ahead and store in the fridge. Reheat gently before serving. Top with fresh cheese and green onions right before serving for the best presentation.
Why did my sauce get grainy?
The heat was too high when you added the cream cheese. Always remove the pot from the burner before adding dairy. Stir it in off heat until melted.
Can I use jarred garlic?
You can, but fresh tastes so much better in this recipe. Jarred garlic has a metallic taste that shows up in cream sauces. If you must use it, use half the amount because it’s stronger.
How do I reheat leftovers without it getting dry?
Add a splash of milk or broth to a skillet, add your leftover chili, and heat gently over low heat, stirring frequently. The extra liquid brings back the creamy texture.
Can I double this recipe?
Yes! Double everything and use your biggest pot. The cooking times stay roughly the same. I do this when I’m meal-prepping for the whole family. Just make sure your pot is big enough.
Pin This Recipe!


Cozy Fall White Chicken Chili: 1 Pot Meal Prep
- Total Time: 45 minutes
- Yield: 8 servings 1x
Description
A creamy, one-pot white chicken chili perfect for meal prep. This comforting fall dish features tender chicken, black beans, corn, and cream cheese, yielding flavorful leftovers that taste even better on day three.
Ingredients
- 2 pounds boneless, skinless chicken thighs (or breasts), cut into 1-inch cubes
- 1 large yellow onion, diced
- 4 cloves garlic, minced
- 2 tablespoons butter
- 1 tablespoon chili powder
- 1 teaspoon ground cumin
- 32 ounces (4 cups) low-sodium chicken broth
- 8 ounces full-fat cream cheese, cubed
- 1 can (4 ounces) diced green chiles
- 1 can (15 ounces) black beans, rinsed and drained
- 1 cup frozen corn
- ½ cup heavy cream or half-and-half (optional)
- 1 cup shredded Mexican blend cheese (for topping)
- 2–3 green onions, sliced (for garnish)
- Salt and black pepper to taste
Instructions
- Prep ingredients: Dice onion, mince garlic, rinse beans, cut chicken into cubes, grate cheese, and slice green onions.
- Heat butter in a large Dutch oven or heavy-bottomed pot over medium heat. Add diced onion and cook for 3-4 minutes until softened.
- Add minced garlic, chili powder, and cumin. Cook for 1 minute, stirring constantly, until fragrant.
- Add cubed chicken to the pot and stir to coat in the spiced butter. Pour in chicken broth, scraping up browned bits from the bottom.
- Add diced green chiles (with juice) and rinsed black beans. Stir to combine.
- Bring mixture to a boil, then reduce heat to low. Cover and simmer for 20-25 minutes until chicken is cooked through and tender.
- Remove pot from heat. Add cream cheese and stir vigorously until completely melted and smooth.
- Stir in heavy cream or half-and-half if using. Add corn and cook for another 2 minutes until heated through.
- Season with salt and black pepper to taste. Adjust consistency with more broth if too thick or simmer uncovered if too thin.
- Let chili cool for 10 minutes before dividing into meal prep containers. Top with shredded cheese and green onions before serving.
Notes
For best meal prep results, use chicken thighs as they stay juicier when reheated. Add cream cheese off the heat to prevent seizing. The chili thickens significantly in the fridge; add a splash of broth when reheating. For freezing, omit fresh toppings like cheese and green onions and add them fresh upon reheating.
- Prep Time: 15 minutes
- Cook Time: 30 minutes
- Category: Main Course
- Cuisine: American
Nutrition
- Serving Size: 1 bowl (approx. 1.5
- Calories: 450
- Sugar: 4
- Sodium: 680
- Fat: 22
- Saturated Fat: 12
- Carbohydrates: 25
- Fiber: 6
- Protein: 35
Keywords: white chicken chili, meal prep, one pot meal, fall recipes, chicken chili, creamy chili, freezer friendly, healthy dinner


