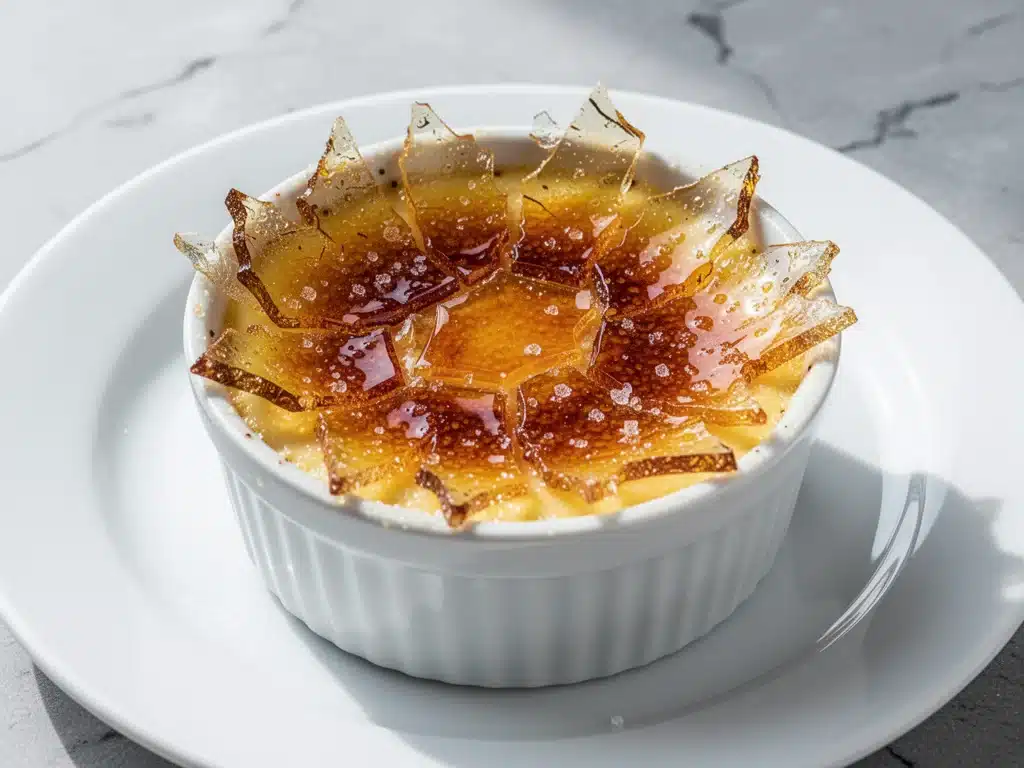
I still remember the first time I tried to make crème brûlée at home. It was a Tuesday in November, the kind of night where the wind howls outside and you just want something warm and comforting. I had bought those beautiful ramekins at a thrift store, polished them until they sparkled, and filled them with what I thought was a perfect custard. I popped them in the oven, feeling like a professional pastry chef. Ten minutes later, I pulled them out, sprinkled on the sugar, and turned on my kitchen torch.
It didn’t crack. It didn’t even brown. It just melted into a sticky, watery mess that looked like a sad puddle of amber goo. I scraped it off with a spoon and ate it cold. It tasted like sweetened milk with a weird texture. I was mortified. I considered throwing away the torch and admitting that fancy desserts were strictly for restaurants with staff.
But I couldn’t let it go. That crackly, shattering sugar top is one of the most satisfying textures in the culinary world. So, I went back to the drawing board. I ruined three more batches. I overcooked them into rubbery sponges. I undercooked them so they sloshed like Jell-O. But then, I figured it out. It wasn’t about fancy techniques or expensive equipment. It was about temperature control and patience.
Now, I make this foolproof crème brûlée recipe at least once a month. It’s become my go-to dessert when I want to impress guests without spending hours in the kitchen. The best part? The custard needs to chill overnight. That means you can prep it in the morning, go about your day, and just torch it right before dinner. It’s the ultimate make-ahead dessert. If you’ve ever been intimidated by custard, this recipe is your gateway drug. It’s simple, it’s reliable, and that first crack of the spoon? Pure magic.
Why You’ll Love This Recipe
There are about ten reasons I keep coming back to this crème brûlée, but let’s be real—you’re here because you want that perfect texture and flavor without the stress. Here’s why this version works every single time:
- Zero Failure Rate — Seriously. I’ve tested this method with different ovens, different ramekins, and even when I was running on two hours of sleep. It works. The water bath method ensures even cooking, so you never get those rubbery edges.
- Make-Ahead Hero — This is my secret weapon for dinner parties. The custard sets in the fridge for 4-6 hours (or overnight). You literally do nothing until guests arrive. Then, you torch and serve. It makes you look like a genius pastry chef, but the actual effort is minimal.
- Simple Ingredients — You only need four main ingredients: heavy cream, egg yolks, sugar, and vanilla. No weird thickeners, no gelatin, no cornstarch. Just pure, rich custard. If you can whisk, you can make this.
- Restaurant-Quality Finish — That sugar top isn’t just for looks. It’s a textural contrast that elevates the entire dish. The sharp crack against the smooth, cool custard is what makes people ask for the recipe. And they will ask.
- Customizable — While vanilla is classic, this base is a blank canvas. I’ve made it with espresso powder for a mocha vibe, or swapped in lavender honey. But honestly? The classic version is so good, you might never change it.
This recipe has saved me from ordering takeout dessert more times than I can count. It’s elegant, it’s delicious, and it’s surprisingly easy. Once you master this, you’ll never buy dessert at a restaurant again.
Ingredients You’ll Need
Here’s the good news: you probably have most of these ingredients in your fridge already. This isn’t a recipe that requires a trip to a specialty store. I’m particular about quality, though, especially with the cream and vanilla.
For the Custard
Heavy Cream (2 cups / 480ml) — Do not use half-and-half or milk. You need the fat content for that rich, silky texture. If you buy organic, even better. I use whatever heavy cream is on sale, but make sure it’s fresh.
Egg Yolks (5 large / about 100g) — We use only yolks because they provide the richness and structure. The whites would make the custard chewy. Save the whites for my fluffy buttermilk blueberry pancakes or meringues! You’ll need about 5 yolks, so plan ahead if you’re making pancakes another day.
Granulated White Sugar (½ cup / 100g) — This goes into the custard. It sweetens the cream and helps thicken the eggs. Don’t use brown sugar here; it will change the color and flavor.
Vanilla Bean (1 whole) or Vanilla Extract (2 teaspoons) — I’m a vanilla bean snob. Splitting a pod and scraping the seeds gives you those little black specks and an incredible aroma. If you don’t have a vanilla bean, use high-quality pure vanilla extract. I use Nielsen-Massey. Avoid imitation vanilla at all costs; it tastes chemical.
Salt (¼ teaspoon) — A pinch of salt is crucial. It balances the sweetness and makes the vanilla flavor pop. Don’t skip it.
For the Topping
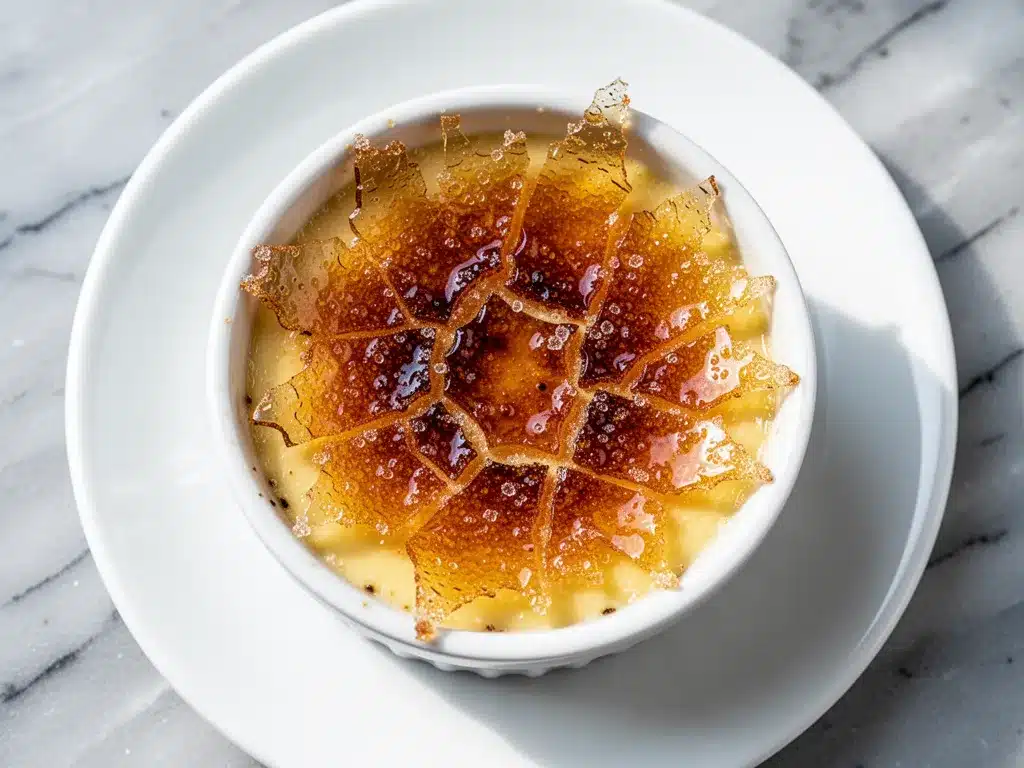
Granulated White Sugar (2-3 tablespoons per ramekin) — This is for the torching. Use regular white sugar. Brown sugar burns too easily and tastes too molasses-heavy. I like to use superfine sugar if I have it because it melts more evenly, but regular granulated works fine if you spread it thinly.
Equipment Needed
You don’t need a fancy kitchen, but you do need a few specific tools. Here’s what I actually use:
Ramekins — I use 6-ounce ramekins. They’re the perfect size for a single serving. You can use smaller ones, but you’ll need to adjust the baking time. Make sure they are oven-safe and can handle a water bath.
Roasting Pan — You need a deep pan large enough to hold your ramekins with space around them for the water. A 9×13 inch roasting pan is ideal. I use my stainless steel one.
Kitchen Torch — This is the tool that creates the magic. You don’t need a $100 blowtorch, but you do need one with a adjustable flame. I use a small butane torch from the hardware store. It’s cheap and works perfectly. Do not try to do this under the broiler; it’s messy and uneven.
Whisk and Fine-Mesh Strainer — You need to whisk the eggs and cream smoothly, then strain it to remove any bits of cooked egg or vanilla pod fibers. This ensures a silky smooth texture. I use a silicone whisk.
Hot Water Kettle — You’ll need boiling water for the bath. Having a kettle ready speeds things up.
How to Make It: Step-by-Step
Alright, let’s make this! I’m walking you through exactly how I do it. It sounds technical, but it’s really just mixing and baking.
Step 1: Prep the Oven and Ramekins
Preheat your oven to 325°F (165°C). This is a low and slow temperature. If you go higher, the eggs will scramble. Place your ramekins in the roasting pan. This helps them stay stable when you pour the liquid.
Step 2: Heat the Cream
In a small saucepan, combine the heavy cream, half the sugar (½ cup), the salt, and your vanilla (scraped pod or extract). Heat it over medium heat until it just starts to simmer. You’ll see small bubbles around the edges. Do not boil it vigorously. Remove from heat and let it sit for 5 minutes. This infuses the vanilla flavor into the cream.
Step 3: Whisk the Yolks
In a medium bowl, whisk the egg yolks with the remaining sugar (if using all sugar in yolks, adjust accordingly, but usually we split it) until pale and slightly thickened. If you used a vanilla bean, you can add the seeds here. Whisk gently; you don’t want to beat air into the yolks.
Step 4: Temper the Eggs
This is the most important step. Slowly pour about half of the hot cream into the egg yolks while whisking constantly. This raises the temperature of the eggs gradually so they don’t curdle. Once combined, pour the egg mixture back into the saucepan with the rest of the cream. Whisk to combine.
Step 5: Strain and Pour
Place a fine-mesh strainer over a large measuring cup or jug. Pour the custard mixture through the strainer. This catches any stray bits of cooked egg or vanilla pod. Pour the strained custard into your ramekins. Fill them almost to the top, leaving about ¼ inch of space.
Step 6: The Water Bath
Place the roasting pan with the ramekins in the oven. Carefully pour boiling water into the roasting pan until it reaches halfway up the sides of the ramekins. The water should be hot enough that it doesn’t drop the oven temperature too much, but not so much that it splashes into the ramekins. This gentle heat ensures even cooking.
Step 7: Bake
Bake for 35-45 minutes. The custards are done when the edges are set but the centers still jiggle slightly like Jell-O when you shake the pan. They will continue to set as they cool. If they look completely firm in the oven, they are overcooked.
Step 8: Chill
Remove the ramekins from the water bath and let them cool to room temperature. Then, cover them with plastic wrap and refrigerate for at least 4 hours, preferably overnight. This chilling time is non-negotiable for the texture.
Step 9: Torche and Serve
Right before serving, take the custards out of the fridge. Sprinkle a thin, even layer of sugar over the top. Use your torch to melt the sugar until it bubbles and turns amber. Let it sit for 30 seconds to harden. Crack and eat.
Expert Tips & Tricks
Here’s everything I’ve learned from making this dozens of times. These tips will save you from my mistakes.
Don’t Overbake — This is the #1 mistake. Custards continue to cook after you take them out of the oven. If they are firm when you pull them out, they will be rubbery when cool. Look for that gentle jiggle in the center.
Use a Water Bath — Never bake custards directly on the oven rack. The water bath provides gentle, moist heat that prevents cracking and curdling. It’s the secret to that silky texture.
Strain the Mixture — I know it’s an extra step, but straining removes any bits that could ruin the smoothness. If you hate extra dishes, you can skip it, but your texture won’t be as perfect.
Chill Overnight — I know you want to eat it now. But the cold temperature is essential for the contrast with the hot sugar. Warm custard with hot sugar is a soggy disaster. Plan ahead.
Thin Sugar Layer — When sprinkling sugar, aim for a thin, even layer. If you pile it on too thick, the sugar will burn before it melts, leaving bitter chunks. Tap the ramekin to distribute the sugar evenly.
Common Mistakes
Mistake: Cracked Custard — Fix: Your oven was too hot or you baked it too long. Use an oven thermometer to check your actual temperature. Lower heat, longer time.
Mistake: Watery Top — Fix: You didn’t strain the mixture, or you didn’t let it chill long enough. The water bath also helps keep the surface smooth.
Mistake: Burnt Sugar — Fix: You held the torch too long in one spot. Keep the torch moving in a circular motion. If it’s too dark, it’s bitter. Aim for golden amber.
Variations & Substitutions
Once you’ve nailed the basic version, here’s how you can mix it up. I’ve tried all of these.
Espresso Crème Brûlée — Add 1 tablespoon of instant espresso powder to the cream while heating. It pairs beautifully with the vanilla. This is my favorite winter variation.
Lavender Honey — Swap the vanilla bean for 1 teaspoon of dried culinary lavender and 2 tablespoons of honey. Infuse the lavender in the hot cream, then strain it out before mixing with eggs. Floral and delicate.
Chocolate Crème Brûlée — Melt 2 ounces of dark chocolate into the hot cream before tempering the eggs. Rich and decadent.
Gluten-Free — This recipe is naturally gluten-free! Just make sure your vanilla extract and sugar are certified gluten-free if you have celiac disease.
Dairy-Free — Replace heavy cream with full-fat coconut cream. The texture will be slightly different (more gelatinous when cold), but the flavor is amazing. Use coconut sugar for the topping.
Serving & Storage
How to Serve:
I usually serve this straight from the counter after torching. It’s rustic and elegant. Pair it with fresh berries or a dollop of whipped cream if you want to be fancy. I also like it with a side of overnight vanilla cinnamon chia pudding for a lighter breakfast option, though this dessert is quite rich!
Storage:
You can store the unbaked custard in the fridge for up to 2 days. Just cover tightly with plastic wrap. Do not freeze the custard; the texture will break down and become grainy upon thawing.
Reheating:
Do not reheat crème brûlée. The sugar top will melt and become sticky. It’s best served cold with a warm, crunchy top.
Meal Prep:
Make the custard mixture on Sunday, pour into ramekins, and refrigerate. Torche them individually as guests arrive. This is the best way to host without stress.
Nutrition Information
I’m not a nutritionist, but here’s the breakdown if you’re tracking. This is a rich dessert, so portion control is key.
Per Serving (based on 6 ramekins):
- Calories: 320
- Protein: 4g
- Carbs: 22g
- Fiber: 0g
- Sugar: 22g
- Fat: 24g
- Saturated Fat: 14g
- Cholesterol: 180mg
- Sodium: 45mg
What’s Good: High in calcium from the cream and eggs. Very low carb if you use erythritol for the topping.
What to Know: High in saturated fat and sugar. It’s a treat, not a health food. Enjoy it mindfully.
Final Thoughts
So that’s my foolproof crème brûlée! I’ve probably talked your ear off at this point, but when you make a recipe this often, you have a lot to say about it. This dessert has saved me from so many dinner party disasters. It’s elegant, it’s delicious, and it’s surprisingly easy once you understand the process.
Make it yours! Try different flavors, use different ramekins, or just stick to the classic. The best recipes are the ones you adapt to your family’s tastes. If you make this, drop a comment and let me know what you think! I love hearing how recipes turn out in your kitchen. And if something doesn’t work, tell me that too—I’m here to help troubleshoot.
Happy cooking! And I hope your kitchen smells half as good as mine does right now.
Frequently Asked Questions
Q: Can I use a broiler instead of a torch?
A: You can, but it’s risky. Put the sugar-topped ramekins on a baking sheet and broil for 1-2 minutes. Watch them like a hawk—they burn in seconds. It’s harder to control the heat, so a torch is much better for even browning. I tried the broiler once and ended up with half-burnt, half-raw sugar. Stick to the torch.
Q: Why did my custard curdle?
A: Usually, this happens if you heated the cream too much before adding the eggs, or if you added the eggs too quickly. Always temper the eggs slowly. Also, make sure you don’t overbake. If it curdles, you can strain it through a fine-mesh sieve to smooth it out, but the texture won’t be as perfect.
Q: Can I make this in a muffin tin?
A: Yes! Use a standard muffin tin and fill the cups with the custard. You’ll need to use a water bath just like with ramekins. The baking time will be shorter, about 20-25 minutes. Check for the jiggle early.
Q: How long does the sugar top stay crunchy?
A: Ideally, serve it immediately after torching. The sugar will start to absorb moisture from the air and the custard within 30-60 minutes. If you’re serving a crowd, torch them one by one as people finish their plates.
Q: Can I use egg whites instead of yolks?
A: No. Egg whites will make the custard airy and chewy, like a soufflé. You want rich, dense, silky custard, which comes from the yolks. Save the whites for cookies or meringues.
Q: What kind of sugar should I use for topping?
A: Granulated white sugar is best. It melts evenly and creates a hard, glass-like shell. Brown sugar or powdered sugar won’t work well—they either burn too fast or melt into a sticky syrup instead of a crisp crust.
Pin This Recipe!
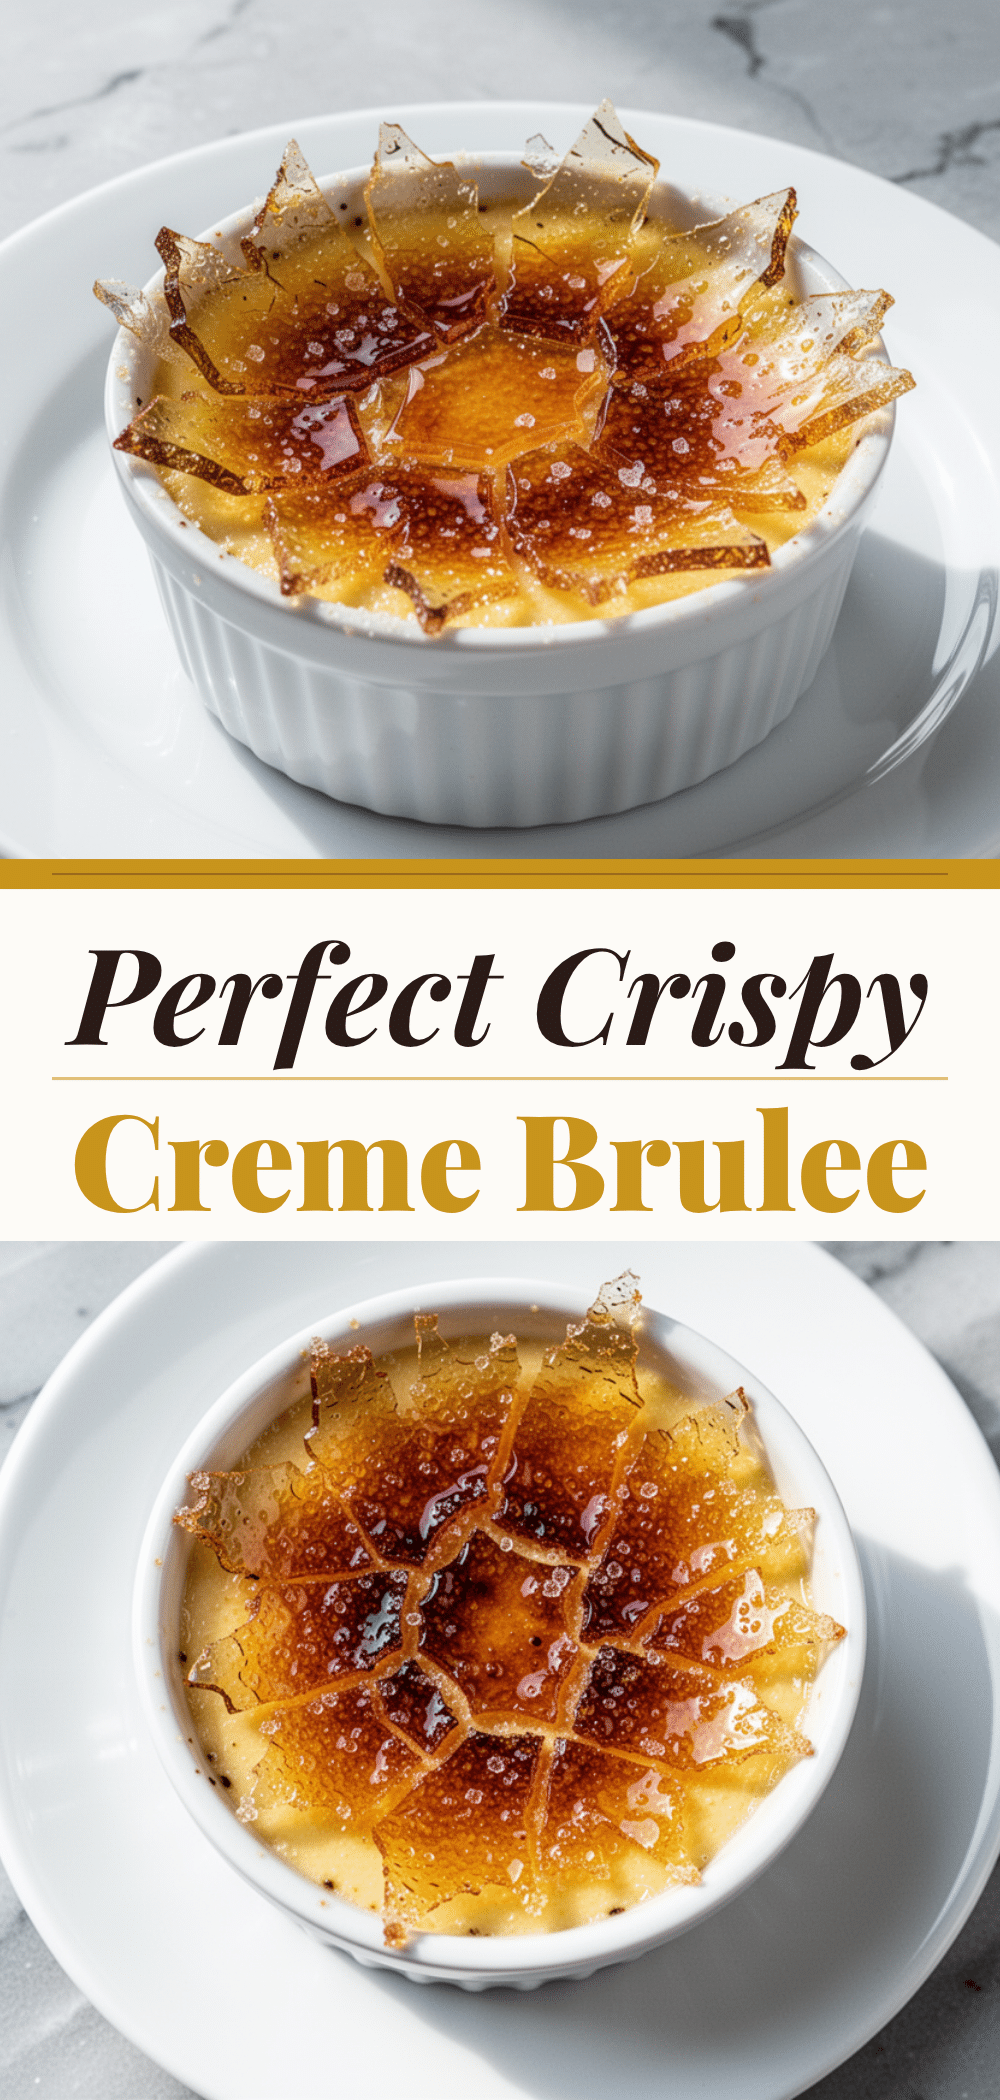
Foolproof Creme Brulee: The Best Easy Homemade Recipe
- Total Time: 4 hours 65 minutes
- Yield: 6 servings 1x
Description
A reliable, make-ahead crème brûlée recipe that guarantees a crackly sugar top and silky smooth custard using simple ingredients and a water bath method.
Ingredients
- 2 cups heavy cream
- 5 large egg yolks
- 1/2 cup granulated white sugar (for custard)
- 1 whole vanilla bean (scraped) or 2 teaspoons pure vanilla extract
- 1/4 teaspoon salt
- 2–3 tablespoons granulated white sugar (for topping)
Instructions
- Preheat oven to 325°F (165°C). Place ramekins in a roasting pan.
- In a saucepan, combine heavy cream, half the sugar, salt, and vanilla. Heat over medium until just simmering, then remove from heat and let sit for 5 minutes.
- In a bowl, whisk egg yolks with the remaining sugar until pale and thickened.
- Slowly temper the eggs by whisking in about half of the hot cream mixture, then pour the egg mixture back into the saucepan with the rest of the cream.
- Strain the custard mixture through a fine-mesh strainer into ramekins, filling them almost to the top.
- Place the roasting pan in the oven and carefully pour boiling water into the pan until it reaches halfway up the sides of the ramekins.
- Bake for 35-45 minutes until edges are set but centers still jiggle slightly.
- Remove ramekins from the water bath, let cool to room temperature, then cover and refrigerate for at least 4 hours or overnight.
- Right before serving, sprinkle a thin layer of sugar over each custard and torch until bubbly and amber. Let sit for 30 seconds to harden before serving.
Notes
Do not overbake; the custards will continue to set as they cool. Straining the mixture ensures a silky texture. The sugar top is best served immediately after torching as it absorbs moisture from the air within 30-60 minutes. Do not freeze the custard.
- Prep Time: 20 minutes
- Cook Time: 45 minutes
- Category: Dessert
- Cuisine: French
Nutrition
- Serving Size: 1 ramekin
- Calories: 320
- Sugar: 22
- Sodium: 45
- Fat: 24
- Saturated Fat: 14
- Carbohydrates: 22
- Protein: 4
Keywords: crème brûlée, custard, dessert, easy recipe, make-ahead dessert, vanilla custard, sugar top


